Asked
— Edited
Using Thinkercad
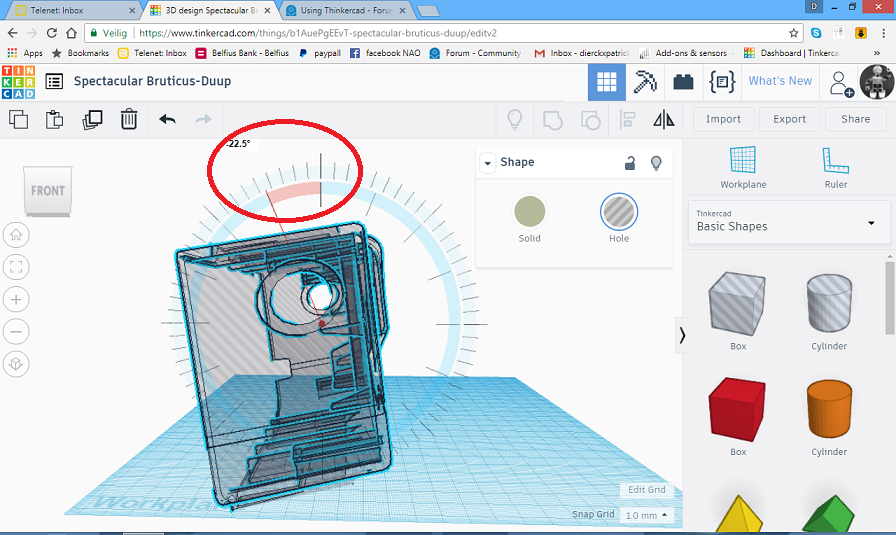
hi anyone using thinkercad?i want to lock a part off a part and chift a part.
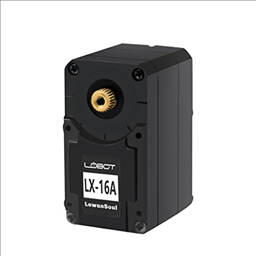 Lewansoul Servo
— Control LewanSoul LX-16A servos via ARC (EZ-B v4/IoTiny): assign virtual ports, read positions, set speeds, and enable continuous rotation.
Try it →
Lewansoul Servo
— Control LewanSoul LX-16A servos via ARC (EZ-B v4/IoTiny): assign virtual ports, read positions, set speeds, and enable continuous rotation.
Try it →

Yes... it's pretty much the easiest 3d design software to use... However it is limited... Fusion 360 is much better and it is free as well...
RR
i google it but its only 3 years free here.so it not possible to change the pics, in thinkercad?
Fusion 360 for now is free forever... People get confused on this... Students and upstarts get it for free... you might have to re-apply after a while but for now it is free for students and upstart companies that make under a certain amount $...
I don't understand what you are asking... my advice is to watch all the tinkercad "how to" videos to learn how to use the software...
RR
i have done all TC tutorials.i gess the problem is TC dont show up all , messurements off the part.as you say its limited.
Like Richard said, you'll really need to watch the how to videos online to learn how to use Tinkercad for yourself because the subject is more than can be covered via a textual reply.
But as an answer to your question, yes you can move what you want to in Tinkercad once you know more about how to use it. I'll give you a hint about moving JD's arm socket, what I would probably do is:
hi justin
thanks for your replay.i try that.
justin
sofar i dont see it,is this adjusteble ?
Yep, you can rotate it to any angle you want...