
cauld
Hello everyone,
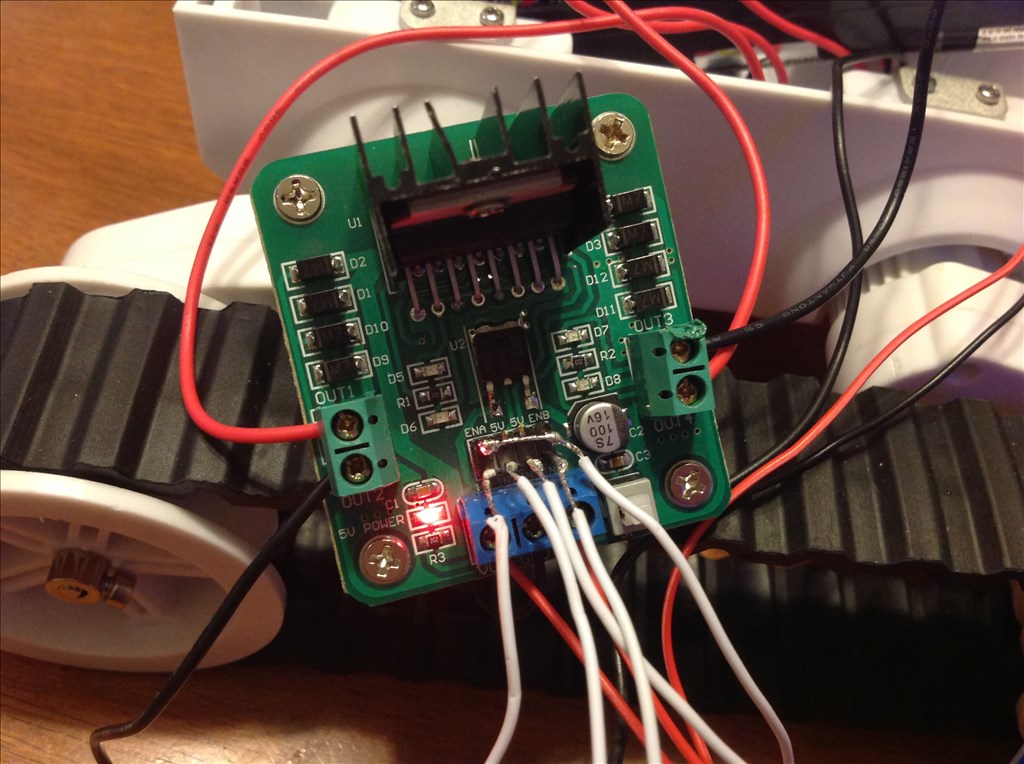
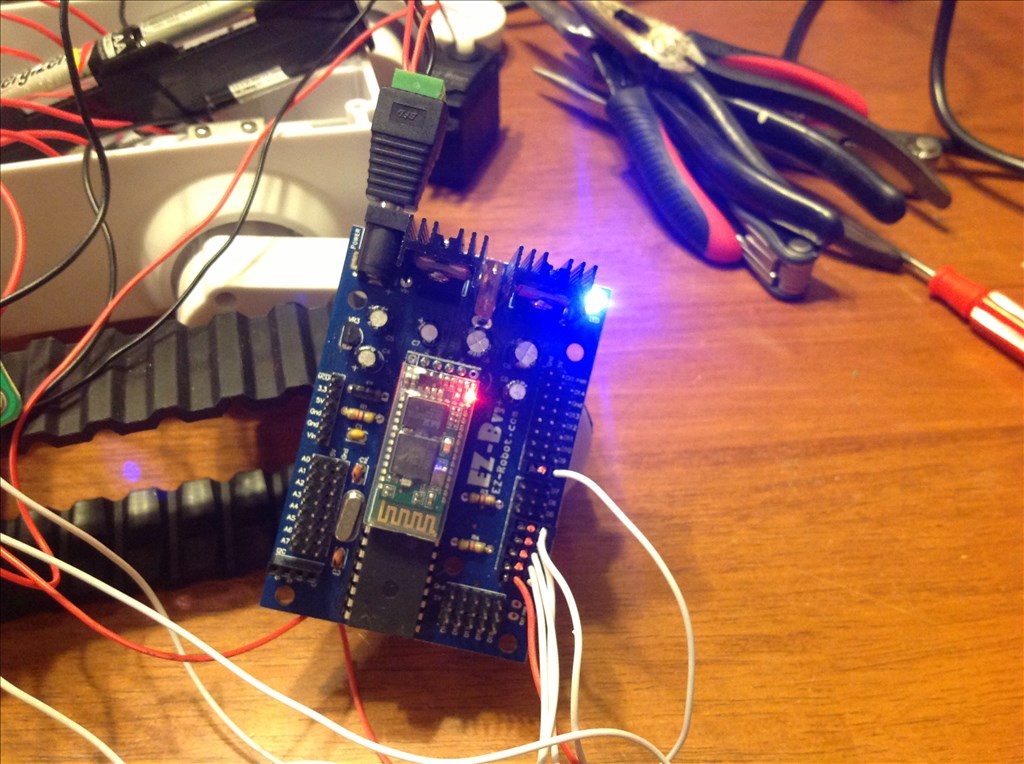
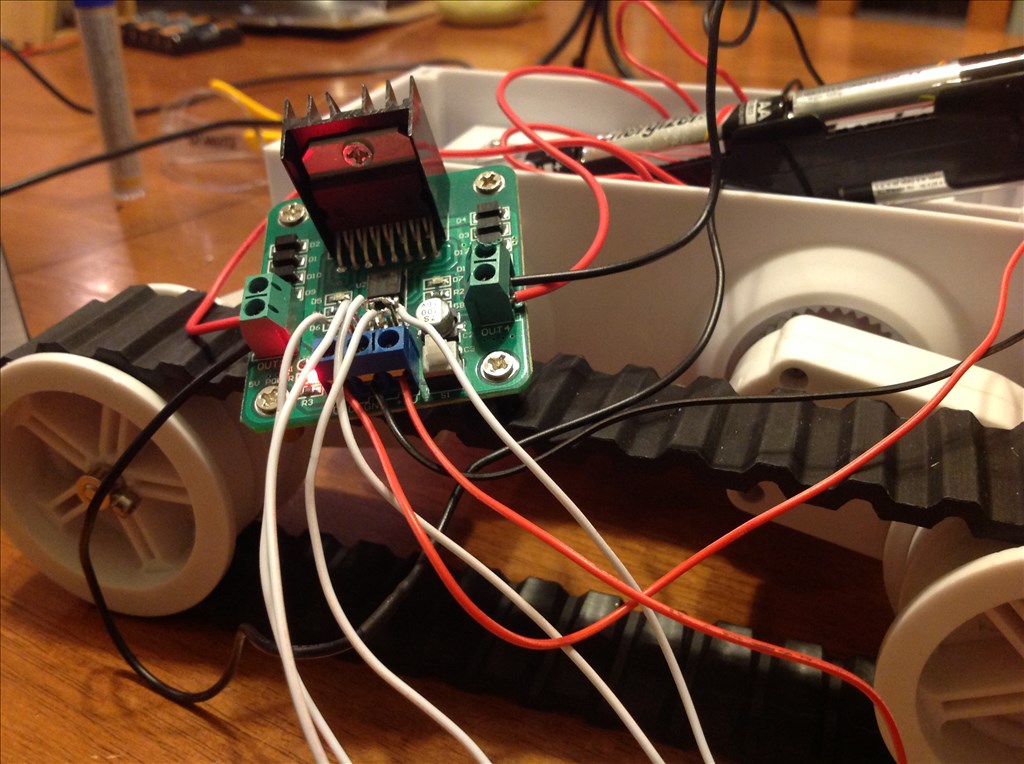
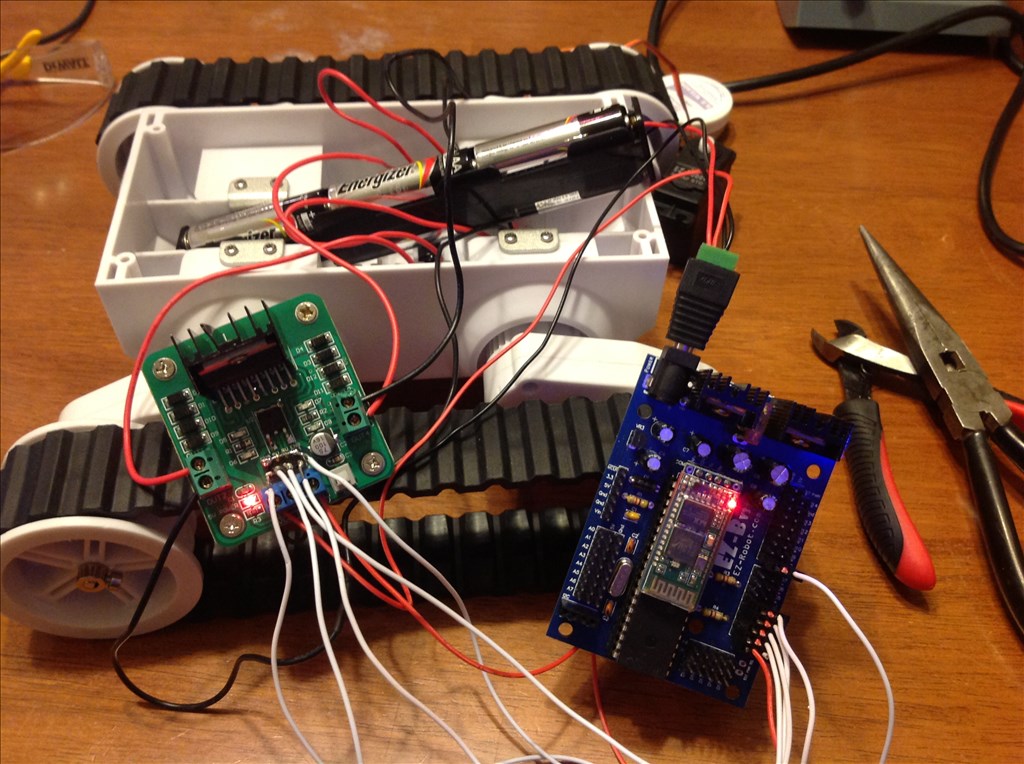
I recently purchased a new EZ-Robot kit with the Rover 5 chassis and the 2.5 Amp Motor Controller. I need some help hooking up the Rover 5 chassis to my EZ-B. I've read the docs and watched DJ's video tutorial and studied the diagram found here numerous times - synthiam.com/Tutorials/Hardware.aspx?id=25.
The video does the setup somewhat differently than the diagram. I started with the way the video does it, but when that didn't work for me I tried the setup as shown in the diagram. I have tripled checked everything and I still can't seem to get this working. I have power to the HBridge and to the EZ-B via the 6 AA battery adapter provided with the Rover. I've even tried using the adapter from the EZ-Robot kit. When I connect to EZ-B via ARC and add an HBridge controller nothing happens. I get no movement. Beginning to wonder if the Rover motors are bad, I doubt it, but not sure how I can test that at the moment. I put a standard servo on one of the other digital ports at the same time and that moves just fine.
I am attaching a few pictures from my setup as it stands right now. Wondering if anyone here can take a look and see if they notice something I've messed up any/or offer some suggestions. I'm stumped. Thanks in advance!

I cannot recommend a LiPo battery enough. My 2S 5000mAh pack still hasn't needed charging since I put it in. It's only been testing and writing scripts but it's been a lot of hours.
If you have the space and can afford the battery and a good charger go for LiPo. I'd guess the problem is the power and the EZ-B browning out.
Your right rich , the Bluetooth module will disconnect the moment the voltage drops when a motor pulls current on those AA batteries. I really like turnigy , cheap and reliable. Now 2s means the amount of cells @ 3.7 volts. So that's 7.4 volts. The slightly higher voltage gives your equipment a buffer to make sure the ezb never drops below the minimum 5 volts and disconnect. I've tested the rover motors with 13.8 volts and it ran like a champ all day. So no worries about over voltage on the 7.4.
Thanks guys! Really appreciate the help.
Looking at the Turnigy Lipo image now and I have a series of questions. Sorry if this super basic, just want to be sure I get this right.
I see 2 sets of plugs. Are these just two different adapters for connecting to different types of inputs? I assume I'd need to use the smaller connections to wire this up to the EZ-B power adapter I have. Is that correct? I'd cut off the small white adapter and hook up the red/black wires, but then what is the yellow?
Or is it even easier... do they make an adapter that I can connect to this with that I would in turn wire to the EZ-B power adapter. This would seem to make more sense since I could them probably still hook this up to a charger. If I cut the wires I'm not sure how I'd charge it.
Can you recommend a charger for this as well? I found this one that looks like it might work - www.hobbyking.com/hobbyking/store/__7637__Turnigy_balancer_Charger_2S_3S.html, but it appears to be on backorder. I guess with this I would just take off the EZ-B power adapter and put these clips on when it needed to charge?
That charger works great but its a slow charger that take 4 or more hours to charge fully. You could always extend the balance charger wires and mount the charger plug somewhere practical. The battery can be charged through the power leads but you must be careful to not charge at a rate higher than recommended for the battery.
Oh those yellow connectors are called turnigy xt60 gold plate connectors rated at 60 amps. The little white plug is the balance plug. Its wired with common ground and individual positive for each cell.
Guys,
I'm happy to report the Rover is now functioning. I was too eager to wait for an shipment so I ran out to the local hobby store. They didn't have the exact battery you recommended, but they do enough RC car stuff that they had some very similar alternatives. I grabbed a couple LiPo batteries and a charger. I just tested it out and things appear to be working great. I've got forward and reverse and the PWM slider is correctly adjusting the speed. Time to play.
Thanks again for all your help! I'd have been stuck without you.