
PRO
RoboHappy
USA
Asked
— Edited
Programming And Wiring
Hey all, I kinda have a two part question that I have just wondering....
- When it comes to creating the scripts, is there some sort of program flow that helps you create the task at hand when deciding what gets turned on or off in a certain order?
- When connecting servos,motor controller,sensors,etc... is there some preference to a particular order that every thing gets plugged into the controller that works best?
I've just started piecing together a new robot based on the arlo design, and am trying to keep it all neat both in the hardware end and software end of things.
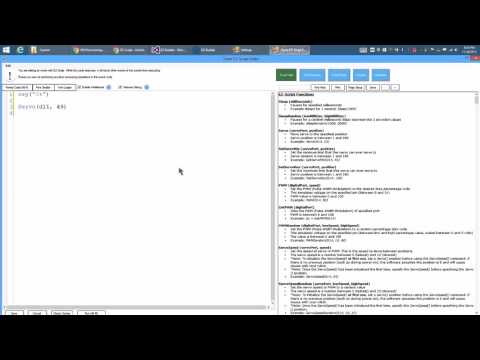
PS. here is a simple voice command for a gripper I can't seem to get working, what am I missing?
Phrase is "open gripper", the command is Say("ok")Servo(d11,49) I have tried this in the speech recognition, but it keeps giving me an error.

Hey RoboHappy
Once you are getting into complicated coding, be sure to check the SCRIPTING section of ARC. ARC is the software that you will be using to program your robot. Information is available all over this website regarding that, it'll be easy to find. The SCRIPTING section of ARC has a control called SCRIPT FLOW, and another called VARIABLE WATCHER. You will want to use those two controls once you start sending ControlCommands() and setting variables. You can find out more about what a variable is with a few google searches and the LEARN section of this website.
In summary, start with the tutorials in the learn section - and grow from there.
If your robot is being built by the developers kit, the same method applies. Ensure the BLACK wire of the servo matches the BLACK wire of the EZ-B. To understand what ports to connect the servo, consult the LEARN section for more information. Any of the D labelled ports control servos. Any of the ADC ports are for analog input. You can find out more in the learn section by pressing LEARN from the top of this website.
That'slikemetypinglikethisandyoutryingtoreadit. You need to put spaces (new lines) between the commands. Such as so...
There are tutorials in the LEARN section that will be able to help you. Such as moving servos and performing other features. Also remember, every control has a ? (question mark) next to the X. There's information about that when you load the ARC software. Press that button on the SPEECH RECOGNITION control will provide you with tutorials for that control.
Soon you will be a pro before you know it!
Thanks DJ. I do have some programming experience, mostly in Basic from the old days and the Parallax Stamp. I have been using the tutorials as much as possible, as this is way different from from Basic:) Also was just curious about how others wired up their bots. oh, and the code example, I had also already tried the one you provided, still wouldn't work for me. the first example was based on an example from one of the demo programs which did work. btw, how much total weight has ever been measured with the lifting power of the gripper/arm setup?
The weight is not much - the servos use most of their lifting ability to hold their own weight. If you're planning on lifting something, there are large servos (such as what bob houston and richard r, etc) are using in their InMoov.
Are you editing the script in the script editor or on the single line? Perhaps due to the way the text is being pasted in here, looks as if you're not hitting the multi-line edit button. Any of the video tutorials in the Activities section of the LEARN menu will demonstrate how to press the multi line edit button for multi line code.
For example, your code is multi line, because there is more than one line. Two or more lines is considered multi line. I know the terminology for multi line is a little strange.
To bring the multi line editor window into focus, press the multi line edit button on the single line script. It looks like a little pen and paper, next to where you are editing the code right now.
The syntax of your code is correct, long as they are on multi lines. You will remember on your basic days with basic stamp, that each line of code had to be on it's own line. Pressing the ENTER key will create a second line of code once in the multi line editor.
You can even test your code in the multi line editor, there is a RUN button next to the SAVE, etc.. Press the RUN to test your "procedure"
good luck!
DJ, I am using the speech recognition phrase panel (one with some pre-programmed phrases already in it) I added an additional line with the phrase "open gripper", then in the command line is where I wanted to do Say("ok")Servo(d11,49), then an additional line to "close gripper" ,etc.. This is what is not working for me. The Cheatsheet function would not even show me any kind of suggestion either.
Hello, you will need to add a new line of text between the Say("ok") and Servo(D11, 49). For example, you posted this...
As stated, that is not valid code. Each line of code is required to be on it's own line. You can use the ENTER key to add new lines. This is what your code should look like..
If you are typing the code in the single line editor, that will create a single line of code. You will need to press the Multi-line button to access the multi-line editor. A multi-line code will have new lines.
The Cheat Sheet will not help you for using the ENTER key. The Cheat Sheet is for pre-defined code. You can find out more about the Cheat Sheet in the learn section under Activities. There is an activity based on the EZ-Script editor. Here is the link: https://synthiam.com/Tutorials/Lesson/23?courseId=6
That link also contains a photo with a giant arrow pointing to the multi-line editor button. Pressing that button and reading the tutorial will help you add code.
Additionally, every control has a ? (question mark) next to the X (close) button. Press this ? (question mark) on the Speech Recognition Control to access help. There are tutorials and lots of information on how to use it. Here is a direct link to the ? (question mark) tutorial of the Speech Recognition Control. You can access it by pressing the ? (question mark) on the Speech Recognition control: https://synthiam.com/Support?id=90
Remember, each line of code must be on it's own line. This is done using the ENTER button on your keyboard.
Here is a video which demonstrates how to access Multi Line Editor and use the ENTER key to add new lines. Hope this helps!
Awesome! thank you. That is what I was looking for. Tried it,worked great. The little video helped. I always learn better from seeing it done first hand like that.