
captor03
Omnibot Project:
I put the letter H in hack!
Here is the Omnibot I've been working on for the past couple of months.
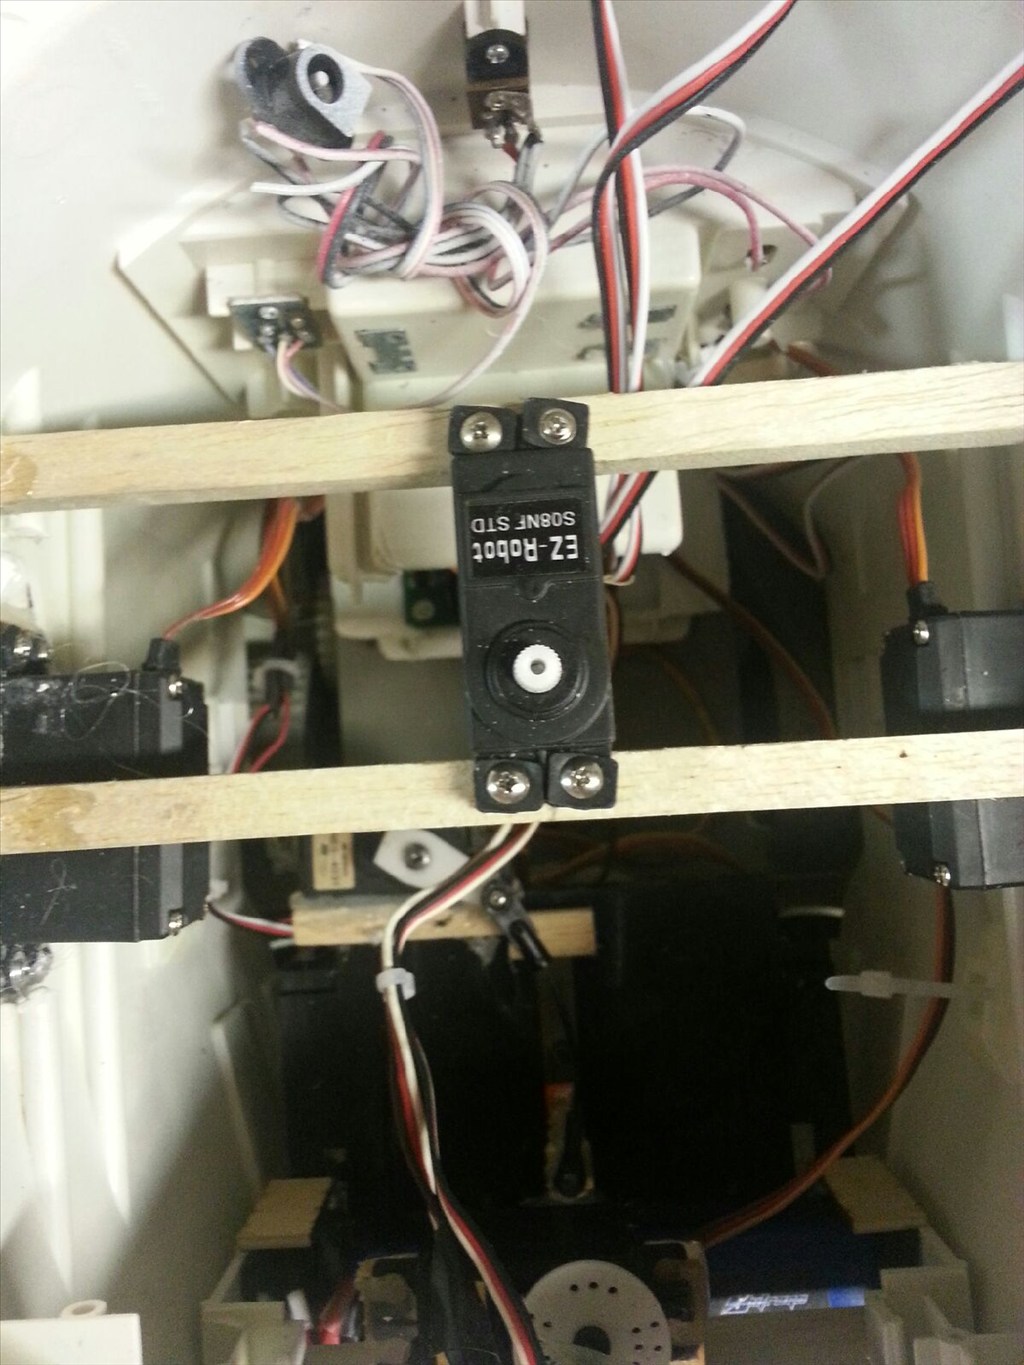
Both arms, the left wrist, and the left hand have servos in them.
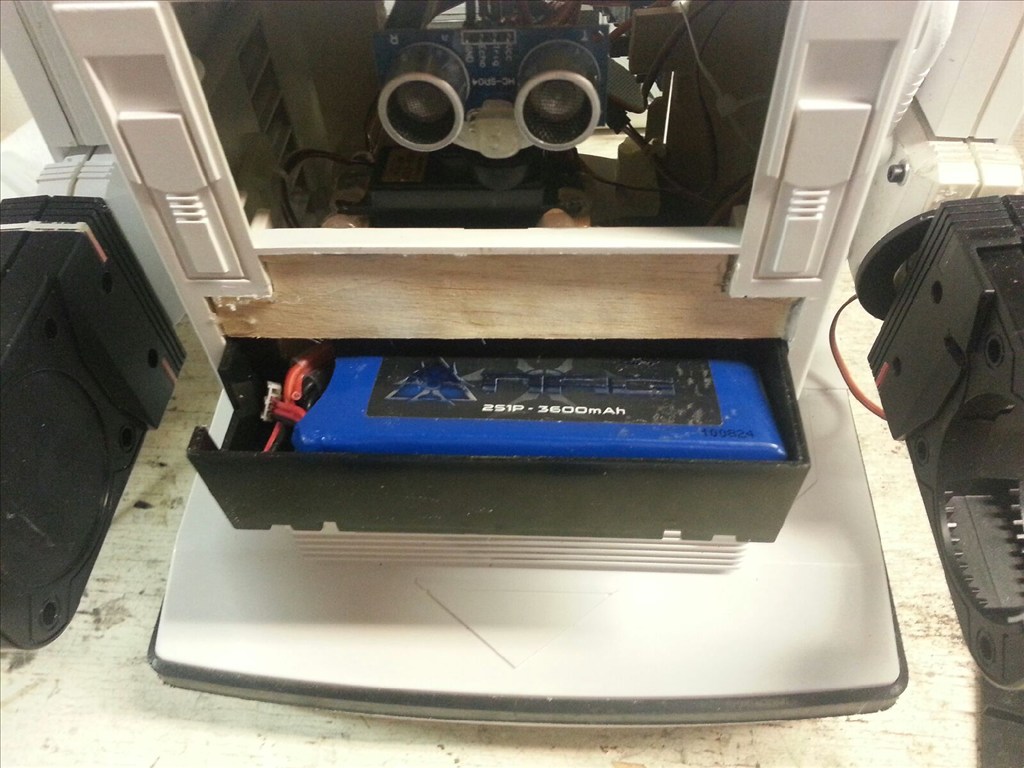
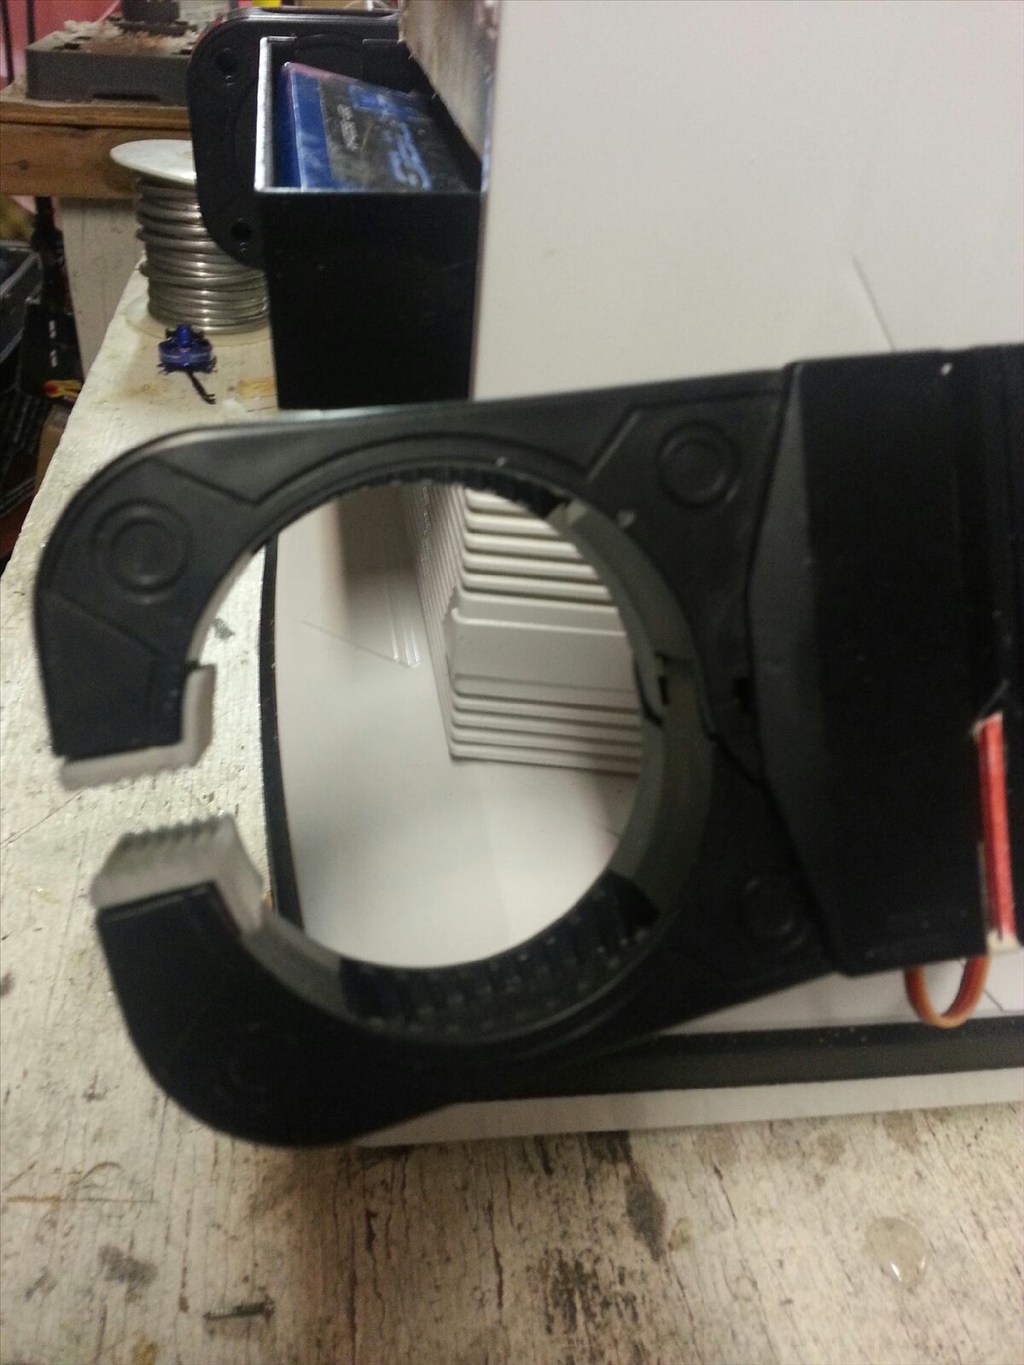
The battery tray in the front has a servo so it will open automatically.
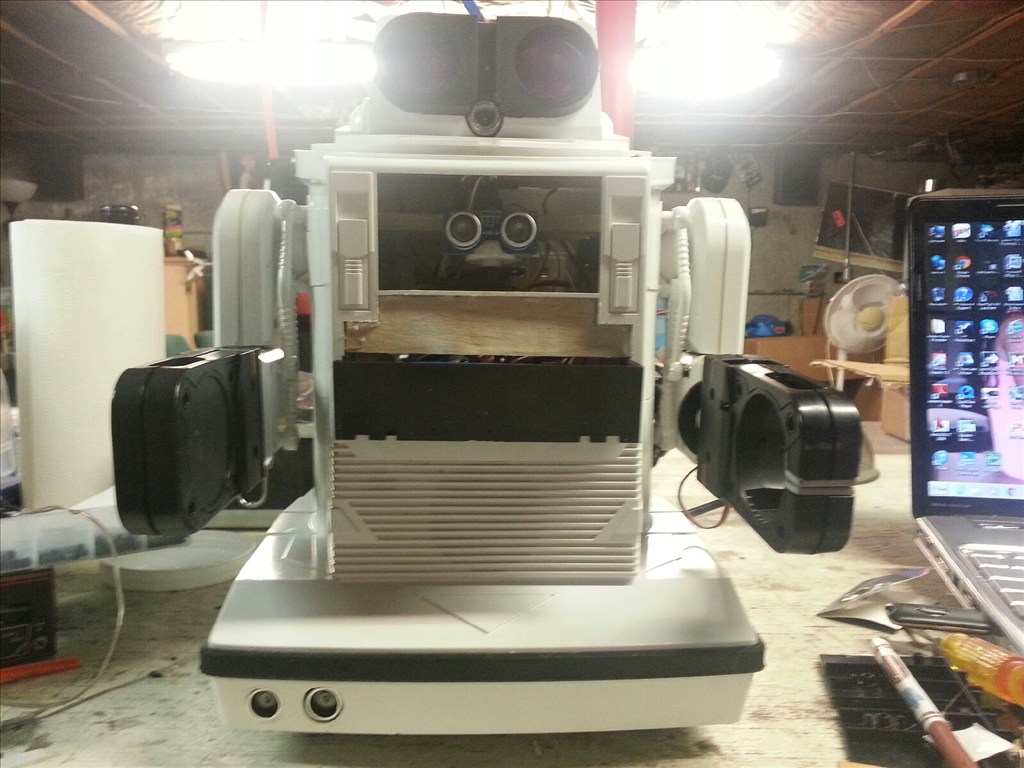
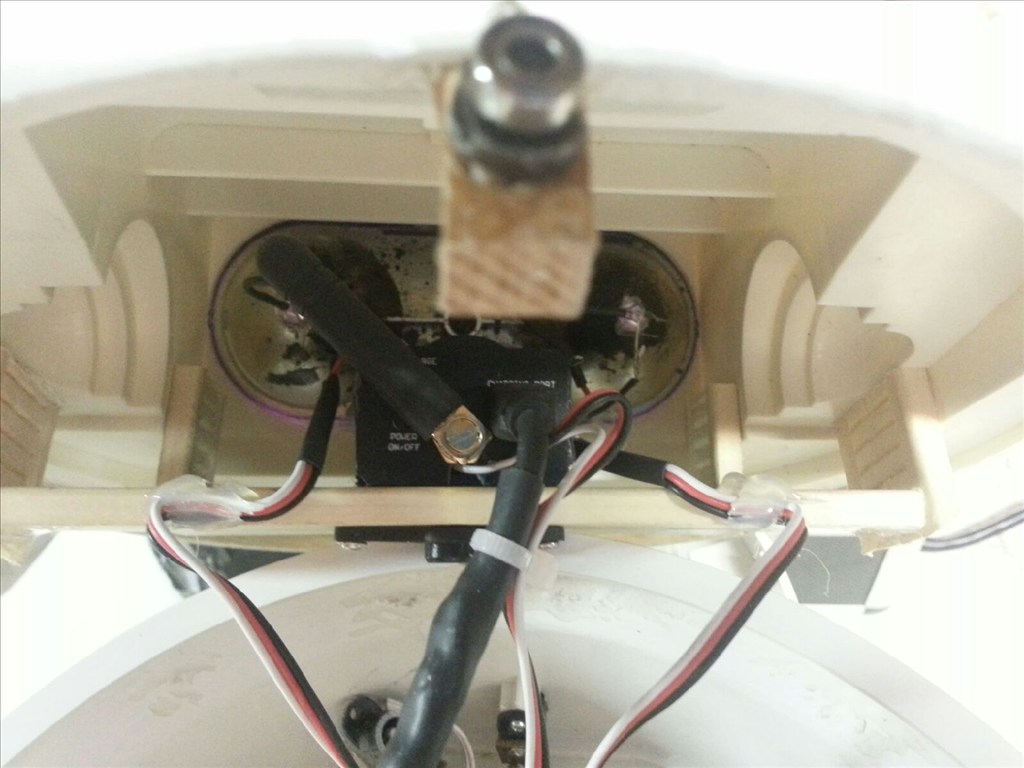
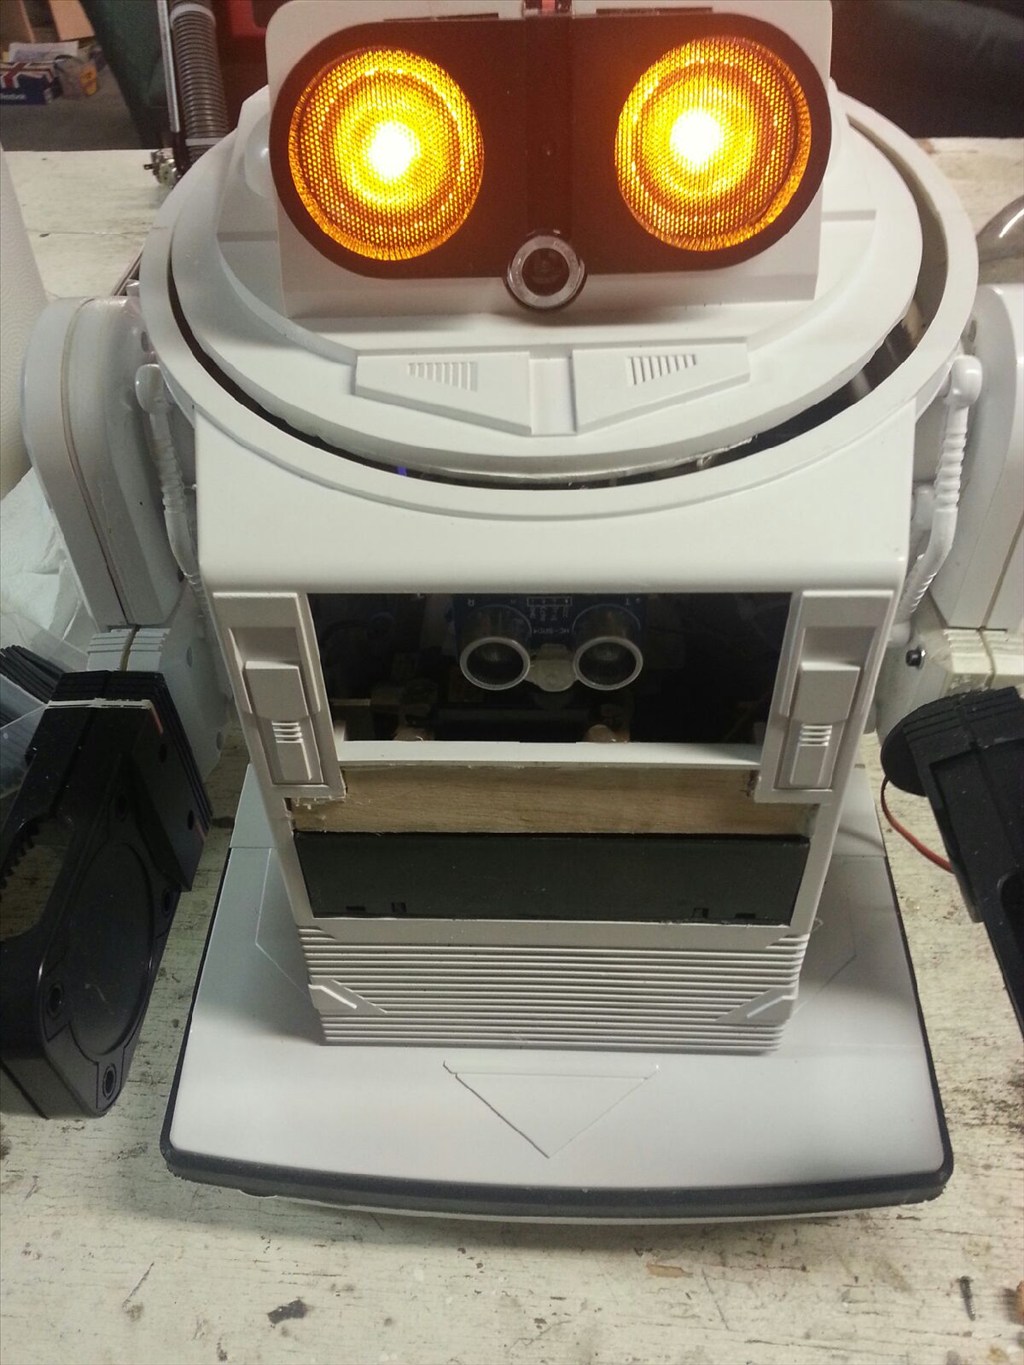
Obviously the head has a servo for the camera to follow objects. If you see the picture of the head, you'll notice I put a bearing in the back so the head can move better with less wobble.
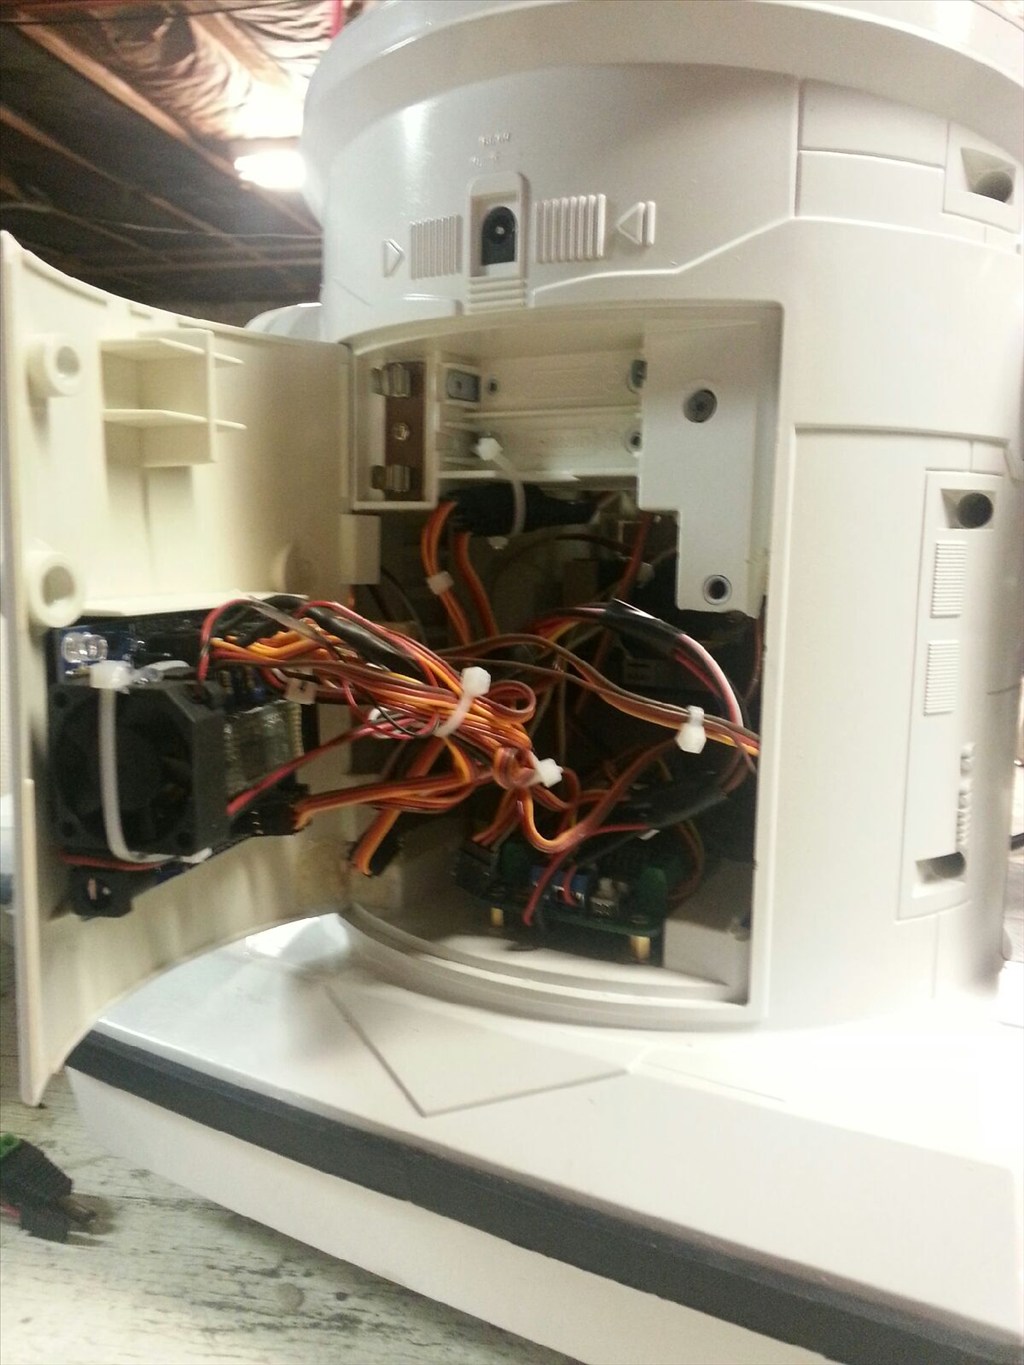
I mounted the EZ electronic board on the door. The door has hinges on it so it can open, and close.
I have a ping sensor in the middle of the front chest area Ill say, and one on the bottom right side. The robot still gets hooked on things with the working hand, and I'm wondering if I need another ping sensor on the bottom left side.
An IR sensor is on the way.
I intend to get a MP3 Trigger, and a sound card for it.
I haven't tried to write script for it. I never do it, and a friend is going to help me.
The motors work of an H bridge.
I'm going to try to post pictures of it. Anyone who wants to give me some input-feel free.

Nice. What did you do with the arms? Any photos? I've been struggling to get the arms on my Hearoid to operate to my liking.
Thanks,
I didn't take any pictures of the arms, and I wish I did! I struggled with them. Later I'll see if I can get some for you.
What I did was mount the servos in the blocks that hold up the arms, but the round servo arm didn't reach the arm itself to work it. so I put a servo wheel on the servo, then built a spacer so it will reach the inside of the arm, and hot glued the spacer to the arm, and the other side of the spacer to the servo wheel making up the distance. Also I drilled out 4 holes in the servo wheel, that go through the spacer, to the inside of the arm, and added screws with nuts for strength. I also drilled out a hole in the inside center of the arm so I can take the screw out of the servo. This way the whole arm pops out from the outside.
One thing I figured out is when putting the arm back together, I didn't put the screws on the cover that we would consider to be our bicep. There are three screws that hold that cover on from the back. I had to take the arms apart so many times, I finally figured out if I use hot glue then I could access the inside of the arm, and get to the screw that fasten the arm to the servo. I hope I explained that correctly. So later I'll pull off a cover, and get you a picture of it.
Thanks, Den
Nice work. I love the mods you did. There are some things there I wish I had done on my omnibot. But now I am totally rebuilding him as a mech warrior. I also did something similar on my arms. On my mech warrior I tried something different and it works really well. I drilled out some of the holes on the servo horn and attached stand-offs. Then I could attach the arm to the stand offs and it is very strong and stable.
I think I misread originally, do you have servos on the "elbows"? That is the part I can't get to work to my satisfaction (very high standards mind you, which doesn't help).
No servos in the elbows. I thought about it, but then I got lazy!
I thought I seen a picture of that mech warrior on one of the forums-nice!
Den
Good modification! for elbows I can think of mounting a servo in the shoulder with a stick to pull the elbow, this reduces the leverage that makes the servo shoulder more weight to be balanced, but I have no one to know Omnibot space on the shoulder, it would look like this:
Yes, something like this could work if the servo is internal, but I think the space for the servo may be a problem. For the use of a servo with rods, I always found that the push pull method of having a rod on both sides of the servo horn works best, and takes out a lot of slop. Even wires could be use instead of rods in some applications.
Thats heavy duty, no slop there!
Den
Check out my design i went a little better ,and still have mods not done on my arms with tests i took i can lift up to 35lb
I mostly design my own gear boxes for many reasons,arm design can lift over 12000 oz,and current very low,working the math for torque is easy ,plus the inside will have it all aluminium,one reason strength,another easy to mount and remove boards or servo's
So it may give you some good ideas ,like inside the arms it will have aluminium plates the track design is very heavy duty over 140 lb load it can carry
when you use more torque on your motors tthen needed it use much less current,plus all torque is measure at stall torque,and you need to add the length of the arm.torque is ounce per inc so 144oz/inc and using a 12 inch arm is 12 oz and 24 inch arm with most robots have is .6oz lift and operating torque 75 % less
my omnibot 2000 project
his nickname is 6 millon dollar robot,and was not named beacause of the cost
BUT looking at your project it does look really good
I HAVE a great design for elbows with be putting up soon only so many projects