Asked
— Edited
Non Ez-Robot Mpu9150 - Any Luck
Has anyone had any luck getting a non EZ-Robot supplied MPU9150 to work with the EZbv4? I'm not able to get mine to work.
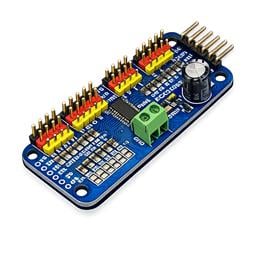
I'm using the 5.16.15 release of ARC Added the MPU9150 control to my project EZBv4 Interfacing the MPU9150 to one of the i2c ports This is module I'm using: MPU9150 The board does power up.
Any suggestions on what I can try to get it to work?
Thank you!

I solved my own problem, but still have a questions on using the MPU9150 control.
I reviewed this thread: MPU6050
Which covered using a non EZ-Robot 6050 module and it was suggested to use the sample project from the cloud JD with the MPU6050. In that project I found I the script "Gryo Update", I took the code from it and applied to my project with the MPU9150 module. I renamed the variables and the command controls to match those of the MPU9150. It did not work at first - I got errors on the int command.
I started my project over, repeat the steps and it worked. I assume I had something named wrong in my "Gyro Update script". So the awesome news is that it works.
I guess part of what seems confusing to me about the control is it has an "Init" button on the control which seems like I could click it and bingo-bango data would come in from the sensor. But re-reading the ARC tutorial from the Learn section for the MPU9150 we are required to add an external script to call the Init of the MPU9150 control. Is that right? If we click on the "Init" button of the control we really are not doing anything are we?
The default settings for the board's i2c address must be misconfigured on that breakout which you're using. That chip has default settings specified in its hardware configuration - which many inexperienced hardware manufacturers are changing the values from default.
It works now!
And that is what I thought at first DJ, but I might have been overall confused on how to use and why I needed to use "Init" for the MPU9150 control when the Init button is on the control. I thought I could click the Init button.
@JustinRatliff
Hi,
Do you get any consistent data output on your MPU9150. I get different outputs for the same heading/direction in my apt depending on where my robot is located. It seems very inconsistent. Is there a calibration process / a i2Cwrite that I am supposed to run before ?
THank you
Are you referring to the compass heading/direction? If so, you will need to hold the compass in a flat position on one axis. Remember that the compass has a few axis. You need to only use one at a time. For example, you cannot hold a compass facing the sky and expect to find north
The init button referenced in this thread initialized the module. Init means initialize - which is sending configuration data before it can return data. The module doesn't start sending data. That's not how i2c works. You are required to "query" data once it has been initialized. Initialize is done with the init button.
To query data, there is a ControlCommand() for it as seen in the examples.
Hi,
I just received today the MPU9150 built by EZ robot. It worked great at first, then a couples minutes later started giving inconsistent data, keeping values around 140. I had that problem with my non-ezb MPU9150 later and now... well now this old one gives consistent data again and the new one doesn't. I have no idea what I'm doing wrong and, moreover, it makes me want throw my multi thousands dollars project over the balcony... which would make my wife happy, at least there's that...
What data are you referring to? the mpu9150 has multiple sensors, each with multiple axis.
The speed of which the sensor is polled will also affect the data capture within the sensor itself. Ensure you have a slight > 10ms delay.
Are you using a /2 comm ez-b v4? This will assist with polling time
Sorry for the lack of info!
It looks like something gets stuck somewhere at the software level. INdeed, after testing in an empty ezb project I got to recalibrate and get consistent data again then it went back to staying around 135 or 140 vlaues after a minute or so...