Welcome to Synthiam!

The easiest way to program the most powerful robots. Use technologies by leading industry experts. ARC is a free-to-use robot programming software that makes servo automation, computer vision, autonomous navigation, and artificial intelligence easy.

Get Started
Asked — Edited

Need Help Testing The Elechouse Tlg10ua03 Uart-Wifi ?

After Midnight Thursday, 14 March 2013

Good Morning EZ-Robot.com Hardware Team !

Last week I received my ElecHouse UART-WiFi Kit, and got it Connecting to my Home Router with help from Robot-Doc, who led me to the TLG10UA03,
ElecHouse UART-WiFi

I have attached my Screenshots and Test Procedure, "13-Mar-2013 ElecHouse WiFi UART Serial Terminal Loop-Back Test.doc", and my ARC File of the same name.

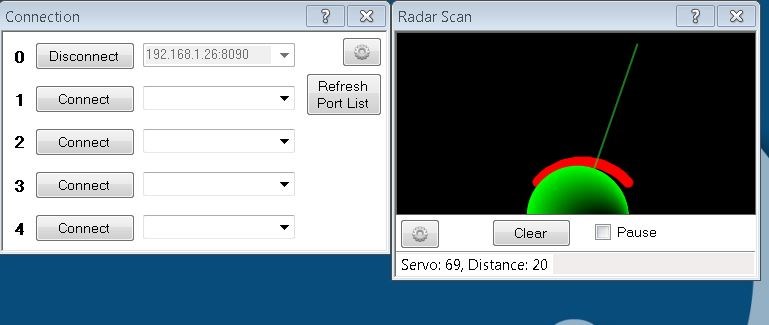
I am using DJ's New Serial Terminal within EZ-Builder; seems to WORK GREAT, but I need to LEARN MORE on its proper use ?

My Question is, Exactly Where Do I Loop-Back the WiFi Module; I tried Tx-to-Rx with No Success ?

Thank You All & Best Wishes,

DougPope@cox.net, 602-246-1246(H)

13-Mar-2013ElecHouseWiFiUARTSerialTerminalLoop-BackTest.zip

13-Mar-2013WiFiUARTSerialTerminalLoop-BackTest.EZB


ARC Pro

Upgrade to ARC Pro

Unleash your creativity with the power of easy robot programming using Synthiam ARC Pro

#112  
You may have better luck if you remove power from the EZ-B and then reconnect it. Sometimes something locks up the board and the connection cannot be made. You may also observe that the blue LED goes out when attempting a connection and to clear that condition requires the power to be removed and then connected again. You will finally get rewarded with a connection like this:
User-inserted image
#113  
ok but definitely not what I need since I use this robot remotely to check on my cats...:D I cannot afford a system that needs to be power-recycled to work properly. Thank you anyway.

By the way... I must have done something wrong again with my new TLG10UA03... I can access it through the config app but cannot make any modification or restore. Anyone knows where to find the firmware ?

Best.
#114  
I hope I am not throwing good money after bad, but I just ordered one of these http://www.rovingnetworks.com/products/RN174 (specifically, the RN174U since I have the antennae from the fried Elechouse board I can use with it). At $79 + shipping, it sure isn't cheap. You can get just the chip for less, but it is surface mount, so a lot more work and parts to make it usable which I am not ready to do. This dev board should be just about plug and play.

I'll let you all know how it works.

Alan
#115  
@thetechguru I was looking at rn172 to,i will wait to see how you make out before i buy one good luck
United Kingdom
#116  
I'm still holding out for the Tlg10ua03 but the issue with not enough current is what's stalling my progress. Hopefully I'll get a solution to that soon - I'm yet to try it while running from the 2S LiPo due to limited time.
#117  
This device sucks... There is a low current device on the market made by Saint Smart, a wifi Shield for Arduino that theoretically should be compatible with EZB. According to those who successfully set it up on their project it really takes very low current. But I couldn't even get it to run with standard arduino wifi webserver programm and I could not access it through serial/usb either so I returned it. I think we should all look forward to finding a device explicitely sold for its low current consumption.
United Kingdom
#118  
Cost is a big issue I like to based solutions on though. While it's not always just because it's cheapest, or because I can't afford anything more expensive I'm driven by helping as many others as possible and that includes those who are on tight budgets (naive people, I was one once before I started building robots). So I will continue to pursue this option and find a solutions (or try to) for the power issue. I have some ideas.
#119  
@Rich, I am pretty sure you'll be able to get it working with alternate power. Robot-Doc has repeatedly reported success with that board. If I hadn't blown mine up, I would still be trying, but since it is problematic, I figured I would go another direction and try it.

The Roving Networks boards can be had for less. $29 for the chip, and I saw a developer board at RadioShack yesterday for $8 that the label said worked with surface mount chips and minimal soldering., so if you are skilled with a soldering iron, it is competitive to the Elechouse. I decided to go more plug and play for now, but if it works well with the developer board I ordered, those on a budget would have some options.

Alan
United Kingdom
#120  
I'll have to look in to that one sine my hatred for soldering has turned to a near love now.

My plan is to find a 3.3v regulator that'll do the job if powering the ezb with the lipo doesn't work. I need more time in the day though, another 20 hours would be nice!
#121  
@Alan : indeed it works and I could make it work too, not through direct ip though. However it seems pretty precarious for a permanent solution since it needs some regular intervention on the device itself such as power cycle. Perhaps I'm doing something wrong but this is the second one that stopped working properly on my side...:)
#122  
One point I may have forgotten to mention is that I am powering the WiFi module using standalone LI-ion cell phone batteries. Each battery is rated at 1600 mAH. I wire two together in parallel for a complete battery pack that provides 3200 mAH at 4 volts dc. I just got some dc to dc converters from China that can operate with a dc input of 9 to 30 volts and provide 3.3 vdc at 5 amps output. I plan to modify the LI-ion pack and add more cells to increase input voltage so that I can test these new regulators. I would like to make sure that the slowing down of the application is not due to power input to the WiFi device.

Although I can connect most of the time without issue I'm now finding that there is an issue with transmission capacity that degrades with the addition of more than one IR or ultrasonic device to the screen.
United Kingdom
#123  
If/When I get it working and stable you can expect to see a step by step guide on it. I'm sure you're aware of the level of detail and clarity I put in to such things so if I can do it I'm confident we will get yours stable too.

Having had mine powered by USB on the PC for over 24 hours with no issue I don't see that power cycling will be required once it is powered correctly, with enough current to maintain the connection. Hopefully this doesn't offend you as that is not my intention but I am leaning more to the side of user error than a problem with the module.

On the other hand, I don't accept sub standard kit so it could go either way but I wont give up until we have a definitive answer on this module one way or the other:)


@Robotdoc, how often is it checking the IR? I know there can be issues with checking multiple ADC ports frequently. My bluetooth benchmark shows it can read from ADC 25 times in 1 second, so if it's set to check every 200ms it will be capable of reading 5 sensors (5 sensors, 5 times a second each = 5x5 = 25). It may pay for you to run a benchmark (benchmark control is in general in ARC I think) and see what the limit is. That is important to a lot of builds and if WiFi is low it will be worth noting for anyone looking to go down this route.
#124  
It's checking the Sharp IR radar at 500 ms and the radar scan at 250 ms. All I did was add one digital and one analog port taking the defaults from EZ-B.
#125  
Don't worry Rich, none offense to be taken since I'm perfectly aware of the fact that I suck! I'm just who I am : French! I'd rather accuse the second module I burned than myself !:D Looking forward to reading your tutorial !
#126  
By the way... I suck so much that I cannot make my new robot to turn, (I burned the old rovio eventually because of my two system in one... I know, I know... you told me:) ) so I put everything on a 4WD platform with an HBridge (I strictly followed DJ's tutorial for that part) and the only way I get the platform to run is by stripping out the rear wheels from their rubber so there's less friction and it can turn. It seems that while given the order to turn the Hbridge runs the wheels on both side at the same speed while the wheels on the inner side should run much slower than the wheels on the outer side, is that correct ? If so, do you know what could possibly allow me to have the inner wheels to turn slower beside using PWN each time I want to turn ?
#127  
@elfege, it looks like you went off topic for this thread. You may get someone to answer your question in a new thread.
#128  
@elfege
Hello
i have read your post. like you i am also stuck with wifi module i have made some changes to use webserver on this UART-Wifi module i have achieved it successfully. Now i am not able to connect it again with UART-Wifi configuration software.
www.elechouse.com/elechouse/images/product/UART%20WiFi%20Transparent%20Module/UART-WiFi_English.rar
I am getting error "no valid com found". i tried to hard reset the module by connecting pin 2 to 5 and then 4 to GND temporary. but no result. I have followed your post and apply the solution as per the pdf you posted(on page 121). but still my module is not responding. Now i am also not able to configure it over WiFi. so how can i achieve Hard reset?
can you please help me?
#130  
Hi taher, could you help me to exit of the auto-work mode please, I have tried to exit unsuccessfully. could you put some images of your configuration, please. *confused*
Australia
#131  
Guys,

I've been reading your thread with interest, I'm not using my wifi model for robot at the moment, but I thought I'd share my experience and learnings.

1. The firmware in these modules seems to vary depending on where you get the module from.
Most documentation states the data rate is 115200, however I've found that the default rate is often 9600 not 115200

2. Web admin page address is not always 192.168.1.119 this varies with the firmware.
To find my web admin address I had to connect via wifi on my laptop, then use the windows ipconfig command, to get the address assigned by the module to the laptop, then use the gateway or router address shown by ipconfig

3. As well as the web admin, some devices have a text user interface on port 23.
Windows users, need to enable the Telnet program, and the at the command prompt type
Telnet 192.168.1.119. 23
I,e if 192.168.1.119 is the IP address of the module
The login using password 000000

4. On my module when i did a factory reset AT+RSTF the ,module reset to a different set of parameters to those that it was supplied with. It came back on with SSID. Was wifi-socket, so I suspect that the module I have, and many of there out there, looks like it was destined for wifi controlled mains socket. If did some research and there are several Chinese products and one uk product that does is. There are also wifi controlled inline lamp sockets which these modules are used for.

5. There doesn't seem to be a way to do a factory reset via any of the connections.
With the wifi socket product, it has 2 push buttons on it, and according to the docs for that product, holding in one of the switches causes a factory reset, but I tried holding reset low for 10 secs but that didn't reset my module.
However I've not tried holding cts or link or rts low or high for 10 secs, after power up, so anyone with a bricked module, should probably try that as a last resort. But connect the pin to GND to Vcc via a resistor e.g. 1k

6. According to the pdf docs, the module can be put into config mode, by holding cts low for at last 300ms after doing a hard reset.
However this doesn't seem to work on my module.
But it could depend on firmware.

7. On my module, it was impossible to disable Auto Work Mode.
Changing this setting in the web admin, wasn't saved after pressing save.
Though I didn't try doing it via AT commands

8. The PC UART Config exe, seems to assume the module is in command mode and doesn't send +++
the best way to get the program to work is to use a separate comms program to send +++ to the module then when its in command mode, then close the comms program and run the config program.

9. My module didn't seem totally compatible with the Config exe, I got a message of command not supported, but it generally seemed to work.

10. I found a reliable way to initialise a module is to take rest line LOW then wait around 5 seconds, by which time RTS line will go Low, High then back to Low, when rts line is low again, send +++ and you should get +OK

11. You can't type +++ in hyperterminal etc enter command mode, the timing is critical.
There is a free program called Hercules which seems to be part of the software bundle for this module. I used this, as it has a send option, where you can enter the +++ into one of the three boxes at the bottom of the screen and then press send to send the +++ together with no gaps.

I have found some Arduino sketches that puts 60ms delay between each + but I have written Arduino sketches that send without delays and it always seems to work. So I don't think the delay is necessary

12. For Anyone thinking of writing software to use the module, eg using Arduino. I have found in my module that some commands don't seem to work.
Eg creating a network socket as a server e.g. T receive data, doesn't seem to work.
Creating sockets to send at a I.e as a client does appear to work

Anyway I hope this helps anyone trying to use this module as I think it can be useful but is quirky;-)