
jstarne1
Jarvis Hacked Omnibot 2000 W Pc ,Ezb & Vacuum Inside By Josh Starnes
Jarvis is a project inspired in part by Jarvis the AI that belongs to Tony Stark in the movie and comic book series IRON MAN. This is my first real robot with no previous experience. I dreamed of making a couple of robots one was a vacuum robot with 4 motors. Brush, impeller, and one motor.driving each wheel. This was back in 98 before roomba was thought of. Lol my drawings as a kid even resembled one. Now that I am older and have tools like EZ Robot I can start making these dreams come true. It has been a learning experience and I hope to learn more. Jarvis is basically my personal computer but also will have a few key features. Goals are that he can help maintain a home by vacuuming and sweeping the floors. My fish need to be taken care of while I am away so scheduled feedings and turning tank lights on in the morning and off at night are in the works. Jarvis can answer calls , act as a telepresence device because he has a camera and screen. He would be great for security by detecting motion, taking pictures or video and sounding.alarm if intruders are detected. Just for fun I would like Jarvis to bring cold beers to the table when asked to which I am sure would be a great conversation piece. Jarvis will be autonomous in some.situations and because of the wireless video link by wifi and wireless keyboard and mouse, I can be checking facebook on either the upstairs or downstairs Tv while Jarvis is roaming the house or cleaning. Thanks to 4g USB antenna Jarvis is not limited to my home and can.take control quest (or kill.switch.lol) from a smart phone or laptop. This makes the Jarvis project.show friendly as I can take.him to show off without lugging around a laptop or other equipment. Also i do plan to somhow work in being able to control his base movements , head ect from a ps3 bluetooth.controller. I'm still thinking of other tasks Jarvis could do but I gotta get this guy together so there is no time to waste!
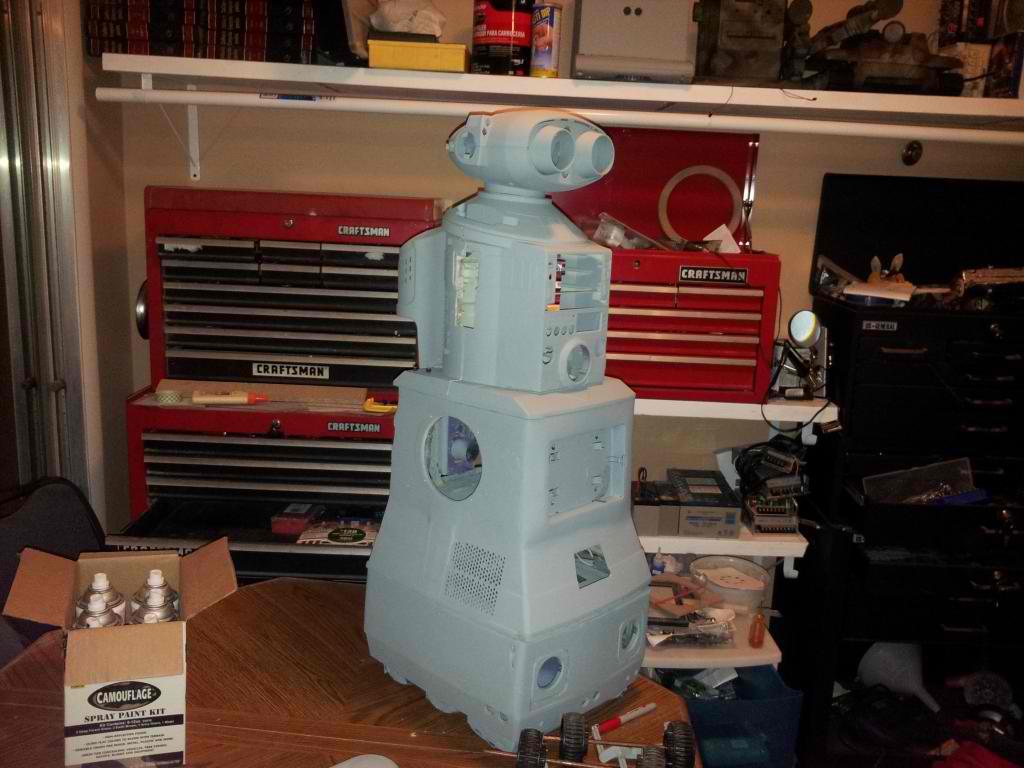
February 1012 when I first received the Tomy Omnibot 2000 . My starting main parts were/are asus mini itx motherboard, 8 GB ram , Win 7, 250gb Western Digital Hard Drive, Nvidia 560ti graphics card, 2 ghz AMD 25watt tdp dual core CPU, Thermaltake 430 watt psu, 460 watt apc backup, Ez Board Kit w EZ WIRELESS CAM , Shark vx63 cordless vacuum, 4 Power Sonic batteries 12v 9ah , power HD 240 oz servos, hitec 645mg 130oz in servos, hitec 5995tg 400 oz in servos , Robotzone.gearbox 5 to 1 ratio for shoulders and other electronics.
At this time im getting the body ready to start putting things together. The fun begins!


@techno pro lol I didn't really do that much today , it doesn't take long to mount a motherboard and hot glue in two fans. The TV was easy because I molded in a headrest mount before it was painted. I had a list if stuff to do but I ate dinner at my grandparents house and that easily sucked up a couple hours of the evening I wanted to be building.... Its all good though.
In regard to Troys comment about the battery placement.. It appears two batteries maybe three could fit side by side right above the gearbox in the bottom. I do need to remember I have the intention of using lipo batteries though....I really should just order them tonight.
For 89 dollars I have this m4 250 watt max ( really 125 watts continuous) DC to DC power supply. As little as 8 volts and as high as 30 volts. I picked this up over the models that were 20 bucks cheaper because it has programmable features like automatically shutting your PC down when you gave low battery. This is super important when using lipo batteries.
https://store.mp3car.com/M4_ATX_250W_Intelligent_DC_DC_PSU_p/w0-h9vm-hlf7.htm
jarvis is looking freaking fantastic! Its the other end of the spectrum compared to my "steampunk" robot but the cherry shiney red draws me in like a moth to a flame ..and thanks for the intro/demo of the minikeyboard/controller..keenly waiting to see what your gonna do with it!
Josh, I really like your robot....can't wait to see him in operation. I am interested in how that new power supply turns out. Keep up the good work!
@Rgordon thanks I'm anxious to get him moving around too , but I realized robots kinda move around like a blind toddler at times and I need to make bumpers to protect both Jarvis's base, paint job , and furniture... Here's my idea.. Cut a bumper from 1/4" plywood and wrap the edges with rubber hose. I will try to make it discreet the drawing is exaggerated a bit.
Under the edges of the bumpers I will hide sensors pointed straight down for cliff avoidance on front and rear...
OK so trying to customize the LCD bezel , I taped the led bar I made with Teflon tape to reduce the likely hood it will get stuck. The idea is to epoxy around , let cure , and pop out the led bar , then sand and see how it worked.
OK the led bar is fitted into the frame. This is a great opportunity for 3d printing in the future. Just for now its plenty good and will either be painted or coated with spray on rubber.