
smiller29
USA
Asked
How To Add New Functions To EZB Firmware?
How to define new commands functions to Arduino Mega EZB firmware? Currently I am using the CmdOurCustomCmds 0 for a skill I have made but I would like to add more commands to the below list for other custom commands/functions. What is the best way of doing this? Is there a number range that I should use that won't conflict with future ARC development?
Should this use sub commands like the CmdEZBv4 Commands under the CmdOurCustomCmds ?
#define CmdOurCustomCmds      0
#define CmdReleaseAllServos   1
#define CmdGetUniqueID        2
#define CmdEZBv3              3
#define CmdEZBv4              4
#define CmdSoundBeep          5
#define CmdEZServo            6
#define CmdI2CWrite           10
#define CmdI2CRead            11
#define CmdBootLoader         14
#define CmdSetPWMSpeed        15
#define CmdSetServoSpeed      39
#define CmdPing               0x55
#define CmdSetDigitalPortOn   100
#define CmdSetDigitalPortOff  124
#define CmdGetDigitalPort     148
#define CmdSetServoPosition   172
#define CmdGetADCValue        196
#define CmdSendSerial         204
#define CmdHC_SR04            228
#define CmdGetFirwareID       253
#define CmdSoundStreamCmd     254

// CmdEZBv4 Commands
// ----------------------------------------------------------------------------------
#define CmdV4SetLipoBatteryProtectionState 0
#define CmdV4SetBatteryMonitorVoltage      1
#define CmdV4GetBatteryVoltage             2
#define CmdV4GetCPUTemp                    3

#define CmdV4UARTExpansion0Init            5
#define CmdV4UARTExpansion0Write           6
#define CmdV4UARTExpansion0AvailableBytes  7
#define CmdV4UARTExpansion0Read            8

#define CmdV4UARTExpansion1Init            9
#define CmdV4UARTExpansion1Write           10
#define CmdV4UARTExpansion1AvailableBytes  11
#define CmdV4UARTExpansion1Read            12

#define CmdV4UARTExpansion2Init            13
#define CmdV4UARTExpansion2Write           14
#define CmdV4UARTExpansion2AvailableBytes  15
#define CmdV4UARTExpansion2Read            16

#define CmdV4I2CClockSpeed                 17
#define CmdV4UARTClockSpeed                18
#define CmdV4ResetToDefaults               19

// CmdSoundStreamCmd Commands
// ----------------------------------------------------------------------------------
#define CmdSoundInitStop 0
#define CmdSoundLoad     1
#define CmdSoundPlay     2
Related Hardware (view all EZB hardware)
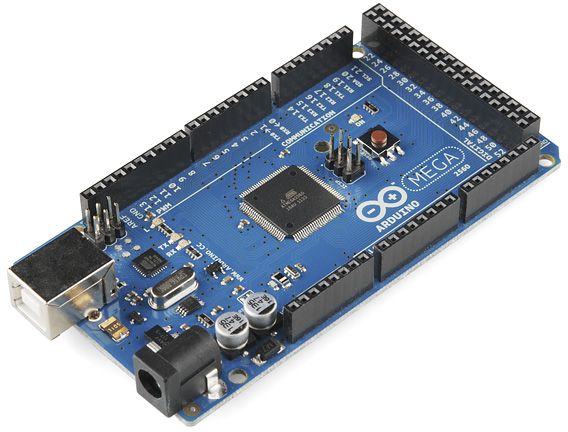
Arduino Due/Mega
by Arduino
Synthiam ARC enables Arduino Mega 2560 control with 8 ADC, 13 PWM, 21 digital ports and 24 servos; includes firmware, shield and tutorials
USB
Servos
24
Camera
Audio
UART
3
I2C
ADC
8
Digital
21

It appears you answered your question.
As documented, just make sure your custom commands fall under the CmdOurCustomCmds (or EZB Command 0 (zero))
To add new functions to the EZB firmware for the Arduino Due/Mega, you can indeed use the
CmdOurCustomCmds(Command 0) as a starting point for creating custom commands. This is a designated area in the firmware for user-defined commands, which helps avoid conflicts with existing or future ARC commands.Here's a step-by-step guide on how to define new custom command functions in the Arduino Mega EZB firmware:
Identify the Custom Command Range:
Modify the Firmware:
CmdOurCustomCmdscommand.else ifstatements within theCmdOurCustomCmdsblock to handle your new custom commands. For example:Compile and Upload the Firmware:
Update Your ARC Skill:
CmdOurCustomCmdscommand followed by the specific custom command number you defined.CmdCustomAction1, you would send a packet withCmdOurCustomCmdsfollowed byCmdCustomAction1.Testing:
Regarding the number range for custom commands, there isn't a specific range reserved for user-defined commands. However, it's essential to choose numbers that are not already in use by the firmware and are unlikely to be used in future updates. Using sub-commands under
CmdOurCustomCmdsis a good approach, as it organizes your custom commands under a single parent command and reduces the likelihood of conflicts.Remember to document your custom commands and maintain a list of them to ensure that you don't accidentally reuse numbers for different functions in the future.
A good example would be to look at DJ's Balance Robot firmware for the Arduino Mega, which is what you are using. The changes will be similar; here is the link: synthiam.com/Support/Hardware/Balance-Robot
Thanks for confirming this for me.
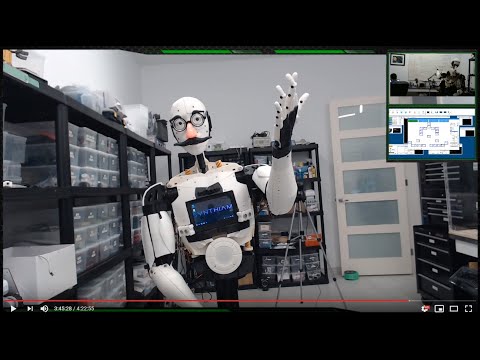
This is long but you can skip through it ... It's a live hack where i demonstrated extending the ezb protocol for the wheel encoder.