
EzGreeney
How To Make Our Own Jd-Like Robot (Except With Wheels) Move?
Hi everyone,
A friend and I are in high school and we built a bigger version of JD but with a two wheel drive (instead of the legs and their servos) for our graduation project. To control the wheels we're using two IFI Victor 884 speed controllers. These Victors are being connected to the I/O board with PWMs.
We want to script it so that when we tell it to go forward/back/right/left (say, we hit the arrow keys in the Auto Position panel in the ARC IDE), it does that. We don't have a joystick at the moment, we just have the computer controls and the mobile app controls.
It seems like a relatively simple task, but we're not sure how to go about it - using the PWM ports that the Victors are connected to, to move the two wheels in a direction. Our questions are at the end of this post (sorry it's a bit lengthy, we're hoping that if someone comes across the same problem, they can use what we did to resolve some of it).
This is what we've figured out so far:
If we go onto the EZ-Robot panel, and click on the design icon at the bottom, we can re-arrange the way that JD looks on the board and add our own continuous servos (aka Victors). We synced the bit library and added two continuous rotation servos to the picture by double clicking. We got rid of JD's assembly by right clicking on the leg parts once they were clicked/highlighted once. Then we hit save.
After that, we added two continuous servo controls. We adjusted their settings so that they were connected to the two ports on the control board that we connected the Victors to. We made the forward value 1, and the reverse value 180. After doing this, clicking on the arrows in these two servo control panels made the wheels turn forward and back. This step allowed us to individually test our wheels, and make sure they were running properly.
This page of the tutorials helped us out a bit with the next part: https://synthiam.com/Support?id=12
We exited out of the Auto Position panel because it would not let us have two movement panels open at the same time. With the custom movement panel, we were able to simply click the arrows and it made the wheels move. Forward with the forward arrow, Reverse with the opposite arrow... and so on.
However, we really want the Auto Position panel there because we're not sure how to bring it back. We find the actions it preforms very valuable (waves, and YMCA dancing and so on).
So we need to program the AutoPosition panel so that when we hit forward, the wheels go forward (and so on). We kinda made it go forward (auto position settings > Actions > Forward > Action Script > Edit Script > Servo(d#, 1); previously in the Forward action there were Walking steps, for JD)... but then it never stopped going forward, no matter what we clicked. Are we going in the right direction, or is the movement script config panel the one we need to adjust? (https://synthiam.com/Tutorials/Help.aspx?id=47 ... but then what code would we put there to make it move?)
Also, we're not sure how to make the wheel movements slower (we think it's servospeed(d#, 10), but not sure where to add this line of code?).
If anyone could help us out, that would be awesome.

Thanks for the detailed write-up. This will help me help you.
Firstly, the auto position movement control expects NO wheels. It is the incorrect control to be using. That means it is an Auto Position for servos only. It will not work with an HBridge or anything else. The Auto Position Movement only moves servos to make your robot walk, or crawl like JD.
What you need is how ROLI works...
Now, I understand that you would like JD's actions (wave, gorilla, etc). So this is what you have to do.
Make a backup of your project (i.e. give it a new filename so you don't lose anything during this process)
Load your project
Select CONFIG on the Auto Position control
Press the IMPORT/EXPORT Utilities tab
Press EXPORT TO FILE
Enter a filename and that will save all Auto Position values to the file
Close the CONFIG menu and return to ARC main screen
Close the Auto Position Movement (press the X to remove it from your project). We don't want that control in your project any longer.
Press PROJECT -> ADD CONTROL -> SERVOS -> Auto Position (do not select the one that mentions MOVEMENT).
*Note: you want the Auto Position that does not support movement
Press CONFIG on the Auto Position control
Press IMPORT/EXPORT Utilities tab
Select IMPORT and browse to your file
A dialog will display to load selected ACTIONS and FRAMES. Select the ACTIONS that you want. The frames will be auto selected.
Now to control your robot with an HBRdige, use one of the HBridge controls. You will find them listed under the HBridge section of PROJECT -> ADD CONTROL -> HBRIDGE
Here's a video I made for you
DJ Sures,
That worked perfectly! Thank you so much! We got all of the actions onto the normal Auto Position panel (w/o movement).
Now, we're still not able to move the wheels with the 4-Wire HBridge PWM Movement Panel arrows. We set the settings for this panel as all the left triggers/PWM to one port (d23), and all the right triggers/PWM to the other port (d22).
We can move the wheels individually with the Continuous servo panels and the sliders on the 4-Wire HBridge PWM Movement panel.
So, we're not using a 4-Wire HBridge, we're just using two IFI 884 Victors: they just have one PWM wire that connects to the IO board each. Should we be using a different panel to control our wheels? How can we just get it to move with the forward/back/right/left arrows in the panel?
Is the IFI 884 Victor the speed controller? I do not know anything about them. Could you provide a link to the manual and i'll take a look?
Here's the manual for the Victor, it's a speed controller: https://www.robotmarketplace.com/products/images/V884-Manual.pdf
And here are some links with more info about them: https://www.vexrobotics.com/news/2010/01/vexpro-victor-884-speed-controllers-now-available-for-discounted-price/
https://www.robotmarketplace.com/products/IFI-V884.html
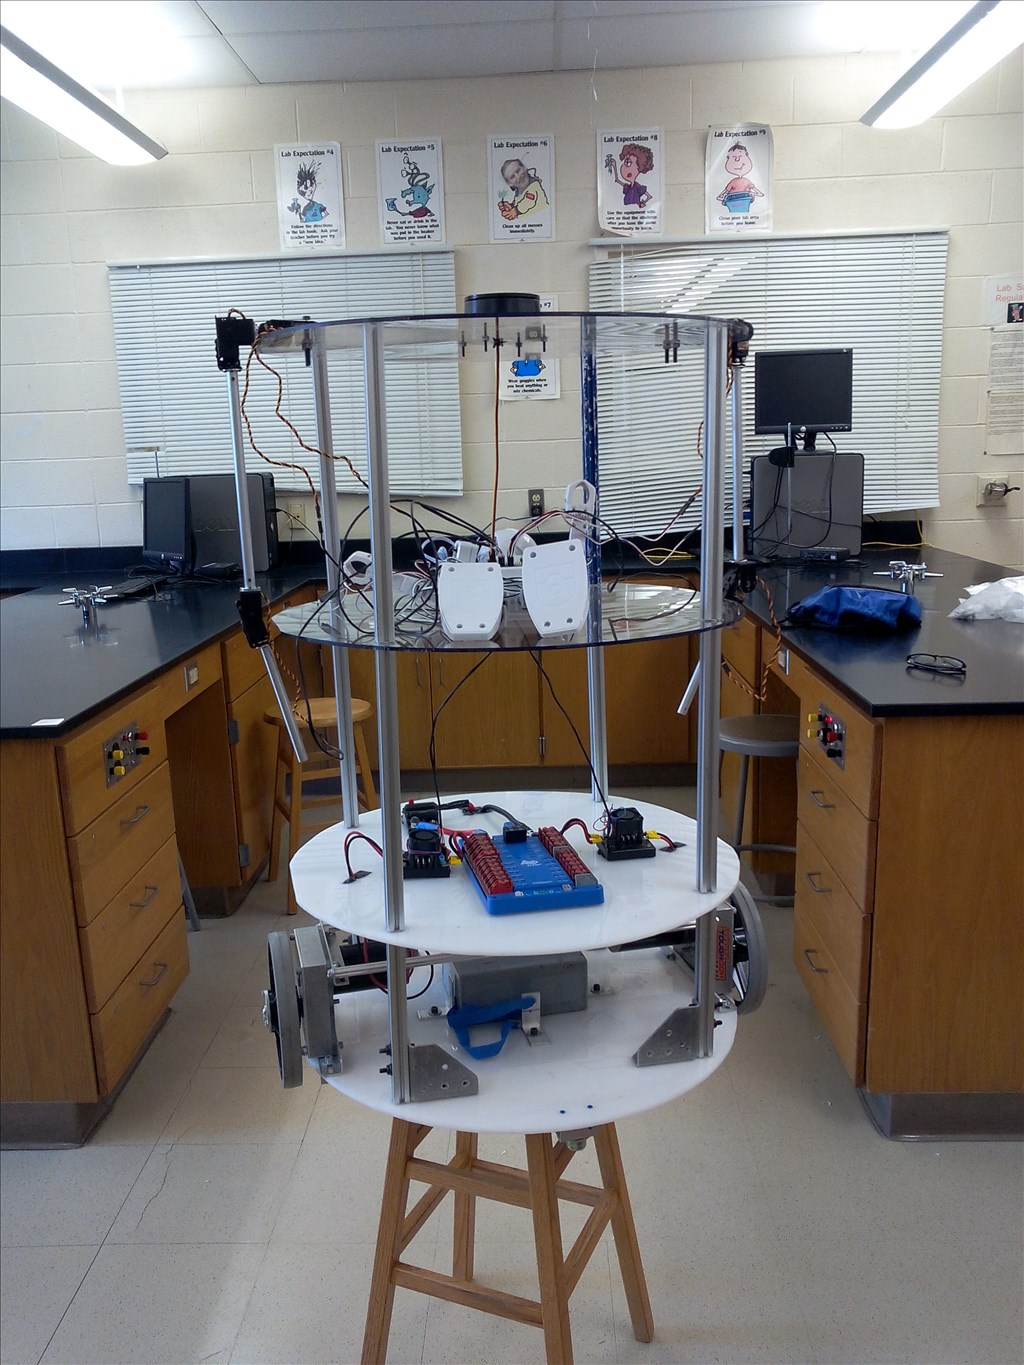
It's a type of HBridge, but it just has one PWM port. In the image attached of our robot, we have two on either side of the blue power distribution board, each connects to a motor that spins a wheel (we're using an alternate power source to run our drive system).
Dj Sures,
We figured it out!
We used the Continuous servo Movement panel, and now our robot moves with the arrow keys Thank you so much for all of you help! You're awesome! Also, thank you for your hard work in designing this product, we've had a lot of fun using it and building with it.
:)
I am marking this as resolved because we figured it out. Thank you, again.