Asked — Edited

Fun With Solidoodle 2 And My New Customer Experience

I ordered a Solidoodle 2 Pro which arrived today. I also ordered with that 2 rolls of filament. It should be 4 total pounds of material to start with. User-inserted image

User-inserted image

User-inserted image


ARC Pro

Upgrade to ARC Pro

Harnessing the power of ARC Pro, your robot can be more than just a simple automated machine.

#1  

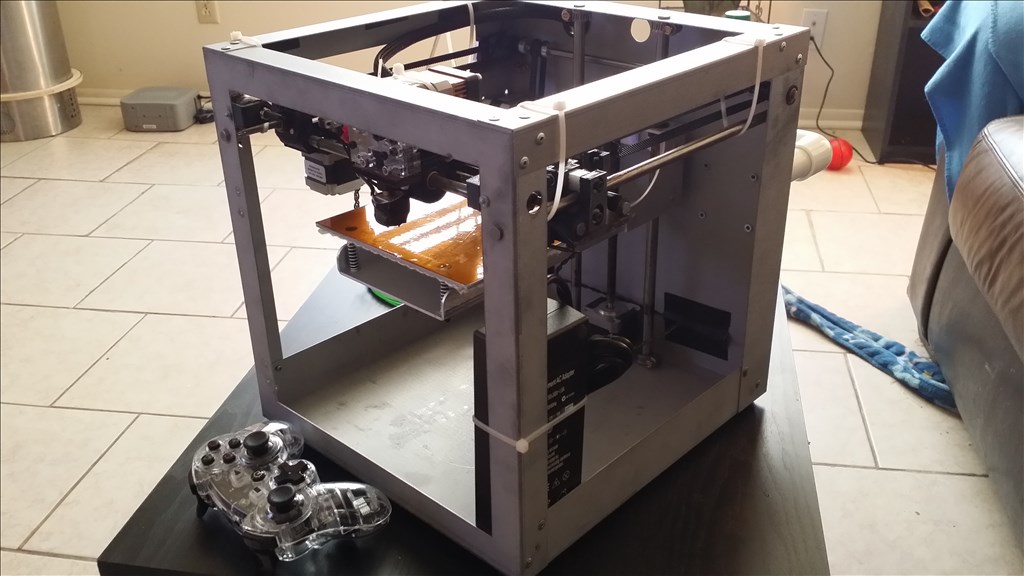
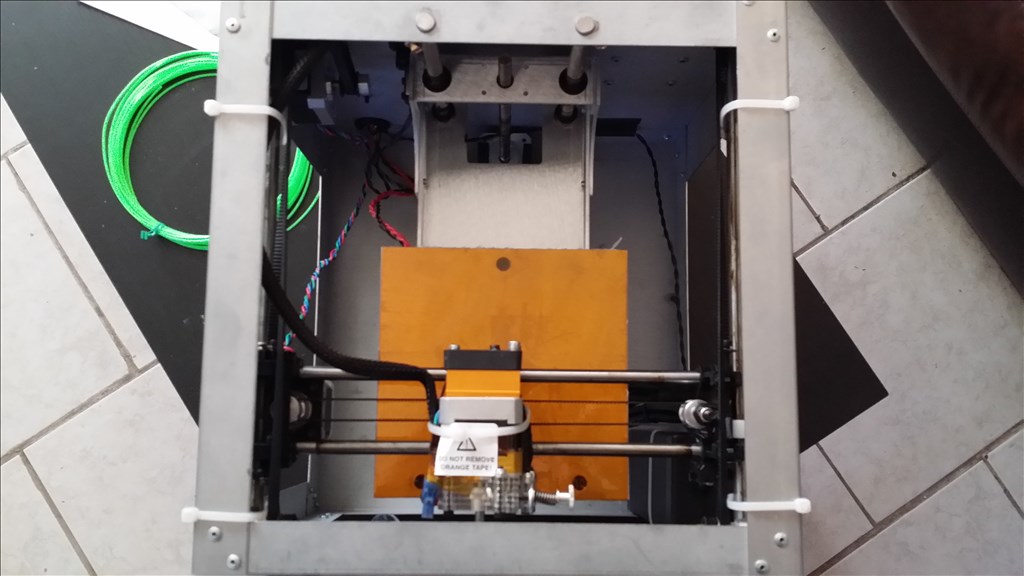
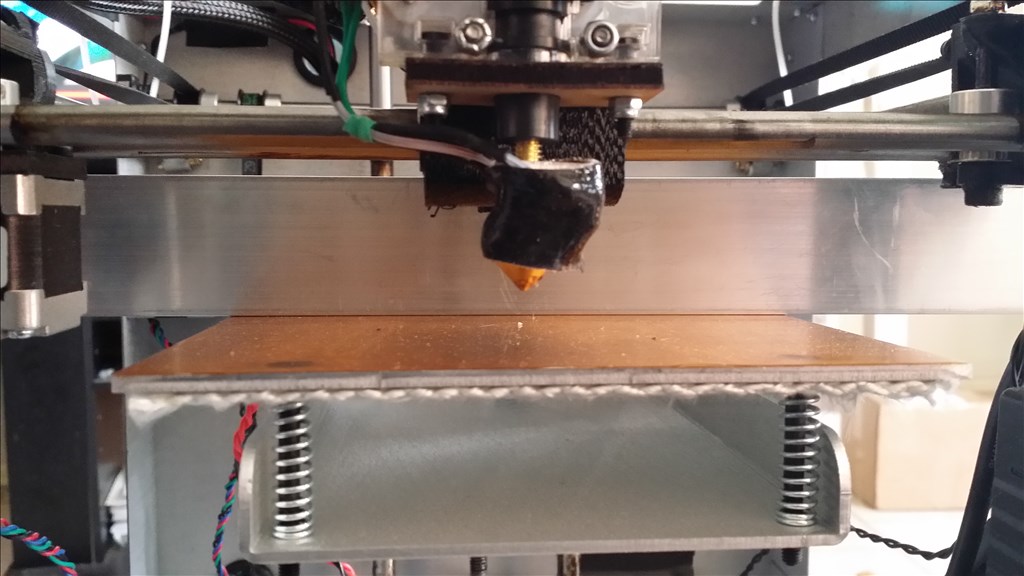
Looks like the print bed is warped a bit from the factory

https://www.youtube.com/watch?v=_8yqM-2DsD0&feature=youtube_gdata_player

#2  

Here's the start guide , there were not any instructions included with the machine. Only a piece of paper with the URL for soliforum.com , wiki.solidoodle.com , solidoodle.com/blog and their facebook.

Wiki.solidoodle.com

#3  

Awesome Josh, I can't wait to see what you do with your new toy. Lucky dog ;)

#4  

Welcome to the land of 3D printers and warped print beds. Most owners of the Makerbot and Flashforge 3D printers have added a glass plate bed to solve that un-even print bed and get much better extrusion which then helps make better 3d models.

#5  

@Robotdoc , i have heard of cutting glass beds. Any idea where to buy them or will any pane glass do?

#6  

Since you print bed is not heated you can use regular glass from your local hardware store. You can order pre-cut Heat-Resistant Borosilicate Glass from McMaster-Carr HERE

I ordered the heat resistant glass for the Flshforge since it has a heated bed. Since I now use mostly PLA I only heat to 50 C so it's not very hot. I used a 1/8 inch diamond drill bit to cut a hole in each end to mount the glass to the heat bed but other 3D hackers use silicon pads from Amazon.com to hold the glass in place.

#7  

I have a heated bed , it runs 100 degrees Celsius. So I will look at those bed options. My material is ABS , higher extruding temps , stronger material , chemical resistant as well. Definitely not arguing anything because PLA has its benefits.

#8  

No problem, I got lazy and run one extruder with ABS and the other with PLA. Just have to keep them straight in my mind when I slice a 3D model so that the temps match the extruder.

#9  

Ok so i spent a few hours going through recommended steps tuning the machine and I'm sure a few more are needed. The very first items I had to print were adjustment knobs for the bottom of the bed. This allows a immediate adjustment soon as a print starts to ensure even build. Also the Kapton tape that was included only lasted through these 3 knob prints. I switched to painters tape. User-inserted image

User-inserted image

User-inserted image

I must say the knobs are a great idea however the order of startup steps is stupid. The recommended adjusting the zip axis first , then print knobs , then level the print bed where you will need to redo the zip axis adjustment. It makes must more sense to level the bed first with the machine off and the do the Z axis adjustments when the machine is on.

#10  

Next my first print was the ear pods on the ironman helmet. User-inserted image

User-inserted image

User-inserted image

#11  

I will say that painters tape is a clear way to go to make sure the print doesn't peel and also to protect your print bed from scratches when you pry your part off.

#13  

Wow! congrats Josh! Looks like your first print are going well......Cant wait to see all the items you'll be printing...Its def encouraging for the wanna be buyers!:) With your painting skills, changing colors should be easy :)

#14  

Too cool Josh. Nice work. Thanks for posting this stuff. Having aspirations of being a 3d printer owner one day, it's interesting to watch someone else's into journey.

#15  

Josh, I was going to tell you to expect a learning curve, it took me about 2-3 weeks to get really comfortable with the machine. But it looks like you have got it. You will have SO much fun with it. I have a FlashForge Create which is the same as a Maker-bot Replicator One. Except I have all the Upgrades and I can print in either PLA or ABS. I have had more fun with this machine except when I draw my own models. This is where it takes skills like Aameralis has. Also, good luck on your new business. Oh, and ALL print beds are not level. That is why you put a piece of glass, lexicon, or other material on top of it.

#16  

@ Mel - so do you have problems with filament absorbing water through the air? I've heard rumors it causes print issues but then I see other people with rolls of filament out in the open.

Also about the print bed I was able to get it flat by adjusting the tension on the build plate and the plate started to flatten out.

#17  

Pretty cool and a very good job at being a newby at 3d printing, I am like so close to buying a 3d printer :-} I hope everything goes well for your business :-} I might be getting a hold of you for a few things :-}

#18  

@josh, Some rolls worked fine from start to finish. I recently put in a new roll that is jamming the Extruder up. Also, it is not printing very well at all. I believe it was a bad roll. But, with my experience with other rolls, they work just fine. It took me a little while to get the way of operating it. You print out about 50-75 items, then you must maintain it. Also, it takes a rub of alcohol every single time. 95% alcohol or denatured. I am using a heated bed with ABS filament. It seems to be a stronger plastic. I don't think that the moisture is going to affect you if you open the roll and use it in a decent amount of time. If you open it and let it set open on the shelf for a couple of years, it will certainly have problems. I haven't had luck with PLA. I just tried it for a little while. Everyone says that I will love it. We will see.

#19  

@josh, what is your bed size? mine is 6X9.

#21  

Yes 6x6x6 but I believe I found a way it can print to over 7 inches with a larger build plate. The Repetier Software is open source so make changes to the settings and code are possible.

Anyways I has to make adjustments to the Z axis stop and initial print height. I also reduced initial print speed by 50 percent. I do want to print some accessories as practice Today I made my first .1mm resolution print. It is a filament feeder cone. I used a 2 layer raft and 3 mm skirt. The raft and skirt combo mean delamination of the edges are not likely to effect the print. User-inserted image This is a test print I did a few times to get the filament to stick yet also squish evenly.

User-inserted image

User-inserted image

User-inserted image

Once the print was done I decided to try acetone on the print. I just dipped it in a cotton ball and dabbed it on. I believe I will make a acetone vapor station from a crock pot with a lid. Here is the part after just being wiped with it. You can see the slicked over gloss it makes. I believe this will result in a more stable part as well to protect against layer delamination. User-inserted image

User-inserted image

User-inserted image

Looks like a great part. The one thing I can say is that the first 5 to 10 minutes of a print are the most important and it's 90 percent likely that if a print will have a problem it will happen then.

#23  

You can still see the lines in this .1mm print. I have found two things that will improve this. A backlash nut for the Z axis and replacement carriage ends that have two sets of bushings instead of one. This should take it from being a acceptable print to a crystal clear print. Apparently these two mods/improvements are common for most consumer 3d printers. Even the makerbot replicator has the option for the same mods.

Next though I believe I will do the extruder fan and tunnel add on.

#24  

So something I learned is that the environment inside the printer is very important. It's odd that this is not given as part of a tip before printing. I took Djs advice on using a garbage bag over the printer and turned on the heated bed about 20 min before starting to print. The bed warms the air and all the components up inside and then while printing I left the bag on to shield from vents blowing air in my workspace. It worked excellent! In the efforts to have something for practical I believe I will build a cabinet of some sort with a door or something. Without the bag the print material shrinks unevenly and causes the part edges to curl up or to come unstuck from the bed.

Ok so after my first .1mm print I decided to try a .3 mm which is standard with support material. I apologize as I forgot to take a picture before I pulled the support materials off. Since we will be putting together bipeds and such it is beneficial to have a couple dozen servo blanks laying around just for assembly purposes. I will check the measurements and if everything is good I will do repeat prints. User-inserted image

User-inserted image

User-inserted image

User-inserted image

User-inserted image

I have learned that printing with a raft increases adhesion to the build plate and acts as a buffer between and warps from the print bed and the part. There are many projects where supports are needed to keep the part perfect and this is all don't with software.

This instructions on this part were to scale to 105 percent but since I can only use decimals I used 1.05 scale.

#25  

I picked up a couple accessories from Silhouette that were intended for my Cameo Paper cutter however I noticed they did a superb job at prying a part off the print bed gently and without scratching the painters tape. I can use the same layer of printer tape over and over for a handful of prints which saves money. The tool was 7 dollars on amazon.com but it's a excellent deal. It is stainless steel and works better than the plastic spatula.

User-inserted image

User-inserted image

#26  

So far there is a learning curve with the solidoodle but it isn't too bad. Once you take the time to daily in a setting it repeats this well. So far the biggest complaints are printing perfect arcs and perfect circles but this is common among 3d printers. There are mods to improve this and it usually caused by vibrations called "wobble". There are belt tensioners, z axis supports and a couple other things that practically eliminate these issues so I am really not concerned. At this point I feel like the 480 spent of the printer was well spent.

#27  

@josh, you are doing good son. I wanted to say that after you preheat it, adjust the bed level screws again for a perfect setting. With my printer, it's Extruders get closer to the bed when hot.

#28  

How to keep your 3d printing ABS or PLA filament fresh , dry and free of contaminants.

Both these materials can collect dust and other contamination from the air that can clog your extruder later. Also the filament can absorb water from the humidity in the air. I want to keep my filament fresh long enough to use it all up. I picked up a cheap plastic toolbox that is near airtight and a roll of water strip.

Home Depot -Homer 19" orange tool box -16 oz of desiccant with carbon absorber -.25" wide weather strip

User-inserted image

User-inserted image

User-inserted image

User-inserted image

The 2 pound filament roll fits nicely. Looks like I can fit 4 rolls of filament in here for storage between printing.

#29  

Thanks for sharing about using a 3d printer and all pictures, plus tips.

J

#30  

I needed a box to keep my filament in anyways and the moisture absorbing thing makes me feel better lol. A lot of people on forums have complained of humidity getting to the filament and causing problems with keeping the material temps up.

I picked up the box and damp aid while I was on the way to pickup 1/4" lexan and magnets to enclose the solidoodle.

#31  

Ok almost done with the insulated foam topper. I may do a outside coat of resin so i can paint it but that's only for looks. It is just meant to keep the heat from flying right out of the top of the solidoodle. User-inserted image

I have a dual temp lcd I may install so i can monitor inside and outside case temperature.

#32  

I notice when you're printing there is like a plastic screen or grid on the bottom. Is that part of the print like you're printing it on a tree and snapping it off afterwards or, is that a seperate thing that you have on the bed to keep the part from sticking to it?

#33  

Yes , it's called a Raft. And I check the box for supports of overhangs more that 45 degrees. I have had near perfect success since I have used rafts.

#34  

So the raft is like the first few layers to be printed then. I can see several advantages to that. Thanks for giving out all of the info and tips.

#35  

Alright I'm done for the night this is the progress picture of the plexiglass case I put together. I still need to do three things tommorow. Clean up the edges, back spray a border in black around the edges of plexiglass and add some weather stripping to fill the gap between the glass and case. That way I can keep around 90 percent of the warm air in the case and keep cool air out. User-inserted image

User-inserted image

I used the 1 inch foam and a hot knife to carve a giant gasket to lift the top plexiglass out of the way of the extruder and filament feeding in. Once I had the carved price I painted it black with acrylic paint using a brush. Unfortunately spray paint will easily melt the foam.

#36  

I've heard that Krylon H2o Latex Spray Paint works on foam but I bet that would stick to the glass even after drying.

#37  

Ok so here is today's print. It's the biggest thing I have tried so far. The ironman suite hand User-inserted image

User-inserted image

User-inserted image

#38  

I can't wait to see how that prints out. I love this thread.

A couple more questions. Where did you get yours? On the Solidoodle website it mentions open source software but I can't find the software anywhere on the site. What software does it use? It says you have to download it, that there is no disk, but no info on where to download said software. What am I missing?

#39  

that print is going to take a while. But, you have done good so far.

#41  

You gotta go to wiki.solidoodle.com to go through the start guide. I printed two fingers last night. After the second finger it did something wierd. The bed started going down and never stopped. It doesn't have a limit switch going down. It moved down until the platform was against the bottom of the machine and the knobs were against the bottom. The platform started to flex I guess it's hard to explain but it looked like it was about to break itself. After that I tried to test print and the bed was out of level. I will follow up tonight when I check to make sure it's just the bed out of level. User-inserted image

I believe with the knobs on the bottom of the platform keep is from lowering completely and it appears it may need that space to print an object 6 inches high. I will remove the knobs tonight.

#42  

@Josh I'm sorry to hear about your issue. Having problems printing more than six inches huh? There's a bad joke in there somewhere. Anyway, I look forward to your follow up later.

@jdebay, Thanks, I see it now. Duh. -1 for me.

#43  

User-inserted image

I pulled the knobs off the bed screws and did a quick print test and came out okay, the front of the bed was mildly out of level. It 30 min I leveled the bed agian and adjusted the Z to tighten the squish on the first layer.

User-inserted image

Without the knobs the bed can drop the full 6 inches. So word of advice. DO NOT KEEP the knobs on the adjustment screws like recommend in the start guide to prevent the platform from bottoming out.

#44  

Ok so after that scare I continued printing but it does seem like something is off. It has a strange extruding pattern using .1mm and .3mm the filament sometimes doesn't adhere and leaves a stringy mess. I did a tiny test print for a cube. The prints are ironman costume fingers by the way before anyone gets the inappropriate ideas. User-inserted image

User-inserted image

Here are just individual finger segments Anthony drew up using white abs.

User-inserted image

Here is the test cube with only a 6 mm brim added for stability. One side of the cube came out fine but not the other. User-inserted image

User-inserted image

User-inserted image

Here is a ironman costume finger that started having some issues , you can see at the bottom of the print it was fine but the higher it went things got rough. User-inserted image

User-inserted image

I have emailed solidoodle with my concerns today and I went through the more basic steps but I certainly don't want to void warranty with mods if there was something else I could do to make it print well.

#45  

On a positive note , a good 3d print can take between 2 hours and all night or all day. No one realistically has time to physically monitor progress. I highly recommend setting up a remote desktop from your phone or even laptop if you carry one. I use splash top 2 I bought for 1.99 app on my android device and it is working very well. It allows me to swith between multiple monitors and also between several computers from anywhere. Here is a screen shot of my most recent print which did fail. The camera is the one that comes with the ez robot kit and I removed the ir filter so there is more yellow hue to the image. User-inserted image

#46  

Here is the last good print that was done. It was a couple days before the bed dropped down until the stepper stalled. Its A servo Blank At 105 Percent To scale. This is standard .3mm print with 4 layer raft and brim.

User-inserted image

User-inserted image

User-inserted image

User-inserted image

#47  

thanks for the update and warning Josh. Ill be ordering my SD2 as soon as the funds become available. I appreciate the heads up. i know it,s a little late but have you considered using a lower profile thumb screw? im at work so i dont have any links right now but if you'd like i can post at least one i saw later this evening.

I hope you didn't strip your stepper motor when it bottomed out. Are you still using ABS? have you tried PLA yet? Im just curious as to whether you need anything special to print PLA. everything I've read just says use lower temps and maybe a fan. Is that true? it would be great if temp control was all that is needed. im just leary. if it sounds too good....

it's good to here from you again Josh. I was starting to wonder where you've been.

#48  

@Antron , i later figured out that it didn't matter if the knobs were on the bottom the machine can still bottom out. There's no limit switch on the X axis going down. I thought of wiring one in by tapping the other limit switch to trigger emergency stop but I need to resolve print quality issues first in case I need to ship the solidoodle to them.

#49  

Alright so i recieved my response back from solidoodle. They feel we need to do a live chat to get the settings tweaked to figure out the wierd patterns I had on some prints. In the meantime I have two prints , a ironman thumb and servo blank as well going on the platform and I will see if any weirdness happens with them.

Email response: Josh,

Please call me to resolve this issue. I think we might need to do a team viewer session.

We can be reached Monday - Friday 

We are in the office from the hours of 9:00AM - 6:00PM EST.

Our phone number is 347-457-6608 

Please note, our lunch hour is 12:30-1:30PM

Regards, Joel

, it's already past 6pm , i received the email about 15 min till 6pm so there wasn't time to troubleshoot today. I will update everyone with what they do.

#50  

I've been interested by 3D printing for a while. seeing as solid doodle is much cheaper as other printers i'm really interested. I do have some questions...

  1. Do you recommend solid doodle for a not very well funded nearly high school student?

  2. What common problems will I face.

  3. how difficult is it to learn how to use the software?

  4. does software come with the printer?

  5. What version of printer should I use?

Thanks for any answers and I hope I don't hijack the thread. Very interested in how your iron man suit comes out.

Tech.

#51  

Hey Tech, I've been doing a lot of research on this matter lately. I'm getting a Solidoodle 2 Pro soon. at $599 assembled, It's ultimately one of the best printers in my opinion. I researched the intro levels of a bunch of printers and while there are a few that are slightly cheaper the have smaller print areas. It appears to me that others look cooler but that's about it. They all seem to do the same thing at the same speed. It's also actually available. A lot of the sub $1000 printers are pre-order or kick starters so there's no real consumer feed back. The only drawback I see to the solidoodle is that it lacks end-stops that prevent issues like what Josh had. I'm not sure if any sub $1000 printer does. If you're only printing smaller things that don't use up alot of the print area I don't think it should be a problem.

I anticipate having to calibrate and fine tune it for a few days to get it really dialed in and printing great. I'm going to get a mirror to put on my heated bed. Getting a good first layer and, getting it to stick is one of the keys to a good print. That's why the raft helps. You're now kind of printing onto it so if its a little messed up it may not mess the part up since it just get scrapped anyway.

I didn't find the software too difficult. There's alot of settings for fine tuning the print process but weather you'll need to use them or not just kind of depends on a little bit of luck I think. Some people claim to pull them out of the box and being super happy with default settings and others have to do a lot of calibrating. The cool thing about settings is that it's better to have them and not need them then to need them and not have them.

You can download the software in a link provided earlier in this thread. There's actually a few pieces of software you need. All free.

  1. A 3d design (CAD) program. Ie Sketch-up or 123DDesign. I recommend 123 because it exports stls. Sketch-up does too with a plug-in and I had issues importing those stls into ARC so I switched to 123D. Design your object and export it out to an stl file.

  2. Netfab, once you make an stl you want to check the item to make sure it's printable. Netfab will check and fix the model and export a fixed stl.

  3. 3d Printer software. Solidoodle uses one called Repetier-Host but you can use others. Once you've imported your stl you can place it where you'd like on the bed. For single items you'll probably just want to center them. Then there's number 4: Your slicer program. this is the one that slices your file up into layers and converts it to the G-Code that get sent to the 3d printer.

I recommend going to you tube and searching for solidoodle ans well as 3d printing. I spent the past week or so absorbing as much as possible. If you want, export some ez-bits and put those through netfab then import them into Repetier-Host and slice them. Once you slice them you can go through and look at the individual layers so you can look at just the bottom layer or a range of layers. You can also modify the slicer settings and go through the part and see how it affects the construction. I think it's cool if anything.

I learned most of this in the last week. I just did intense research. Do some you tubing and you'll get a good grip on it. I recommend playing with the software as you discover new things about it. Infill is lots of fun to play with if you want to go looking through the layers.

Anyway Tech, I'm going with the SD2 Pro because it's the best for my budget. And honestly based on my research it's the only one I'd buy under $2000. That's just my opinion on the matter.

#52  

Thanks so much Antron for your research on SD2 Pro....your evaluation helps others! :)

#53  

Thanks Irobot. I really tried very hard to find a printer worth getting at a cheaper price. I kind of tried to find a different brand. I was kind of hoping to find some lesser known company like ez robot sort of was when I discovered them. It's done me good so far so I figured I'd try to continue the trend and find another new, going places, company but, "when it comes down to the numbers" the Solidoodle is the best overall value. IMHO :)

#54  

The software is free and open source , slic3r is already built in as well as skienforge 3d. You can download it from wiki.solidoodle.com on the right hand side click downloads. You can see how it slices and how positioning works ect.

I would recommend it but it takes hours of patience to get things right and learn how to use tools. I have learned to use netlab cloud to fix models with holes or non manifold. In many cases the slicer in solidoodle will not fix them so you need to get the mesh repaired before trying to slice it.

I repaired 2 models one being the ironman thumb and next a servo blank and the processed and sliced in seconds. Better results than before. I will update pics when I get home.

#55  

User-inserted image

User-inserted image

User-inserted image User-inserted image

Ok these are all prints I tried after Dj suggested I use a spritzer of wd40 in the extruder before starting. WOW what a difference it appears to have made. I did close up shots and you can see how much tighter the laters were. No other changes to settings were made. The servo is 1 to 2 mm longer than its real counterpart as you can see from top view. I may keep that ratio as servos can vary by that much anyways.

Also a today was a first. I completely sliced and initiated a print remotely first I printed the servo blank then sliced the ironman thumb in a different location of the bed and started another print. I monitored it through a wireless cam that comes with the ez robot kit from a top view since I have plexiglass on top too. It was a bit of a nerdy rush , crossing my fingers the initial raft laid down correctly since I wasn't there for a do over.

User-inserted image

#56  

The prints seem to be working a lot better now?! Did you correct or do anything different?

#57  

I just used Dj suggestion , a spritz of wd40 on the filament going into the extruder and it seems to not have the crazy pattern gaps. I'm not sure what role the wd40 plays but on 2 prints back to back it performed much better than the last 3 or 4 where there were layer delamination and gaps.

#58  

For me, at the price, I'd be happy with pictures 1 & 3.

I'm no expert by any means but, in regards to picture 2. I've only done a lot of research but, it looks like maybe you need to either lower your speed or lower your extruder temp. Unfortunately, I can't tell you how much or which as I don't own one yet so I've no personal data to use but, based on all of the videos and things I've read, that's what it seems to look like.

Also, I see you are using support material. Now, I can't explain it but, a lot of the stuff I've seen on ye ol' internet, didn't use support material and seemed to come out pretty good. I'm not exaggerating when I say I've watched hundreds of videos on the SD2 and 3d printing. I just want to know as much as I feel I need to about something I'm gonna spend $600+ on.

I'm sorry I suck at keeping track of the best of my research to share. In the future I will try to remember to keep track of my sources. i just sort of cram everything I can into my brain. Needless to say, sometimes my brain can be a mess. eek

#59  

It's alright, I appreciate the feedback. I too watched many good prints on solidoodles. The question is how they did them lol. The lower temp with abs started having trouble feeding and popping noise can be heard from the extruder loosing it's grip and stripping the filament. Once that happens you gotta clean out the extruder mechanism from filament dust so it grips the filament agian properly. Then cut that mangled piece of filament out and refeed fresh filament. Micro maintenance is a bear and I wish they made a comprehensive guide for these simple fixes.

#60  

@josh until you receive some answers from the SD 2 company and your quote " I just used Dj suggestion , a spritz of wd40 on the filament going into the extruder and it seems to not have the crazy pattern gaps. I'm not sure what role the wd40 plays but on 2 prints back to back it performed much better than the last 3 or 4 where there were layer delamination and gaps. " If you could make/create a "drip" feed onto the in feed of the filament perhaps that would help with making better prints (without voiding any warranty issues of course) :) just a thought and trying to build on your better success!

#61  

On my mig welder I lube the wire with some thick felt and a clothspin . I'm not sure the printer would be able to pull it through that as I have never 3D printed. Could cut i grove on the felt though to reduce friction. :)

#62  

I received two spools of ABS when I purchased a FlashForge dual extruder. The white ABS caused the extruder to jam up alot. Switching to the black ABS worked much better. Then obtained the upgraded extruder pair and started printing PLA (red) and really liked the results. I'm still using the stock firmware but lots of folks are upgrading to the Swordfish firmware for more flexibility and control of their 3D prints.

#63  

@josh, now that you have had your solidoodle for a while, Would you purchase another one if you did not have one and know what you know now? How do you like it. If I got one, It would not work with makerware and repG, I guess. And, are the replacement parts high? I like the metal frame. Have you had any problems? and they are not Opensource are they? What is their program called and can I play with it.

#64  

@moviemaker- You have a mekerbot now correct?

The solidoodle recommends, Repetier Host (Click to download). I believe you can also use repG and a few others as well. My solidoodle was just marked OK to Ship today so I don't have one to speak from experience but I've done tons of research. I'm not sure if the hardware is Open Source or not but some of the software is. Like slic3r for example, I know is open source.

I can't tell you about part cost but I'm assuming that they're the same as or cheaper than Makerbot. (Based on the fact that SD's most expensive printer is still $400ish less than Makerbots cheapest one. They proboably use the same parts. A lot of 3d printers seem to spawn from RepRap printers which, are also open source. I believe Cartesian 3d Printer is the generic term.

Being on team Solidoodle I hate to say it but, I would have gone Makerbot if I had the money but, I wanted a 3d printer, NOW, and for what I can afford, the Solidoodle is the best option for me.

I hope this can get you started playing with the software at least, until Josh can fill in some more details.

#65  

@Antron007, I don't own a Maker-bot. I own a Maker-bot clone. It is the same as Maker-bot, but has Way more improvements. I would recommend it to anybody. It is like the Replicator. It prints both ABS and PLA. The Solidoodle seems made better because it is metal.

#66  

@moviemaker- Clones are cool. Did you build it or could you tell me what brand it is? I already want to build one but I wanted to own one and get familiar first.

#67  

It is called the FlashForge Create, you can read about them here on a USA site instead of having to go the the China web site.

FlashForge 3D printer

#68  

@Antron007,

 It is in my opinion the BEST Clone of the Makerbot. You get all of the features of the Replicator1Dual Extruder for about half the price. It is a Flash-Forge CreateII. They duplicated the Makerbot Replicator and gave it all the upgrades. It is almost identical. It runs Makerbot software. The downside for me was that i purchased it from a FF Dealer and not FFusa.com. I would have prefered to have bought it in the USA. I now have to wait for China to ship parts in warranty. But, I have to pay the postage. $30 to send me a $15 part.  Once it is out of warranty, I can purchase the parts in the USA.  I can still purchase the parts now, but FFusa does not support items bought from Dealers. That includes Ebay, Amazon, other dealers. FFusa is the ONLY authorized dealer in the USA. You ought to see the Factory. It is HUGE. I LOVE this machine.
#69  

That looks pretty awesome. Still just a little out of reach for me but I'm hoping that the SD2 will keep me busy long enough to save up for one. I might build a 3d printer once I'm more familiar with the mechanics of them. Thanks for all of the great info.

@Josh- I know you've been busy with the truck but, how's things with your printer going?

#70  

I turned the printer on today to try and print something small and the Z axis motor that moves the bed won't move... :(

https://www.youtube.com/watch?v=4lthYHfWYJo&feature=youtube_gdata_player

#71  

Sorry about your troubles Josh.... However, this is precisely why I wouldn't invest in new technology until it matures to the point of reliability... I thought about getting one, but unless I spring for the expensive Makerbot I am just going to hold off until reliability catches up with the industry.

#72  

Josh have you tried turning the Z shaft by hand and see if you can raise the print plate up ?

#73  

Update , robot doc , yes it was torqued down so I went to home depot and purchased nuts to match the thread. 5/16 -18 course threads. Then threaded two on and locked them together by turning the first backwards. I then used a wrench to gently turn the Z axis until it was unstuck.

https://www.youtube.com/watch?v=4OsSRnAiTf4&feature=youtube_gdata_player

Test after I lubed the Z axis and the y and X axis rails as well.

https://www.youtube.com/watch?v=_yN4mdQ1VtQ&feature=youtube_gdata_player

#74  

I wanted to share this , this print was the last one before the Z axis locked. It was a 9.5 hour print of a Hand piece I was attempting as a solid piece with lots of detail. I used supports. The supports printed great but the object itself is practically none existent. Only the repulser actually printed. Some say it was the walls themselves were too thin and the machine could negotiate that in mid air. Never the less I have a giant loofah worth keeping just to laugh about. User-inserted image

User-inserted image

User-inserted image

User-inserted image

User-inserted image User-inserted image

It's almost a epic misprint , it pretty much printed everything but the object yet due to a optical illusion, you think the glove is inside. This demonstrates good reasons why I need to learn to use the autodesk software.

#75  

Cool updates. At least your printer appears to be working again.

#76  

Josh, I'm sure you're aware that there are multiple slicer programs out there that may help get some of your more busy 3D prints to actually print on your printer. You may have to experiment a bit to find one that is right for your detailed prints.

#77  

Yea i have tried makerbot and it didn't like the g code , it just wouldn't initiate the prints. Anyways I finished a print which was 90 percent good but I notice my rows don't squish together so I'm researching how to fix this in the firmware. User-inserted image

User-inserted image

User-inserted image

you can see in some areas the layers are not stuck together well on the horizontal plane. Apparently this has to do with amount extruded and individual layer hieght. Making the layer shorter causes squish I really need.

I did a acetone bath to adhere the seperate layers together , you can pour it on or dab it on with a cloth.

User-inserted image

User-inserted image

The parts do seem to be more stable but you need to let them sit a few hours so all the acetone evaporates and abs rehardens. I will let them sit overnight and update everyone tommorow. You can do this with heat , like a butane torch or propane to glaze the surface of the pla.

#78  

This seems like the best acetone vapor method I've see.

#79  

@anthony , yup makerbot is better , if I could find one for about 1200 I would sell solidoodle and get another one. That being said overtime the prints have gotten better but there's so much manual adjustments physically and in the firmware to make it do a great job.

#80  

Yes I do think the slicer is partially to blame.

#81  

Ok so a popular improvement to banding or layer alignment is the Z backlash mod. All it does is tighten the Z axis from play. Here is what I did. This is recommended by solidoodle but also voids warranty so if you need tech support be sure to remove this before they do a video session with you. This is not a permanent modification and utilizes unused m3 screw holes.

User-inserted image Oem z axis bung is on the bottom , previous models had one on top but my run of printers didn't have one.

User-inserted image

User-inserted image

User-inserted image

User-inserted image

Be sure to apply lube above the new nuts. Lube not only aids movement but viscosity of the lube being so thick it provides hydrostatic pressure between the threads meaning even less play. This raise your bed up and down over the fresh lube.

The are the recommended steps however today I will pick up a rubber washer to put unter the nuts so they fit more snuggly. At this time they are not finger tight. With a washer I believe that will do the trick.

#82  

User-inserted image

I will snap a update picture when I add the rubber washer but this is what your end product looks like. I plan to later paint any mods I do but I leave them white so they are easy to identify for the purposes of aiding other community members.

#83  

@Josh Seems like a useful engineering mod ...we are all hoping it will prove good!:) I don't have a 3D printer yet and this is all so very informative! Thanks for posting the "good, bad and ugly" news :)

#84  

Thanks I robot , from what I have seen on other printers the calibration and modifications for better prints are mostly universal from model to model. They all follow the reprap printer type and use either abs or pla.

Ok so here is my first print after adding the Z backlash mod but I have not added the rubber gasket yet. I am pleased with the obvious alignment improvments. This is a .3mm print so it's more obvious here than it would be with a .2 or .1mm User-inserted image

User-inserted image

User-inserted image

User-inserted image

User-inserted image

User-inserted image

User-inserted image

After the print I wiped the part with acetone to seal up and layers that might not have stuck well. Overall it prints 98 percent correct only a couple passes didnt stick in the air tunnel but this is a vast improvement from before the Z backlash mod. It costs like 3 dollars and a couple hours of printing. This particular part I printed was for the extruder fan , it cools the filament slightly to control oz and improve layer adhesions. This is also a recommended mod by solidoodle.

#85  

Ok so here is the printed extruder head fan shroud with mount on top. I may install this in a couple days but first I need to get a high flow fan to fit. I will post what I bought. User-inserted image

#86  

User-inserted image

Here is the fan I ordered on amazon.com

Sunon 40x40x10mm Medium Speed fan, Model KDE1204PFV2  Low noise with Patented Vapo Bearing  Model KDE1204PFV2  Specs  Bearing Type: Vapo with MagLev tech  RPM: 5800  Air Flow: 7.0  Noise Level: 27.0 dBA  Power Connector: 3 Pin w RPM Monitoring  Fan Dimensions 40x40x10mm  Rated Voltage: 12V DC

most fans of this size can only move around 4 cfm and some 5 cfm. This fan is rated 7 cfm so i will have plenty of warm air moving across the extruder. This is the second most recommended modification to get clean prints , better bridging and sharper edges and corners. I've also heard the can assist with curves where layers have trouble sticking. There are options in the software for this to be controlled by the slicer as well or i can have it separate from the oem electronics so i have not done any permanent modifications. So in a few days I will have this new fan and I will put those suggestions to the test.

#87  

@Josh- From what I gathered the fan is for printing PLA. I'm not sure if it will be a positive or negative with ABS. I'm very interested in how this works out. I just ordered mine last week so I won't see it for a minute but I planned on doing the backlash mod. What thingiverse item number was that one you used?

#88  

@antron - sorry I don't know the number but search solidoodle fan and look for the artist username Lawsy. That's the moderator for solidoodle forums.

Yea there are lots of pages of posts with people who tried this and confirm the improvement. Here are before and after pictures using the same settings User-inserted image

User-inserted image left no fan, right fan on

User-inserted image fan also helps bridging which is jumping a gap.

#89  

The smooth columns on the left were with fan on and the rest , most on the right print are without the fan. All the other settings were the same here. User-inserted image

These little things seem to have a dramatic impact so it's worth me trying them.

Here is the instructions from solidoodle but I'm not using the fancy controller pictured unless I see further benefits I may get one of them but the stock board has a fan controller anyways I hear.

http://www.soliforum.com/topic/204/fan-installation/

#90  

So here's a short TO - DO list for solidoodle.

  • get rubber gasket for z backlash -get fan for extruder fan mod (already Ordered) -resolve warped bed issue- get glass 6x6 inch bed build plates , clips and thermal pads -print stepper motor 40mm fan mounts for cooling -Print fan mount for the solidoodle stepper controller +60mm fan -layer height adjustments, update firmware -Team Viewer chat to help calibrate the printer with solidoodle tech.
#91  

At family dollar I got 3, 6x6 mirrors for $6. they came side by side in the pack and were in black plastic decorative frames. They just unscrewed from the back and Bam!, 3 flat glass pieces. I read/watched that mirrors are best to use because they HAVE to be flat in order to reflect properly. So swing by Family Dollar. I've heard of other dollar stores have even better deals but I scoured my town looking until I finally found what I did. I'm looking forward to using them. I'm still going to do a print right out of the box first, just to have the comparison.

Thanks for sharing all of this info and pics Josh. You've saved me a lot of trial and error time. I'll definitely be doing the fan mod then too.

#92  

User-inserted image mirror bed testing 2 mm thick. My only concern is what happens when you heat up the mirror to 105 Celsius. I'm sure it will be fine. I'm looking for any warp from expansion and ability to provide a level surface to print on.

User-inserted image

honestly after all the mods I may consider selling the solidoodle for what I have in it with all the cool upgrades and get a makerbot. It's not the hardware so much as the easier to use software. Base on it being a 500 dollar printer I would still recommend it just take in mind you need patience to learn how to calibrate it and learn the software settings because there are a billion... or more like couple hundred.

#93  

Alright guys the proof is in the pudding. I set this print for zero raft and no support material. The anti backlash neoprene gasket has NOT been installed yet and the fan and fan duct also not yet installed and this is before any optimization from solidoodle. The is the most level and consistent first layer the machine has put down. It's TRUE mirrors so work well as a build plate. User-inserted image

User-inserted image

#94  

Awesome news about the glass. I can't wait to see the finished print.

#95  

I didn't finish the print , it was just a test to see if the first layer was balanced like in the picture or if it would still print with the middle thick and the front and back super thin. You can see what i mean in this pic. User-inserted image

See the edges of the bed are higher than the center and it's obvious. Closer you get to the edge the thinner the layers are.

This is a BEFORE picture printing to tape on the aluminum bed , no glass used in this pic so you can see the obvious problem.

#96  

try using just 2 clips opposite each other in the center instead of four corners. it looks like your bed goes ?/---. like its bowed up in the center. clipping the glass on in the center at the top of the bowing should give you an even surface. just more info ive absorbed. hope it helps.

#97  

Honestly, Clips are a PAIN! Just tape them at the corner. It is said to use office tape. I don't know if they are talking about the 3m foggy or the clear. But, the recommend 2". I haven't tried it yet because my printer is down.

#98  

Josh, are you trying to put Acetone on PLA? it works with the ABS.

The PLA needs a fan. The ABS needs an enclosure.

hope that this helped.

#99  

The Solidoodle Users Almost Exclusively Use ABS But Their Tech recommend a Fan to cool the filament slightly but to have a enclosure to maintain a internal air temp of around 120 to 140 degrees F which prevents shrinkage or warped prints.

Also clips are super easy and I only clip the very edges.

#100  

Ok so with the glass bed clipped on and the Z backlash in i decided to try a print that previously didn't do so well. They are simplified ironman fingers , this is the index finger in 3 segments. I'm a hour into the print and happy so far User-inserted image

User-inserted image

#101  

Lookin good:) so far....We're all holding our breath and maybe you've found the right formula!

#102  

So far so good but we will see the proof in the pudding when i get home and take a i resolution picture. So far they are 1000 times better than the first try. Take in mind there's still two mods I need to do plus I need to do some firmware adjustments for the layer height and filament feed ratio to get a tiny bit more squish between layers. User-inserted image

#103  

Ok.so direct comparison before z backlash mod and before spraying a tiny bit of wd40 in the extruder which i now believe cleans it. User-inserted image

User-inserted image

Ok so the first two pics are before the mods , z backlash and glad bed with wd40 cleaner/lubricant, all axis were lubricated with lithium grease and now the following pics are the print from tonight!

User-inserted image

User-inserted image

User-inserted image

User-inserted image

User-inserted image

The old print is red and clearly not great and the white is the print from tonight in comparison. This is the near makerbot quality I was looking for:) no raft was used in the print or supports.

#104  

Getting better all the time Josh. I hope they finish off well.
[edit]LOL you must have been posting those while I was reading the thread. Those do look nice. Are you using a skirt and a brim or just one of those?[/edit]

#105  

I would say 1000 percent improvement and there are still a few more tweeks to go! gotta love that!

#106  

Ok next print , 2 fingers the middle and ring finger. They were a 5 hour print and came out great except the top edge of one and bottom edge of another. The overhang was too much and needed support. It is a easy fix and very minor so these prints are keepers! User-inserted image

User-inserted image

i will fill the tiny tips on the top edges with resin filler and they will be done. These tight overhangs are exactly what the extruder fan is intended to be used for. These edges were thin and we're too hot so they curled. I'm just waiting on the fan I ordered which should be here Friday but the prints are going good enough to continue.

next are the thumb and pinky fingers on the bed right now. Estimated 7 hour print.

#107  

These Prints I'm Trying With NO raft and support material for the overhang on the very edges. Hopefully I won't have a chipped edge this time and support will take care of it. User-inserted image

i started recording my prints with amcap which is the software that comes with the V3 ez robot cams. I could use these videos in the future for troubleshooting or technical assistance.

#108  

@jstarne1 I'm looking hard into getting a Solidoodle...you are making me really like it :) Plus the price is nicer than the MakerBot. You might have mentioned it elsewhere, but what software are you using to make your designs?

Since you've been using it a while, what would you say are like your top 3-5 tips for 3D printing - things you wished you had know when you started more or less.

Thanks for sharing these posts and your progress!

#109  

Hi Justin , i have had the solidoodle for one month now. I'm hardly a expert but I'm still working on it.

Ok so that list

  1. I wish I had started by learning to use autodesk 123d or the pro version autodesk 3ds max before buying a printer. Imagine the printer is just a tool to print what is designed. Sometimes prints don't come out right because the design is not optimized for your printers capabilities. Getting to know how to slice objects and make slight changes is very important and I'm not there yet.

  2. I wish I had either bought a makerbot ( yes way more money but I wish I had its ease of use) or at least the solidoodle 4 to have a bigger build area. 6 inches build volume is good size but bigger is better.

  3. Soon as you get a solidoodle you need to spend your whole first month calibrating it. There are many many options and it takes a while to understand what each does. I'm still learning them and even need to get with solidoodle to show them various price and video of print so they know how to resolve the issues.

  4. Consider using alternative software, different slicers for example because each one has its limitations. Document any changes you make so you can reverse them at a moments notice. Some settings work for one model but not a different one.

  5. Print out all the recommended mods and also replacement parts for your solidoodle. Things like extruder fan shroud, adjustment knobs, z backlash mod, and a over the top filament roll holder. Even if you get a solidoodle with no case a case is absolutely needed as well as the heated bed. You can buy a model with heated bed and even a case included.

Document everything you do , don't make permanant changes to your machine so you still get tech support. Printable mods usually are held on with a screw or magnet but the machine is still intact.

Lastly read through soliforum.com that is your biggest asset considering there is no real instruction manual for these things.

#110  

Ok latest print , this is ring finger and pinky finger. One edge is a bit chewed up. Once agian a bridging issue but I believe the fan will resolve this and keep the material cool and stable. Otherwise I had great quality. User-inserted image

User-inserted image

User-inserted image

i am going to move the printer into a closet downstairs so i can print even when I am asleep and get more use out of it. I can absolutely see myself having another printer in the future. They are useful in so many ways.

#111  

@Josh- I see you as the kinda guy that might build his next one. ;)

#112  

@antron , knowing me that's not too far fetched lol , you can use a generic board with this same software but there is lots of math to calculate steps for the motors on each axis. Considering solidoodle uses generic parts I was talking to my best friend about making a giant one like 2 or 3 ft wide. It would take forever to print but it would be awesome to print large items.

#113  

Great news , the 12v 40mm fan arrived. At full speed it pushes 7 cfm of air around the nozzle. User-inserted image

User-inserted image

User-inserted image

#114  

Josh,

I know you did several mods and have some more to go. Once all is said and done, how much do you think you will have spent above the original cost to have it really working the way you want? If you had just gone Makerbot from the start, does it have all the things you are adding/changing, or would you be starting with a higher price and still adding to it before it is the quality you need?

I am no where near being in a position to buy one and by the time I do there will probably be improvements and lower prices all around, but I think this kind of info might help those getting ready to pull the trigger now.

Alan

#115  

The Z backlash mod was less than 5 dollars and this fan mod , wiring and all is about 20 dollars. The plexiglass case I made was about 80 with all the magnets and stuff. The mods have been minimal as far as cost. Take in mind even buying a used makerbot is 1500 to 2000 on average in which you could have 3 or 4 of these. The makerbot is more user friendly and much easier learning curve but most people can't afford it. I imagine I will get one eventually and sell this one. The little improvements ar re things that the makerbot already has. Makerbot has a dc blower for example which makes bridging and printing this easier.

#116  

Josh, you might consider checking out the FlashForge 3D printer. It uses firmware similar to Makerware and is about half the cost at $1199. There is a new website now in the USA so support and parts are now much easier to obtain, you can check it out here:
Flashforge-USA

#117  

Ok so I've been lazy I guess and have not touched the printer a few days. I recieved the fan and magents. By the way neodium magnets are ridiculous strong for their size. Anyways I pulled out a 9 volt AC adapter I had in the tool box and tested it. 12.7 volts. I hooked up the fan and the voltage dropped to 11.97 volts. Given this is a 12 volt fan this is a spot on adapter for the fan. There are pins coming off the solidoodle specifically for this purpose but I don't know which pin is which voltage or ground so there no use popping a 170 dollar controller when i have a external option. Plus this doesn't actually modify the machine , it's just held on by two magnets.

#118  

User-inserted image

because the shape is square and there is a screw that sticks out in the back. Also I used the soldering iron to widen the holes and fit in the magnets.

User-inserted image

User-inserted image

User-inserted image

i soldered the 9 volt adapter to the leads of the fan and covered them with white heatshrink.

#119  

User-inserted image

User-inserted image

I kinda want to spray this black so that it blends in better. The brown burned marks are from the soldering iron where I heated the plastic up some to widen she shape around the square heat element. I covered the inside and outside of the fan duct with epoxy to help give it some heat resistance but it should be fine.

#120  

Out of curiosity, do you know what board you have? The Sanguinololu (aka Sanguino) or the newer Prntrboard? I'm expecting a Prntrboard though everything I've read so far seems to prefer the Sanguino. It seems they've been shipping with those for at least a few weeks now and I was just wondering if yours got made before the changeover. I don't think the Sanguino has pins for the fan by default. I could be wrong about that but I seem to remember someone pointing out somewhere that the Prnterboard did. So, it made it sound like the Sanguino didn't. I guess it makes no difference to me as I have no experience to compare it to. I was marked shipped yesterday so I hope to have it by next weekend.

#121  

User-inserted image

User-inserted image

User-inserted image

Well overall it looks good. I used flex seal to give the piece a rugged finish. We will see if there are any heat issues but this is a duct that has been printed and used many times. I did widen the air outlet by trimming the edges all the way around. It clears the bed when the extruder is touching by about 3 mm. It does however stick out the front if I push the extruder all the way forward. I will extend the mounts by say half an inch for the front plexiglass so it will clear easily.

#122  

@ Antron , I will check the board today when I get home , i have to rearrange some stuff in my house to get ready to start casting stuff.

#123  

@Josh- Cool. I appreciate it. Whenever you get a chance. ;)

#124  

I have passed on the solidoodle 2 pro on to Irongaming.Tv , i hung out at their studio set about a hour yesterday and their head honcho Aaron wanted a 3d printer to play with. They are thinking about printing custom trophies or plaques for contestants in gaming competitions. They have both online broadcast , prerecorded youtube videos, public events , online competitions and twitch tv. As a matter of fact in one of their segments they showed some prize money which were large stacks of bills but 50,000 is not as impressive in real life so they used stacks of 1 dollar bills with a hundred on top. So when he bought the solidoodle I was paid in 1 dollar bills lol. User-inserted image

Here is their set behind the scenes...

User-inserted image

User-inserted image

User-inserted image

i will be back in their studio later this week I guess to teach them how to use the machine.

#125  

Cool. I'm glad it found a proper home. I think it will be well used there/