elektrophunktronic
Canada
Asked
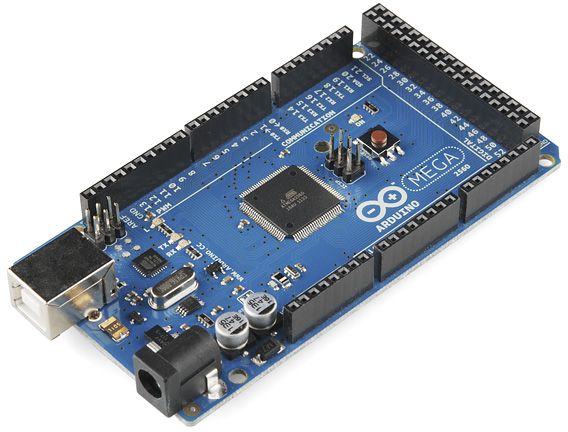
Hello, I cannot get my Ardunio MEGA to control servos in my Inmoov via USB. I have followed the instructions closely multiple times. Some info:
- I have successfully uploaded the code to two different MEGAs and neither work.
- The status box shows that there is a connection with the ARDUINO ( no errors), however the servos will not move when using the horizontal/vertical sweep commands nor position module. (I have followed all instructions in the servo tutorials)
- BAUD rates are set correctly in device manager, the arudino code and in ARC
- I am using a 40A, 5V power supply connected to the wall. This supplies power to the Inmoov servos. I connect the same setup with My Robot Lab and it works.
- I enabled DTR/RTS
- I am using a new DELL XPS with USBC. I read this may cause issues, but I tried it on my old desktop and it still wont work.
Is there something I am missing?
Related Hardware (view all EZB hardware)
Arduino Due/Mega
by Arduino
Synthiam ARC enables Arduino Mega 2560 control with 8 ADC, 13 PWM, 21 digital ports and 24 servos; includes firmware, shield and tutorials
USB
Servos
24
Camera
Audio
UART
3
I2C
ADC
8
Digital
21


You saw on this page that servo port D0 is Mega port 22, etc? https://synthiam.com/Support/Hardware/Arduino-Due-Mega
Oh, one more thing, you can quickly access that page by pressing one of these two buttons when selecting servo or digital ports. I know it's a bit weird with the Mega, but that's because the behaviors of ports are split between the built-in hardware support. Those servo ports are related directly to PWM hardware timers within the microcontroller. It's documented on the Mega pages on Arduino's website, but it's not always easy to find or interpret. The Mega is a power-house, but with the minor inconvenience of needing to reference the pin mapping.
We made it easy to press either button and view the mapping page.
This might be the issue. Is there a way to change the mapping? With the inmoov nervo board, the servos are locked to their respective ports on the Arduino. I will have to test with a seperate servo tomorrow.
Are they not using the servo ports? That's too bad. You can edit the mapping by changing the firmware file for the mega. But I would recommend using a proper servo shield that allows using the correct servo ports. Because using servos on ports that do not have the hardware timer support asks for trouble and jerky/twitchy servos. The link I provided you has a recommended servo shield from the key studio, and it's only $27 Canadian.
Otherwise, you can edit the firmware file as it's pretty straightforward.
You might overlook the jerky/twitchy servos on the InMoov due to the weight and slow movement of the servos. But that does make sense now that I see several InMoov builds using that board with jerky movements. That's good to know.
I think editing the firmware would be my best bet. The Nervo board took alot of time to solder and set up correctly. Eventually I will set up a different shield/method for power distribution though. But for now I want to get it up and running on ARC quickly.
Thanks for your help. I will report back tomorrow if its still not working.
Got it working! I have another question. I downloaded another user's Inmoov file which uses auto position. How can I set servo max/min within auto position? I can do it in vertical servo but cant see it in autoposition. Or does this have to be done with a global script?
Min and Max servo positions are globally set, not per robot skill. This is because controlling servos can be done from upwards of 800 robot skills. So this is therefore done at a global level. We recommend using JavaScript, but similar commands exist in Python or EZ-Script. Here is the link to the manual for javascript, as it's the fastest compiler in ARC:
Set Max: https://synthiam.com/Support/javascript-api/Servo/setMaxPositionLimit Set Min: https://synthiam.com/Support/javascript-api/Servo/setMinPositionLimit
An Auto Position is slightly different than other robot skills in the way positions are assigned. When a servo position is set to a frame with the auto position, it will never move past that position during the transition. This means it does not require a min/max, such as what you find with other servo skills (as in the vertical robot skill). So, while you may see min/max settings on other robot skills, that is only for their operation, not globally within the software. This is explained in greater detail in the support section located under Servos in Using ARC. This is because a camera may only require the head servo to move 20 degrees in either direction for tracking an object. Meanwhile, a VR robot skill may need the head to move 40 degrees in either direction. This allows each robot skill to have its min/max values for its behavior. However, those min/max values are for achieving behavior, not protecting servo limits. The global values must be set to protect a servo limit.
Also, if you are importing auto positions from other projects, their servos may be configured differently than yours. For example, D0's position of 100 on theirs might be 110 on yours. And D3's position 90 might be 70 on yours. So there is a fine-tune option to adjust the values. Generally, the STAND frame is the default position for calibrating servos. You may wish to use their STAND frame for calibration.
Great, thank you!