Welcome to Synthiam!

The easiest way to program the most powerful robots. Use technologies by leading industry experts. ARC is a free-to-use robot programming software that makes servo automation, computer vision, autonomous navigation, and artificial intelligence easy.

Get Started
Australia
Asked — Edited

Camera Head Tracking

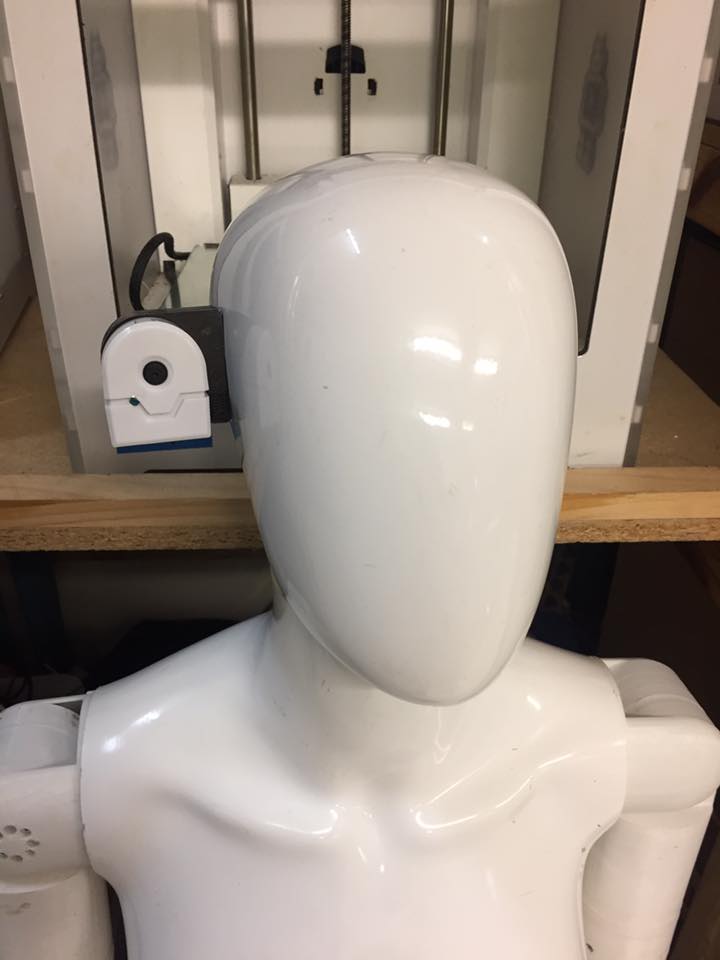
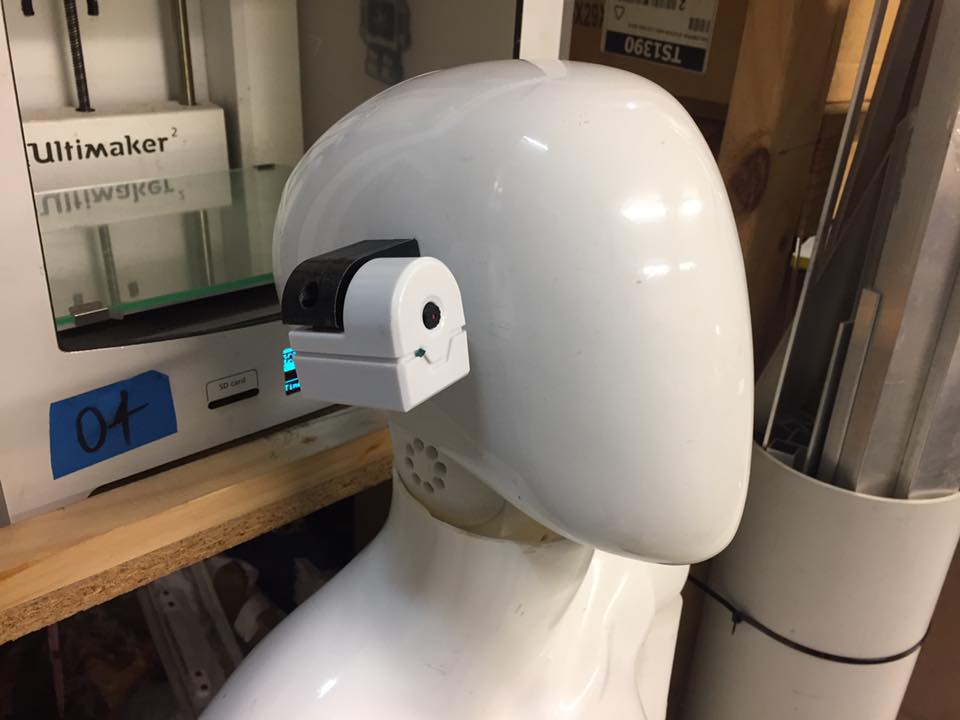
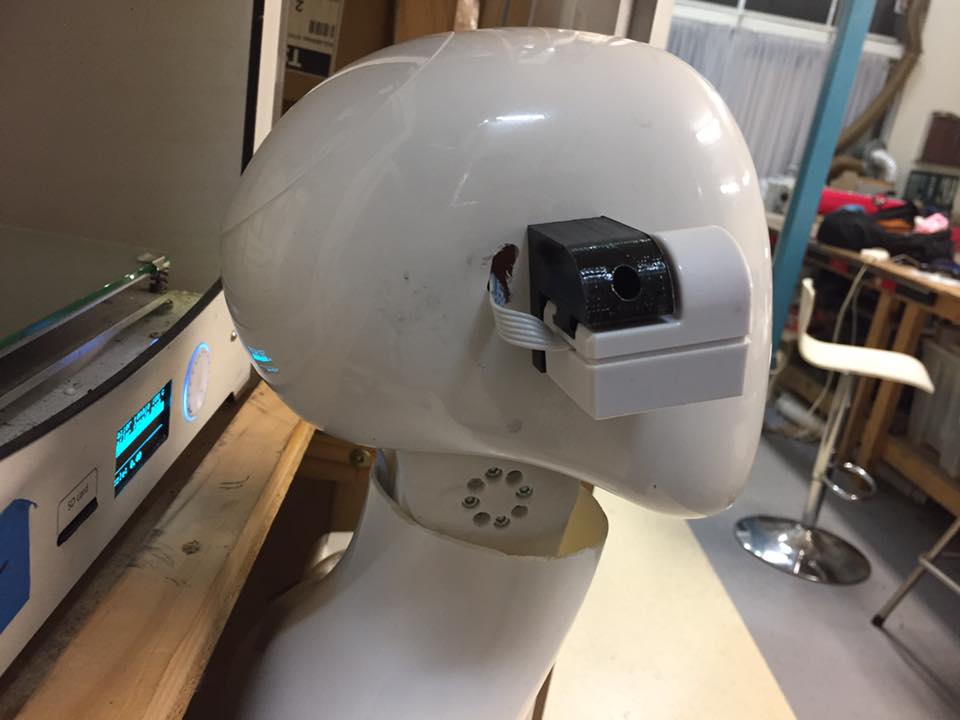
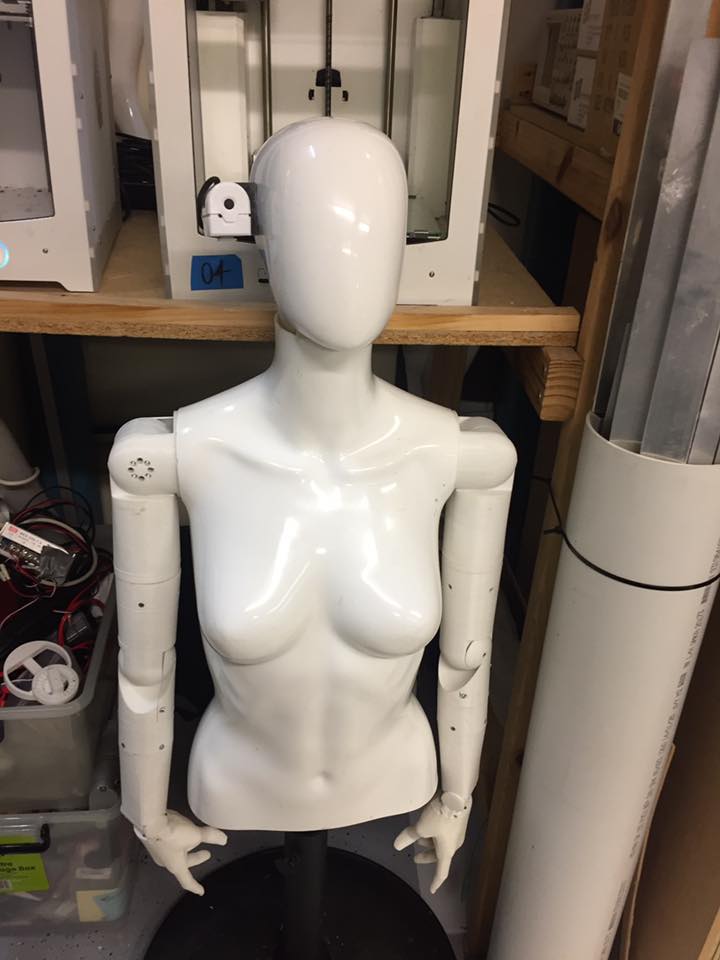
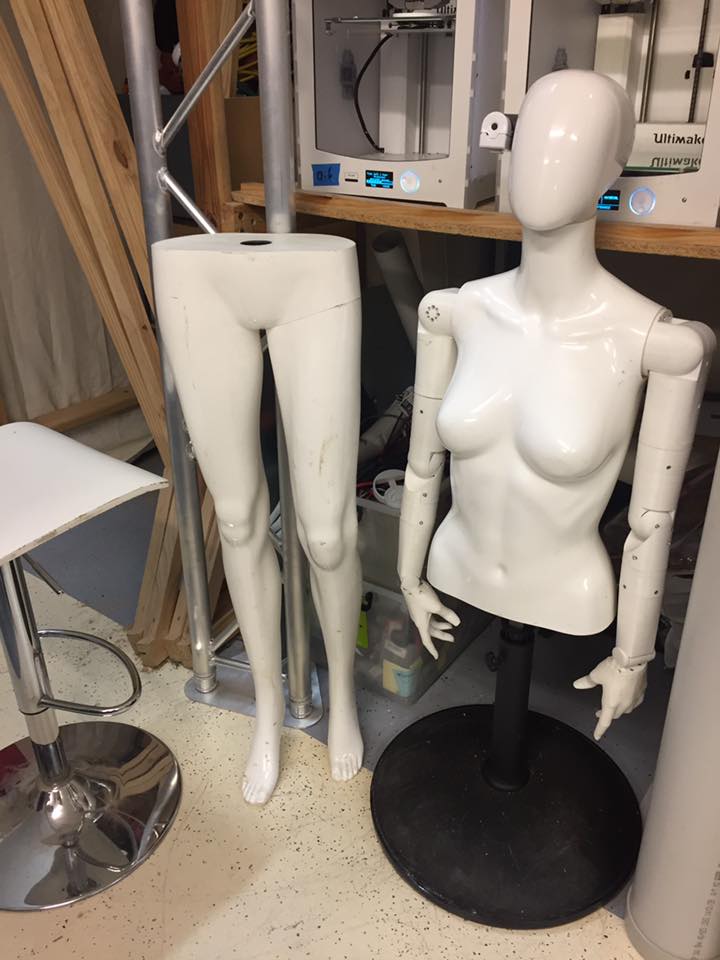
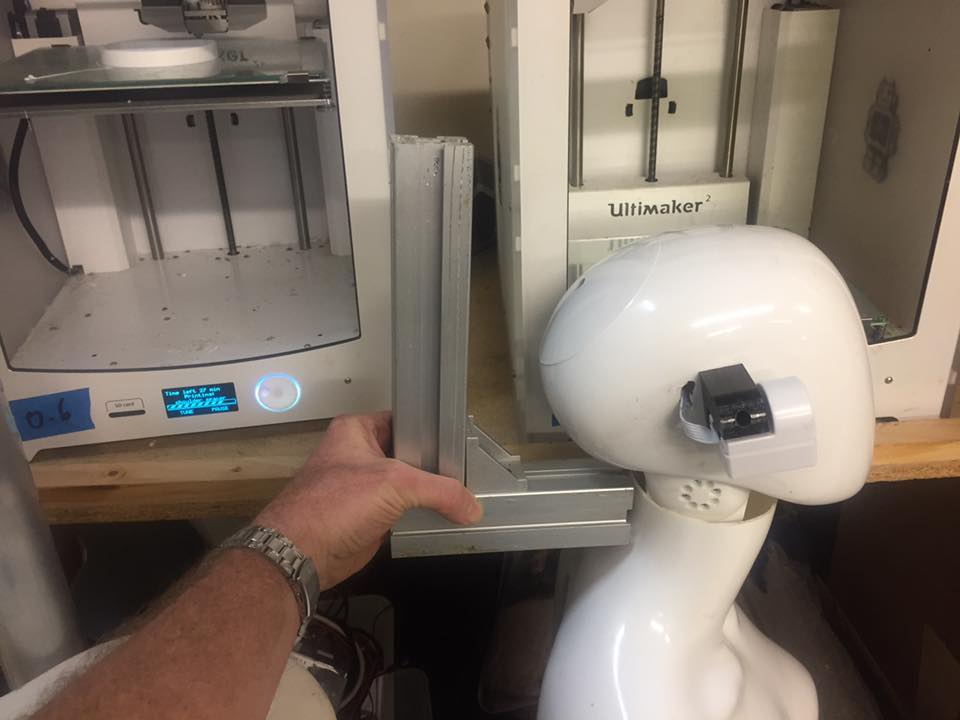
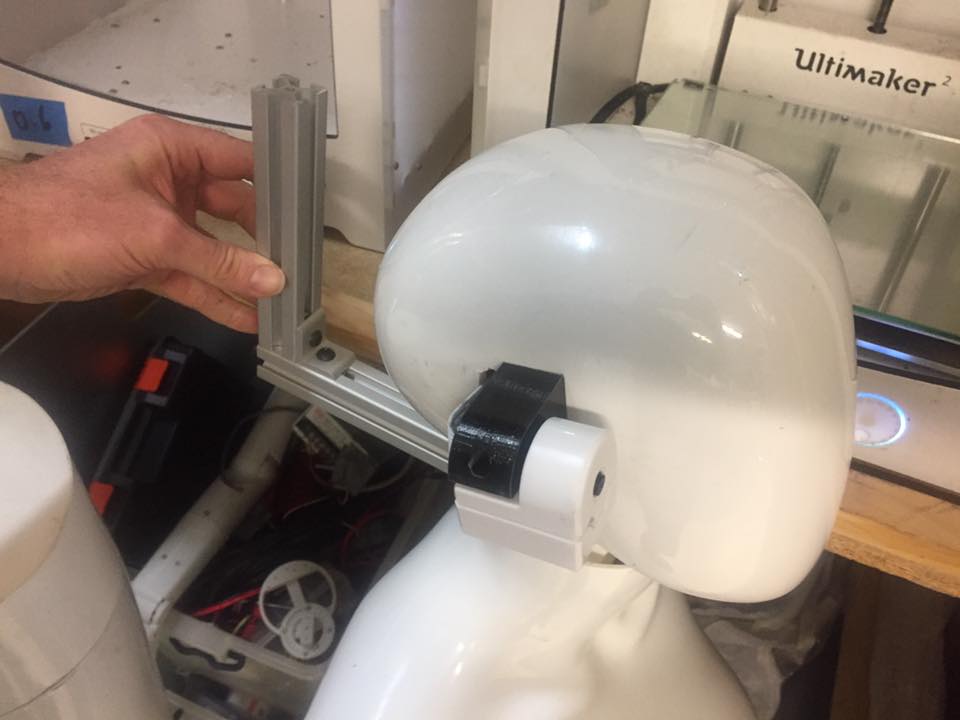
I need to extend the camera from it's circuit board and mount it in something like a cable dot on the side of the head facing forward. At the moment she looks borg. Not good. This is for department stores for women's fashion. Can I separate the camera with wires so its just a tiny dot?

How do I do that please?

PS The camera will definitely not be placed in the face of this particular mannequin head - It will be under the chin or facing forward from the ear.

User-inserted image


User-inserted image


User-inserted image


User-inserted image


User-inserted image


User-inserted image


User-inserted image


User-inserted image


User-inserted image


ARC Pro

Upgrade to ARC Pro

Become a Synthiam ARC Pro subscriber to unleash the power of easy and powerful robot programming

#42  
IT sounds like you need to spend a little time experimenting with the camera tracking as opposed to trying to figure out a complete solution and fleshing it all out. Don 't overthink it. As you experiment you will find solutions to your questions. Make sure the EZR tracking routines are even adequate for your application. You have the hardware, set it up, do some tracking, then figure out how to integrate it.

Incremental progress like that will prevent CPA as you put it.
PRO
Canada
#43  
@Zxen a couple of suggestions, if I may.

If you are having difficulty mounting inside of a curved Head I could suggest using the new version 2 EZ-Robot camera and peel the lens away from the PCB to change the angle a little. It is just held against the PCB with double-sided tape.

User-inserted image


My second suggestion would be to make only a 1mm hole somewhere in the mannequin's head. A 1mm hole is all you need for the actual lens portion to see.

User-inserted image


Now you may have to drill out a small cavity for the rest of the lens but the opening only need to be 1mm. Here's an example, created with my amazing MS paint skills LOL.

User-inserted image


I should also note that the camera v2 lens is interchangeable with Fish eyes lenses that are somewhat difficult to find but do exist. But note that you will need a larger viewing hole to incorporate a larger lens; it have would be 10mm in diameter.

Oh and yes I can confirm that you can definitely extend the camera cable, we've gone as far as 10 feet successfully but we've never really tested out the maximum range.
Australia
#44  
Very good explanation Jeremie. I may eventually put a 1mm hole in the face.

I have spent hours testing the facial and colour tracking and its just like I remember. EXTREMELY SLOW AND UNRELIABLE REACTION TIME.

The motors in my robot's head are fast - she can nod and shake her head faster than a real human. But when she is tracking, she moves like a pigeon. I get best results when I shrink the grid and I am moving my face further away, but I basically need to move past at less than 1km/h so she doesn't lose me.

Can someone please tell me how to fix this so its smooth?

Is it slow because it requires WiFi? Video is being sent wirelessly to my computer fast enough, so I don't understand whats causing this delay thats so extreme she moves in slow motion. Are the calculations being done in the ARC software or on the board? She only moves smoothly if I tell her to move 5 or more steps at a time, but this often results in overshooting the mark, after which her head begins to thrash violently to get back to the mark.


User-inserted image


User-inserted image


User-inserted image


User-inserted image
PRO
USA
#45  
@jeremie, is this camera ( v2) released yet? If so what are the changes?

@ Zxen I feel your pain. I've tried to get smooth motion from tracking and the best thing to play with is the increments steps found in the camera set up where your servos are set up.
Australia
#46  
The newer camera is a single board instead of a double decker board and is smaller - not sure about other changes. Do you know where the processing is done? Would it be more responsive to connect from the ezb to the computer with ethernet or something? Do I need a spotlight on my face so it can see the face more easily? I found that colour detection works better when you increase the saturation of the video output. If its being done inside the board, is there a way to make it process faster? Anyone know the smoothest facial tracking demo video on this site?
Australia
#47  
This appears to work smoothly, so its possible.
PRO
Canada
#48  
@fxrtst Yeah for sure! Version 2 of the camera has been in the wild for some time now. I believe we had discussed it in the past when you were looking for dimensions and we released not long after that.

Some of the changes are:
- Single board design = smaller form factor
- Added Heatsink for on board cooling and spacing inside JD's head
- More even gain adjustment for lighting changes
- Flexible and modular ribbon connector for camera CCD + lens assembly
- Adjustable and/or removable lens, for focus or replacement lens
- RGB LED feedback

Version 2 of the camera is meant to match the operation of version 1 but with some quality of life improvements from a hardware and firmware perspective.
PRO
Canada
#49  
@Zxen with a tiny bit of tweaking and some decent lighting you can definitely get some favorable results with ARC facial tracking. Check out this video I just posted:


I used the standard JD example project. I added a script that made Servospeed 0 for the pan and tilt servos: D0 & D1 (The fastest speed). I also slowed down the camera frame rate a touch with the slider bar. The last thing that I changed was the vertical increment steps, I changed it to 2.

*Edit: I also adjusted the Grid lines to be closer to center
#50  
This is encouraging @Jeremie. Thanks for the suggestions. Your tracking is so smooth!

So just so I understand better:
*Set servo speeds to zero so servos will move as fast as possible.
*Slow down camera frame rate a little. (Why is this?)
*Changed was the vertical increment steps. (Why is this and will this setting be different for others?)
*Tighten up the grid lines. I assume this is because tracking takes place in the two side boxes that this gives the software more room to work trying to bring the object back to center?

Also, is the camera you're using in this demo stationary or mounted on the part of the robot that is panning back and forth?

Thanks again!:)
PRO
USA
#51  
Thanks for the info on the camera not sure how I missed that, might have been while working on Guardians ?! I have a box of old cameras I'll have to try and sell then I'll pick up a few of the new ones!

Also thanks for the tut on the tracking. I never thought about setting the speed first. That is fast and pretty smooth tracking. I look forward to trying it out with hard core Alan this week.
PRO
Canada
#52  
@Dave Schulpius

Quote:

*Set servo speeds to zero so servos will move as fast as possible.

Correct, I wanted the servos to react as fast as possible.

Quote:

*Slow down camera frame rate a little. (Why is this?)

I slowed down the camera frame rate a little bit to decrease the chance of missed frames due to communication slow downs over WiFi.

Quote:

*Changed was the vertical increment steps. (Why is this and will this setting be different for others?)

Yes, you are correct. In the tracking settings I changed the vertical increment steps to move a little farther with each movement, this will likely be different for each robots/servo. Distance away from the person being tracked will also affect this value.

Quote:

*Tighten up the grid lines. I assume this is because tracking takes place in the two side boxes that this gives the software more room to work trying to bring the object back to center?

Yes, you are correct again Dave :). I tightened up the grid lines so JD would have more time to detect my face moving away from center. The servos will only move if my face is detected in one of the 8 "boxes" (left, right, upper right, top, etc) surrounding the center box. To summarize, it gives JD more room and time to detect a change in face position.

Quote:

Also, is the camera you're using in this demo stationary or mounted on the part of the robot that is panning back and forth?

The camera I was using was inside JD's head and his pan and tilt (neck and head) servos were doing the tracking.
Australia
#54  
Smooth tracking Jeremie! I want to achieve that. How many incremental steps does he move at a time? 1 horizontal and 2 vertical did you say? Do you have powerful WiFi in your house or something? What if you use the phone app instead of a computer? Does it need Wifi to work or are calculations done internally? The video of your face looks like real time - if I decrease the frame rate I get lag, while you do not. Is that your Wifi Router quality thats responsible?
Australia
#55  
I think I'm right - WiFi connection speed must be the answer. You're getting 10-14fps even after slowing down and I'm only getting 2-3fps maximum. Its either WiFi or the video card on my computer. Anyone know the reason for frame rate discrepancies? (I have the new v2 communication board.) How close is your router to your EZB? What kind of graphics card do you have?

User-inserted image
PRO
Canada
#56  
@Zxen

I was using 3 horizontal incremental steps. I was connected via AP mode (no router involved)
I believe I was averaging 10fps.
Have you tried AP mode instead of client mode (connected to router)?
Australia
#57  
Oh I see. If this is the answer then the instructions should be updated. I have tried a direct connection many times but it never works. Was it easy for you to achieve?
PRO
Canada
#58  
I'm a bit confused, what instructions are you referring to?

A direct connection (AP mode) is our default mode. It is very easy to connect via AP mode. Do you have anti-virus software that could be blocking your connection to ARC?
Australia
#59  
Maybe I am using AP mode. I guess that means my computer is slow or antenna is weak? Why would I get such a slow frame rate?
PRO
Synthiam
#60  
Zxen, post your project so we can see what settings you have. The DEFAULT settings of the camera control are ideal. If you modified the default settings, something like this could happen.

AP mode means your computer is connected directly to the ezb. You learned this when using the learn section for your ezrobot product.

Client mode means your ezb is connected to a router. You can only know of client mode if you followed the tutorial on the learn section for your ezrobot product.

There is no need for updating the connection tutorial. The last update of the tutorial was a detailed and fantastic video less than one week ago. There is no additional information. For client mode, only two peices of information is necessary: SSID and PASSWORD. Client mode is incredibly easy.

However, client mode depends on the speed of your router. Ezrobot does not own your router. We have no idea the speed of your router. The performance you experience in client mode has no relationship to ezrobot. The router speed is specific to the model and manufacturer, and not related to ezrobot.

If your computer is experiencing low frame rate with AP mode, then the pc speed may be the reason - OR the default settings have been changed.

1) Can you verify that you have the latest ARC?

2) why camera resolution setting are you using?

3) try adding a new camera control and enabling face tracking with ezrobot camera. Do NOT change any other settings. Do you still get a low frame rate?
PRO
Synthiam
#61  
Okay - After viewing your diagnostic info, the answer is clear.

Quote:


20/06/2017 5:47:07 AMC:\Users\user\Documents\EZ-Builder\My Projects\script manager 2017-02-01g.EZBAttempting connection on 192.168.1.1:23
20/06/2017 5:47:07 AMC:\Users\user\Documents\EZ-Builder\My Projects\script manager 2017-02-01g.EZBConnected to 192.168.1.1:23
20/06/2017 5:47:07 AMC:\Users\user\Documents\EZ-Builder\My Projects\script manager 2017-02-01g.EZBReports EZB v4 OS With Comm 2
20/06/2017 5:47:08 AMC:\Users\user\Documents\EZ-Builder\My Projects\script manager 2017-02-01g.EZBEZ-B v4 ID: 58-54-0-0-48-255-57-56-55-38-38-38
20/06/2017 5:47:08 AMC:\Users\user\Documents\EZ-Builder\My Projects\script manager 2017-02-01g.EZBSetting battery monitor voltage: 7
20/06/2017 5:47:08 AMC:\Users\user\Documents\EZ-Builder\My Projects\script manager 2017-02-01g.EZBSetting battery protection: True
20/06/2017 5:47:08 AMC:\Users\user\Documents\EZ-Builder\My Projects\script manager 2017-02-01g.EZBSetting i2c rate: 100000
20/06/2017 5:47:08 AMC:\Users\user\Documents\EZ-Builder\My Projects\script manager 2017-02-01g.EZBEZ-B voltage is 7.249788618
20/06/2017 5:47:08 AMC:\Users\user\Documents\EZ-Builder\My Projects\script manager 2017-02-01g.EZBEZ-B temperature is 24.78733292604518964C
20/06/2017 5:47:08 AMC:\Users\user\Documents\EZ-Builder\My Projects\script manager 2017-02-01g.EZBConnected
20/06/2017 5:47:21 AMC:\Users\user\Documents\EZ-Builder\My Projects\script manager 2017-02-01g.EZBCamera Initialized: EZB://192.168.1.1 @ 640x480


First, every control has a ? (question mark). You can press that ? (question mark) to view help about that control. The control in question is the CAMERA CONTROL. Here is a direct link to the Camera Control manual page: http://www.ez-robot.com/Tutorials/Help.aspx?id=80

The reason for visiting that page is a section about VIDEO RESOLUTIONS. Please read that section. It is incredibly important that you understand what increasing the resolution does for a computer.

By increasing the video resolution to 640x480, look at the number of Bytes per second your CPU must process.

Quote:


160x120 = 57,600 Bytes per frame = 1,152,000 Bytes per second
320x240 = 230,400 Bytes per frame = 4,608,000 Bytes per second
640x480 = 921,600 Bytes per frame = 18,432,000 Bytes per second


Lastly, i am curious about what other settings may have been modified in the camera control. Please visit my previous message and follow the instructions. Do not change any settings and use the camera control with Face tracking.

Everything I have typed is presented in the Camera Control manual page.