
Asked
— Edited
Basic Info And Tutorials For New Products!
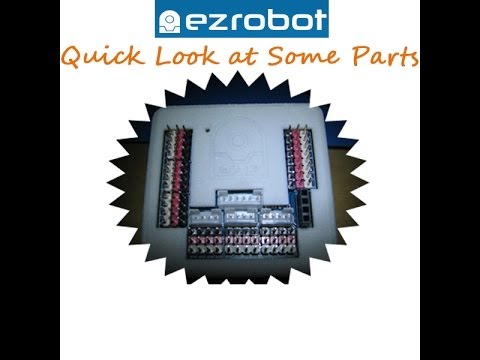
Here's a quick video I made to show some of the parts I got yesterday. I will get into more detail later on in this same thread, which is why I'm labeling this a tutorial, as I will be doing tutorials on certain things in this thread.
Here's the quick look!
More to come!

Awesome, thanks for the video @Technopro
That last past was too funny! Yeah 3D printing the clip and play parts is a little tricky at times, we try to error on the side of tight.
I find you can either use some gloves and twist back and forth to get the pieces apart or give them a light sanding or filing to loosen em' up a little.
As for the L298 motor driver button, it's a switch that turns the 5V regulator on and off. I usually just keep it on all the time. Oh and yes you were correct that JST-PH connector is for stepper motors.
Looking forward to more videos
@Technopro, That white button on the L298 motor driver turns on and off the on board 5vdc regulator. If you can't or you don't want to feed 5vdc to the L298 through the 5vdc port you can push the button and the regulator and it will draw it's feed from the motors power feed at the VCC port.
Personally I have an external 12vcd power supply's positive wire attached to the VCC port, the 12 v power supply's ground to the L298 ground port (along with a common ground to EZB) and nothing attached to the 5+v port. Then I push the button and the unit powers up with the designed 5vdc to the logic and also supplies 12dc to my motors.
Nice video Technopro. I look forward to seeing what you do with your new parts.
Check out my tutorial for the L298n driver when you come to need help with it, I covered it in detail. I didn't cover the button (I will be adding info on it when I get chance though).
Nice video Tech.... I am going to have to learn to do videos better...
Here's a detailed look at the ez-b v4. Video quality get better!
technopro good video.
do i have a question for you personal ..can you wissle.
Yes Nomad I can whistle.
Anyways here's the clip and play servos and mini servo.