

-634918751738750000.jpg)
-634918752058906250.jpg)
-634918752417968750.jpg)
-634918753328125000.jpg)
-634918753552812500.jpg)
-634919384849687500.jpg)
-634919385116250000.jpg)
-634921282099941406.jpg)
-634921282607519531.jpg)
-634921285303984375.jpg)
-634921286081347656.jpg)
-634921286592539062.jpg)
-634921286894394531.jpg)
-634921287070869140.jpg)
-634917821569140625.jpg)
-634917822546923828.jpg)
-634917822752392578.jpg)
-634900401634345703.jpg)
-634912687919804687.jpg)
-634912688173408203.jpg)
-634922231866093750.jpg)
-634922232032812500.jpg)
-634922232710625000.jpg)
-634939426884531250.jpg)
-634941099600468750.jpg)
-634941163205781250.jpg)
-634941163592031250.jpg)
-634941164157343750.jpg)
-634941164341718750.jpg)
-634941924885156250.jpg)
-634941925538281250.jpg)
-634941925705468750.jpg)
-634941925862812500.jpg)
-634922980927968750.jpg)
-634922981092500000.jpg)
-634930603620000000.jpg)
-634930604267656250.jpg)
-634930607122656250.jpg)
-634937753237500000.jpg)
-634937753531250000.jpg)
-634937753872500000.jpg)
-634936811644843750.jpg)
-634936811841718750.jpg)
-634936812280156250.jpg)
-634936812576718750.jpg)
-634936812777343750.jpg)
-634892840812441406.jpg)
-634881851798437500.jpg)
-634888436524687500.jpg)
-634888436834531250.jpg)
-634888437341093750.jpg)
-634888438173750000.jpg)
-634888439034531250.jpg)
-634892832319306640.jpg)
-634892833816953125.jpg)
-634892834249091796.jpg)
-634892834434267578.jpg)
-634892834808886718.jpg)
-634892835278447266.jpg)
-634892835590283203.jpg)
-634942812445937500.jpg)
-634942812734375000.jpg)
-634942813123437500.jpg)
-634942813315625000.jpg)
-634942813599062500.jpg)
-634942814779687500.jpg)
-634942815003593750.jpg)
-634942815713906250.jpg)

-634943735723437500.jpg)
-634943736305937500.jpg)
-634943736485156250.jpg)
-634943737022343750.jpg)
-634943737185312500.jpg)
-634973207973593750.jpg)
-634973208133750000.jpg)
-634973208281406250.jpg)
-634973208663125000.jpg)
-634973208818281250.jpg)
-634973208953281250.jpg)
-634973209073125000.jpg)
-634973209337656250.jpg)
-634973209688906250.jpg)
-634973036686250000.jpg)
-634973036806562500.jpg)
-634973037173906250.jpg)
-634973037551562500.jpg)
-634973037657812500.jpg)
-634973037990000000.jpg)
-634973038105156250.jpg)
-634973038811406250.jpg)
-634973039078281250.jpg)
-634958526087812500.jpg)
-634958526257812500.jpg)
-634958526471093750.jpg)
-634958526682968750.jpg)
-634972882420156250.jpg)
-634972882651406250.jpg)
-634972882767343750.jpg)
-634972883194375000.jpg)
-634972883309062500.jpg)
I posted this in the wrong section I guess, but here is a link to my newest bot - RoboRAD. I am combining a RAD 2.0 base and a robosapien.
By bret.tallent
— Last update
Discover more robots
Justinratliff's Mini B
Mini B robot from Bret Tallent arrived damaged; repairing broken head, camera PCB, neck servo and right arm; RAD power...
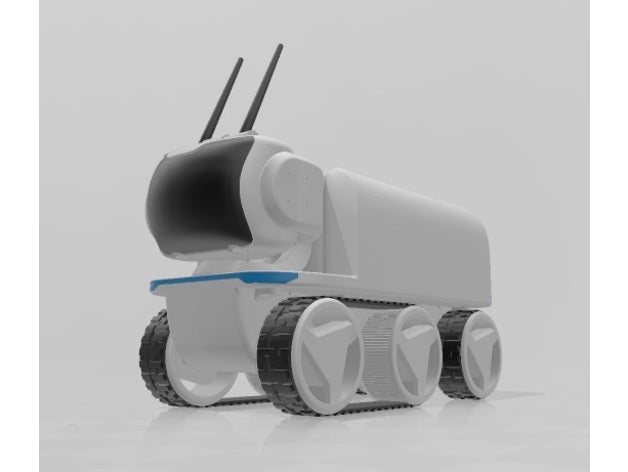
Jstarne1's Calling All 3D Printers! Get The Stls While They...
LEVi Rover 3D files assembled and ready to print, with model cuts for smaller beds and community tips for printing and...
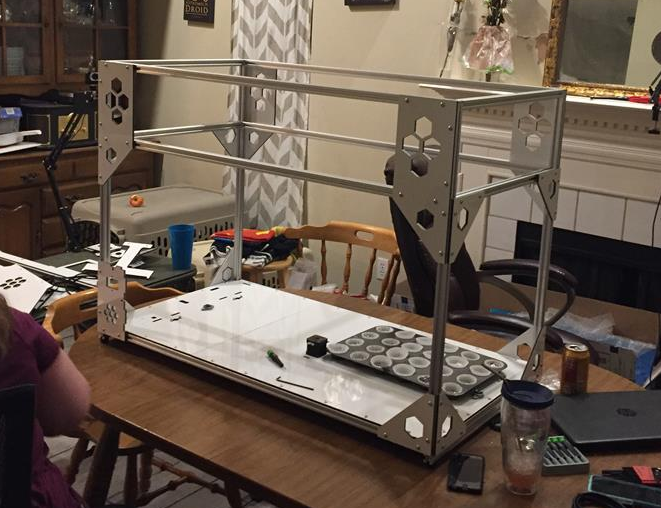
Jstarne1's Building A Giant 3D Printer 720X350x~400Mm Build...
Build a giant FT-6 3D printer: 720×350×400mm print area, 50m resolution, dual-color bowden, heated bed, Marlin...

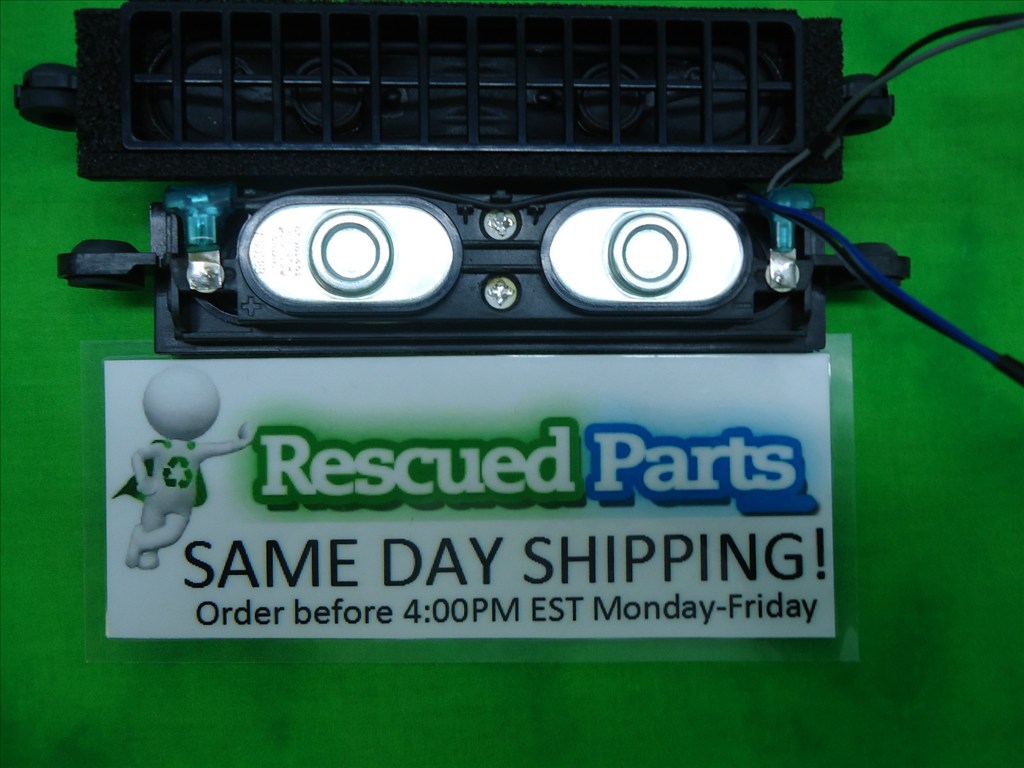
RoboRAD project list: MP3 with lots of music and nice speakers EL wire neon lighting Plasma Ball brain Camera head on pan/tilt mount Mechanised tow hook so he can tow a cooler/trailer around
and open to other ideas for cool functions!
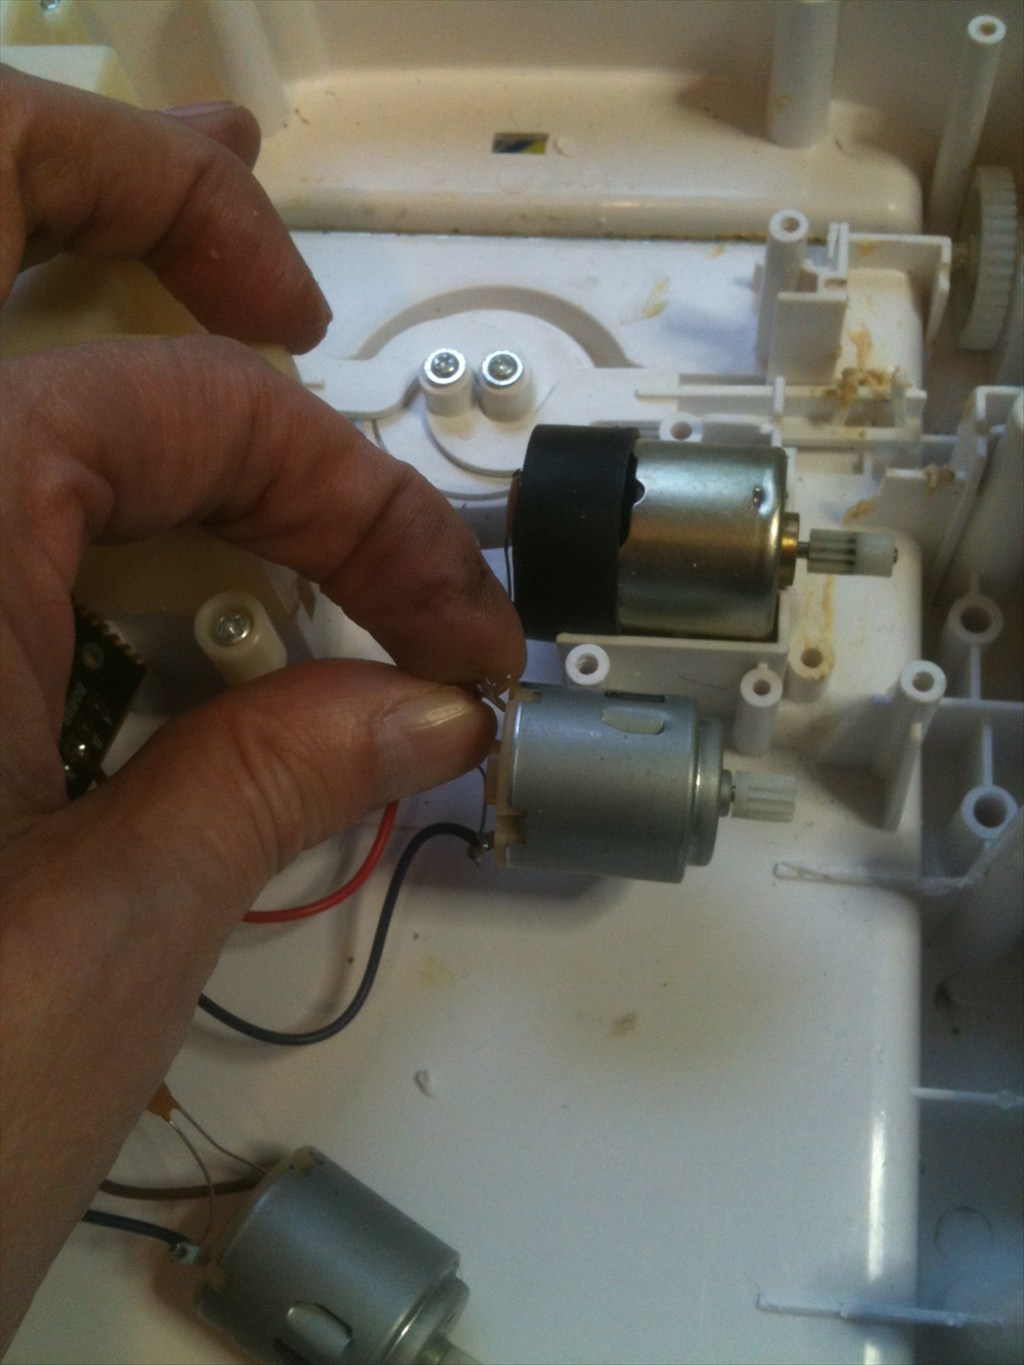
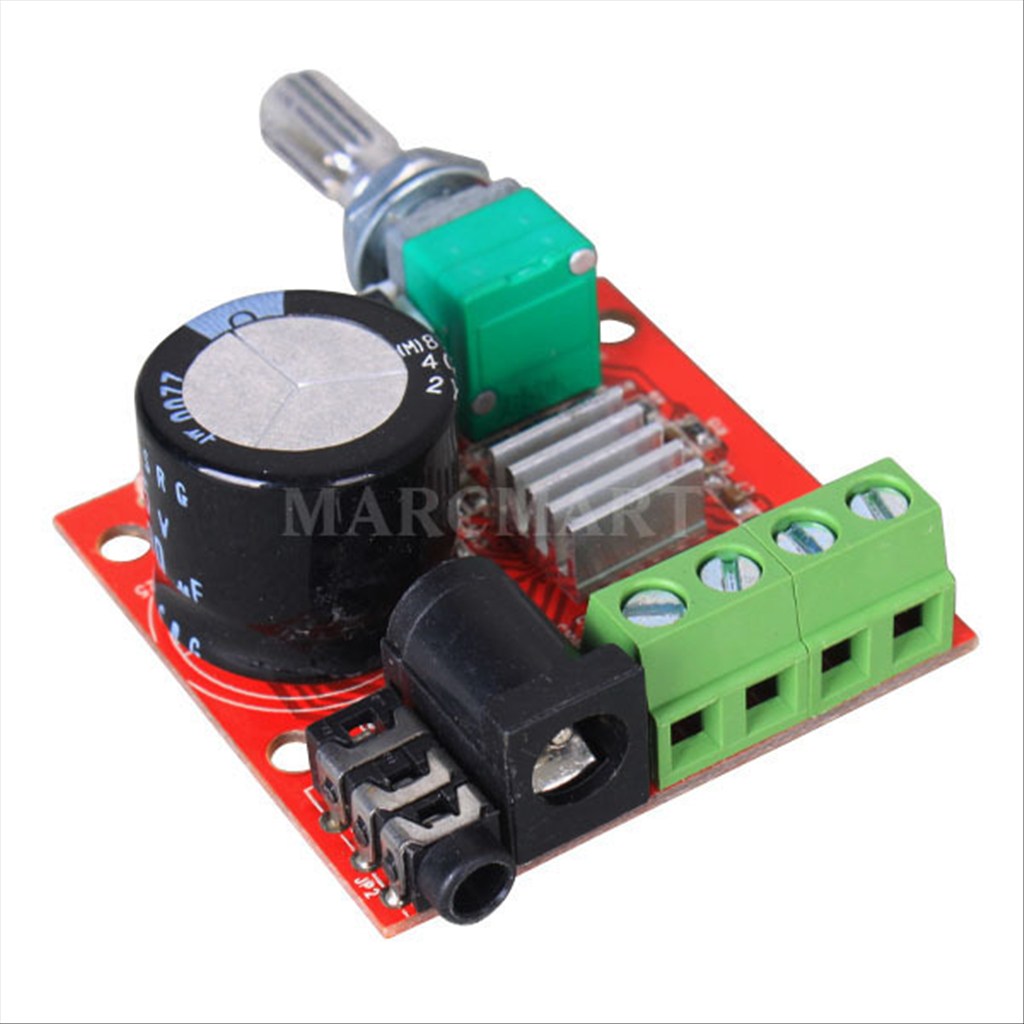
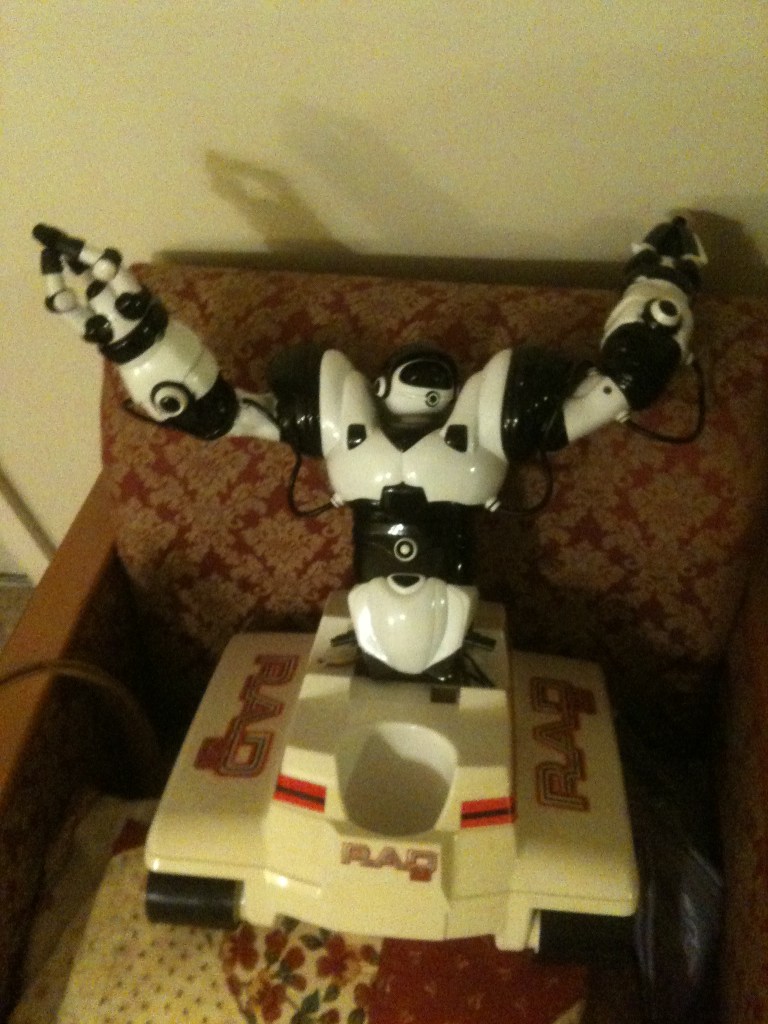
I got the legs removed from Robosapien...he looks kind of sad. I think I am going to use the same 12V battery I used in B9 - it works great in these RAD bases and should give me plenty of power for some of the stuff I want RoboRAD to do.
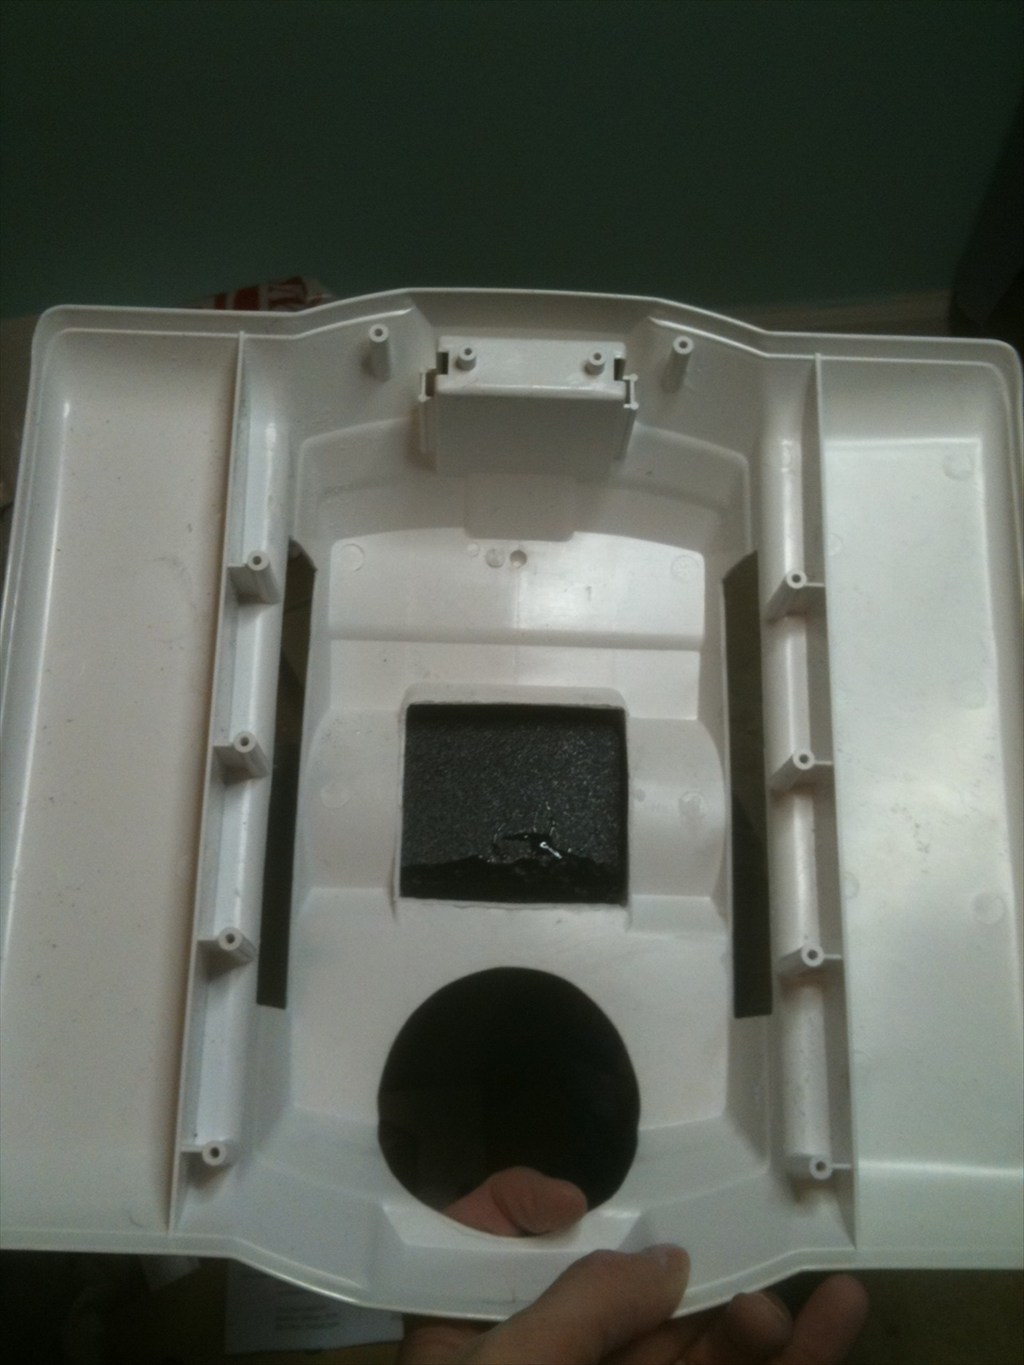
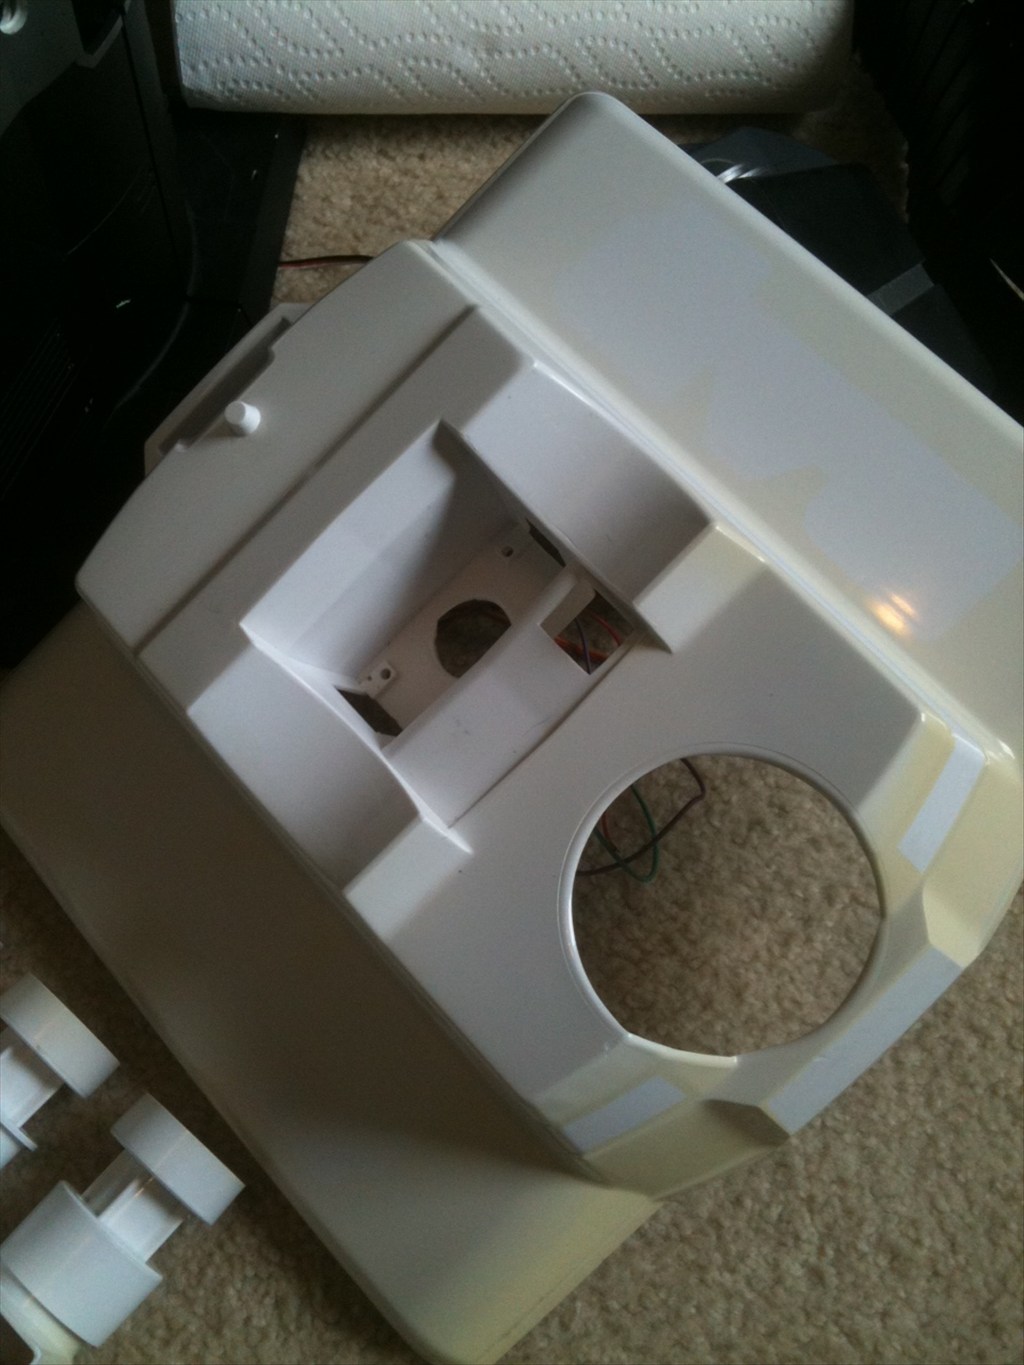
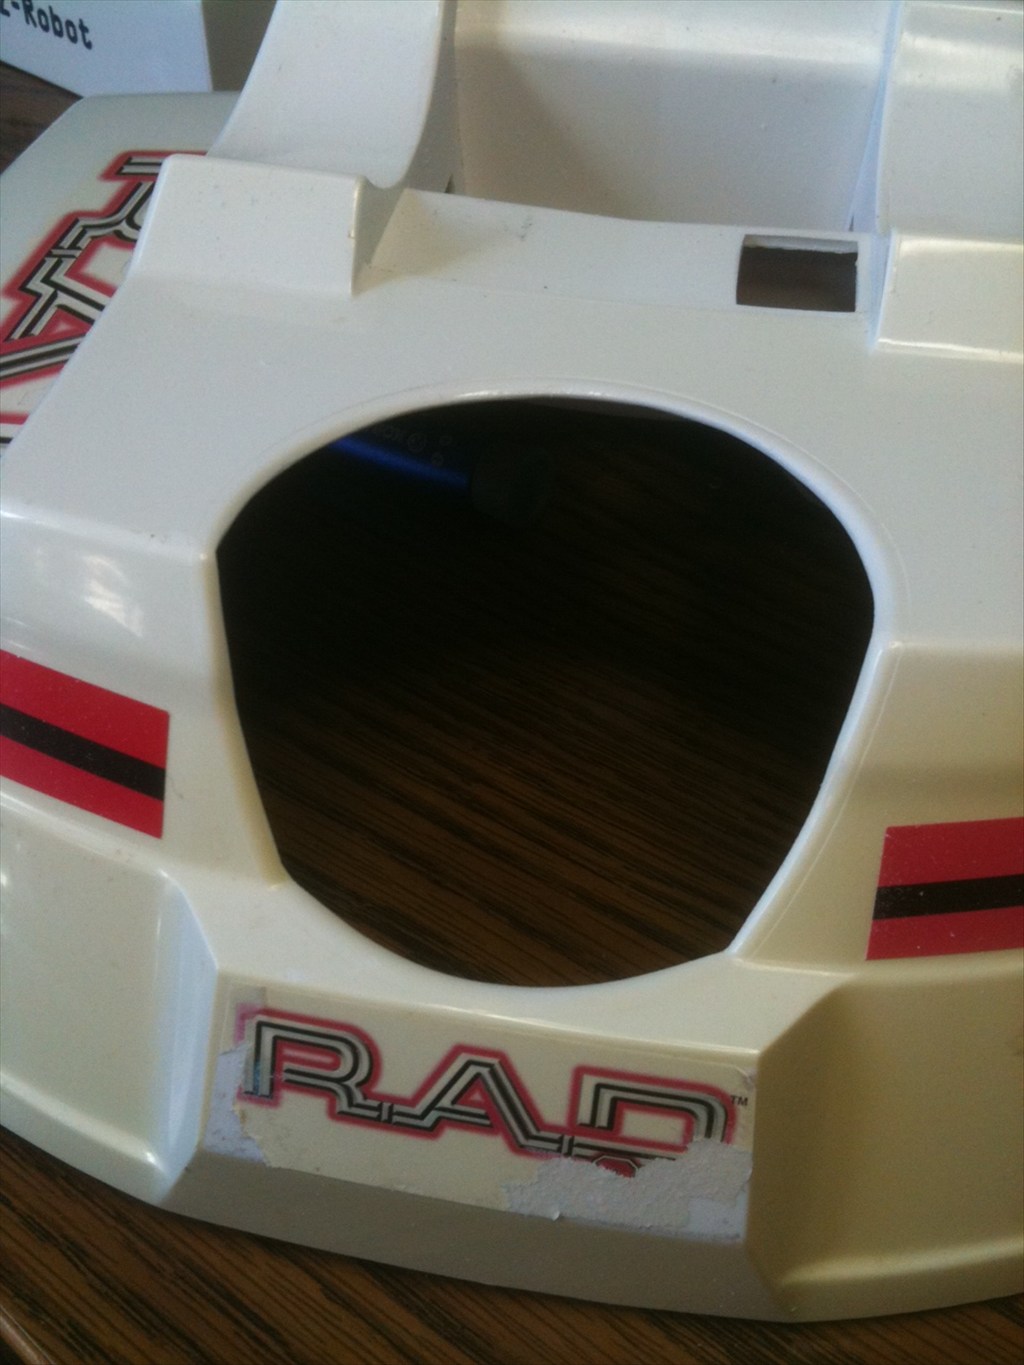
;) I removed his legs and just set him in the RAD base for this pic, but it gives you the idea. After creating two bots wherein I had to build everything (arms, claws, etc.) I wanted to try out the EZ-B with one of the supported platforms - less building and more programming. I do want to make RoboRAD a cool bot - new paint, new functionality, cool devices. But I think this will be a fun platform to start with. I will keep you posted as I proceed. I think my next step is to remove the RAD labels and run it through the dishwasher. Then I guess I am going to lose the cupholder (like Josh did on one of his MechWarrior bots). More later.
Thank goodness for copy and paste
The Robosapien looks right at home on top of that RAD base. I will be able to use most all of his features. And a camera will replace his little head. Right now I am in the process of cleaning out and setting up my new robot building room. My daughter has just moved out and now I get her room for bot building! YAY! (but I really miss her)
Cupholder has to go! Is your kid 18 already?
My son will be 22 in December and my Daughter will be 19 in May. They both live in Albuquerque now. Yeah, I have plans for that cup holder (shhhhhh - it;s a secret until I get that mod finished - but it is cool)
Secrets! This is noooo place for secrets lol
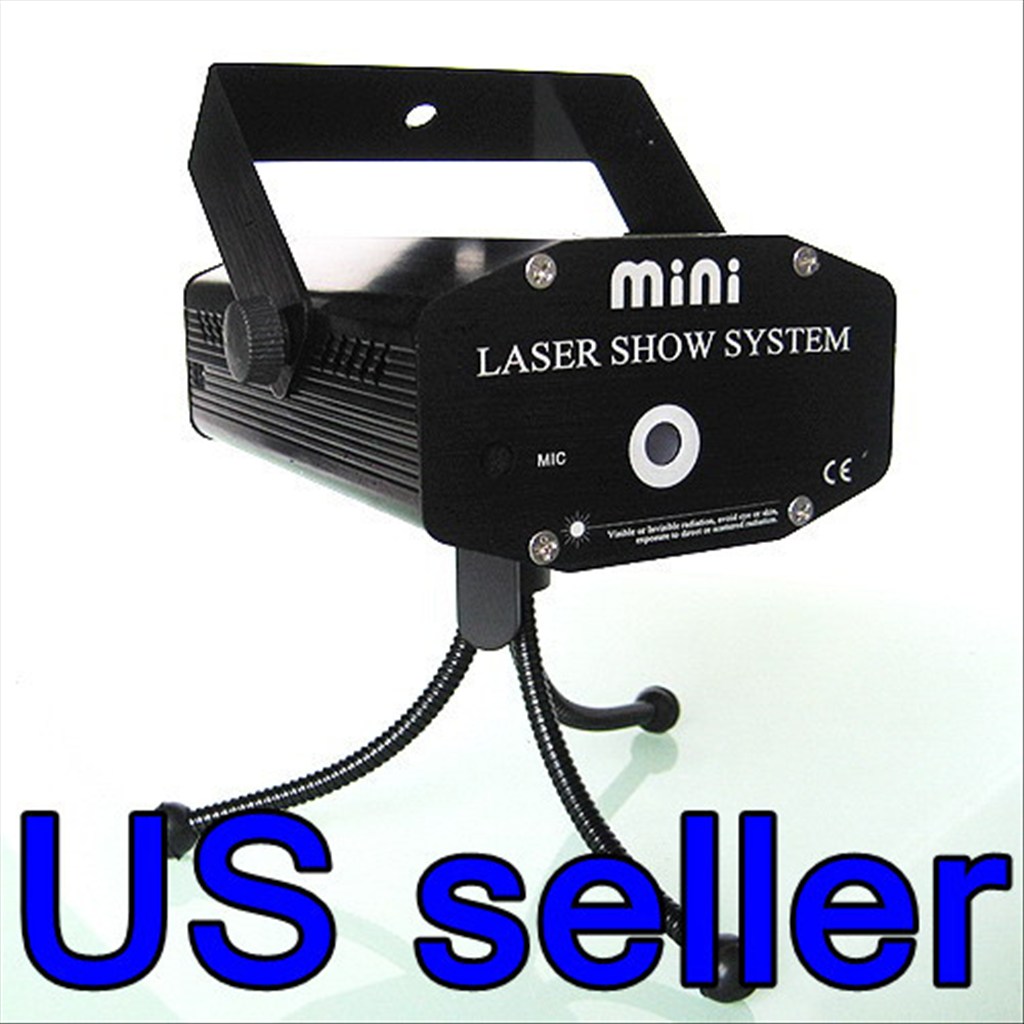
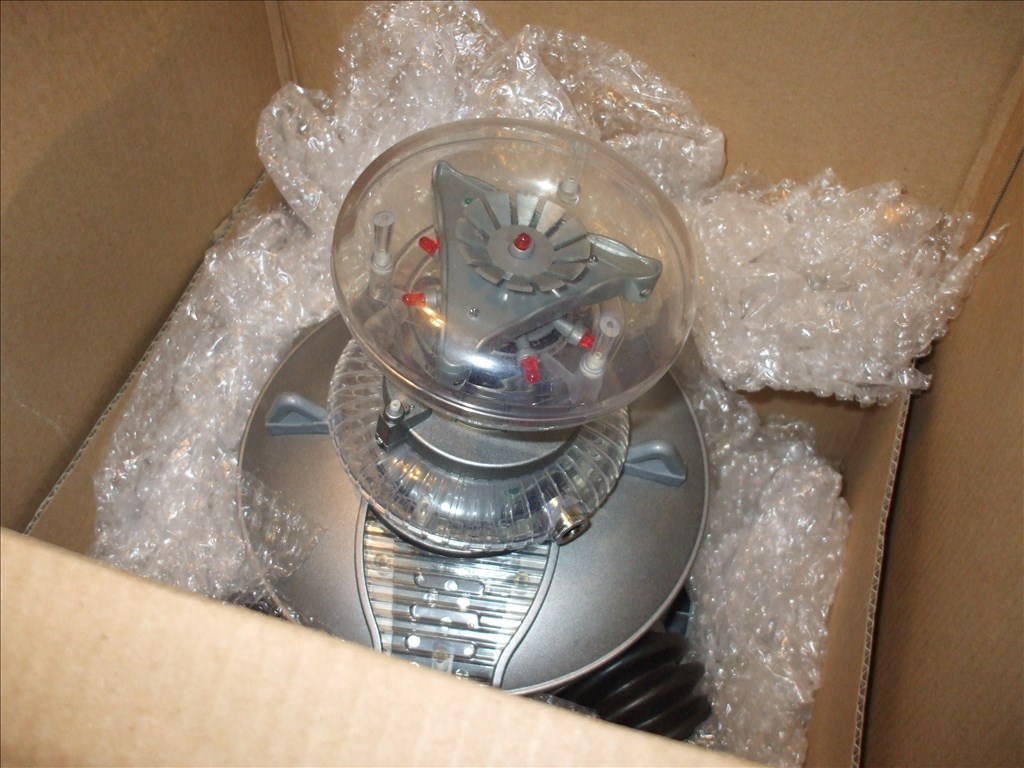
Well.....just for you Josh. I am going to put a 3" plasma ball there. It should look like his power source and be fry reactive to sound and touch.
You should put a bug zapper around it.. bbbzzzzt! Didn't you need that space for the batt and ezb though?