
This is a continuation of my original thread, "Niek's Omnibot Adventure".
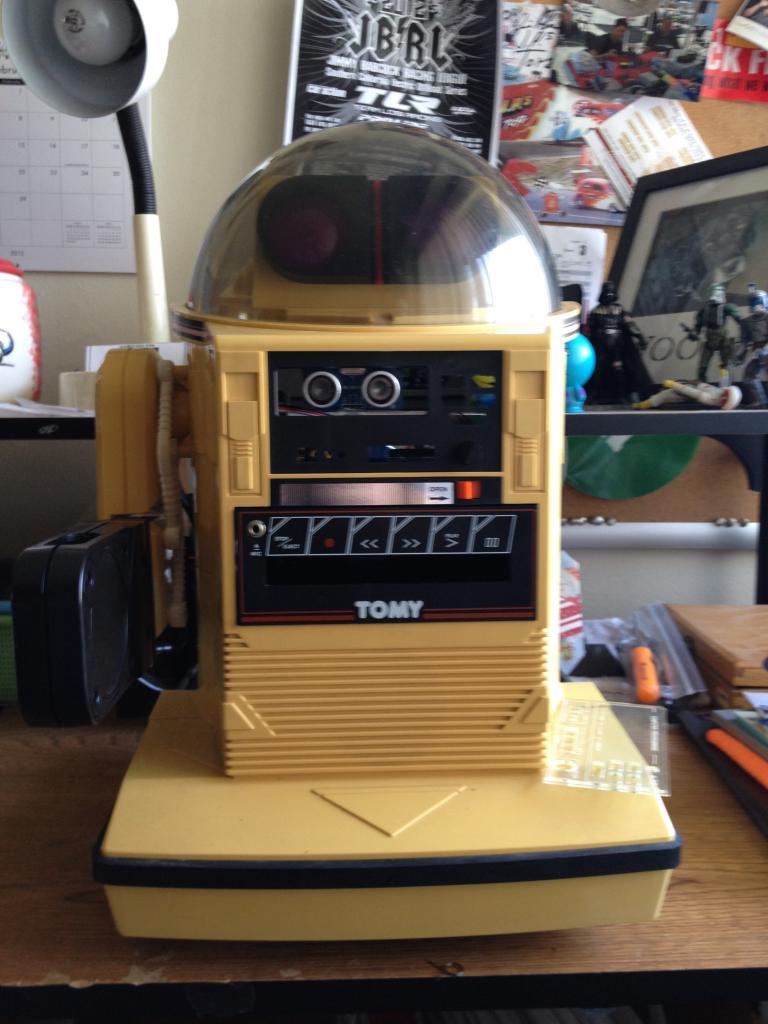
Though I technically finished my omnibot about a year ago, I was too impatient to take the time and put it together well. He was roaming around for a while before both his shoulders broke off (they were put on using hot glue). This is how he'd been spending the last year:
My recent visit to EZ-Robot reminded me how great building robots is. That's why I decided to completely take apart and rebuild my omnibot. Here's what I plan on doing:
1. Fixing his shoulders, wrists and claw. 2. Laser-cutting a volt- and ammeter panel to replace the fake tape deck. 3. Building a new mount for his head servo. Before I used popsickle sticks, so as you can imagine it didn't rotate very smoothly. 4. Making the wire a bit less messy. 5. Replacing the dead battery.
Wish me luck
Discover more robots
Ezang's Some Examples From The Past Of Glyphs, Glyphs With...
Waynea's Tall Tower Light Controller - Ezb V4

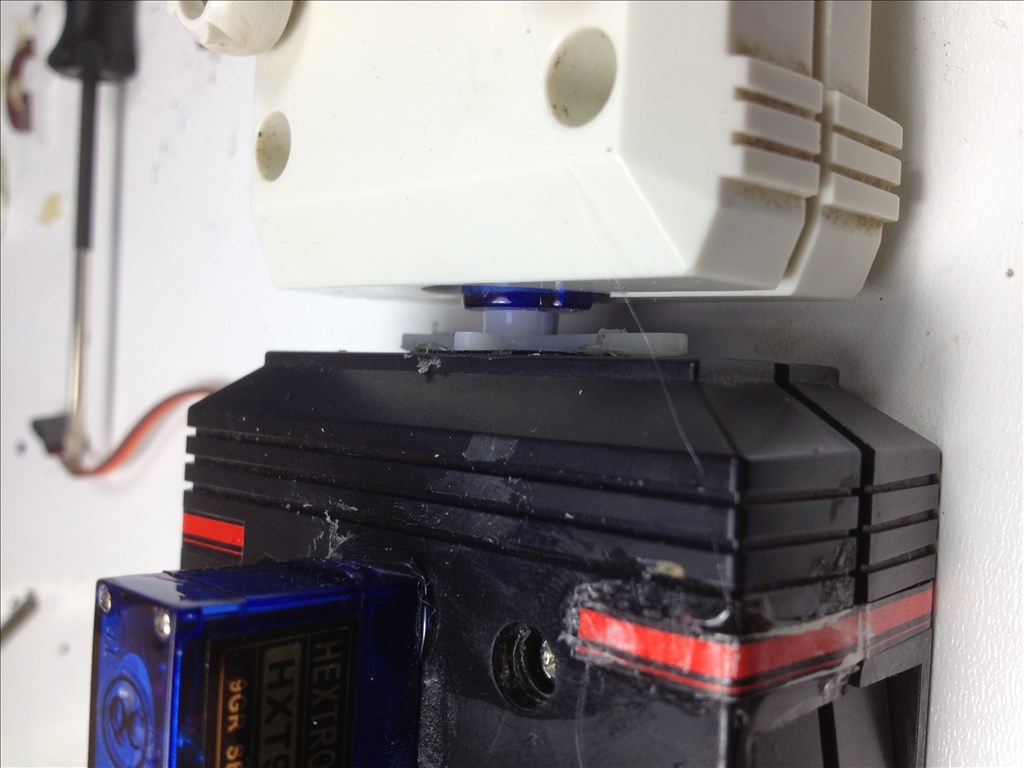
I have now successfully repaired his right shoulder, wrist and claw.
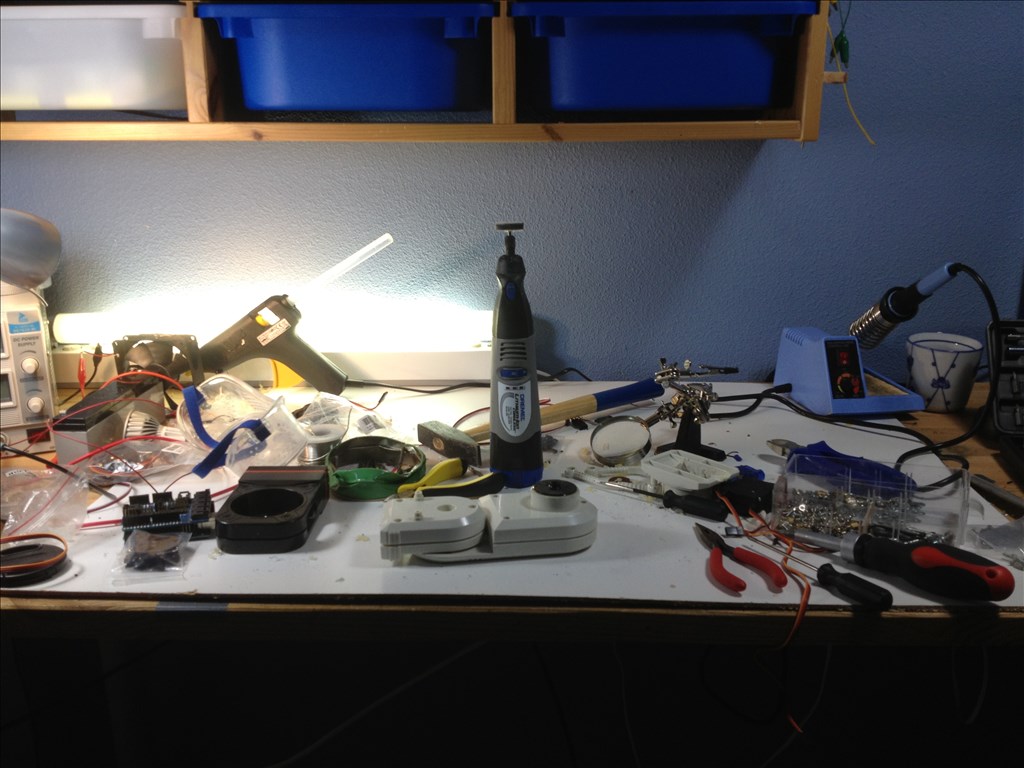
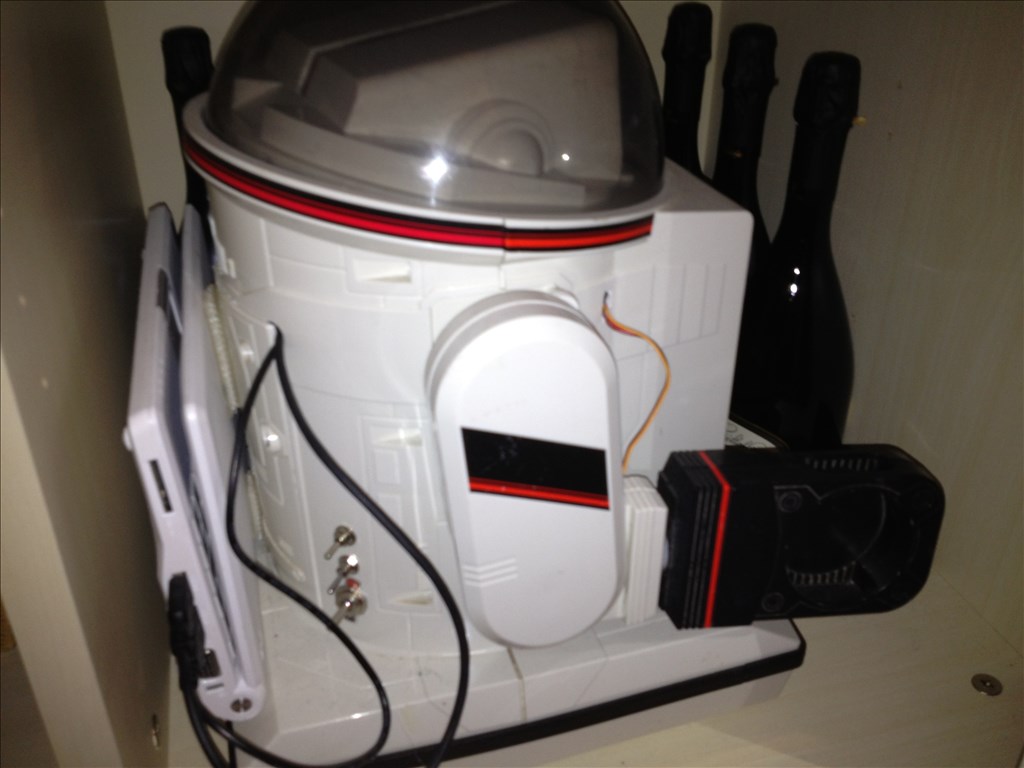
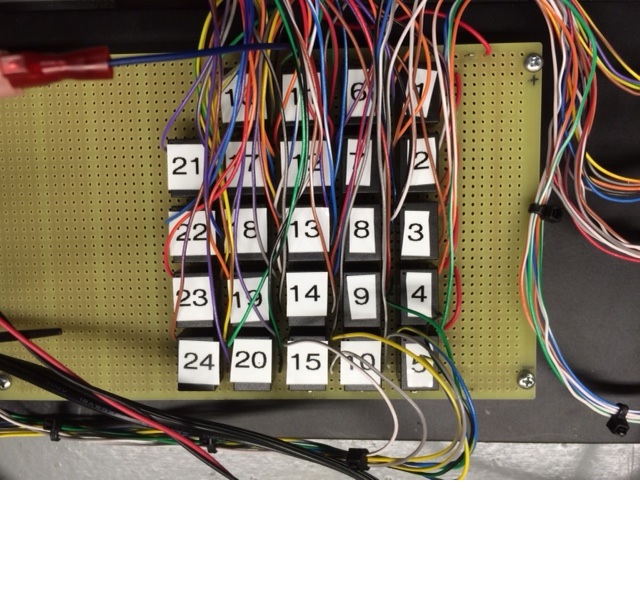
Here's my workbench after a busy week:
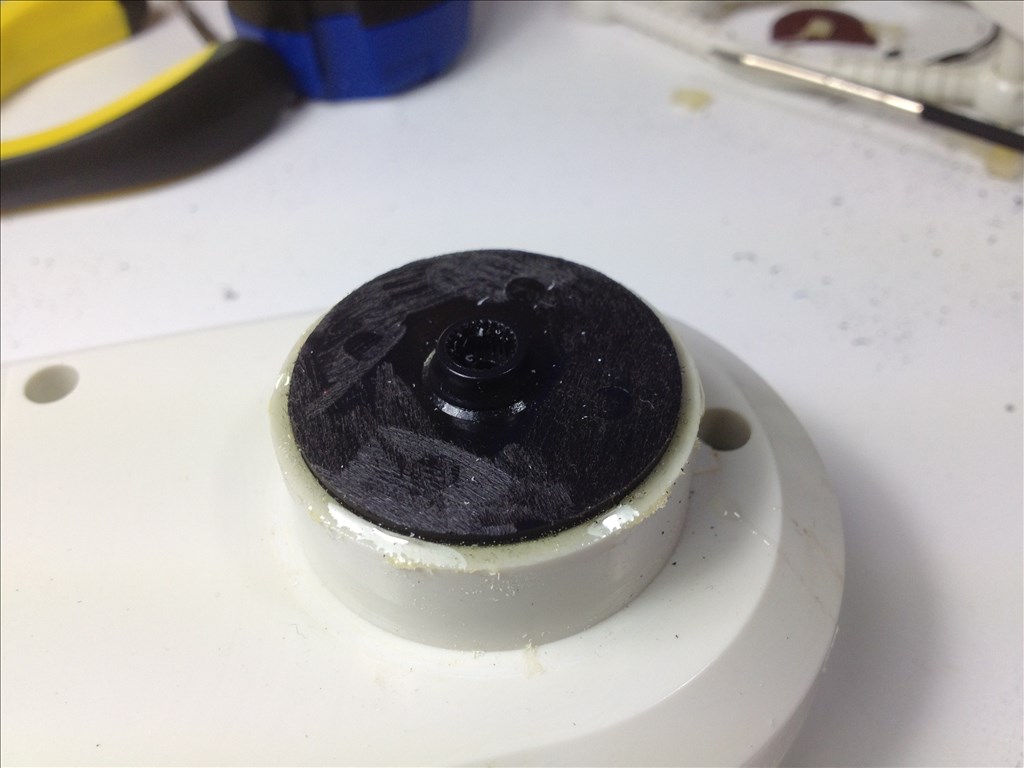
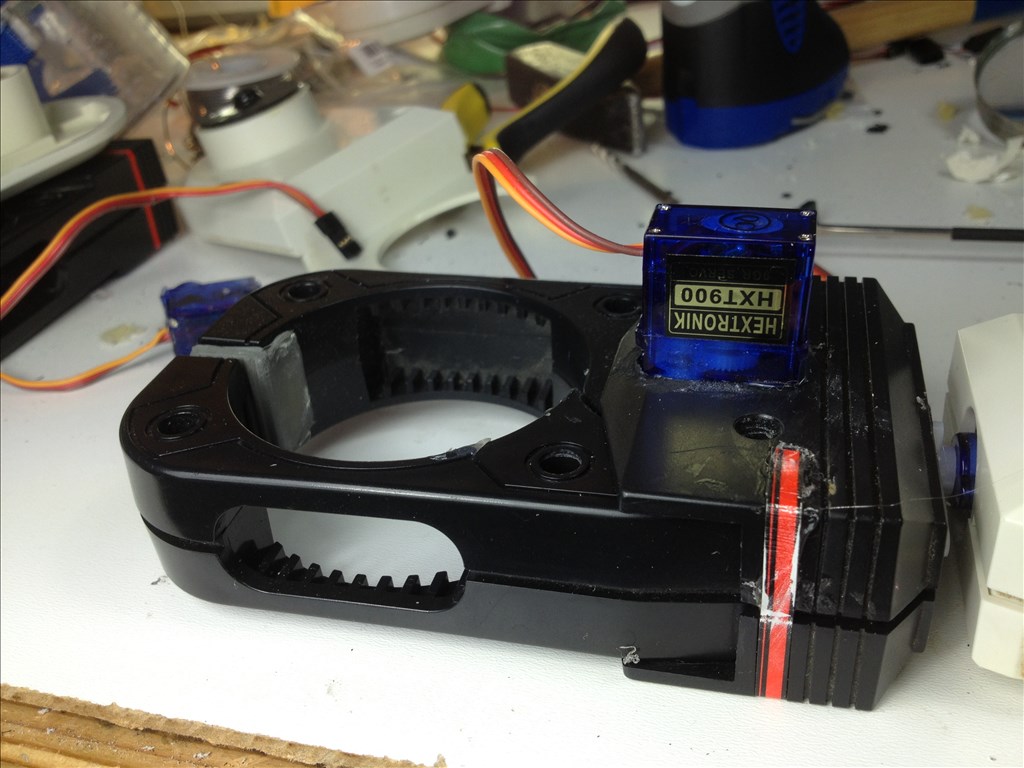
The first thing I did was epoxy a servo horn to the inside of the shoulder.
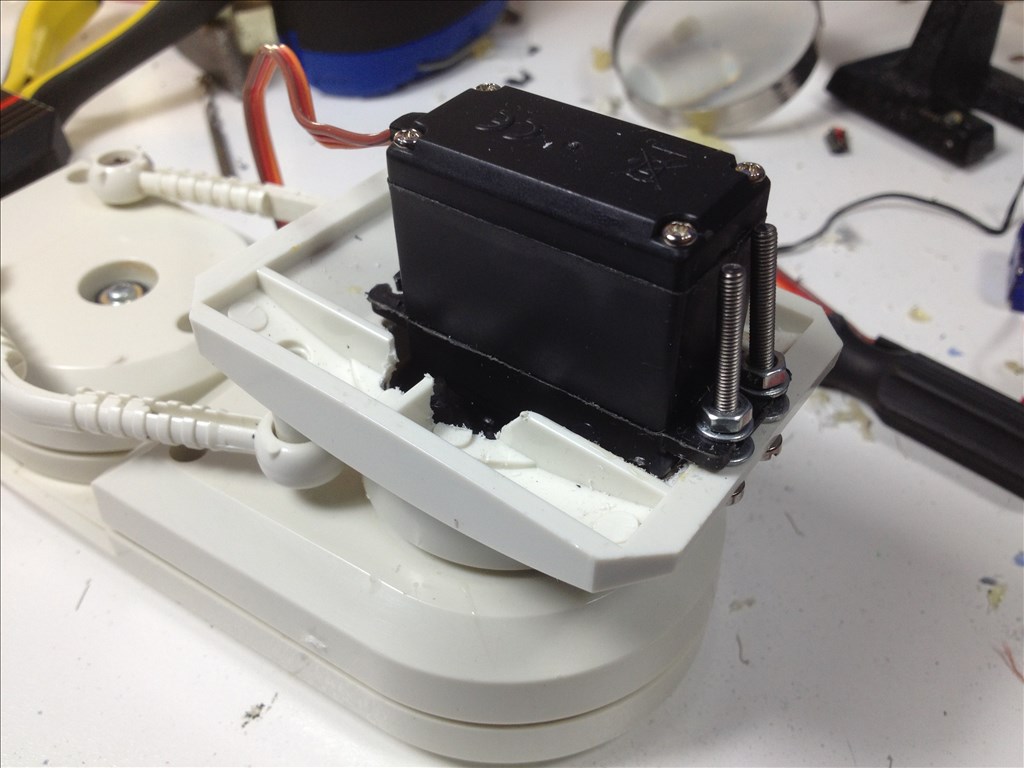
Next I put on the part that attaches to the body and bolted on the servo. I had to cut out a little bit of the mount to make it fit.
I also drilled a hole through to be able to attach the servo to the horn using a screw.
The wrist used a crappy non-brand servo, so that was replaced with a better one.
For the claw I initially put in a really tiny micro servo. This was too weak to even open it so it was replaced with an external 9g servo.
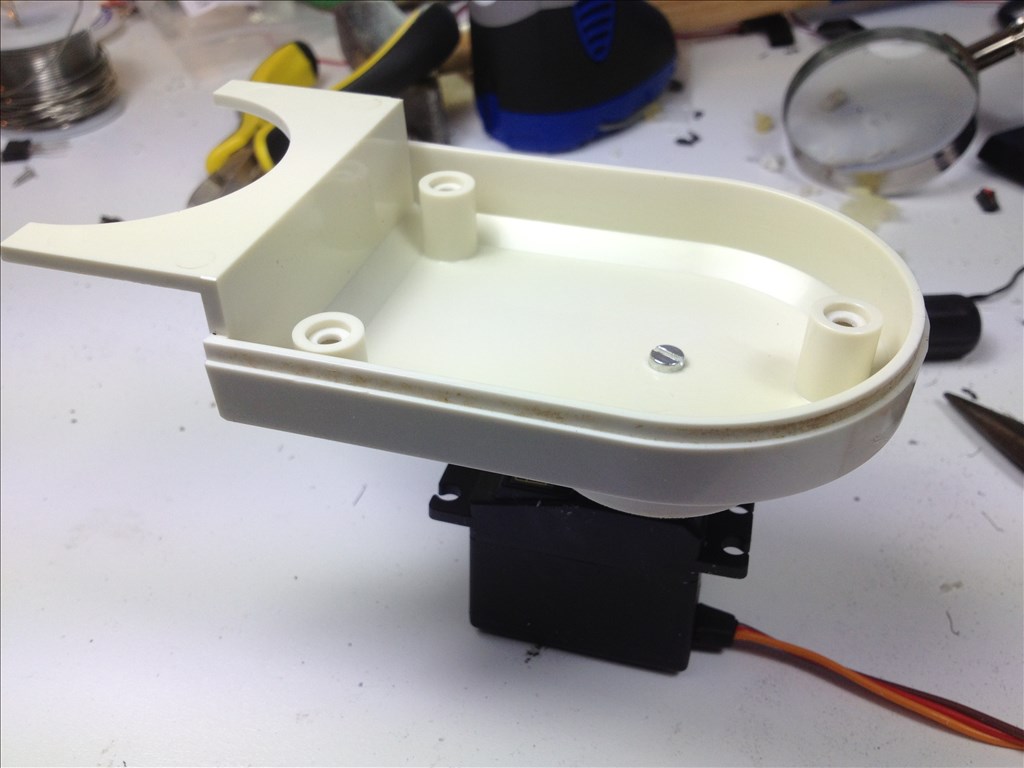
And that's the new right arm! Now onto the left
I have provided cad, pdf and some other format versions of the front panels on the omni torso if you need them for the laser cutting, I'm sure it's listed in my user details, if not it's buried somewhere in Melvin's showcase. If that's of any use to you.
I'll be watching closely how you do the arms, I was never happy with the arms on Melvin (which is why he has none at the moment).
@Rich thanks but I already laser-cut them. They look great
@Niek! I was just going to message you and see how you were doing since your trip here. Great to hear you've re-started working on your omnibot, it's looking pretty sweet! I like that you're going to make the grippers move.
Cool @Niek, I bought some of the same micro servos you have used in the gripper for my intended build but was trying to figure out how I'm going to fit the servo inside the gripper casing? Now I may go the external route if you don't mind me asking, how have you connected to the grippers inside?
Niek, does the HXT900 servo have enough torque to power the grippers well? How do they perform using these servos?
@dkennyken It depends on how you hook it up. I think @Rich used a lever, I glued it directly to the hinge point.
I would've used metal gear mini servo's, but I didn't have any.
Cheers Niek, this robot building is becoming very addictive Good luck with your restoration, look forward to seeing more of what you've done with him.