
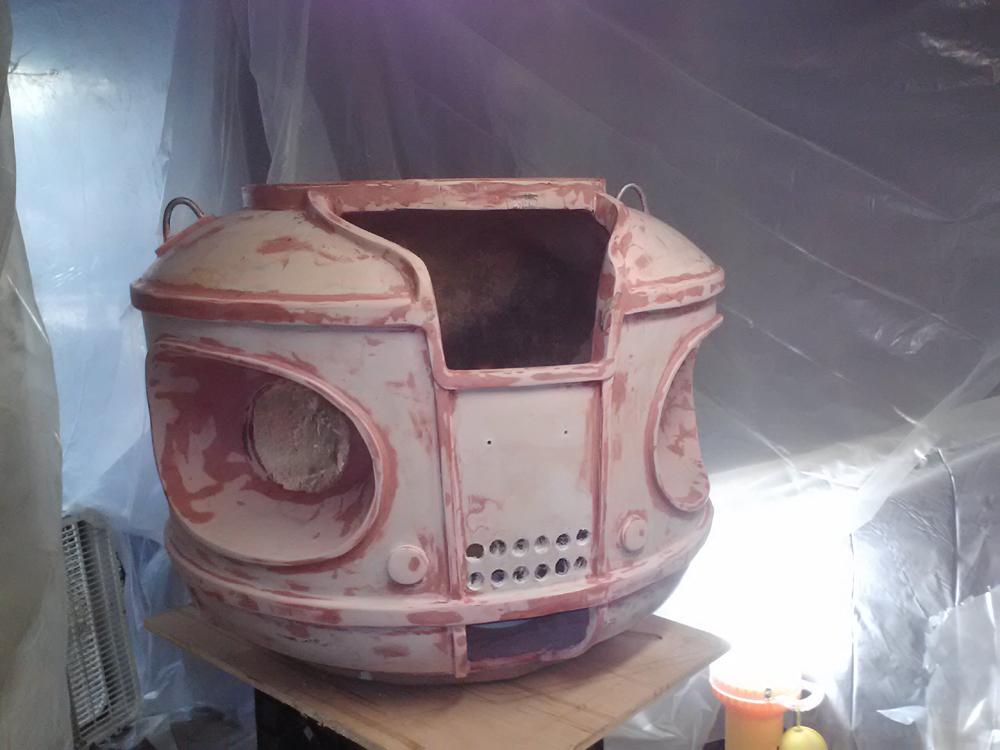
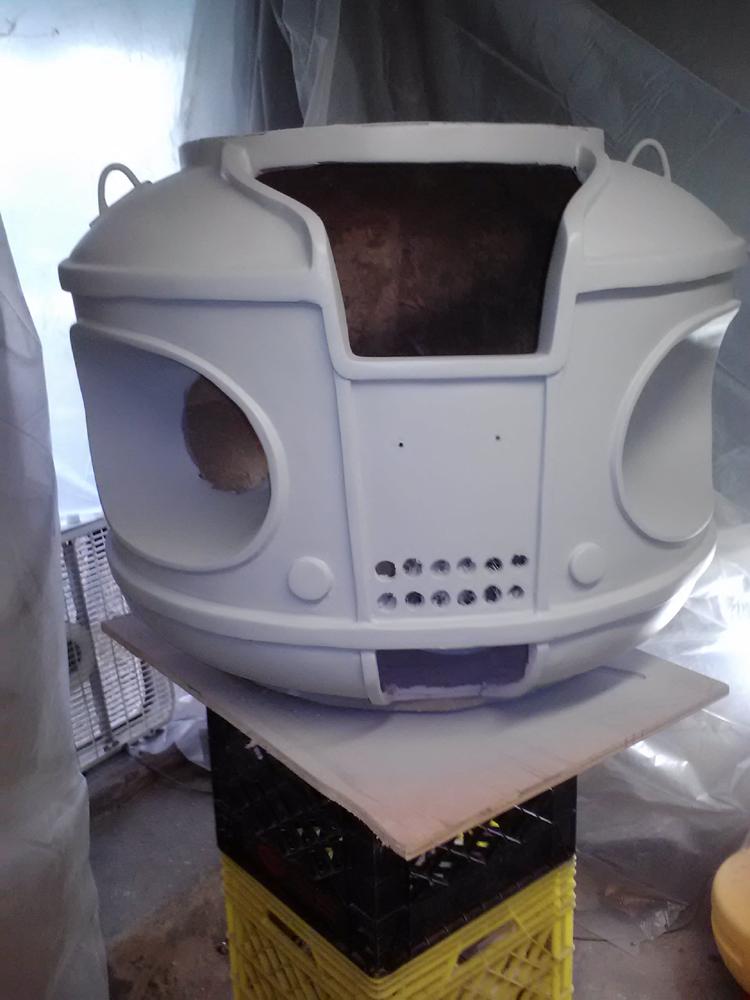
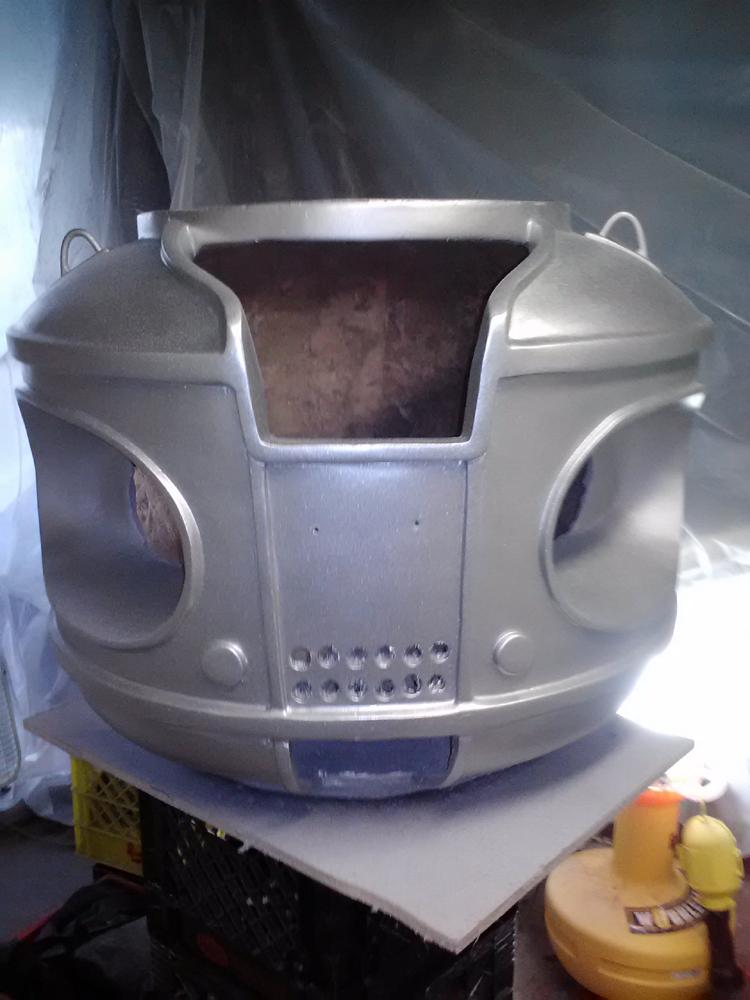
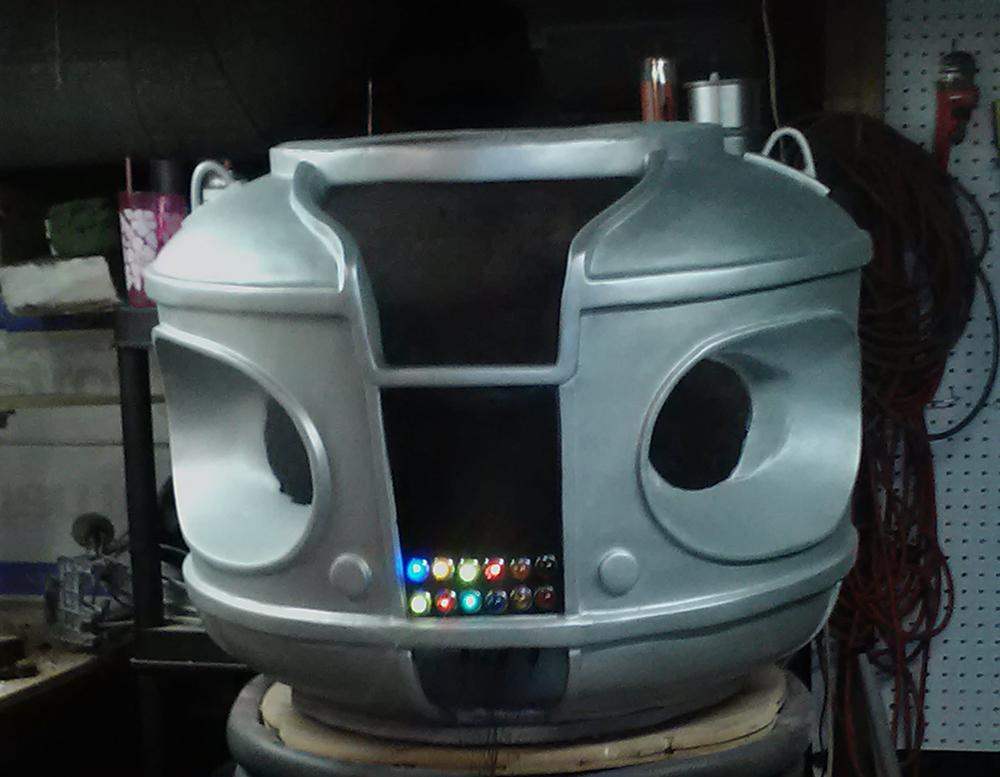

My project is a full size replica of the lost in space robot. My brother and I are working on it together. It will be entirely scratch built. As you can see, it is a long way from being finished. Since it has no moving parts yet, I have yet to use the EZ-B with it, but I have tested some motors, and controllers outside of it. I think that it will work well.
A while back, I posted a link to this site on the B9 Builders site. It seems that several of them have since incorporated the EZ-B into their robots, so I am confident that it will work for me.
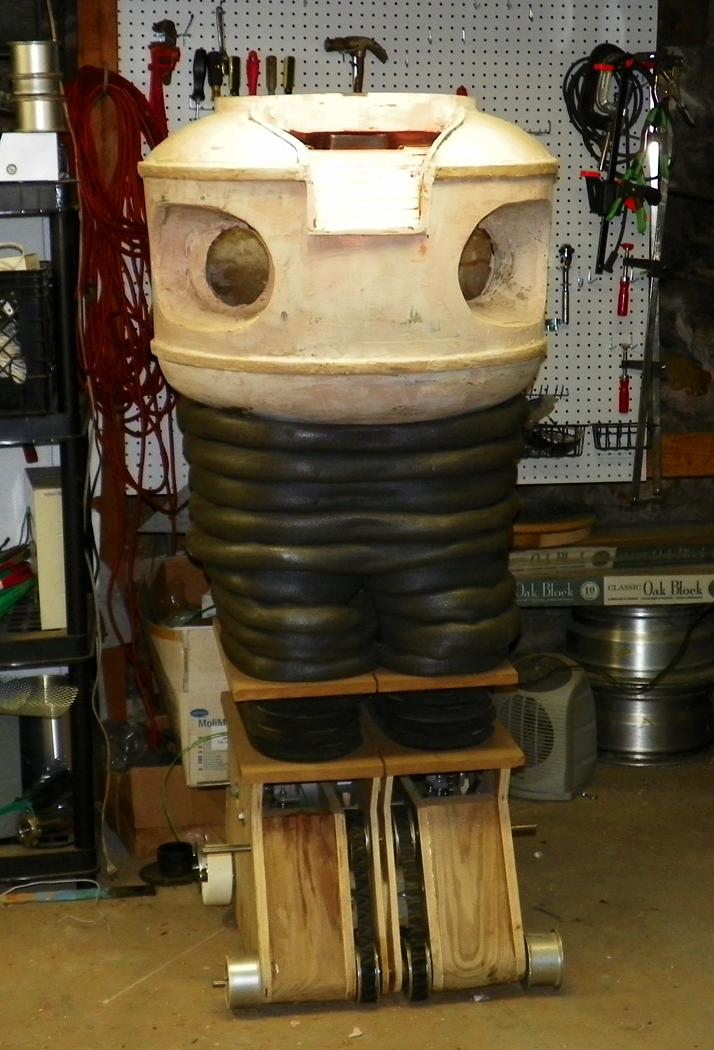
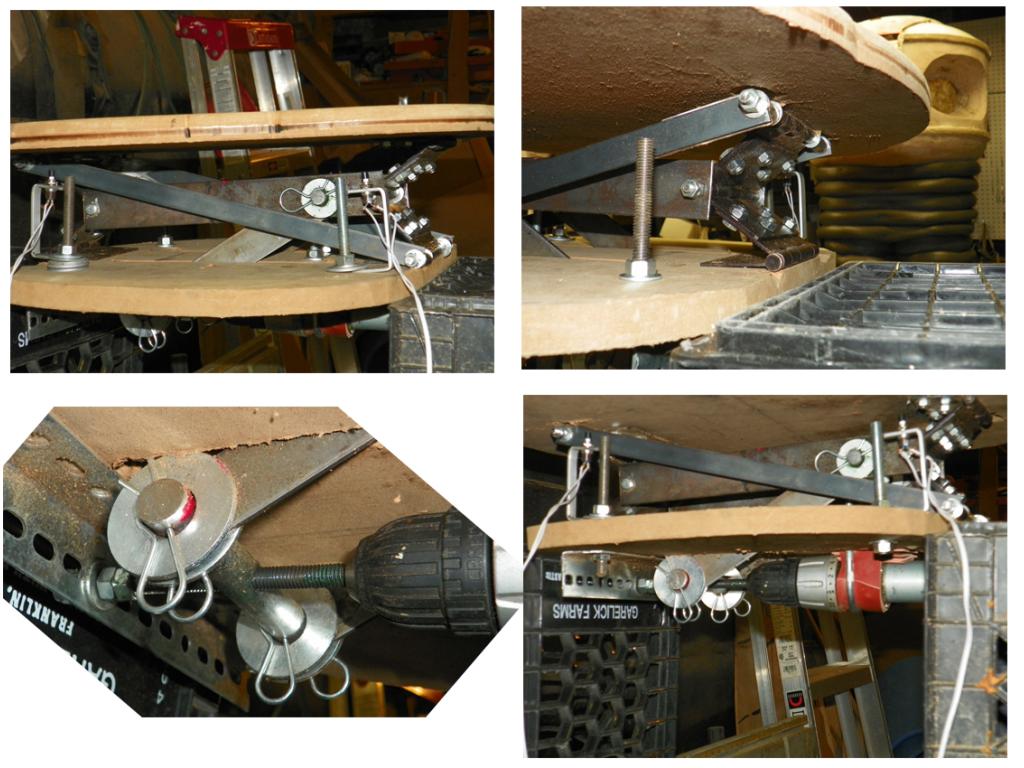
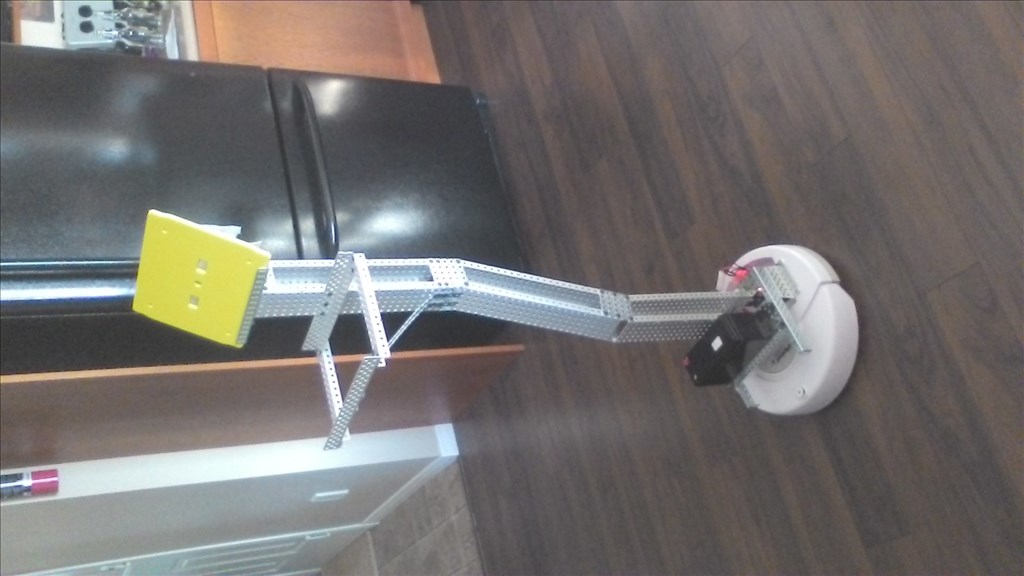
Rgordon asked me how I was making him bend at the waist. I am including a picture of the mechanism that I am working on right now. It might be hard to figure out just looking at the pictures, but there was no way to describe it without something to look at. Basically I have three door hinges on each side bolted together in a "W" fashion. I replaced the center hinge pins with longer bolts, and put flat steel across them. As the steel moves in one direction or the other, one set of hinges opens up, and the opposite end collapses. The diagonals keep the top above the bottom. It is powered from underneath by a motor salvaged from a cordless drill. The threaded rod goes through a larger rod that has been drilled and tapped. My original plan was to have the motor in the middle of the setup, but it would not fit; hence the extra linkage coming through the bottom.
We began with the goal of building a recognizable replica of the B9, and had hopes for animating it as best as we could. Not knowing anything about robotics, I have spent the last few years searching the web and trying to learn what I could. Stumbling upon this site was a real stroke of luck. I feel very positive that this will come out far better than I had imagined.
Discover more robots

Rickymahk2013's Mark 1 Robot
Steve's Artamus, The Rambo Knight Robot Hack

I think that those are too small. I have started on an arm mechanism for mine, Chris. I will try to get some pictures posted. I will be using DC motors, and try to figure out how to use potentiometers to regulate them through the EZ-B.
Cool Please do I might try heavy duty servos not quite sure how to go abou tit but PLEASE let me know
Hi Chris & Danger,
I'm also building a full size B9. I've actually got 2 EZ-B's in my robot. One under the radar in his upper torso and the other in the hip section below the donut. This keeps the wires to just power between the two sections.
I just finished getting the hip section working so he will bend over. I'm useing a Dewert motor and controlling the rotation start and end points with a potentiometer attached the end of the motor shaft. The three power connection lugs of the pot are attached to an ADC port on the EZ-B and a script in ARC is controlling it. ALSO, I learned real fast to add limit switches to each end of the rotation. These kill the power just in case the pot or EZ-B fails. I did have a problem and it was ugly. Now with the limit switches I can rest easy. If you dont know how to build them I'll be happy to help with advice. They are very easy to build.
I've got a script that works for my setup. I'll be heppy to post it and some pictures if you are interested. I did have to modify DJ's Motor & Potentiometer Script example in ARC to get my setup to work properly. For some reason the motor just shot past the $adcSpecified value sent to the main script by the call script. Maybe it's the pot I'm using. Anyway the value returned by the ADC port seemed to lag and the motor would not stop when it got to the value it was looking for. This line controls the stop command:
if ($adcCurrent = $adcSpecified) goto(RotateStop)
I had to change the = in the above syntax to either a > or < depending on the direction it was going.
I also had to split the script into two commands. One to lower the hips and one to have him stand up. If your interested I have the project uploaded to EZ-Cloud as B9 Robot Control here:
https://synthiam.com/Community/EZCloud/Download.aspx?id=196
Have fun! David Schulpius
Thank you David. I downloaded the EZ file. That will be a big help in getting me started. Unfortunately, I am still a long way from programming anything. I don't have to tell you that the build itself is quite an undertaking. I am not buying any club parts. My brother and I decided to build completely from scratch. It will not come out perfect, but that is a challenge that we have decided to take. I think that I am all set with the limiting switched. In the section to bend the waist, I just bought some "normally closed" buttons. I mounted them so that when it reaches the point that I do not want it to go past, on either side; it pushes one of them open. They are small switches. They interrupt the relay triggers, not the motors themselves. I understand what you said about changing the script to ">" or "<" instead of "=". I wonder if the parts are just too heavy and the momentum pulls them past the desired position. Who knows? If the script that you wrote works, then it doesn't really matter. Well, now that the cooler weather is here, maybe I'll be less tempted by outdoor activities, and spend more weekends in the cellar working on the robot. Hopefully I will get around to getting some parts moving and connecting them to EZ-B. Like you, I decided to go with two separate EZ-Bs, one in each half. I did not want all kinds of wires running between the two. Thanks again for the offer, and I will probably take you up on it looking for some guidance when I get to that point.
Blaise Sullivan
Hi Danger,
yes, building this B9 is a huge task. I couldn't imagine building from scratch. I just don't have the proper equipment to make the more detailed parts. My hat is off to you.
I really don't know why the swing moves past the stop value in the script if I use thie =. Watching the voltage in the Vareable window i can see it moves a little slow. It would be nice if I could use tbe = so I could get the motor to stop at a more exact point. Now i need to rellay on the limit switches to stop it close to where I want.
Have fun, Dave Schulpius

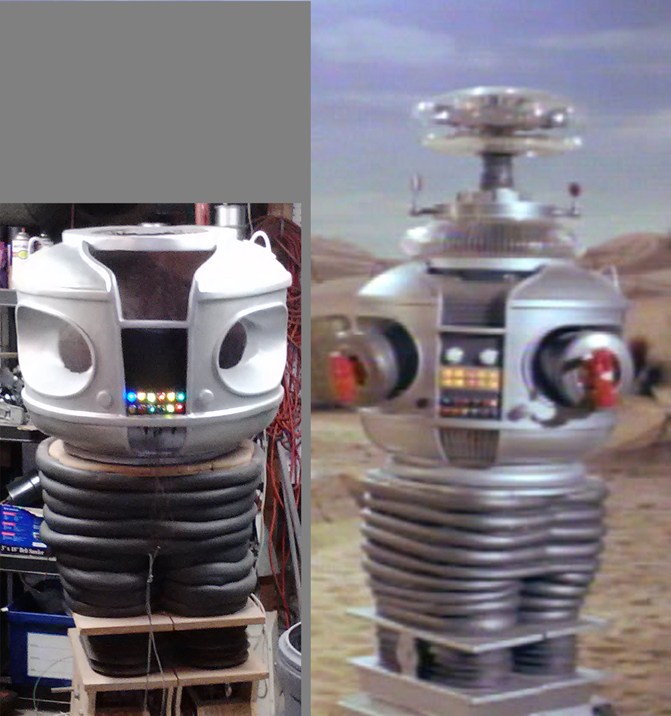
A side by side comparison.WOW guys
Good work on your robots.
B9 sure is a popular fellow . Good luck to you all on the huge task you.ve set yourself's.
Steve_c
Looking great Danger! Your scratch bild is very close to the real one. My hat is off to you. I dont have it in me to do all that work. I got my Torso and most of the outside parts already made. I did however have to do all the finish work like assembly, sanding and painting. Also, most everything inside is my work. Even at that it's been a ton of work and huge learning curve. Your work is much more than I was willing to take on. If I did I dont think I could have made it look even close to how nice your's looks. Again, Well done!