2nd Inmoov Build

Redzone

USA
robot video thumbnail

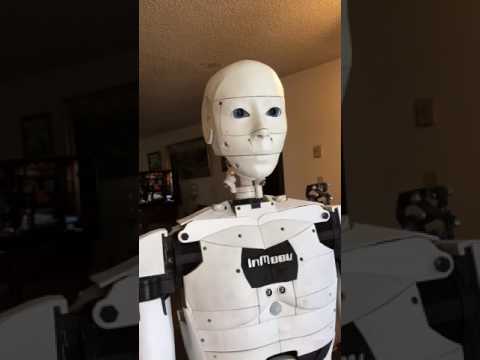
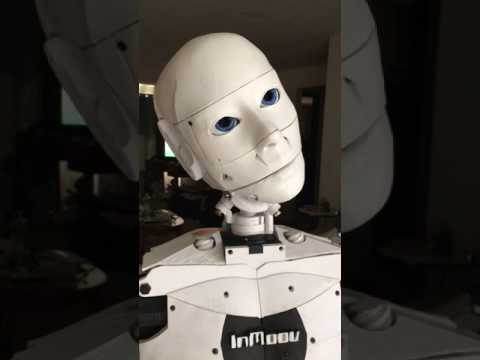
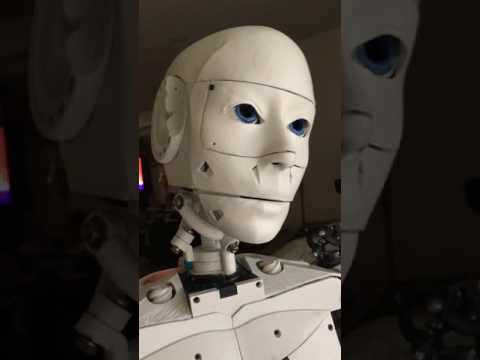
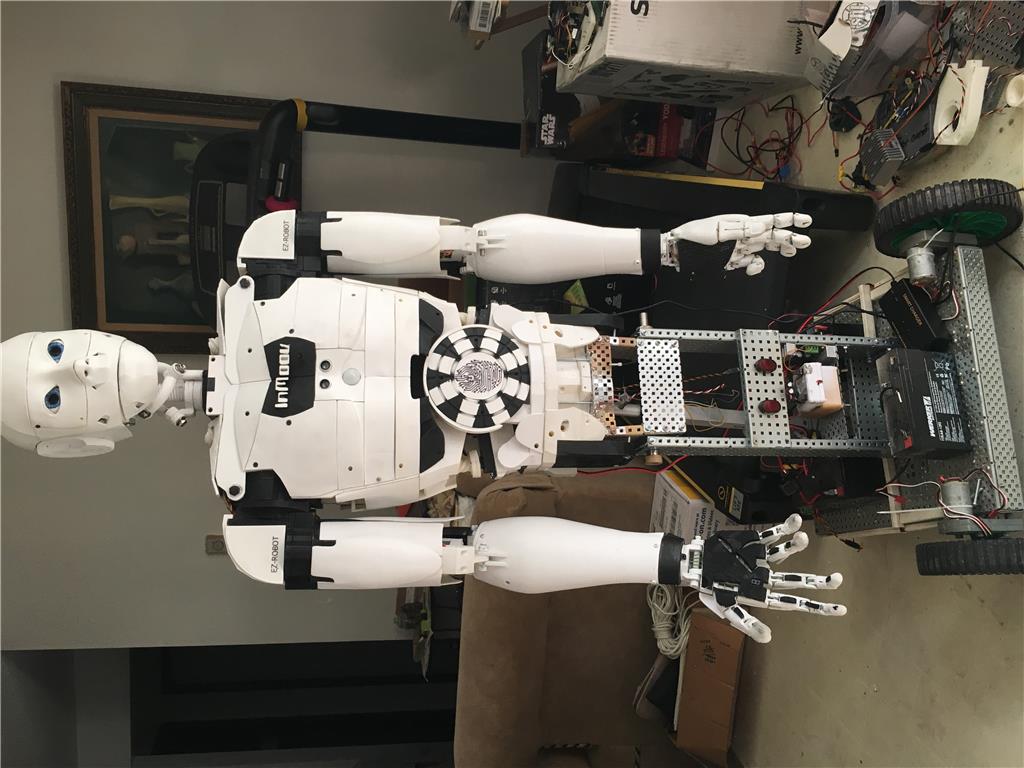
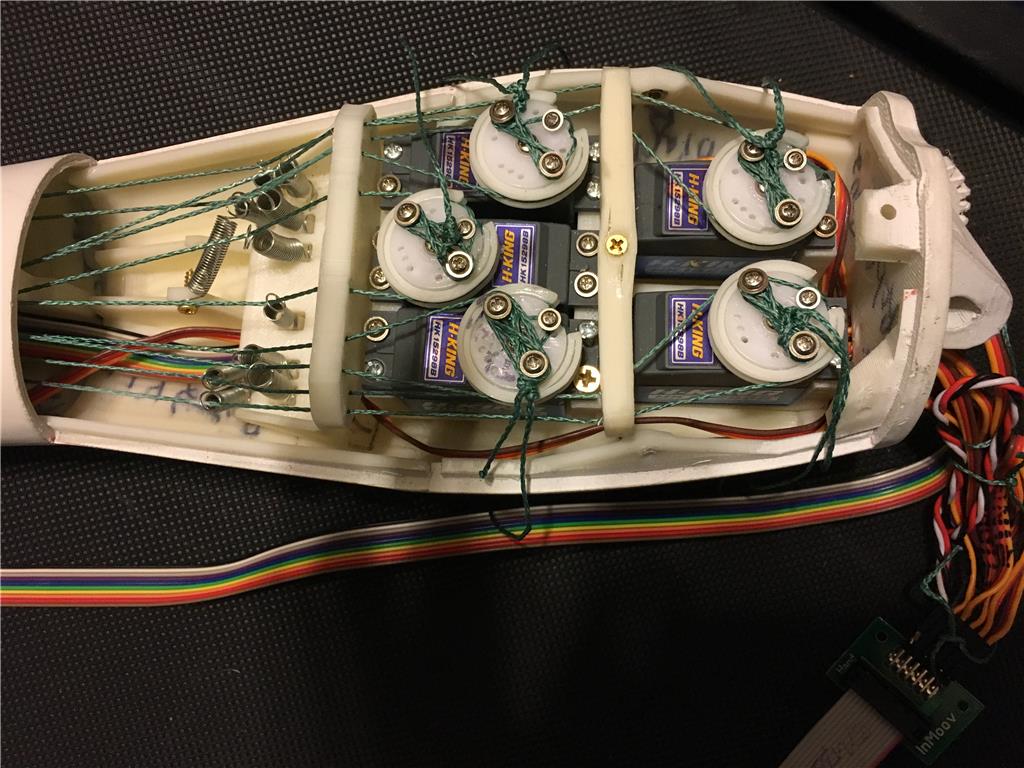
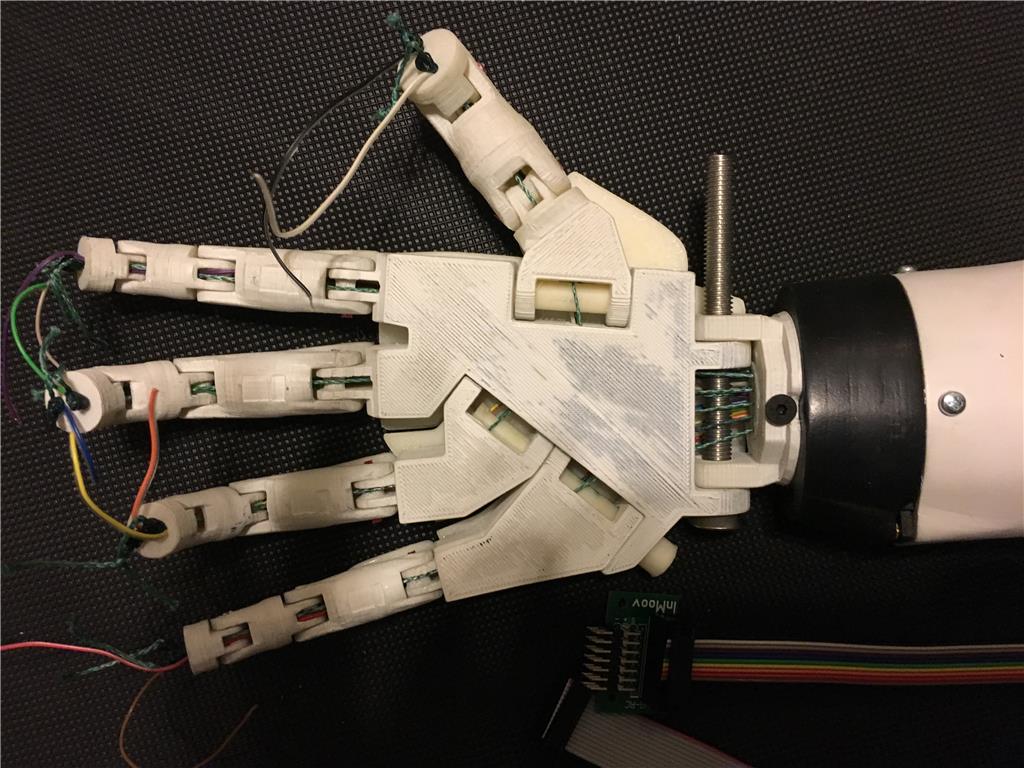
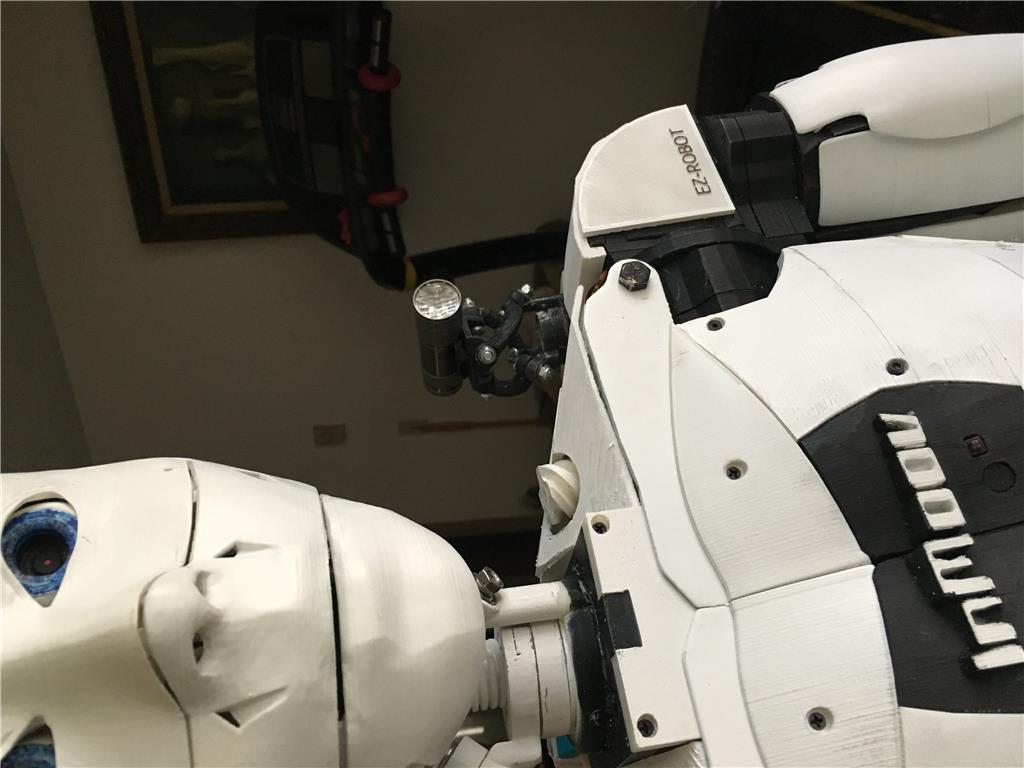
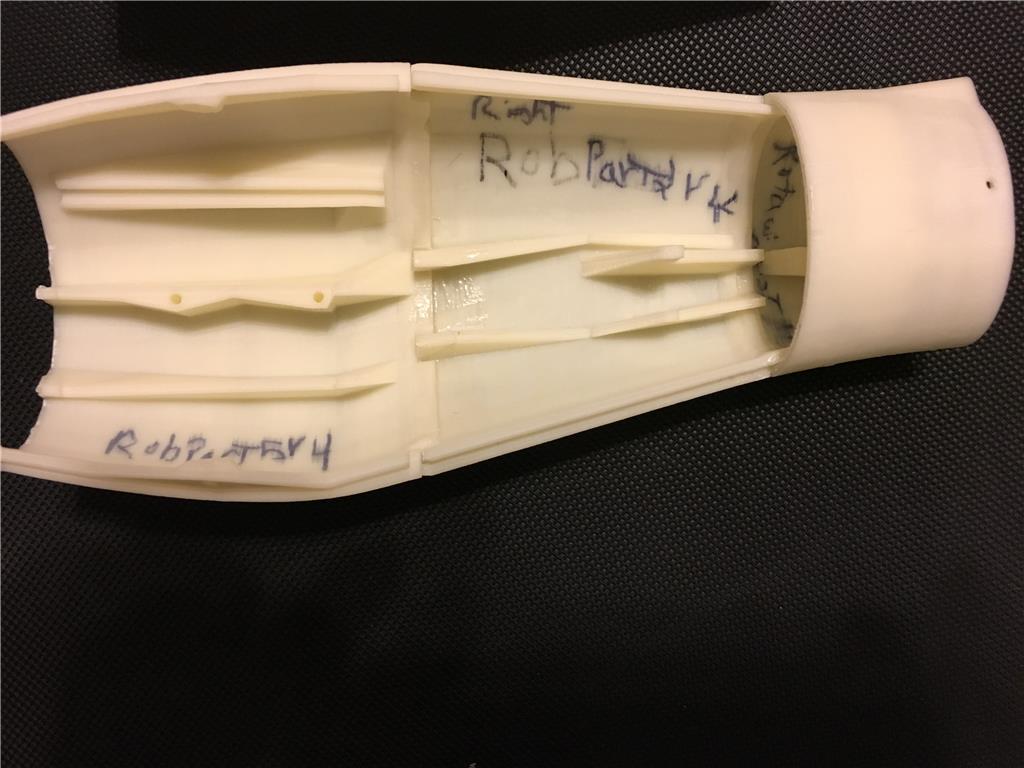
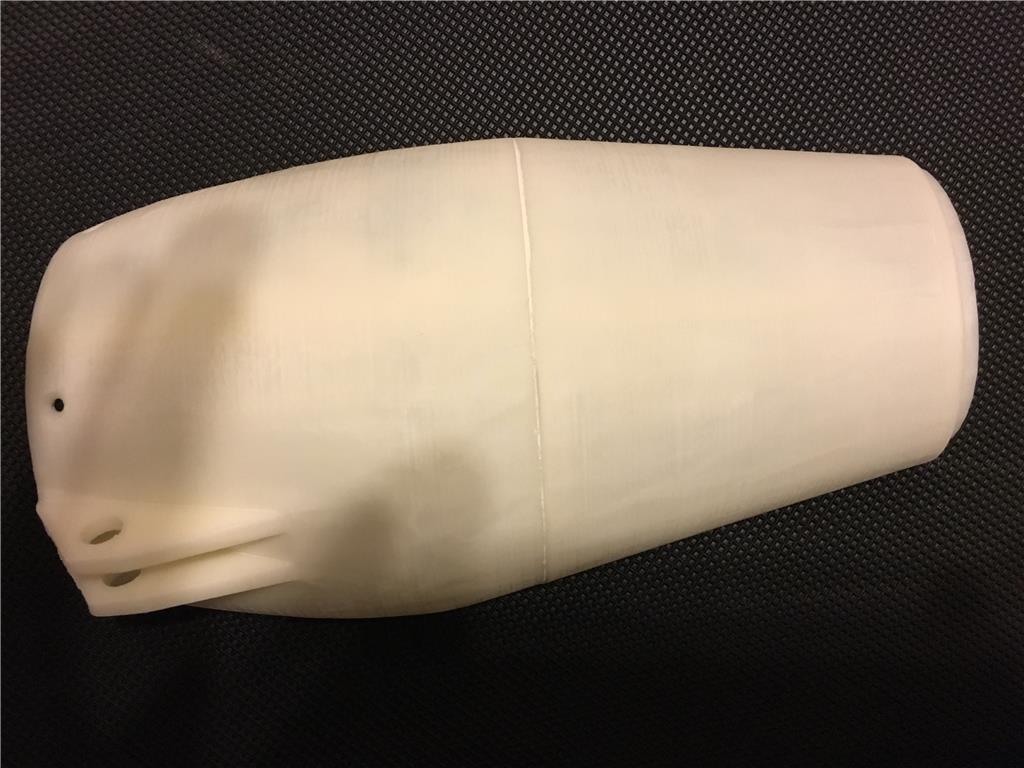
So I started my second Inmoov without a name yet. I haven't given up on Gideon, my 1st Inmoov, I have learned a lot from my first Inmoov and will apply it to my 2nd Inmoov. Anyway I am a long ways from completed. Here is the right forearm, I'm putting the fingers together soon. I'm having a dilemma whether I wanted to have Finger tip sensors or not. I do want a sensor in the hand somewhere so I can tell if something is close to the hand.

User-inserted image

User-inserted image

User-inserted image

User-inserted image

By — Last update

ARC Pro

Upgrade to ARC Pro

Unleash your creativity with the power of easy robot programming using Synthiam ARC Pro

#1  

Try using a small IR sensor. I have one in a hand of my InMoov so it closes to shake hands with someone. You could have it just sense something close and do whatever you want from there. I used this one: http://www.robotshop.com/ca/en/sharp-gp2y0d805z0f-ir-range-sensor.html The Robotshop has lots to choose from.

#2  

@bhouston, Thank you, I was looking at them this mornig be for getting called to work. I seen the digital ir sensor about the same size but could not see the analog ir sensor. This is perfect, I am thinking at mounting it by the middle finger were the slot is on top of the hand under the topserface6 cover goes. I think this would be a good spot.

Thanks again for the link and the tip. Cheers, merne

#3  

I have almost completed the right hand and forearm, I am going to use the wires in the finger tips for something else, waiting on parts. I am building this inmoov much slower then my first inmoov to make sure everything is working correctly without any breakage. I will have a video on the right hand soon.

User-inserted image

User-inserted image

User-inserted image

#4  

I went for lights in the fingertips instead of the pressure sensors. I'm going to do that in the palm of the hand with an infrared that will close the hand when object is close.

Short video of the LED Diodes.

#5  

I forgot to post the video link https://www.youtube.com/watch?v=twudDHz-ILQ&feature=youtu.be

#6  

Looking good but your video link doesn't work

#7  

@bhouston, try it now, it was marked private.

#8  

Yup, it works now. Looks good

#10  

Thanks bhouston and richard.

#11  

I've been working on my second Inmoov off and on for many months now. I'm taking my time as my last Inmoov was build in a hurry and after retrofitting my first inmoov with bhouston's articulating stomach, I forgot the latch down its stomach and he fell and hit the ground and broke many many parts, lol. Plus the first inmoov had too many components that were really not functioning Well.

So my second inmoov I'm gonna follow the kiss rule and take my time testing everything many times before putting it together .

It's left hand i'm still working on I'm trying the flexy-hand but still working on it so it's not in the picture.

Oh, forgot I got my replacement ezb camera the other day and got it back in the head.

Anyway just an update.

User-inserted image

User-inserted image

User-inserted image

#12  

Mike, Your robot is looking great, sounds like you have a plan, and it is moving forward. Thanks for sharing an update. Steve S

#13  

Thanks Steve s. It's going to be a few more months before I start writing the scripts.

#14  

Just a few neck head movement using Drupp's modified paroloma nech. I found if you don't bring the neck to center is can look up the neck joints.

#15  

A few more pictures. I would like to find a good nerf launcher to put on the small paroloma neck on Inmoov's shoulder.

I broke the left front chest when I install the microphone, someday I will fix it. I was going to sand, sand and do more sanding but I wanted it to look natural as it comes out of the 3-D printer to show that you don't really have to do any work after he gets done printing .

User-inserted image

User-inserted image

User-inserted image

PRO
USA
#16  

Mike, Awesome Inmoov build, Great job. I see yours does not have the opening for the Kinects. I do not plan to use a Kinects in my build but have been unable to find that substitute part. Can you point me in the right direction to locate that part and or parts?

Thank you Richard Z

#17  

Thanks edited***ezb, ***. This should have said, thanks RZ but my auto correct changed it .

I used this to fill in the Kinect. https://www.thingiverse.com/thing:1538320

There are a lot of Derivatives for Inmoov from Gael's web site. https://www.thingiverse.com/Gael_Langevin/collections/inmoov-parts-and-derivatives

Hope this helps.

PRO
USA
#18  

Thanks Mike, That link shows lots more then just searching Inmoov on thingiverse.

Looking thru it all now. Hoping to find an ezb camera mount for the eye.

Thanks again.

Will post some pictures when I get a little farther along on my build.

Richard Z

#19  

@RZ, I never found a ezb camera mount for the eyes. I had to us a dremel and modified it for the cameras to fit I believe Houston also did this.

#20  

Looks great Mike! I like the flashlight attachment and the other sensors that you have added. I might have to borrow some of those ideas.

#21  

Thanks David. The flash light is just for looks right now, I'm currently thinking of a nerf shooter or a flash light that can be control from ezb. leaning to the flash light for dark lighting.

The ping sensor in front and back are going to be use to keep Inmoov from reasing the arms from hitting anything.

Thx,

#22  

Really interesting build and it looks great. I especially like that back piece. Makes me want to get back to mine.

I hear you about the gun on the shoulder. I was thinking the same. Something like predator :D

Maybe this could work.

www.thingiverse.com/thing:953753

#23  

@perry_s, thanks. Your link is pretty cool, it looks like it might put an eye out. Lol. I like the flash light the more I think on it. This way if lighting is to low the robit can turn it on. On the other hand I think it would be bad hunny bunny to have a good launcher of course mines the putting out an eye.

#24  

I would be cool to have that gun or the flashlight turn the same as the head when the camera is tracking something.

United Kingdom
#25  

Mike it looks great, I especially like the neck, I to have built the Drupp's modified paroloma neck as a stand alone unit, but haven't put it on my Inmoov as there was quite a lot of strip down and replaced parts to make it fit. I did take its head off and put it on the modified neck unit, but I found it quite "springy" ( can't think of another word to use ) when it moves in certain directions? Yours in the video looks OK and solid when it moves. But you have inspired me to look at it again and might look at putting in on my InMoov, once I have sorted out redo its Power configuration.

Cheers Chris.

#26  

Thanks Cem. It took me a while to get it right and using the servo speed commands to slow the neck movements helped a lot. Otherwise the head bounced around while moving. Good luck, BTY, I use the MG996R servos.

United Kingdom
#27  

Thanks Mike, I've used the MG996R servos, but thinking of changing them to HDD servos, when I get back to it!

Cheers Chris.

#28  

So I've got the mouth and talk servo synced together I believe. Here are 2 videos for anyone's feedback.

Also having fun with the mini Pariloma neck on the Robit's shoulder. Two heads are better than one, right? Videos to come later.

https://youtu.be/tKNsueO0FSQ

https://youtu.be/nfRBLqMw350

United Kingdom
#29  

Mike, I love the quote from 'iRobot' :)

#30  

This has been an on then off then on again relationship. I keep adding or changing my Inmoov. And when I start scripting or new auto-position it seems I have to remember where I left off. Lol

i'm using the same base but want to eventually print the legs, not to walk which really don't think it will ever happen. But maybe motor wheels in the feet?

I'm waiting for cooler weather as my 3D printr is in the garage, to hot to print then I'm going to start on bhouston and Perry_s redesigned flix Inmoov hands.

Picture for now maybe one day some videos.

User-inserted image

#31  

@merne Good looking inMoov. You did well hiding the the typical rats nest of wiring that inmoov's usually have...

#32  

Totally agree on that. Clean wire routing really kicks it off. I need to get on that with mine.

#33  

Thanks Richard R. I need to figure out a video but I my never top your Bartender.

Thanks Perry_s.

#34  

Inmoov Robit, as my wife calls it has lights. https://youtu.be/QvnVU-Czf4A