
milanmark
Well I was one of the lucky ones hearing about the kit just days before it first went on sale! On Nov. 11th I ordered mine!
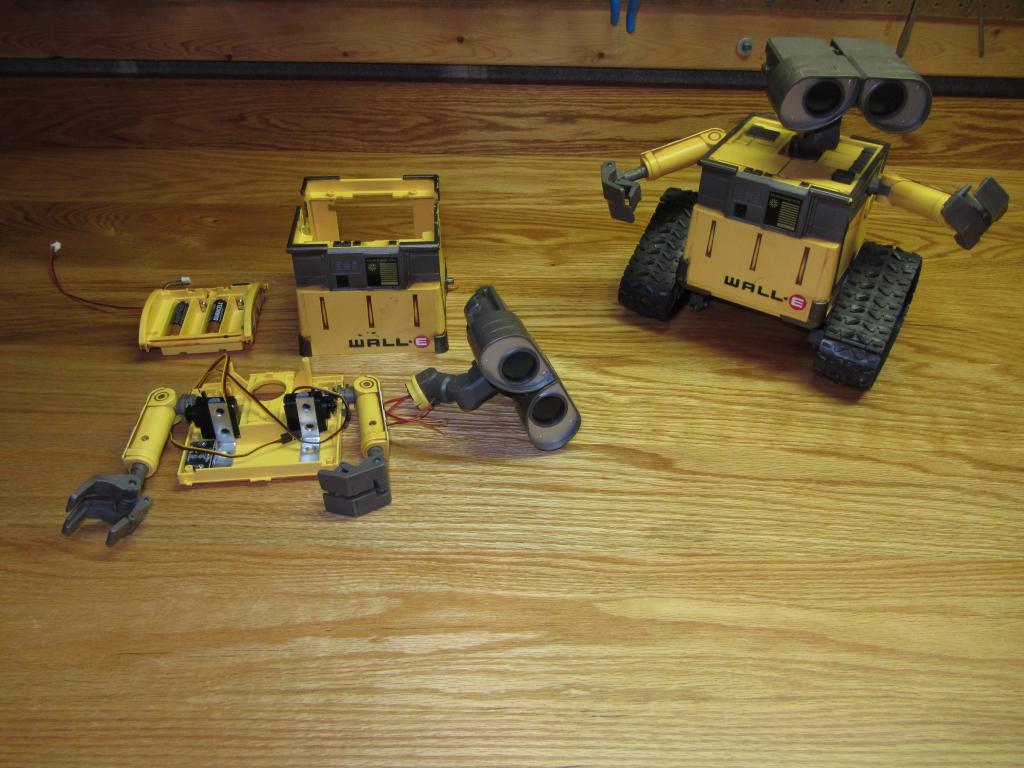
I received the kit and started playing with servos etc. I already had 2 Wall-E U Commands, made one good one between the 2 ( to work as originally sold) and tore the other down.... was trying out ideas and buying parts some that took 3 weeks to get to me so I haven't made much progress! In the meantime I decided to clean up my work area, got rid of some old power tools and some junk, found a place for everything and everything in it's place! Then I decided to replace my workbench top. I have an oak workbench that I had made a long time ago... the top got messed up and replaced by 2x10 construction boards, cracks between boards, not flat across the width and parts would roll off of the back...
Made a one piece oak top with a "back splash" in back. Nice!
I have figured out some things for my Wall-E have the parts and can get rolling now!
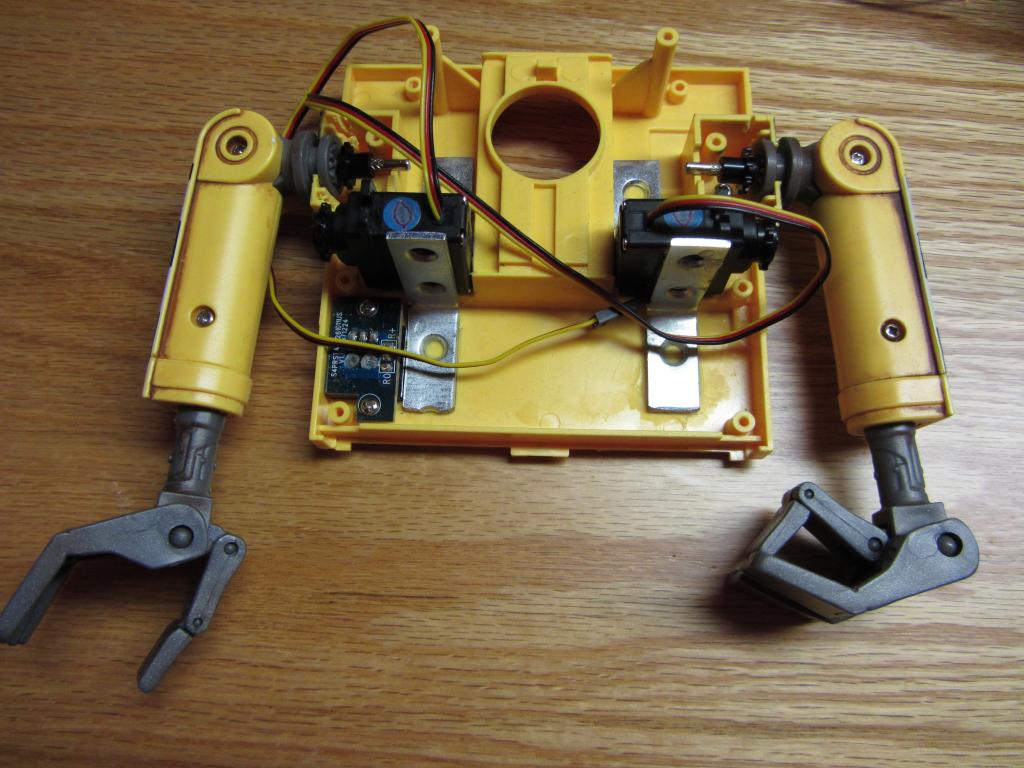
Already have the track servos mounted and the arms ready for assembly, using a modification of the gear and chain idea...
Will do the head next, have the parts just need to finalize my plan! What I really like about the EZ-B kit is that I can hook up parts and play with the software, helps me decide how I want to do things and learn at the same time!
Will post more Wall-E pics as I get further along!

Hey man , there's three ways to etch , one is you have a vinyl decal made and peel away just the area you etch , put some acetone in spray bottle and mist. The acetone frosts the plexi. Then you peel away your vinyl mask. Let this try and wash before the next step. Remember the iris circle that I said to peel away? Now we need that circle that is the same size as the circle you etched. Mask the etching and one the one camera side also mask the center dot as well. Now pray the remaining unmasked areas with black paint. Finally get a couple LEDs and either mount them towards the edge of the new plexi lenses you made or you can point a couple.from inside of the eyes out towards the etchings. In my experience side lighting with a 5mm on each side works great. If you can't get acetone the vinyl store has simulated etched glass vinyl or you could use sandpaper like.400 grit but acetone looks best.AAA
Is there enough acetone in nail polish remover? (I think it is 20%)
jstarne1: thanks for the info! I can do that, will practice 1st on some scrap pieces...
Ok here is two examples. Sorry about spelling errors on my previous post. You can see how good frosting looks , if I can recommend use thin lines to outline your iris , thicker your lines the brighter it will glow so less is more. And remember lighting from the edge with a led in each side just like in these pics
Awesome! Thanks! I'll be playing with this tomorrow! Thanks again for all of your help, this solves a major problem for me as I did not want the camera to be obnoxiously obvious! And I am learning a new technique! No prob with spelling errors... I can spell great but can't type! Results the same.. Who cares as long as the message gets thru?
@thetechguru no I don't believe , acetone levels are really low in nail polish remover. You will want to get straight acetone or closest possible mix. A small plastic spray bottle that are like 3 oz in the air travel section work well for misting. Don't use much or you will eat through your vinyl decal. Once its frosted over rinse it with water and follow the other steps. Agian lots if people get 400 or 600 grit dip it in water and wetsand to frost it but the acetone physically eats into and texures acrylic which catches light better when lit from the side. You can sandblast it too but seriously who has a sandblast booth to practice with? That's why acetone method is what pros use.