
milanmark
What I Have Been Doing Since I Received My Ez-B Kit!
Well I was one of the lucky ones hearing about the kit just days before it first went on sale! On Nov. 11th I ordered mine!
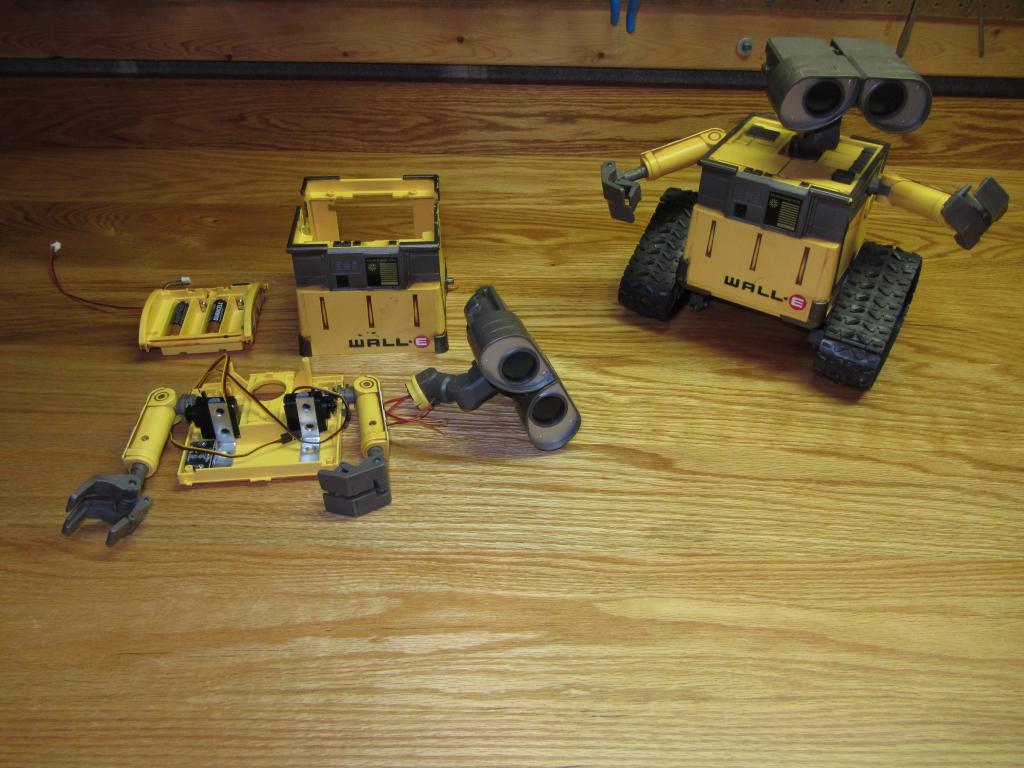
I received the kit and started playing with servos etc. I already had 2 Wall-E U Commands, made one good one between the 2 ( to work as originally sold) and tore the other down.... was trying out ideas and buying parts some that took 3 weeks to get to me so I haven't made much progress! In the meantime I decided to clean up my work area, got rid of some old power tools and some junk, found a place for everything and everything in it's place! Then I decided to replace my workbench top. I have an oak workbench that I had made a long time ago... the top got messed up and replaced by 2x10 construction boards, cracks between boards, not flat across the width and parts would roll off of the back...
Made a one piece oak top with a "back splash" in back. Nice!
I have figured out some things for my Wall-E have the parts and can get rolling now!
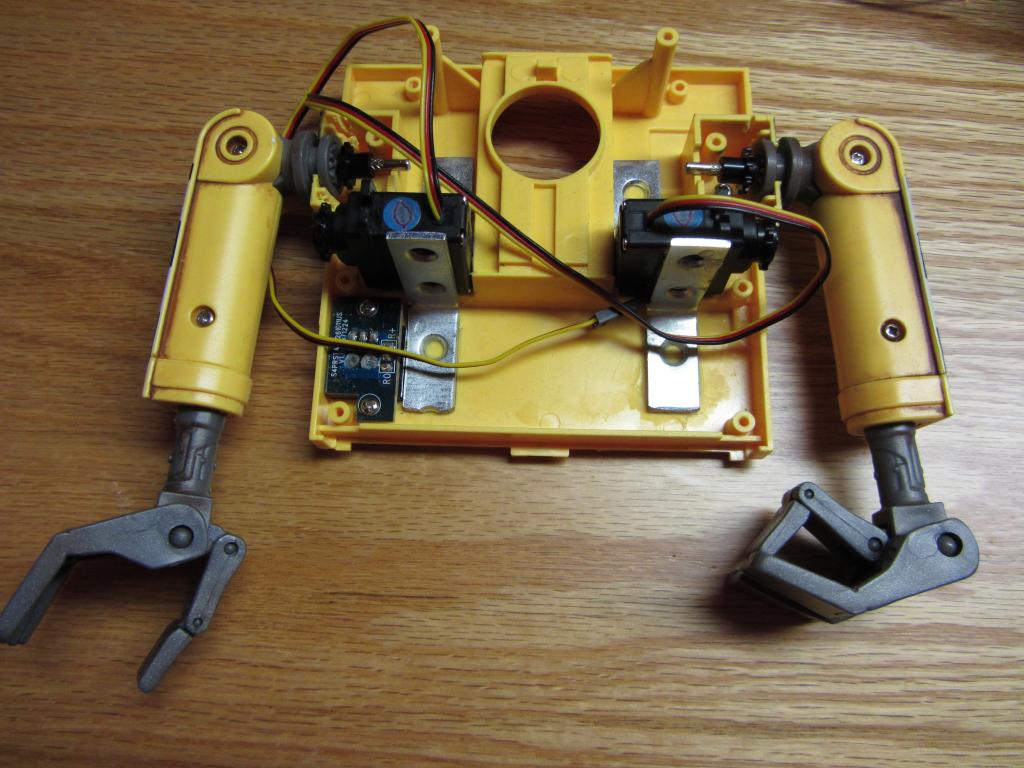
Already have the track servos mounted and the arms ready for assembly, using a modification of the gear and chain idea...
Will do the head next, have the parts just need to finalize my plan! What I really like about the EZ-B kit is that I can hook up parts and play with the software, helps me decide how I want to do things and learn at the same time!
Will post more Wall-E pics as I get further along!

Oops forgot the workbench pic!
nice
I'm liking that workbench
Also interested in your Wall-E U command mods I've got one which I have'nt started on yet
Is have robot guts all over the place , lol khudos for keeping it clean.
Thanks for the comments! Another week and then I will be in Wall-E big time! My goal is to minimize the amount I cut away andf modify... the arms I did minimal Dremmelling and you won't see anything external (IF it works!). The head is harder and I am working on that plan now... The eyes I don't want to change at all so where I put the camera is a big question right now!
For those that are just starting... the only mistake I made so far was I didn't save everything when I disassembled Wall-E! I kept 90% but decided that some things I would not use... and I threw away the wiring harness for the board that drives the speaker to use the onboard sounds... not a biggy but I reccomend save everything till you are complete with your modification... Just sayin'!
Well for movie accuracy the eyes don't glow blue , but if you still want them to glow get plexiglass and etch in a circle a little larger than the camera , do a lens for the otherside matching , then take tape and cover the center of the circle and back spray black. Then remove tape, for the second eye its not needed to tape off the center for a camera. You can now light blue with a led from the inside if each eye but on the eye with the camera the center will be clear for you to mount your camera directly agianst it from the inside. So then you can have a camera and eyes still glow blue except a dot in the center. If you need drawings or step by step that's cool, plexi, paint, and lighting etchings in plexi with LEDs is very common in custom car installs.
@jstarne1: Wow! Great advice! Read it 4 times sounds good just not sure how to do, will read again in the am, I think I am gettin' it!
BTW, did you work at Rawsonville?
I really like this idea to hide the camera but not gettin' it on how to do the etching... googled it several times today but when I get a piece of plexiglass in front of me I have no idea what to do! Help! jstarne1 or anyone else! Thanks!