jstarne1
USA
Asked
— Edited
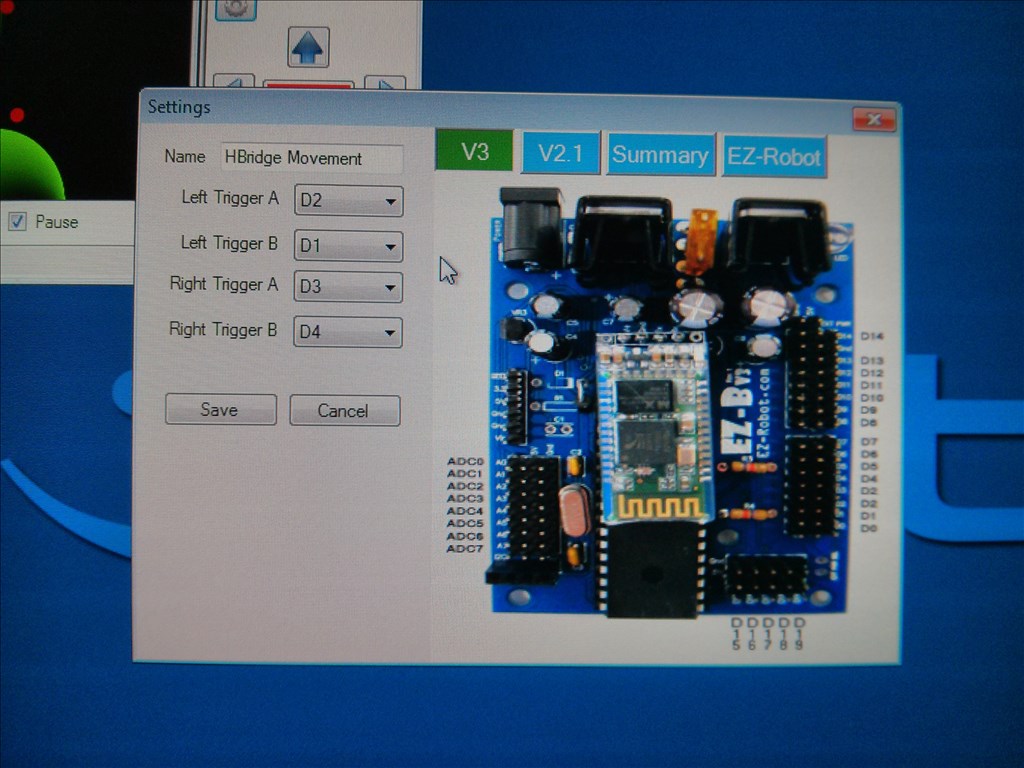
OK so I get to ask a question I have tried several variations and I have forward and reverse but left and right are inversed. I click right turn it turns left. Here's my arrangement can someone tell me what to switch so forward and reverse are still correct as well as right and left?


H-Bridge configuration truth tables are on this topic if that's of any help.
Read through this without reading the last part and see if you can figure out where you went wrong before I finish explaining it
From the topic I linked to;
So to use that on the robot, setting digital to on (1) and off (0) as follows
So look at the truth table. Look at what you can change to keep the highs and lows on Forward and Reverse the same. It may be easier if you looked at it like this. This is what you currently have;
Now if Left turns right and right turns left but forward is OK and reverse is OK. What can change for D2 and D3 to remain high and D1 and D4 low on forward, D2 and D3 to remain low and D1 and D4 high on reverse but change the left and right turn highs and lows? In the above table you can only change the D4, D3, D1 and D2 parts, the highs and lows for the functions must stay the same, they are fixed.
You need to swap left and right motors over so that when turning left the right motor moves reverse and the left moves in forwards. Turning left the right motor moves forwards and the left moves reverse.
We know forward and reverse are OK so that means the right and left motors left hand columns must be either D4 or D1. Reverse is OK too so the right and left motors right hand columns must be D3 or D2. Left and right are backwards so we know that we have to change something. If the right and left motors have the correct polarity it can only mean one thing can change.
Swap over both sides in their entirety. Change LTA to RTA and vice versa and LTB to RTB and vice versa.
OH ! I just have the right motor in the left output but the configuration only works one way. OK I will swap the left and right. I thought of doing that but after wiring all that stuff for three hours I kinda wanted to be done messing with wires for the night. In the tutorial it says it doesn't matter I could just change the configuration in ARC. OK I will swap and test when I get home man!
I may have over complicated the answer... Leave the wires, change the config.
Change from what you have above to; Left Trigger A = D3 Left Trigger B = D4 Right Trigger A = D2 Right Trigger B = D1
Alright I will adjust this soon as home.
yah you can also use a custom Movement Panel and do like what rich has shown and put the forward ro reverse pins to on using set(D1,on) etc inside the movement panel. I found this better because i could add additional code when moving forward, etc. and to add another H-Bridge would be supper easy (on the same chasis such as rover 5 where they both do the same thing) just do the same thing as before but for new ports add put them in the code of the custom movement panels. Also by doing it in custom Movement Panel you can control the PWM while pressing arrow keys, handing if you want to use if statements.
Ex: my L298N code consists of moving left by the right side moving forward and left side moving back, but i can also use q and e (u could use a and d) to turn by lowering the PWM on one side to turn, but if the PWM is at 0 then it prints "you must be driving for use". So an if statements sees if it is at 100 PWM or 0 PWM which tells if it is moving or not.
CustomMovementPanelforL298N.EZB
The file is also now on the cloud so I hope it can help you. The ports are different from yours but you could easily change your wiring or change the ports on the program.
You could do that with the 4 wire h-bridge control panel too, just have a script that loops with;
Alright cool . Thank you ! That fixed the direction problem I'm closing this thread.