Asked — Edited

Poject Magnus Picture Update

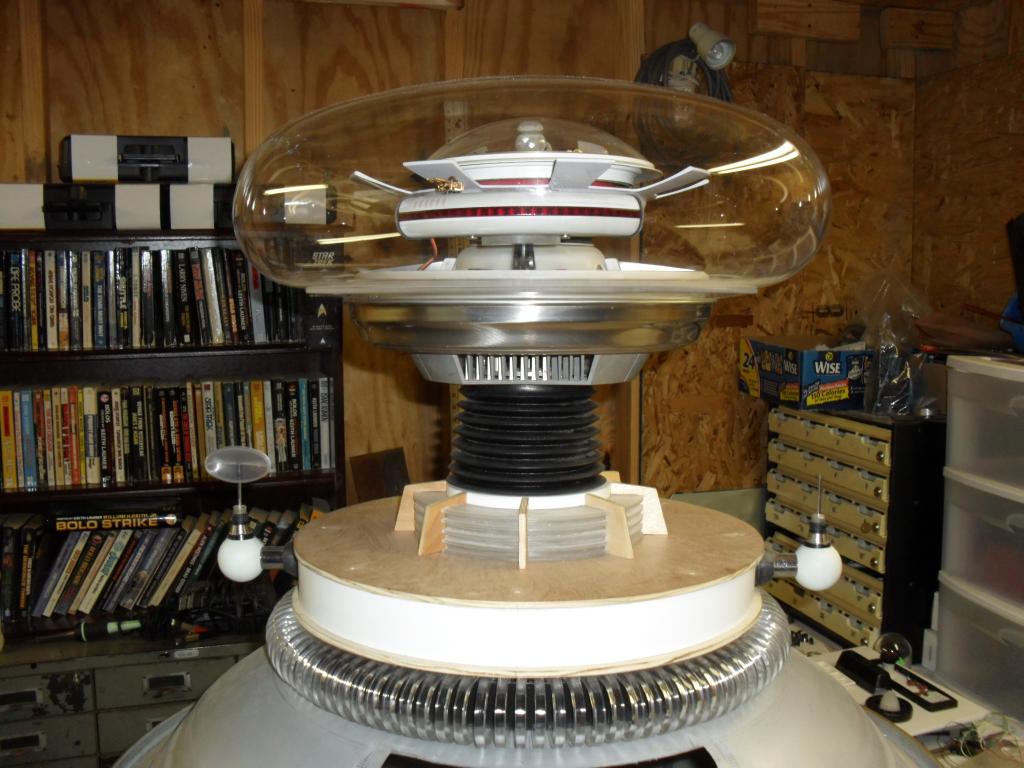
Here are some pictures of his head and neck areas. Still a lot of painting and finishing to be done.

User-inserted image Similar in appearance to the Lost in Space Robot B9 but definitely one of a kind.

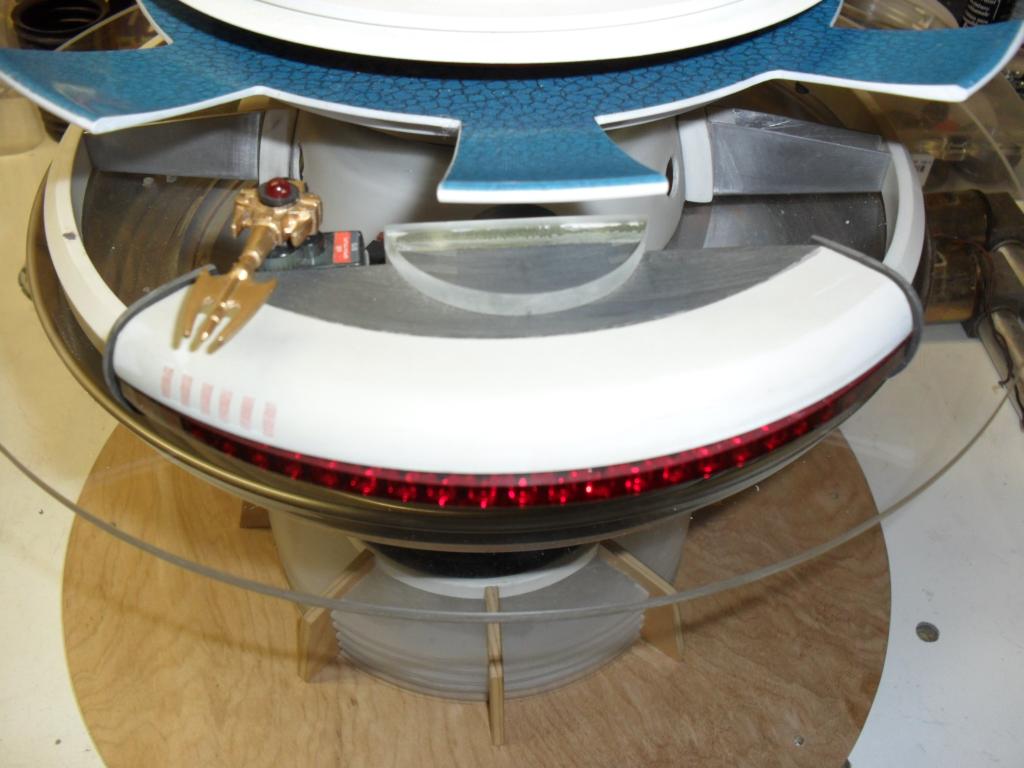
Close up of the collar, radar section, neck boot, and one ear spinner.

User-inserted image

24 L.E.D. eye think Battle Star Galactica Cylon eye

User-inserted image

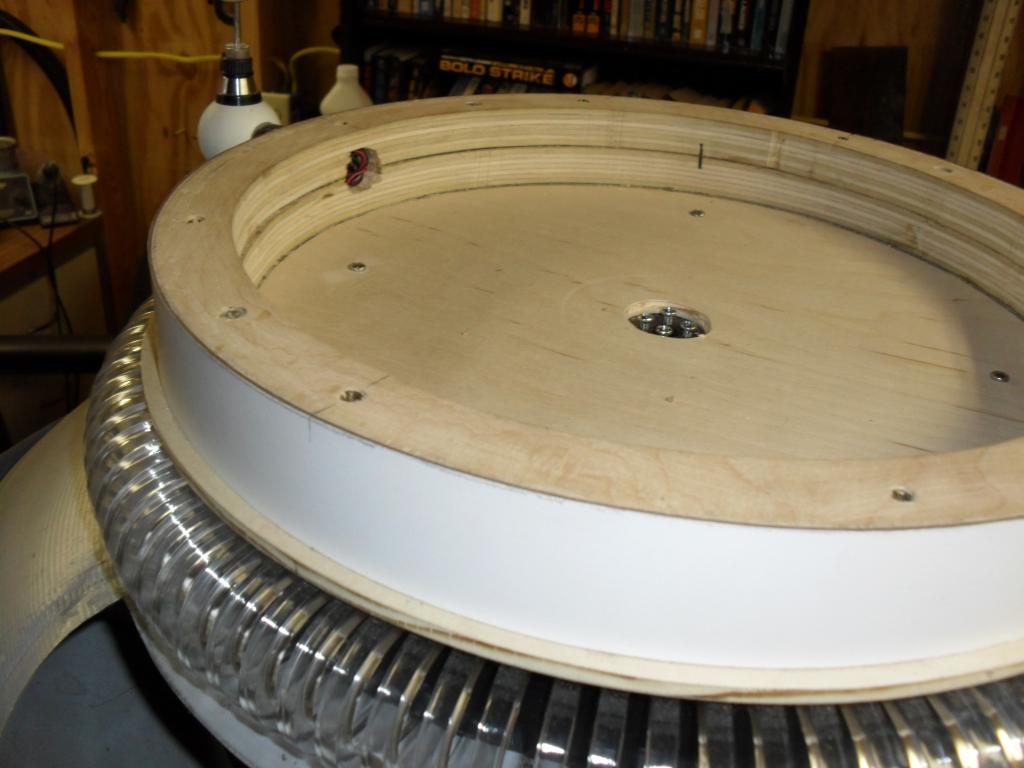
The Brain Area with Rotating Crown Not finished yet. Crown will be sent out to be chromed. Brain lobes and temple lobes have multiple LED's mounted inside that modulate with different colors. An inner Plexiglass dome (not shown) will cover the brain area. All this assembly rotates with the crown via homemade slip rings that send power to the brain area. User-inserted image

User-inserted image

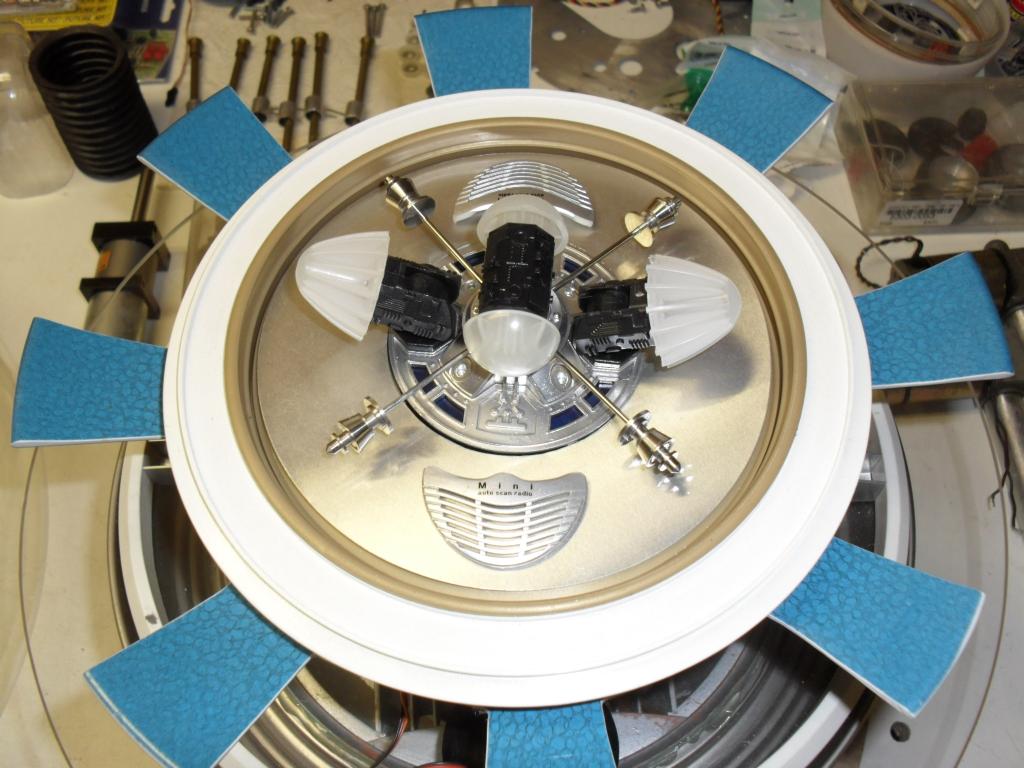
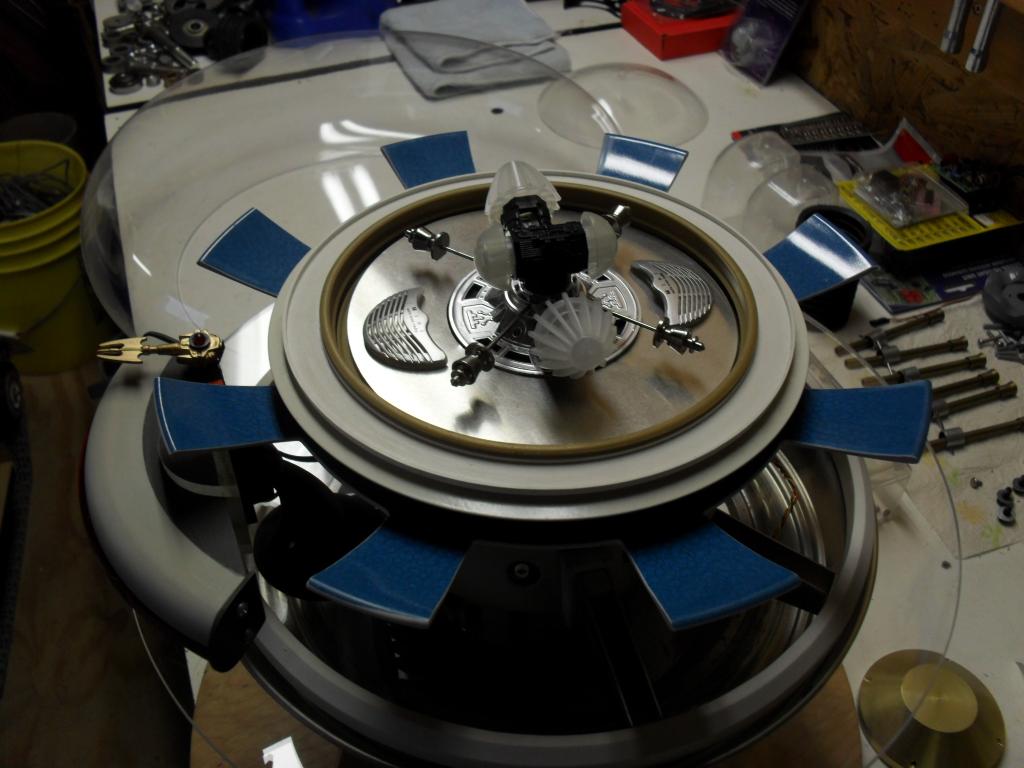
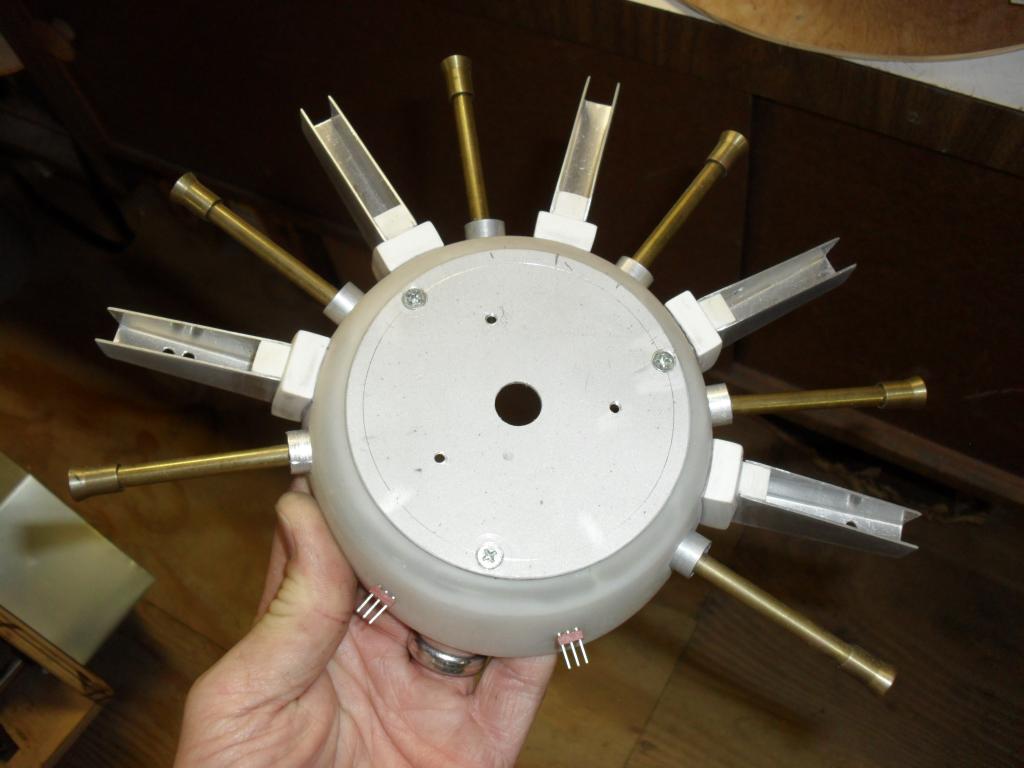
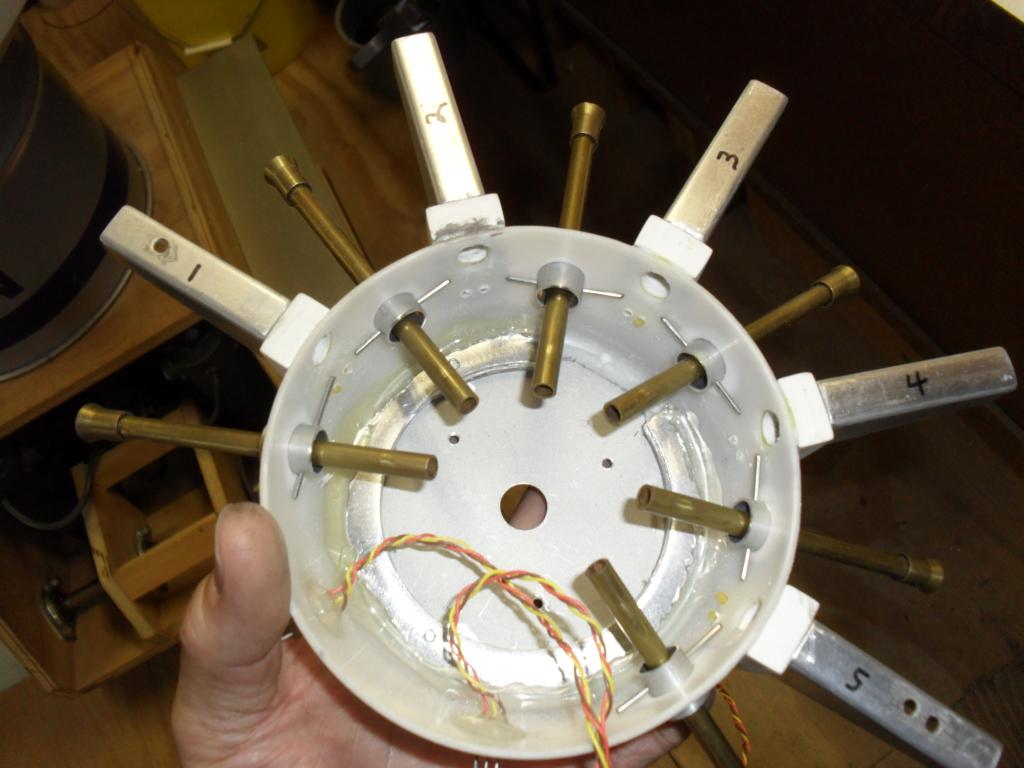
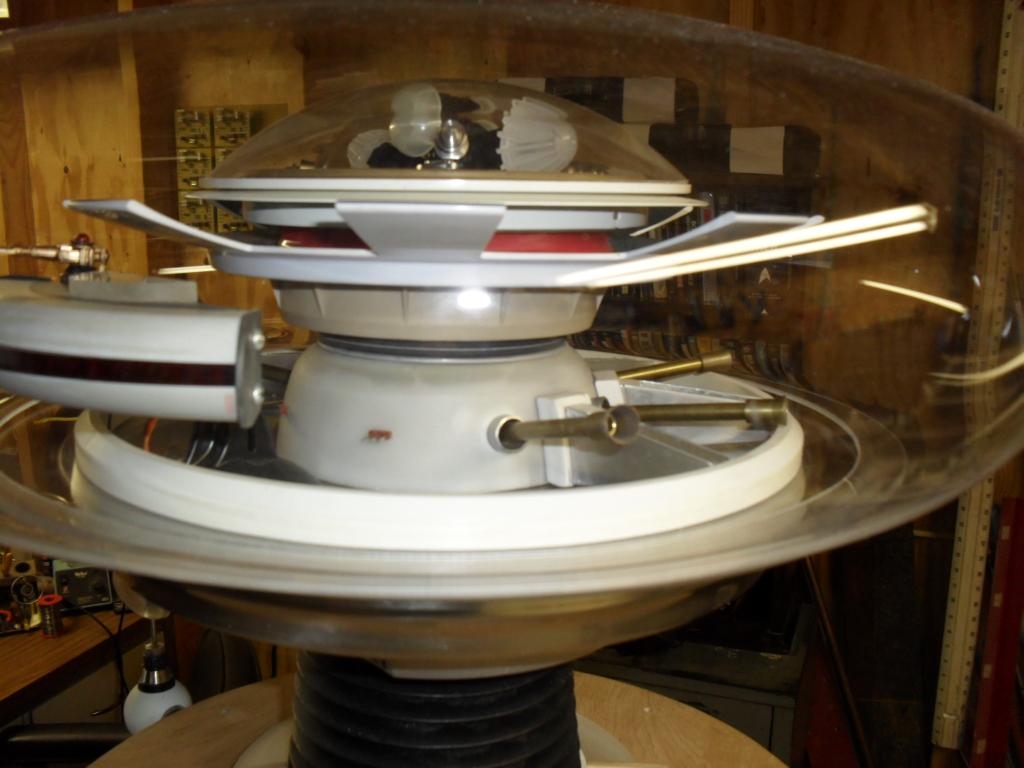
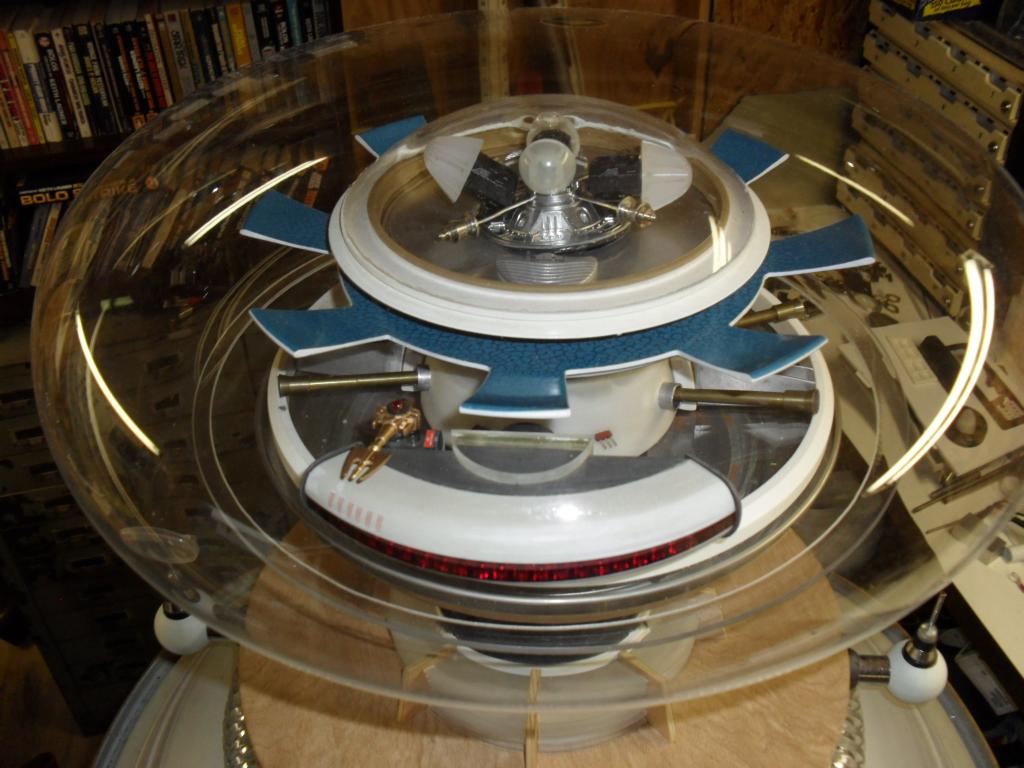
Sensor rods (in name only) and power flow ramps. Each rod moves up and down via a hidden motor driven cam. This motor also turns the crown. Each brass rod will have a round red bulb on the end of it. The funnel shapes on the end of each brass rod were made from rifle bullet shells.

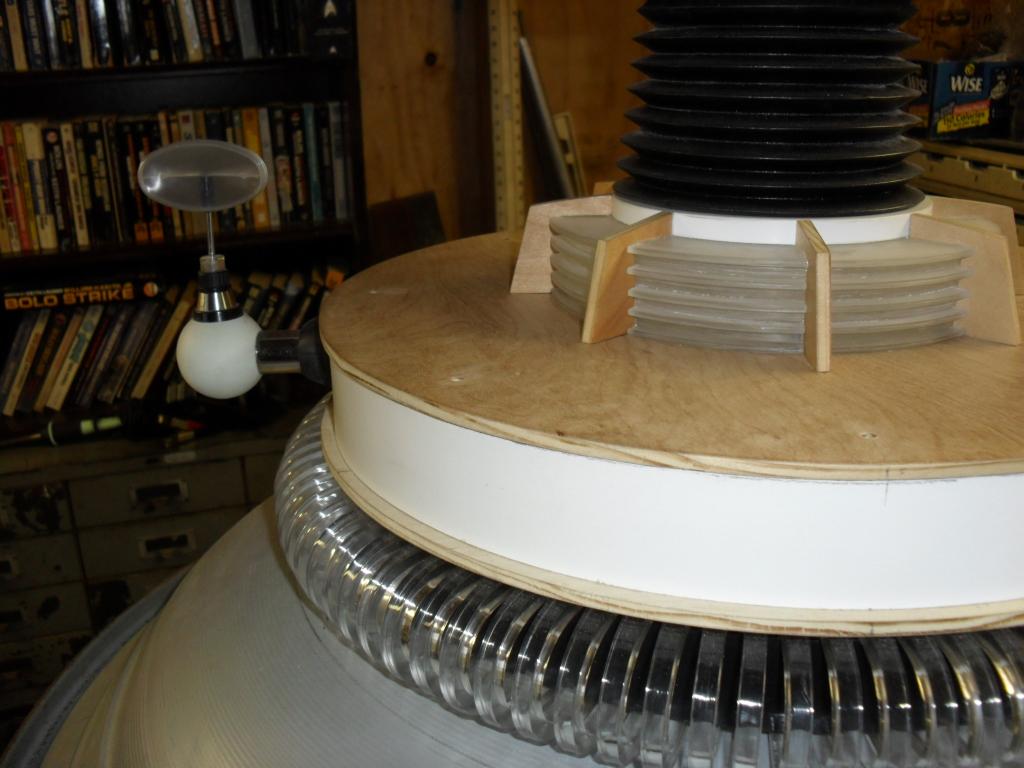
Each of the five power flow ramps will have a blue 20 L.E.D. bar graph that strobes inward toward the brain stem. The brain stem is made up of 5 Plexiglass discs that light up in sequence from bottom to top (using 50 blue L.E.D.'s. Ten for each disc). This lighting effect will give it the appearance of power flowing into the brain stem.

User-inserted image

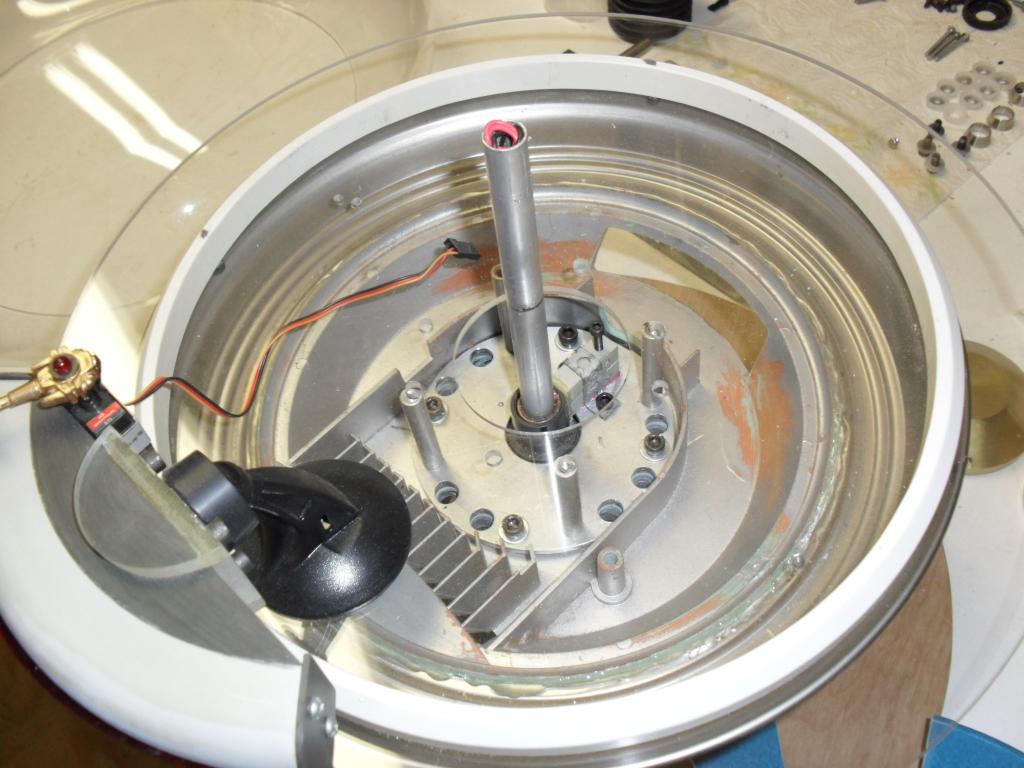
Voice Box Area This area houses the slip rings and the eight voice light L.E.D.'s that blink in time with his voice.

User-inserted image

User-inserted image Inside the Radar Section It's called the radar section because that was what it was called on the B9 Robot from the Lost in Space TV show. (No real radar...I wish ha ha...) Lots of room for circuits in here.

User-inserted image

More close ups

User-inserted image

User-inserted image


ARC Pro

Upgrade to ARC Pro

ARC Pro will give you immediate updates and new features needed to unleash your robot's potential!

#2  

This is really incredible. Your work is amazing.

#5  

Rgordon,

YOU are doing such a GREAT job. I can not afford it, but if I could, I would hire you to build me one. Of course, I don't have any place to put it. But, years ago I did. I am living this experience through you. And I am enjoying every minute with you. I LOVE THE B-9 Go! Go! Go!

MovieMaker.

#6  

Thank You.... Building robots is therapy for me. With the headaches of everyday life this is where I find my happiness...my fortress of solitude.

"and miles to go before I sleep" sleep

#7  

Pictures of the L.E.D. tree inside the brain stem (5)plexiglass discs-

Plastic Pipe Adapter User-inserted image 
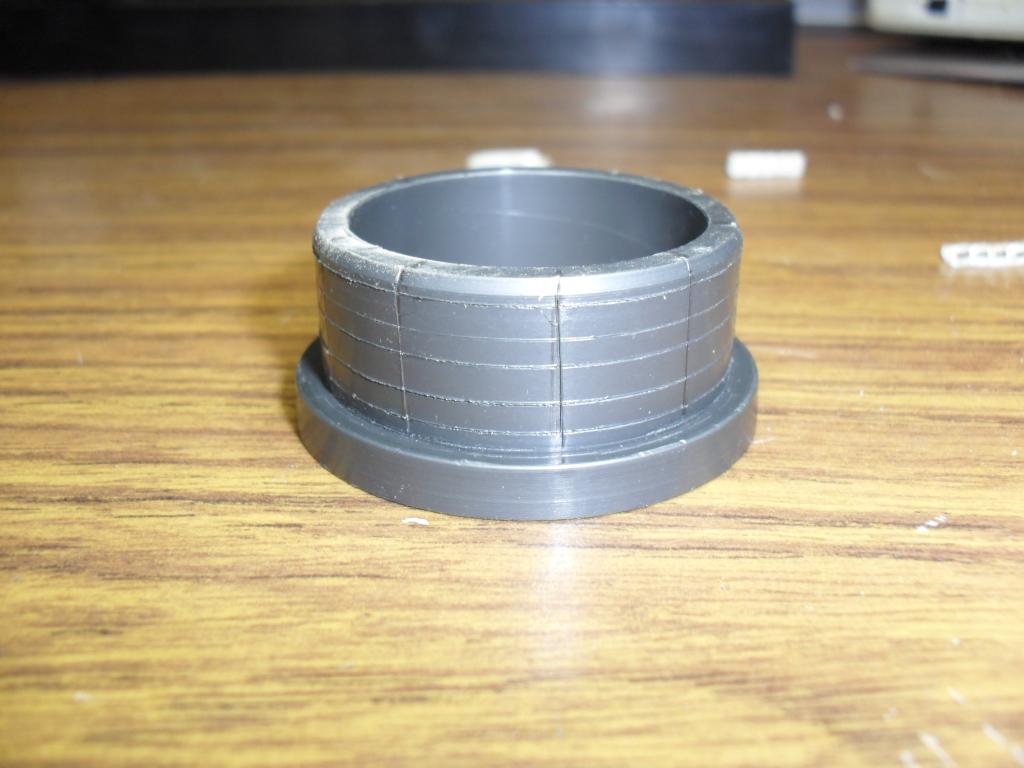
I cut and wrapped thin strips of adheasive backed copper tape around the adapter. User-inserted image

User-inserted image

User-inserted image 
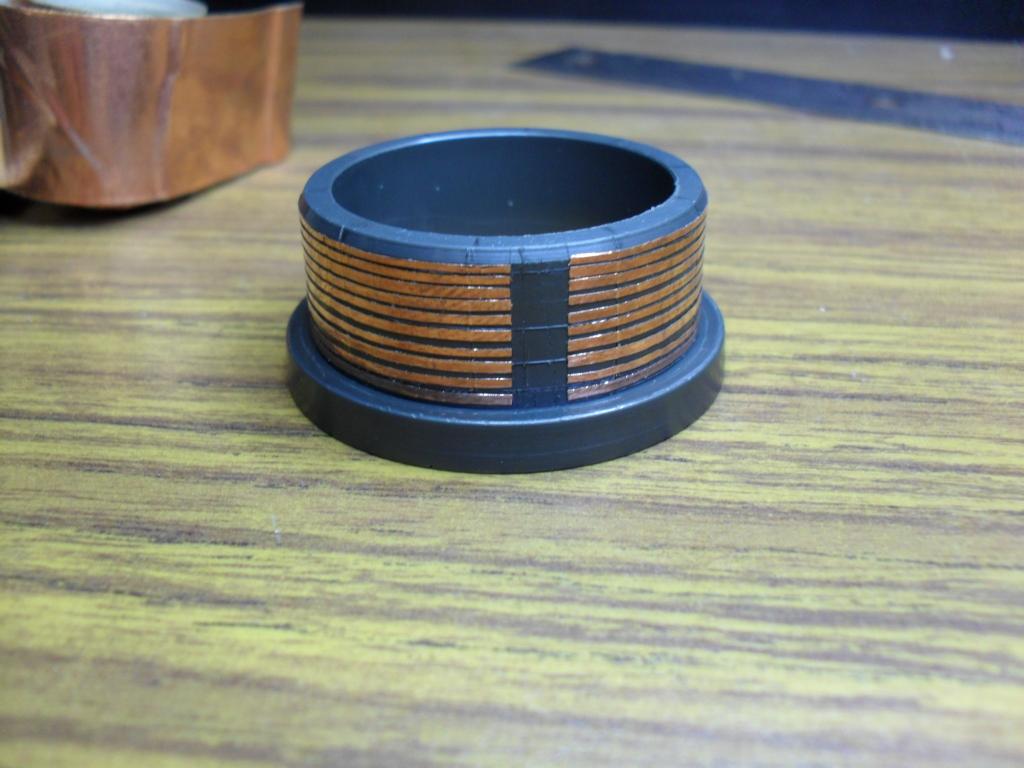
Glued on the high brightness LED's User-inserted image

User-inserted image 
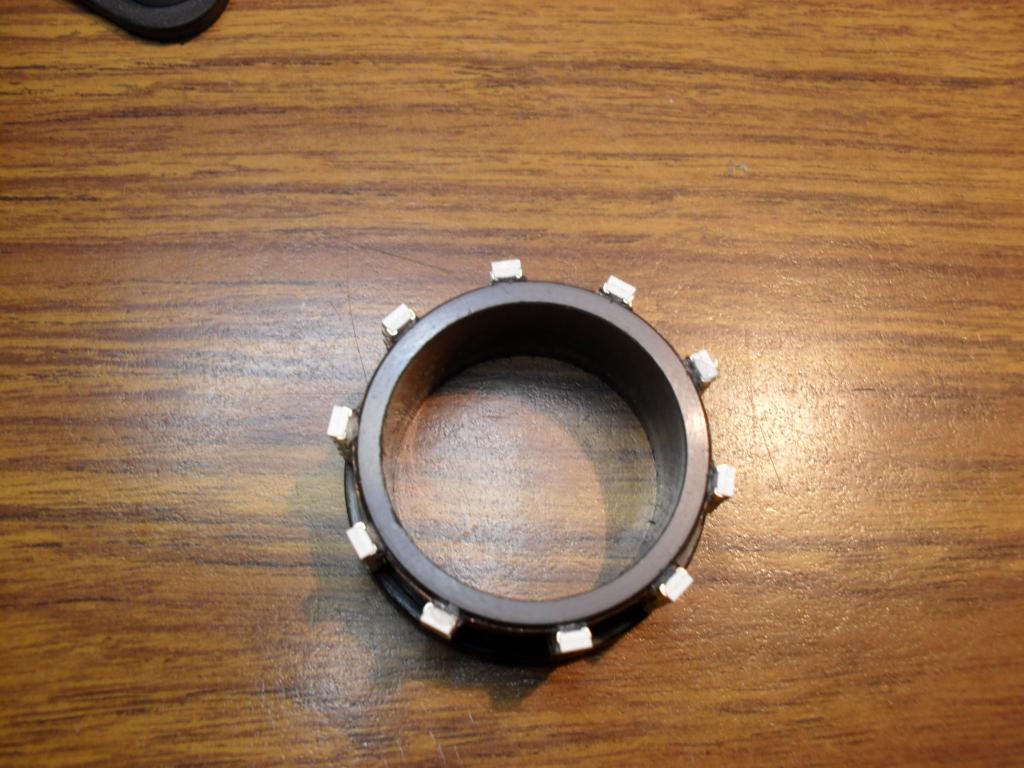
Wired the LED's to the copper strips using conductive glue from ThinkGeek.com Had to use a magnifying glass. My eyesight is not what it use to be tired
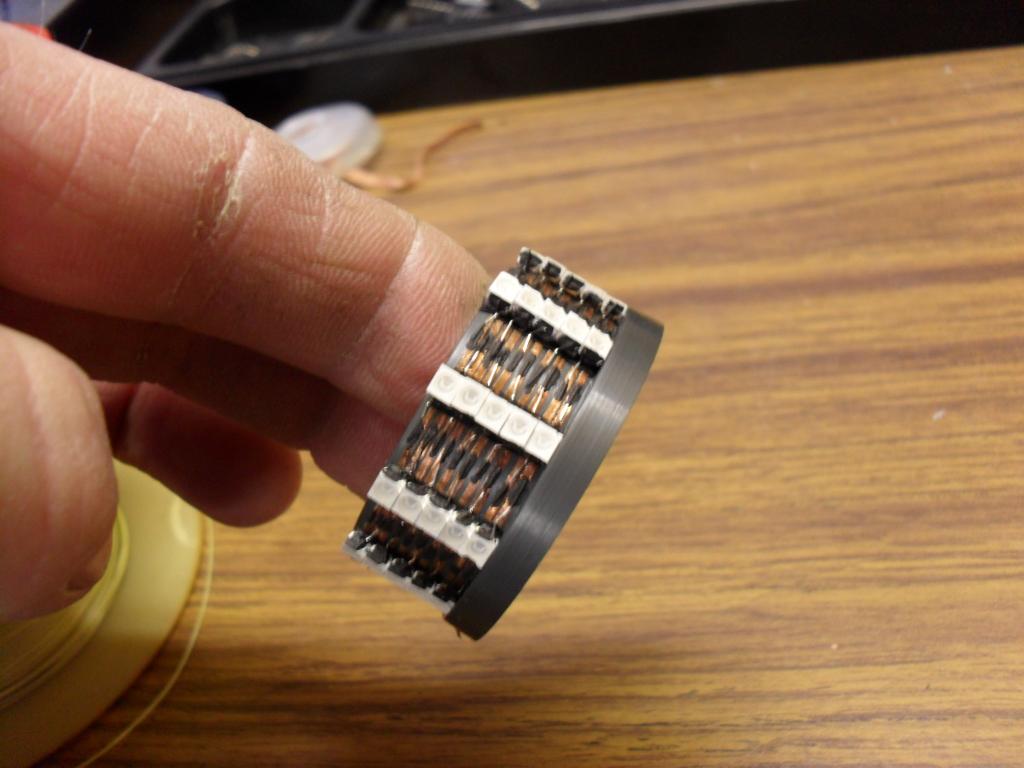
 User-inserted image Solder on wires User-inserted image

Since these pictures were taken I discovered ....much to my dismay... that I needed a resistor hooked in series to each LED due to the way I had it constructed. Had to go back and remove some of the glued on wires and solder in a resistor. 50 resistors and 50 LEDs oh my!sick

Each ring of (10)LED's will light up one ring at the time from bottom to top. This effect plus the 5 groups of ramp LED's (20 per group) strobing inward toward the brain stem discs will make it look like power flowing into the brain.

#9  

Ear Spinners

I used a micro gear-motor from hobbyengineering The shaft is a piece of a radio antenna The first black piece nearest the motor is from a push button. The cone shaped silver piece is part of a stainless steel tubing connector. The black piece with the lens is from a pilot light.

User-inserted image

I used weedeater gas line as a flexible coupling. User-inserted image

I used a ping pong ball as a housing for the motor. User-inserted image

User-inserted image

Used a small aluminum piece I had laying around to set the motor into for easy removal later. User-inserted image

And for my little radar dish I used the throw away part of a deoderant stick LOL! Hey once I fill the back of it with bondo and sand and paint, it will look cool I think :D

User-inserted image

User-inserted image

I will have to do some sound deadening to reduce the noise of the motors. They were louder than I thought.

#10  

That's coming along really, really well. I am very impressed with your handywork.

I have to ask... Is that neck boot what I think it is?

#11  

I know what your thinking... :D

Nope. It is part of a weather boot from an old satellite dish linear actuator. I used to work in the Engineering Department at Channel Master Satellite Systems in Smithfield, NC.

#12  

eek This is serious robot making! I love how you found different items to add detail. It really works!

#13  

Thanks everyone for the kind words.

Yeah, wherever I go I am always looking for robot parts. I see the potential in all kinds of everyday items. I save all kinds of stuff. For instance, the slip rings I made to supply power to the rotating brain and crown area is made from two rings cut from 1/2" copper pipe, a plastic piece from a toy, two motor brushes from an old broken cordless screwdriver, and two ink pen springs.

The 5 ramps that will hold the bar-graph LEDs are made from aluminum channel from fluorescent light fixtures.

The white (soon to be painted) cup that the ramps are glued to are from the bottom of a chemical sample bottle.

The beige colored item just below the crown is from an old emergency light fixture.

Certain items are presently beyond my limited skills such as the bubble for the head. I bought that from Fred Barton "The Robot Man"

Everyone on this forum is an inspiration to me and I appreciate all the advice and help you all provide. I think everyone's robots are cool and the dedication to building them and the attention to detail is astounding.

Never give up. Never lose sight of your dreams! Push it to the limit.

#14  

Magnus is looking awesome...

Samantha

#15  

Thanks Samantha. It's taking forever but it's worth it.