
Breaking Out The Sound From The V4 Ezb
Hi all,
EDIT: the below post has been changed to reflect changes to correct wrong information and show the successes I had with the proper wiring information I received from the fabulous EZ Robot Support team:
I spent some time over the past couple days seeing what I could do with the sound that can be streamed from my computer and played through the EZB V4. First I gotta say I'm no sound engineer or even a weekend garage installer. Just a simple guy trying to stitch this all together and learning along the way. Sound systems are one of my weak points (among a lot of other stuff  )
)
Anyway, I first have to say that the little speaker on the V4 EZB does an amazing job for it's size and what is asked from it. It sounds pretty good but if I relied on it for the voice if my 400 pound B9 robot he'd sound like the Mayor of munchkin town.
My B9 has 4 sound systems. One is stand alone and plays background mechanical sounds through it's own amp and speaker. Two more (EZB V4's streaming sound and a Bluetooth receiver) play through the same amp and speaker and are sorted out by an auto AB switch. They play through the CF Sound system's auto switching input jack and it that can also play it's own sound files. The robot's chest neon is triggered by one of the CF3's speaker outputs.
So, what do I do if I want to Stream my sound files through my B9's main sound system with EZB? The V4 EZB has two little holes on the bottom board marked "Speaker". There you can solder in a couple wires and add another somewhat larger speaker. I first tried to wire in my sound system to these two holes and quickly found I had to also add a ground wire to one of several spots on EZB's grounding grid. I chose the square solder pad marked GND that's right next to the power plug on the bottom board.
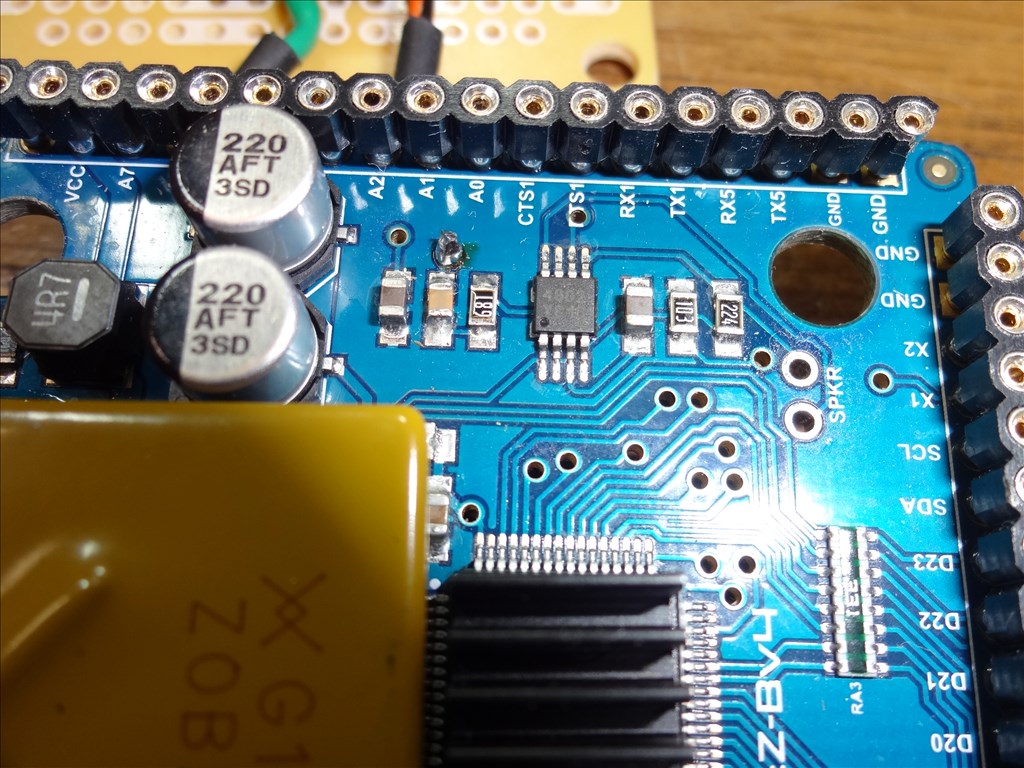
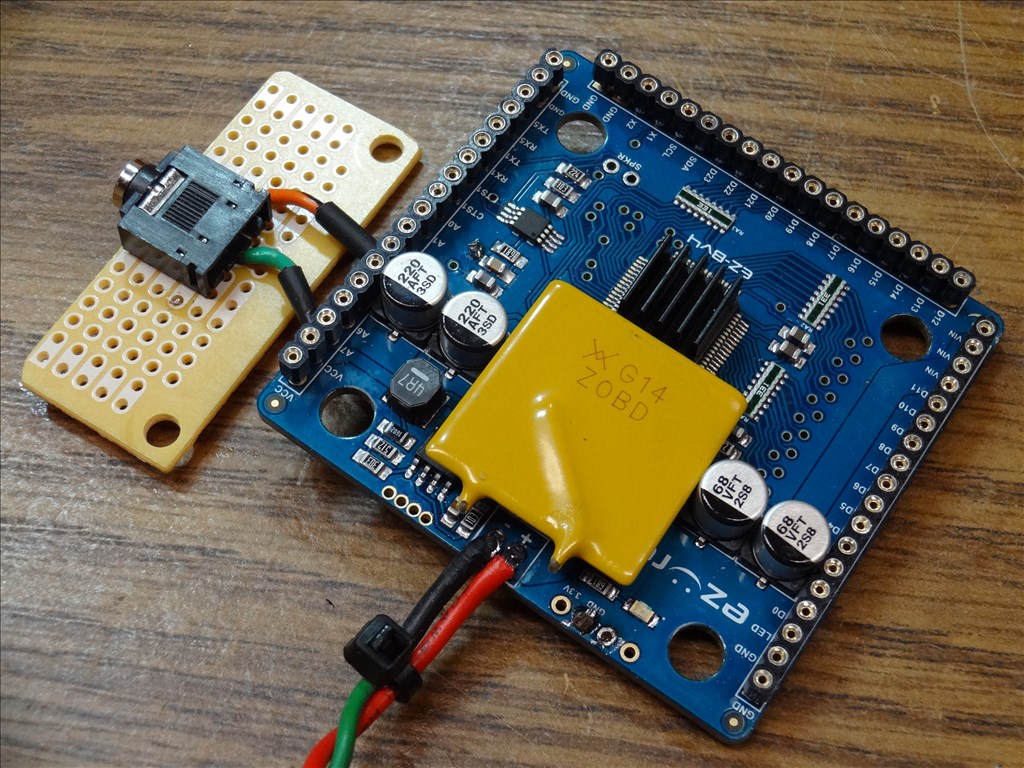
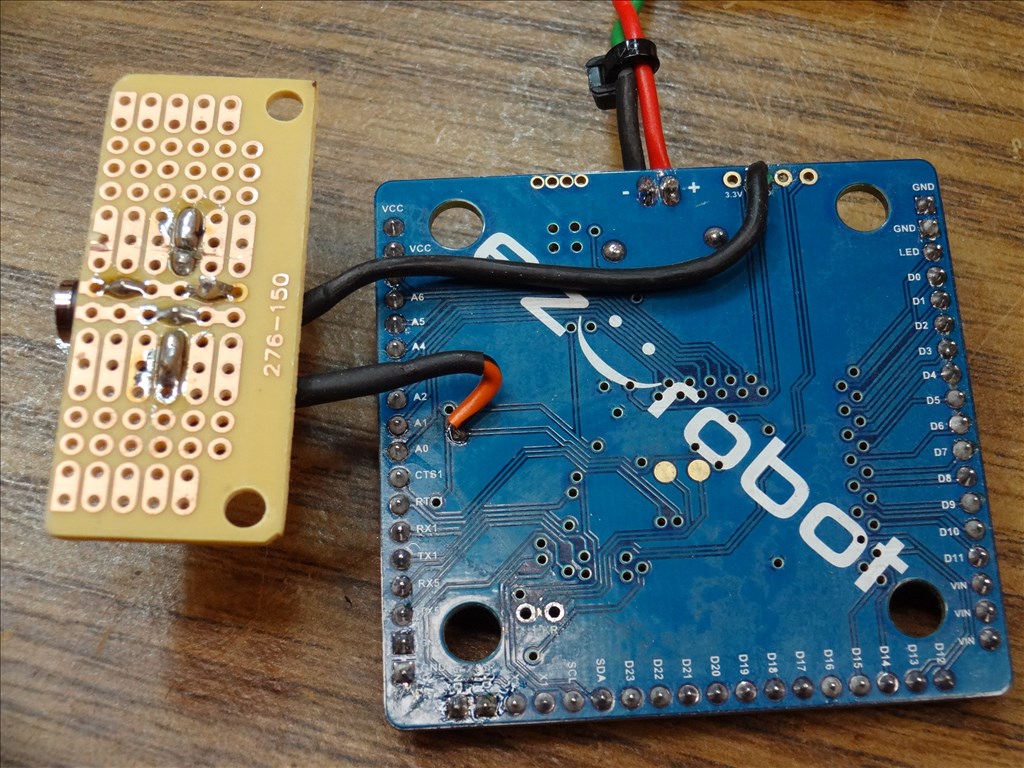
However, when I wired my speaker and amp to these speaker through holes I quickly found that the sound was flat and tinny. EZ Robot support quickly explained that that is because these two breakout holes are "after" the onboard amp. So, If you are using a setup where you wish to use the amplified audio from the EZ-B, then the two solder points marked SPKR on the EZ-B are to be used. To get high quality sound output to my own amp I need to use the provided solder pad that is located before the onboard amp. Jeremie from EZ Robot told me: "We made a small solder point called a via available at the input stage of the amplifier and true high quality audio to be used for inputting into an external amplifier. The via is located to the top right of the amplifier chip when looking at the main board from the top, you should see it no problem from the bottom too as it's the only other through-hole pad that isn't soldered in that area of the board.The connection will be as follows:Via to right (or left) audio channel. GND to GND audio connection"
So I rewired like Jeremie suggested and was amazed at the difference. The sound was crisp, clear and deep. Here's a few pics of the process and a video where I hope you can hear how well this sounds.
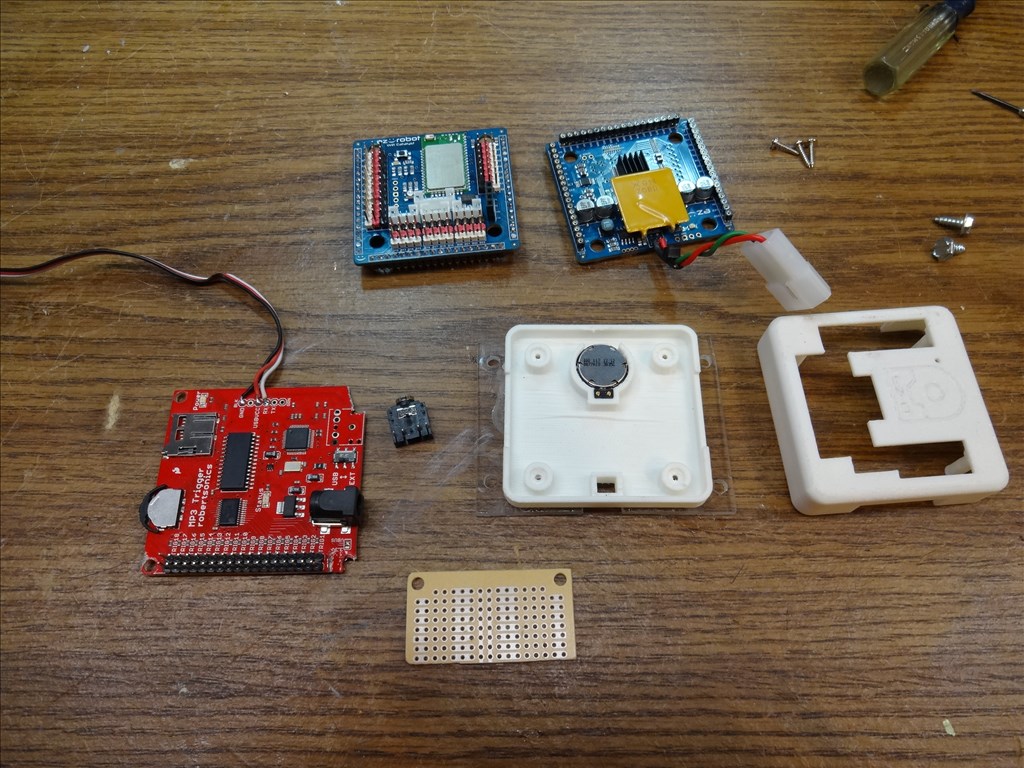
I damaged my MP3 Trigger the other day beyond repair so I de-soldered the 3.5mm Mini Plug and built a breakout board to easily plug into. Here I have everything laid out and ready for assembly:
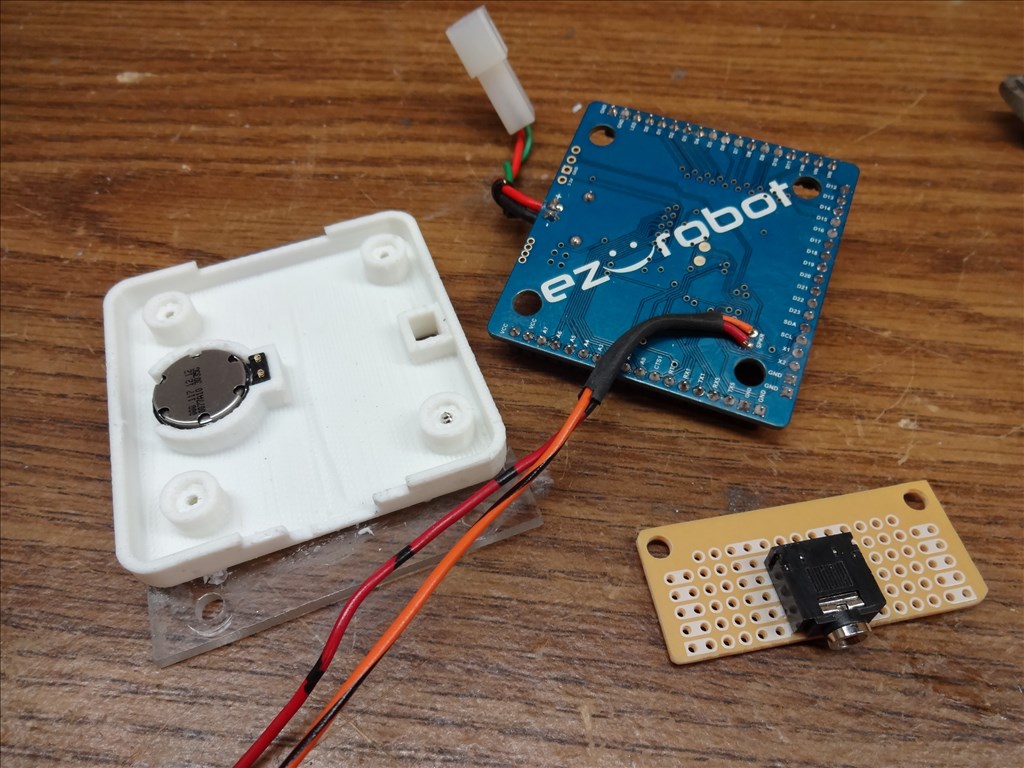
If you just want to add a small un amplified external speaker this is where you solder the wires, Important: adding the black shrink tubing helps to keep the solder joints from digging through the insulation of the wires and a causing short. In this shot you can also see I've removed the little power pin that sticks out the bottom of the board and installed my own Piggy Tail power connector using wire and a Molex connector :
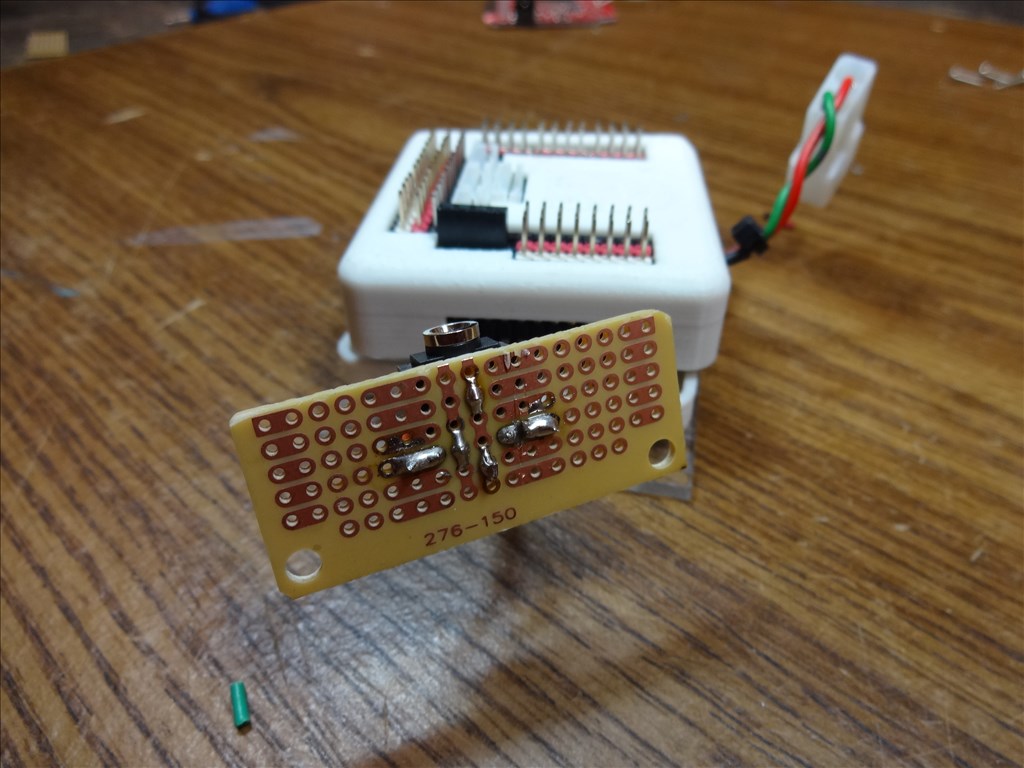
Here's a shot of the solder job under the project board that I bought from Radio Shack and cut to size:
Here are a few pics of the locations I soldered the the wires to "before" the onboard amp:


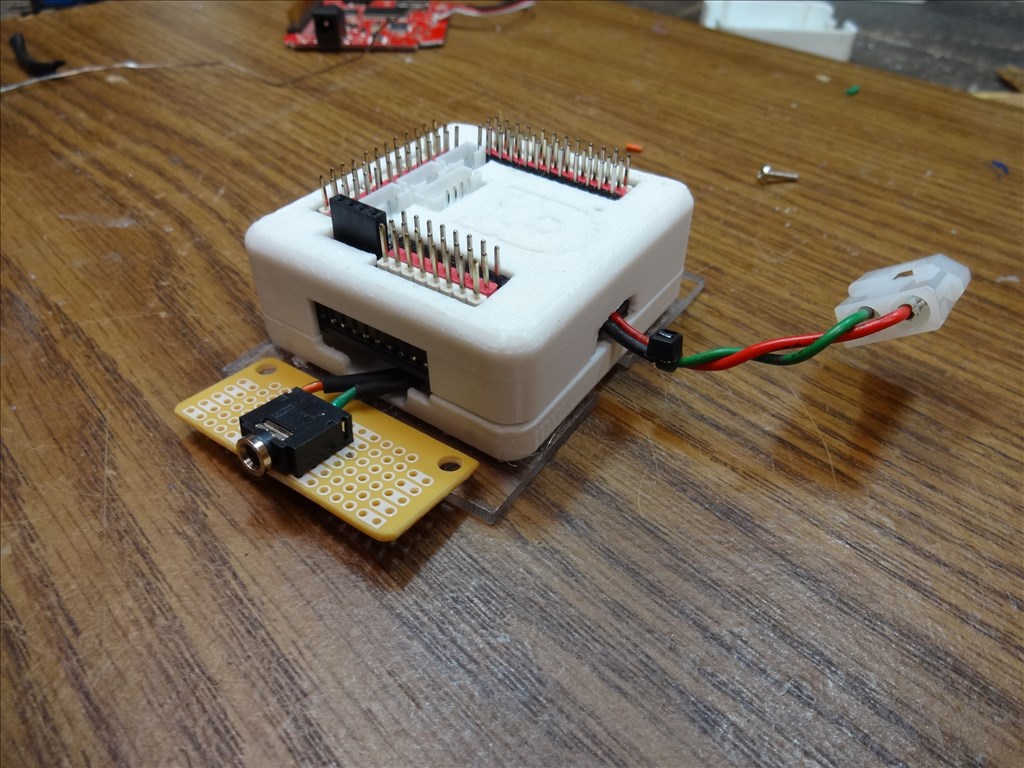
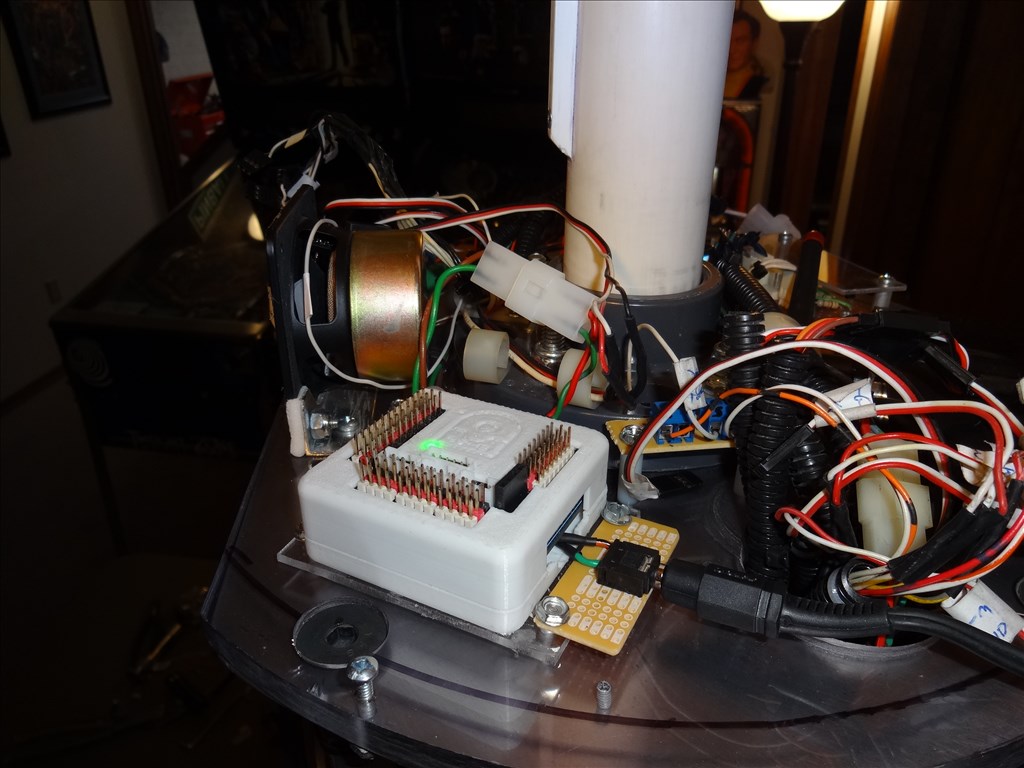
Here it is all put together and mounted in the neck of B9:
Here's a video I made showing it in action and attached to my sound system through the 3.5mm Mini Plug that attached to the amp. I try to compare the fidelity of the already installed CF3 sound system and the streaming V4 EZB. Both play through the same amp and speaker.
I conclusion; EZB V4 does an amazing job making it easy for you to stream sound right from your computer to the board itself. Adding an amp and large speaker can be easily done and the sound is very nice. I'm thrilled how clear and deep it sounds. However I think your true results will depend on the quality of your sound files. I both .wav and .mp3 files and and heard a range of fidelity. Again, the better the sampling the better your file will sound. Also you can adjust sound quality with the controls on the amp and a good speaker will make all the difference in the world.
Before I got the V4 and tried to stream my sound files over the WiFI connection from my laptop to the EZB v4 I was using a SparkFun MP3 Trigger and the V3 EZB. The current setup is much easier to use and the sound when sep up like this is comparable. Again in the end it will all depend on your sound file's quality and how nice of a amp and speakers you use.
I hope this helps and you enjoyed.
Dave Schulpius

I just want to second that thanks to Dave!
Dave, thank you so much for taking the time to document your process and revise it. I was very surprised that you reshot your entire YouTube video, that was awesome of you!
That was fun to watch! It was interesting seeing what you were able to do, and the sound quality is great! Our Jeremy knows what he's doing
Thanks Dave!
No problem everyone. It was an enjoyable process. The help I got made all the difference.
I had to re-shoot the pics and vid. My first draft was way to misleading and I didn't want to put out the wrong info. It also made me look like a dope.
Streaming sound right from the laptop to EZB was one of the features I was really excited about with the new EZB v4 and one of the first things I wanted to explore. I'm thrilled that I was able to have such amazing results.
You are such an awesome EZ-Robot advocate with your B9! Keep it up
Great Job, LOVE THE b-9.
can this red cirkel also being use to let a led lid up when playing sound?same ritme. really a dreamrobot your b9.
Hi @Nomad;
I saw your other post asking about blinking LED's in time with the sound. I think Rich gave you some good advice in that you need to find something like a breakout board that will help process the sound into pulses for the LED. I've never done any LED work like this so I dont have any answers for you. I do know the hole you are asking about on the EZB v4 is where you attach to to get "Unamplified" sound. You run one wire from here to a sound amp and also will need an additional ground wire comming from the point I show above. Any board you end up buying to process the LED blinking would either be connected here or at the speaker through holes after EZB's built in amp (You can see them in the lower left corner of the board in the above picture). Which attachment point you end up useing would depend on if the new board uses pre amped or post amped sound.
Good luck and I'm sorry I could not give a good answer.