ARC Pro

Upgrade to ARC Pro

Unlock the true power of automation and robotics by becoming a proud subscriber of Synthiam ARC Pro.

PRO
Canada
#1   — Edited

User-inserted image

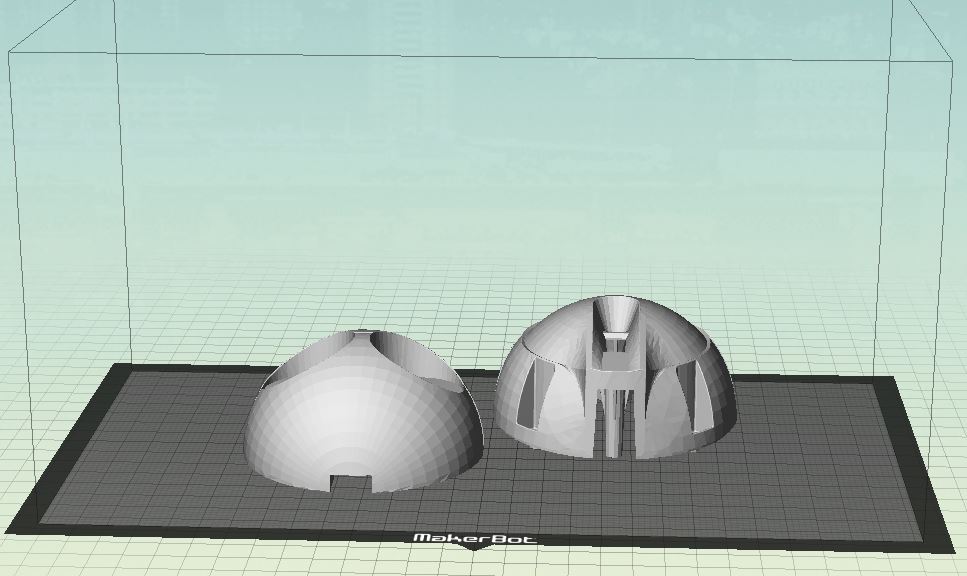
Hello Nomad, Here's how I print it. I use supports and a raft.

PRO
Belgium
#2  

many thanks jeremie.i am printing a glow in the dark one.

PRO
Belgium
#3  

hey jer

is the backside ,the middle pin made chorter?

PRO
Canada
#4   — Edited

No Sorry Nomad, it’s just a illusion of the angle I took the screen shot at. The middle pin sticks out and there should be support material that holds up the rest.

PRO
Belgium
#5  

User-inserted image

hi jeremie

i found the auto ad support in cura.thank you thank you:D
PRO
Belgium
#6  

User-inserted image

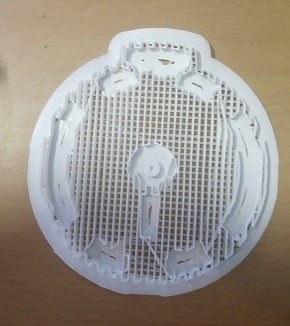
hahaha my first attempt to print the backside of jd's head.lol. it printed only the supports.xD second attempt looks better,hopefully.
PRO
Belgium
#7  

User-inserted image

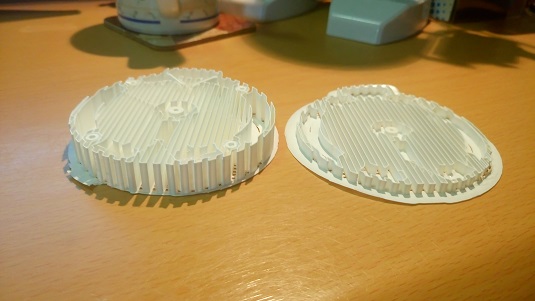
wel it printet a little more.but stopped again.i do see there is no written time laps on the printpage that says howlong it will take, to print.

PRO
Belgium
#8   — Edited

https://www.youtube.com/watch?v=1vQQxNHwVn4

User-inserted image

sofar i am not able to print the jd front head with the eyes.so i found a solution.i printed a  plate, and two rings.as you can see in the video.the eyes where not smooth,thats why i use the rings. they have two clean sides.

PRO
Belgium
#9  

User-inserted image

i have another question about printing jd.am trying to print the chest.all is ok except for one thing. the sides and top is bend.i use pla and no heated bed.i think the bed is damage.

PRO
Canada
#10  

Hello @Nomad, it looks like you are getting some lift on your print. This is likely an adhesion problem, try these things:

  1. Print with a raft
  2. Level the build plate
  3. Clean the build plate with isopropyl alcohol to remove any grease that may have come from your hands
  4. Scuff up the build plate with sandpaper or whatever you can find

Hope that helps!

PRO
Belgium
#11  

hi jeremie

i have level the bed with the blue tape on it.the 4 corners are good but in the middle is not so good. thats why i thought the bed was not good.okay adhesion means ( stycky problem  ). i have isoprofyl alcohol ,

thanks jeremie.

PRO
Belgium
#12  

jeremie its much better but another problem is hapening while printing. the connection with cura server falls out and printer stops. are there any good free programs for printing?

thank you jeremie

nomadr6/EDP/ patrick

PRO
Belgium
#14  

User-inserted image

hi proteusy

the sticky problem is solved.but i notest the bed is bend.also i see a missing page in settings on the printer. i dont see this page as in the pic. do you have an idea ,if you use your android phone as wifi for the cura,will that cost alot? i have a look on your link.and i have UHU sticks. thank you for responding.

PRO
Synthiam
#15  

You have too much air circulation and the pla is cooling at different rates. We resolved this by placing a box over the printer.

Also, the other main reason for lifting on the edges is due to the plate being too far or too close to the print head.

Take some time to calibrate the print head against the bed as often as possible.

PRO
Belgium
#16  

User-inserted image

hi dj my printer sits in a closed. i level the bed about 30 min and in all corners and middle. the bed is bend i cant get a good bedleveling. i bouth this on ebay,new in box.i think the seller got me there.

thank you for the respons

PRO
Belgium
#17  

dj here a video about arflow arround the print.

#18   — Edited

I think JD is correct and your print head is two far from the print bed,  try to do your leveling of the bed with NO TAPE on the bed then when you are finished put the tape back on the print bed,  this makes the extruder closer by the thickness of the tape,  another thing I would use is to turn on RAFT in your program this will adjust for the uneven bed. by adding a pad of plastic under your print object that you peal off.  leaving the printed object flat on the bottom.

PRO
Belgium
#19  

hi nallycat

i am using the raft and its better not compleet good but better. i level the bed wiht no tape.

thanks

PRO
Belgium
#20  

User-inserted image

User-inserted image

okay here are jd's feet.the top will be gold color.

PRO
Synthiam
#21  

I never use the tape. I’ve never had good experience with tape. Every time I used tape, the part wouldn’t stick and warp.

PRO
Belgium
#22  

hi dj

the tape works very good here.but the cura is a bummer.losing serverconnection.printing stops .cura dont open. way too much settings.

#23  

I never use tape years ago I switched to using glass on the print bed and some hairspray.  the printed  parts stick with no warping and release easily when the bed is cool.  I never have to enclose the printer even when using ABS,  my filiament of choice though is PET G. no smell, easy to print, very strong, solvent fused, and can be submerged into boiling water.  won't melt if you leave your robot in your car on a sunny day. try that with PLA.

PRO
Belgium
#24  

User-inserted image

hi nallycat

i have the glass reddy .some day i will use it.thats a great tip about the PETG.

thank you

PRO
Belgium
#25  

User-inserted image

User-inserted image

User-inserted image

User-inserted image

okay i have printed my B9 hehe.tomorrow i will print the transparent parts.

PRO
Synthiam
#26  

Dave snuffleapagus is gonna love that! If it was a bit bigger, you could add servos and an iotiny

PRO
Belgium
#27  

hi dj

i dont have a big printer for the size mini servo's.but i can make it bigger.

PRO
Belgium
#28  

User-inserted image

i forgot i dont have pla transparent.so made it red.i can scale up to 350 size in cura .

#29  

@Nomad 6R    Hi I like your B9, very nice  if you are thinking of printing transparent parts I recommend using PMMA filament it is very clear. print slower and hotter, and you can finish with acetone fuming just like ABS, for a great finish.  How long did it take to print your B9?:D

PRO
Belgium
#30  

hi nallycat

thank you for the tip.i saw a video about fuming.the printing of the little B9 a few houres cant say excacly howlong.

PRO
Belgium
#31  

i forgot what is the recomended speed for PMMA ?i am doing the grippers on scale 350 in cura ,it takes 3.40 houres

#32  

@Nomad 6R    For fuming I use a metal paint can and I put paper towels around the insides held on with a couple of magnets. then wet the towels with acetone put your print in the can on a small piece of wood in the bottom and put the lid on.  I do this outside as the acetone is very strong. use a test piece to test for time check every 10 minutes. for printing I print at 60  and the extruder temp is 240 deg. for clear parts do not use any infull if you can/

PRO
Belgium
#33  

User-inserted image

thats very usefull info many thanks.the grippers takes 4.40 houres to print scale is 350 in cura. printingspeed mine says 1.0 on the printer.how do i understand this?

#34  

@Normad 6R   I am not sure what your printing speed means at 1.0   maybe 0,5 may be half speed which would be ok.  I forgot to tell you if you fume parts don't pick up the parts with your fingers as the surface needs to harden so just upen the lid and let it air out.

PRO
Belgium
#35  

i know you have to let your parts dry out.thanks for telling.

PRO
Belgium
#36   — Edited

User-inserted image

stl jd spider chest

i made a jd front spider chest.you can print it in red and paint the spider black.the spider lays ontop chest. tel me what you think,any improvement always welkom.

PRO
Belgium
#39   — Edited

User-inserted image

User-inserted image

here's is jd spider chest,just using a black marker.

PRO
Belgium
#40  

User-inserted image

3d printed head in red.one issue you can only see red color eyes,no blue or green or any other color. solution you can dril the holes in the backside out and place thin plastik disc.

User-inserted image

PRO
Belgium
#41  

here a chort video of the teflon disc i use.they are 30 MM and 1 MM thikdisc teflon

PRO
Belgium
#43  

hi dj

you can use all colors now.

PRO
Belgium
#44  

User-inserted image

just needs some grippers.sofar printing goes well.i found two errors in the printer. one of the blue fittings in the extruder where the tube goes in,the metal was broken. i notest the tube went back&fort.also the fan was not good.

PRO
Canada
#46  

Looks great @Nomad!  ...does whatever a spider can!:D

PRO
Belgium
#47  

he needs to learn some skills hehe.

PRO
Canada
#50  

Cool idea @Nomad, thanks for sharing the design!

PRO
Belgium
#51  

User-inserted image

reinforced backpart jd chest

i notest that when printing the backside jd chest it was not very strong. i am not sure if it comes to my low skills of 3d printing. anyway i desided to reinforce the back part.as you can see , all the yellow is reinforced.also inside where the screws goes in, is reinforced with a little spacer.the yellow round cirkle is the part, that easly break off.not with this config.i hope its usefull. all is free for download.

PRO
Belgium
#52  

User-inserted image

there are some video's on youtube that says there is no generator to round up corners /edges in tinkercad. well there is .see generators all then page 12 .there it is. i have a quetion also. does anyone made an stl or has one from the main gear micro servo?

#53  

I know nothing about 3D printing and very little about the material available to print with. However are you sure the material available would be strong enough for a servo main gear? It would be nice if something would be available and easy to print.

PRO
Belgium
#54   — Edited

hi dave

i am testing some servo's housing now. i dont think its strong enough cause of the heat servo's make. my goal is something compleet diff.i make dummy servo's.do maybe its possible for very , thik gears on the outside of a motor or servo with 80 or 100 % infill.am just gessing.

#55  

Very interesting. I'll be watching to see what you come up with. Thanks.

PRO
Belgium
#56  

do you have something in mind?

#57  

No, nothing in mind. Just watching talent like your's and learning. Maybe I'll be able to use what you come up with some time in the future.

PRO
Belgium
#58  

talent ,lol i just remember my first jader print was at 80 % infill. you could not even sanded.it was really solid. i will test a gear at 80% infill.let you know here.

PRO
Canada
#59  

Hey @Nomad I've made pieces that attach to the micro servo output gear, it's actually exactly the same as the HDD servo output gear.

You just need to grab the U-Bracket (P24) STL file. It's located inside ARC under Project-> My Robot -> Design -> "Bit library" drop down menu -> Servos -> Lever servo (any) and then "Save STL" for P24. Load the STL file up in TinkerCAD then remove/add whatever you need around the servo gear section.

PRO
Belgium
#60  

hi thanks jeremie.i have a look now.

PRO
Belgium
#61  

User-inserted image

i get only a bracket?lol

PRO
Belgium
#62  

User-inserted image

hi dave.

gear ratio

these are 3 gears with 90 % infill pla.is really solid.when you install a glas bed ,you can use abs witchs is even more stronger. you can ad names or adres or phone number on your gear.so averyone knows from who this robot is. or ad an arrow if you need to line up gears.

PRO
Canada
#63  

Oh sorry Nomad! I thought you wanted an STL for the bracket side of the gear not the gear itself.

I was picturing you designing something like this:

User-inserted image

PRO
Belgium
#64  

hi jeremie

i need the gear.thats what i want.from the micro servo.

PRO
Belgium
#65  

User-inserted image

this one i mean. ithink its called the main gear ( chaft ) spline.

#67   — Edited

Hi Nomad, I just saw the video of your gears with two of my favorite people's name printed on them. Me and my B9. LOL. Thanks for the nod.

Yes, those look very sturdy and would work for most things. I'm still wondering how a print like the brass gear you pictured above would stand up to the wear and tear of the punishment we put servos through. I guess there is only one way to tell, design it, print it, use it. LOL.

As far as Father's head on a gear stand; very cleaver but I think you have Dad issues. LOL!:p

PRO
Belgium
#68  

hi dave

i printed the mini gear, but that didn work.too small not teeth on the print. the names print very well ,and very clear also. as for the dad issue lol .i only knew my dad till i was 13 years old when he passed away. i didn see my dad often cause off ilness.so your thoughts are correct.lol

PRO
Belgium
#70  

Thats ok dave.thats along time ago.

PRO
Belgium
#71  

am doing some testing on a new robot build. the video gifs a little clue. am not sure it will work but its a lot of fun.

PRO
Belgium
#72  

hi

i have made a new mod on the gripper jd.am doing this cause when you make a big robot, you have an idea what works.one question i have is when you grip something and have, a servo some distants away,would that burn a servo when its really gripping.

here a pic off the mod

User-inserted image

here the stl file stl grippers 1

stl nm 2 stl 2

the video

funny it did grip 1 time haha.but the mod is much better.

PRO
Belgium
#73  

hi i never trow away not perfect prints.you can always use them for something. in this case i had a few darth father heads left over.so i made them into, book stands.also improved the word darth.its now in front.

User-inserted image

User-inserted image

PRO
Belgium
#75  

stl jd back panel chest

another improvement.i notest when putting jd chest together and you are a little to hard on the print, some can break off like the pins to hold the servo inplace.so i put some support there.

User-inserted image

User-inserted image

PRO
Belgium
#78  

hi dave

thanks for your supportive words.:D

PRO
Belgium
#80  

okay. here is my version jd's turning waist.the link for the servo is in the topic serco less degree. first a few pics.

User-inserted image

User-inserted image

User-inserted image

and offcourse a little video

PRO
Belgium
#81  

yep finich.i made a lid to cover up the servo.

User-inserted image

you can just pop it on the case without any screws.or you can keep it in place excample with paint the part.

stl servo case and lid

any ideas what i can try out?

PRO
Belgium
#82  

here the turning waist on jd.need more testing how strong the servo really is.

#83  

Very cool! Now you should make him dance to the Beatles song "Twist And Shout"!

PRO
Belgium
#84  

hi dave

thats an idea.haha.

PRO
Belgium
#85  

oops jd has a mallfunction,he thinks he's a bird.xD

PRO
Belgium
#86  

here is jd waist turning in HDD.

User-inserted image

User-inserted image

PRO
Belgium
#88  

just incase i forget.jd will not.xD

#89  

@Nomad 6R   Merry Christmas and happy New year to you and JD. \

PRO
Belgium
#90  

hi nallycat

Merry Christmas and happy New year to you too.

PRO
USA
#91  

Very nice waist turning module, right 2020 is almost here

PRO
Belgium
#93  

after seeing the zoe hands,i made an ez version.

you can lock the hand on the lever with one screw if you wanted.

User-inserted image

here the hand

User-inserted image

video

PRO
Belgium
#95  

hi dave

working on the thumb now.

thanks:p

PRO
Belgium
#97  

here are some hands with thumbs.i will print these later and post it here on how they look.

User-inserted image

PRO
Belgium
#98  

hey mickey

no worries.i have tons of fun with your idea of hands.

thanks

PRO
Belgium
#99  

made some hands with chort thumbs and high thumbs. male and female .8 pairs are reddy.

thank you mickey for the stl's

PRO
Belgium
#100  

here's an idea i have to make it possible to grip a ball with two hands. a spring loaded hand.would this work?all ideas and thoughts are welcome. so the pressure is at the fingers insteadt of the servo.

User-inserted image

3d printed spring with hand.

PRO
Belgium
#101  

first print spring hand at 70 % infill.not much bending sofar.looks good. i am printing one at 20 % infill.take about 3 hours to print.

User-inserted image

User-inserted image

PRO
USA
#102  

great

I don't have a 3d printer yet, any suggestions?

PRO
Belgium
#103  

yes wait till they are reddy.haha if they works i can print a pair for you. and send them to you.send me a mail with an adres you like to use and phone number .

PRO
Belgium
#104  

here's a easy way to make a hip. ad two cube's  on the bottem jd chest.see pic.

User-inserted image

ad this point it looks  allreddy good. next print a cube cover.you can download stl on my tinkercad.

User-inserted image

next slide it over the cube's,then put the legs on.

User-inserted image

and here's ez robot DROID. also the hand are reddy.video comes little later.

#105   — Edited

You're really good at this. Looks like you're having a lot of fun also.

PRO
Belgium
#106  

hi dave

its very rewarding inventing parts.soon i need a bigger printer.lol:D

thanks

#107  

Yes Nomad 6R   When I saw the printer you decided to purchase, and after seeing all the parts you make, I knew it would not be long before you have to get a larger printer.   I use a delta printer as it takes up much less room, the bed is 185mm X 185mm 370mm height it is a FlSun large delta and I have used flsun model printers for over fifteen years with no problems, the printers come as parts and you have to assemble it, but this is a good thing as you learn alot on how your printer should work.  the only thing I added was the Printer Program Simplify 3D  Which I think is the best.  Delta printer's are faster because the printer head is the only thing that moves and it is light, regular printers have to move the print surface a large heavy plate that has a lot of inertia and has to stop and start quickly making it not as accurate, and slower.  I use a glass bed and hairspray, the printer has a leveling feature .  

User-inserted image

PRO
Belgium
#108  

hi nallycat

3d printing is very addicted.lol:Di had this printer in mind. consider big bed and low prize.

3d printer

PRO
Belgium
#109  

looking at the backside waist cover,i saw this.

lot off space for led's

User-inserted image

i found led with flat heat and i have space for 3 led's it will look like this.complete cover.

User-inserted image

here's an idea with one led tri color.

PRO
USA
#110  

very cool lights,

good job

Also I like the way you have the waist move

Ang

PRO
Belgium
#111  

this is a dummy waist .not moveble.i am test printing one now.:D

thanks EzAng

PRO
Belgium
#112  

okay.there are 3 covers reddy.for one led,for two led,and tree led. waiting for the led to arrive.here some pic.

User-inserted image

User-inserted image

the front has tree holes for tree led's. the backside one for the wires come thru. and there is space for using spiral wrap.

PRO
Belgium
#113  

here the LED flat head.

User-inserted image

PRO
USA
#114  

I need a3d printer, still researching.

Nice printed part with the lights - sound

good job!

Ang

PRO
Belgium
#115  

hi EzAng

i started with a cheap 3d printer cause you need to learn alot. also making mod on printers.and learn tinkercad .

thanks

PRO
USA
#116  

I know there is a lot to learn on 3d printers - doing research

did you see my new Roman with head movements?

PRO
Belgium
#117  

yes i saw it on youtube.good work.

PRO
USA
#118  

thanks, now head moves back, forth  :-)

PRO
Belgium
#119  

you becomming a pro in robotics.xD good color skin too.

PRO
USA
#120  

Thanks, my wife helped with that.

It is good to get the wife involved :-)

PRO
Belgium
#121  

i have a question about printing.i have a glas bed now witch works really well. one problem do,the print starts to curl up and split open in the middle.what can cause this?

User-inserted image

any one thank you

PRO
Canada
#122  

I sounds like a layer adhesion or bed adhesion issue. Three things you could try:

  1. Clean your bed with isopropyl alcohol to remove any oils on it
  2. Re-level your bed
  3. Modify the print temperature
PRO
Belgium
#123  

hi jeremie

is possible the temp is to high? i am using 200 . on the box says 190to 220.

PRO
Canada
#124  

@Nomad that temperature actually seems too low in my opinion.

At the office the filament we use is 190 to 220C rated as well and we print at 220C.

If you start seeing little burnt bits in your print or the plastic looks like it's bubbling as it's printed the temperature is too high, you can then dial the temp back a bit.

PRO
Belgium
#125  

oh.many thanks for the info.

PRO
Belgium
#126   — Edited

jeremie

indeed printing at 220 is much better.

PRO
Belgium
#127   — Edited

found it,deleted post

PRO
Belgium
#128   — Edited

all is bin changed

PRO
Belgium
#129  

here a little update.shoulders and hip are reddy.for the shoulders i use ez robot HDD. arms MG995.

PRO
Belgium
#130  

they say trouble never comes alone . i just renewed the heatbed and complete headblock. al go's wel for 1 day and then i hear this sound.i can see the gear is not loose. can this gear worn out?

PRO
Canada
#131  

Hi Nomad,

That gear in particular doesn't "wear out".

You see the inner diameter gets locked onto a motor shaft with a set screw, so it doesn't wear down. The set screw can become loose, so you may need to tighten it.

The outer diameter which grabs onto the filament can get full of filament and start slipping. They teeth are only rubbing on plastic so they won't wear down. You can clean these teeth with a toothbrush or equivalent brush.

PRO
Belgium
#132  

hi jer

i did clean them out and indeed there is some flinters off filament in there. ok the gear is good.and i put in a new spring in and handle . its still do tok tok tok .i also notest i could not get the filament to retrack for excample to use another color

#133   — Edited

@Nomad6R  if you are hearing a noise, like a knocking noise the print head hot end is to close to the table there is not enough space for the filament to exit if it does this for to long it will burnout the stepper motor, it weakens before it eventually dies.  make sure your first layer is not to close to the build table, those stepper motors are around 25.00 u.s. on amazon.  I keep a spare as I had one burn out when I wasn't watching. that ticking is a vibration and can loosen the feed gear, like yours did.

PRO
Belgium
#134  

hi nallycat

i hear indeed knocking sound as in the video.at this moment the nozzle is on the print.not on the table. and am printing on a glas bed. learn something .thanks for the info.

#135  

@Normad6R   When you start printing the first layer is when you can damage your stepper motor if the print nozzle is to close to the glass bed the heated filament has no room to leave the nozzle. the stepper cannot push the filament so it makes a clicking noise.  the stress on just doing the first layer can damage the extruder stepper.  when you setup the alignment and bed leveling use 2 thicknesses of paper to raise the nozzle a bit more.  if the knocking is while the print head is several layers up, then you have a partially blocked nozzle. to test this before you print raise the print head extrude about 50 mm of filament, it should drop straight down if it coils the nozzel is partially blocked, so clean it.

PRO
Belgium
#136  

hi nallycat

your right there's a problem with the new heatblock.filament goes not thru the block.

PRO
Belgium
#137  

hi nallycat

you are spot on.thank you for saving my printer.it was a new complete heatblock with a faulty throat.

User-inserted image

i could nof figur out why the filament did go smooth in the block, and when its in  , i couldn get it out to swap filament. much learned.

#138  

@Normad6R you are welcome  if the stepper keeps clicking after you fix the blockage then it is damaged. you will have to replace it, I hope not,  but it has happened to me, we learn by our mistakes.

PRO
Belgium
#139  

Lucky.it works,doesn click,xD back to printing.

PRO
Belgium
#140  

the real problem that started the tok tok sound is this. i negleted to check the new nozzle.i was assuming it was good. it was loose and cause a cloth in the nozzle.

User-inserted image

PRO
Belgium
#141  

does this picture look normal?

User-inserted image

#142  

@Normad6R    No it does not look normal.  You need to check your extruder it is not putting out enough filament.  print a test cube and check your settings.  did you tighten the grub nut on the feed gear.  and it is tight.  and check the filament leaving the hot end if you extrude 20 mm is 20 mm coming out.

PRO
Belgium
#143  

hi nallycat

lot of filament is comming out,but not line next to line .more like a V chape. also the lines off the raft do not stick together.i use 220 heat.no heat on the bed. i just checked the grub nut is ok. it feels like the sync off the bed and nozzel is off.

#144  

@Normad6R  download and print a test cube   no raft.    reset the bed level to make sure you are the correct distance to the glass. and see how it prints.

PRO
Belgium
#145  

i took the glas off the bed.cause the back screws off the bed is slitly grazing the block where the rods are for the bed. also i see alot of sparkelings from the rods on the belt.i think the machien is worn out. i will test the cube in about 6 houres.i can make a video.

PRO
Belgium
#146  

here is a video with some grinding sound.

PRO
Belgium
#147  

back into printing.i can fix the printer for a few dollars.so i am going to fix the printer. i can learn alot from this repairment.here's what i found yesterday. some times i hear a chort crack sound.this seems to be a happen alot. printing the cube.later i post some pics.here a pic off part of the problem.

User-inserted image

PRO
Belgium
#148  

here's the start from the cube .

User-inserted image

PRO
Belgium
#149  

now i have a leak to fix.but i am able to print.

User-inserted image

User-inserted image

PRO
Belgium
#150   — Edited

some interesting details about leveling the bed. first thing i saw is a faulty speed for the first layer .you need to set the speed half for the first layer. second is the way you level the bed ,see picture.numbers are the screws on the bed, except for number 5 .

User-inserted image

first layer speed set half

User-inserted image

PRO
Belgium
#151  

here's a part printed half speed.its awesome.

User-inserted image

PRO
Belgium
#152  

i finally maneged to get the bed leveling right. here's a paper that comes when bying a printer. its a little thicker then a A4 paper.

User-inserted image

what i learn is this.slight this under the nozzel when bed temp is atleast 30 heat or the temp that you use. loosen the screw untill the paper gets stuck under the nozzel.then gently tighten the screws and at same time pull the paper from underneed, the nozzel.here you will find two things .eather the paper chift in small amount from underneed the nozzel, or all the way.these two are your messurment,your setting chould be between these two . when printing a raft it chould look like this. see pic.no curls,no thin lines.no pullin back filament.

User-inserted image

then you will see a perfect raft .

User-inserted image

you can also see the color is very clear.no warping or lifting from the print. i use the UHU stick ones.on a clean bed.110 heat extruder.30 heat bed. half speed.

PRO
Belgium
#153  

och its allreddy christmas here.new printer arrived, creality ender-3 here's a first print.woef.

User-inserted image

the ender-3 feels like a porche if you comming from a mini printer, its getting better & better the more you print. waitng for spare parts for the monoprize mini v2.

PRO
Belgium
#154  

a smal but useble print.the backpart without the corner.

User-inserted image

PRO
Belgium
#155   — Edited

just found it.i had to ad the printer.

#156  

@Nomad6R  Great Job.  I am sure you will be creating great things with that 3D Printer.

PRO
Belgium
#157  

hi nallycat

question.if your settings in cura uncheck platform heat,chould there be readings off temp on the printer? my monoprize always say 22 heat aldo its unchecked. thanks

Indonesia
#158  

hello @Nomad 6R i never success printing with ABS

PRO
Belgium
#159  

hi EricEZ

indeed starting with 3d printing can be tricky. the  most importend thing is the bed leveling. what do you use now? pla.

#160  

@EricEZ  What Problems did you have printing with ABS   You have to have an enclosure for the printer as ABS warps and lifts from the print bed, I have a large delta printer I use a clear Garbage bag over the Printer, I use a glass Bed with Aussie Hair spray, also the bed has to be hot and the extruder has to be hot, I use an all metal extruder because of the heat used.  it just takes practice.  for most of my printing I use PET-G filament, as it is stronger then ABS but is much easier to print with.  you don't need an enclosure.  but you have to use retraction as it is stringy if you don't.

PRO
Belgium
#161  

okay eureka.the ender-3 is printing well.

User-inserted image

i finally found the error,you can believe it.after seeing a lot off video's, i found the problem.its the original paper that you get with the monoprize mini v2. this one

User-inserted image

it make your setting to far away from the nozzle.now i use orig A4 paper, and glas bed.all problems gone.

PRO
Belgium
#162  

second part anthony robot,the lower back leg.

User-inserted image

the backside has a cover.

User-inserted image

and a little video.

#163  

@Normad6R  Can you show Jeremie your foot and leg design, that is how he should do Astro boy's  foot and knee.   great design I hope you are using PETG or ABS

PRO
Belgium
#164  

hi nallycat

i am still using pla cause i have lots off them.the parts still needs some tinkering.

i use this model design robot

this is the link lower back leg.lower back leg

right foot only two holes for the horn.i couldn get the other in line yet.right foot

right ankle colum.ankle colum

servo back cap,this fits in the colum.servo back cap

User-inserted image

the servo cap slide in the colum,it fits like a glove.

i have a upper arm also reddy for testprint. the reason behind this robot;i making as cheap possible fight robot. all other parts needs to be adjusted and test print. thats why these are set prived.not test print them yet.

220 nozzle heat/ first layer 50% speed /heat 50 heat / 50 % infill/using raft. parts are 5MM thik.

thank you

Indonesia
#165  

oh oke, thank for help i wan to try print with ABS,

PRO
Belgium
#166  

hi EricEZ

keep posting here.and ask questions.some will help. what i know is .use 220 nozzle heat,60 heatbed .print first layer half speed. you can print a cube for testing.or a plate test abs

Indonesia
#167  

@Nomad 6R          yea,    I'm tired doing nothing..lol, .. I will start working on robot projects again,  like before

PRO
Belgium
#168  

EricEZ

what kind of printer do you have?

Indonesia
#169  

i have anycubic delta and anet e12

PRO
Belgium
#170  

nice twi printers.with glas bed?

Indonesia
#171   — Edited

yes i use glas bad, with paper glue i work in 3d printing ordered in my country i have the website www.ngeprint3d.com i just print my new full size robot

User-inserted image

User-inserted image

User-inserted image

PRO
Belgium
#172  

same here works best.and isopropyl 90% to clean the bed. have you printed abs yet?

PRO
Belgium
#173  

oh thats very cool robot.

Indonesia
#174  

for little part i can use ABS, but i always fail in a big size with abs

PRO
Belgium
#175  

what you mean by fail ?does the print warping? lift off the bed?

Indonesia
#176  

i think 3d printing kill my skil...lol...., maybe I will use PVC again in the future

Indonesia
#177  

yes is warping and lift on the bed

PRO
Belgium
#178  

i had same problem.warping when printing big things. 1 clean the glas using isopropyl 90 % 2 heat the nozzle 220 and the bed 60 temp 3level the bed use A4 paper check it atleast two times. 4print with a raft. 5print at a lower speed.raft half speed.

User-inserted image

#179  

The correct bed tempature for ABS is 110 Celcius  for  Fahrenheit people that is 220  Fahrenheit.  but it is very hot.  if PETG is used the BED temp is 60 Celcius. if the day is humid I use 65 Celcius bed temp with PETG .  if you are printing ABS you need to put a box over the printer if your printer does not have an enclosure. do not DO NOT use the fan with ABS or PETG.  With these filaments including nylon filament using a fan causes warping and seperation. because I do not use that junk PLA I have removed the Fan from my printer.

PRO
Belgium
#180  

hi nallycat

i didn know you could raise the temp so high? i am uploading a video . i post it here .maybe you can see if the raft is good and the video is useble.

Indonesia
#181  

yes with ABS i turn of the Fan, 100degre celcius for bad, and 240 nozzle but still promleb in big size object

PRO
Belgium
#182  

ericez

there is your diff in temp.maybe try it like nallycat.

PRO
Belgium
#183  

here is the video.i think its a perfect raft.

#184  

if the glass is clean lightly sand the glass with sandpaper to make a few fine scratches don't  overdue this as the part will be hard to remove, use hairspray on the glass. use the tempatures I use and put a box over the printer if you do not have a printer that has an enclosure.  some print beds can only go to 100 degree celcius it should still be fine, if it can go higher use the higher temp.because heating the bed so hot can take a long time. that is why people do not like to print with ABS     EricEZ  is your printer enclosed. you can't print large without an enclosure.

PRO
Belgium
#185  

i ordered some wood to make an enclosure.i can print 3 parts in a row without cleaning the glas. then i scrape the glue off and clean with isopropyl.90%.good am using junkxD pla. for me abs will be for much later.

Indonesia
#186  

@nallycat no encloser, but i has been try printing inside the box, but  is fail

PRO
Belgium
#187  

EricEZ

do you have a picture of a failled print? that can be very helpfull.

#188   — Edited

@EricEZ  A failed print usually means that object did not stick to the bed, it will release if it warps. if the bed is not prepared properly, the first layer is made to far from the bed and if the speed is  to fast, and in the case of ABS cooling is to fast.   check your print nozzle to bed spacing the bottom of the print should be as smooth as the glass it is printed on  you should not see individual print lines.  Make sure you print on glass use hairspray, check your nozzle height from bed   one sheet of printing paper. in the slicing program slow down the first 2 layers. do not use a fan, cover the printer so it is warm inside the box or enclosure before printing.   IF all of this fails I suggest you use PET G instead of ABS, PET G is stronger then ABS but is much easier to print you do not  need an enclosure. bed only needs to be 60-65 deg C  hot end temp is the hottest suggested temp listed on the filament roll.  maybe 220c you must use retraction.  as PET G is stringy and you will get lots of strings if you don't, but to much retraction  will result in nozzle clogs.  I use 3mm with my all metal hotend, you may need more retraction if you use a regular hotend.    run a test print  2 test cubes on the build plate.  there should be no strings between the cubes if there is then increase  the retraction 1mm, test again until there are no strings.     I have built two Inmoov robots using PET-G and never have a Print failure or strings.    use weldon 3 to join PET G prints it is a solvent weld and is stronger then the print itself.

#190  

@Nomad6R   very nice, and neat, I can see that servo is further in.   good Job.

PRO
Belgium
#191  

hey nallycat

the printer is awesome.i could use 10 off these.xD.and 50 rolls yellow.

next to come is the front supports and knee.

User-inserted image

thanks

#192  

Did you build that one, its really cool!! Awesome robot design, you should make a seperate thread for this build!!:)

PRO
Belgium
#193  

hi mickey

its not my design.i love the walkin gait.i got the stl's from a guy in thinkverse. i need to scale up and test print all.i think its a great play robot for fight.

PRO
Belgium
#194  

i have a new symptome with the printer.hope someone can tell me how to chut off this setting. the printer start to chake to fill up spaces.he does this so hard that the glas bed moves, even with 6 big clips on.how can i chut this off?

User-inserted image

thank you

#195  

Hey, I had this too once...check your pulleys, and make sure there is no dirt anywhere on your printer! This should be fixable!!!:D

PRO
Belgium
#196  

hi mickey

its a new printer.i cant feel any movement there or see dirt.i think its a setting. the printer goes round and make a sorta pit,then he fills it with lot off filament, by doing ,the printer chakes alot.and thats when it happens.the glas bed chift a few MM. even with 6 clips one.

#197  

@Nomad 6R  The printe head is making a lot of small movements in a small area,   you need to check your print job and slice it again and look to see if there is something wrong iwith the .stl file. open that print job in another program like 3D Builder that can detect errors and repair them.

PRO
Belgium
#198  

hi nallycat

ah ok i have a look.

thanks guys&girls

PRO
Belgium
#199  

here's some new pics and video.lower arm connected to ( hand ).

User-inserted image

am using the MG995 servo's.the (hand have a lay in ,looks cooler.

PRO
Belgium
#201  

EUREKA i finally got the chest correct.it has stabelizers ,so there is no unwanted movements there. it protects the spline from the servo.you can use the HDD/MG995 or any big servo you want.

here's some picture's

User-inserted image

User-inserted image

i changed the colors for the brackets in yellow.the name will be red color. and as you can see i got a tooth more haha .now he's got 3 tooth.lol also made the brackets little shorter. a little video.

PRO
Belgium
#202  

hi nallycat

i downloaded the 3d builder to inspect my parts.i am not sure what to look for? so i made a little video. the pic is superman when he was young.lol.

#203  

So nice to see your modeling skills to improve with every post!!:D

PRO
Belgium
#204  

hi mickey

thanks.its amazing how time goes by.i can do this day&night.

#205  

@normad 6R  your video of the part looks good if you select all in ARC it sometimes artomatically detects part errors and does a repair, send me the part I will run it through ez bulder here  and report back to you  the results.

PRO
Belgium
#207  

left arm reddy.waist reddy and head movement. to do tomorow right arm. finally i have four teeth .still printing.1 day and 1 night.lol.

User-inserted image

and a little video

what the heck????

User-inserted image

#208  

@Normad 6R   Hi I just completed the file repair and did not find anything except a few duplicate triangles.  I suggest that you Print this with the way repositioned it that is from the small side down, it will take less time and should eliminate any print errors and have less support material.  here is the repaired file. chest big +head servo.stl  if you have any questions you know how to find me.

PRO
Belgium
#209  

hi nallycat

thanks for cheking.got it.here's the head complete.4 teeth.

User-inserted image

a little video

PRO
Belgium
#210  

two (hands ) reddy.two feets reddy.

PRO
Belgium
#211  

some update on anthony robot.and a riddle for you all. aldo the 3d part is level in anyway you hold it as seen in the video. so question is ? what cause the 3d part is not level on the servo.

some changes on the ankle colum.

User-inserted image

more material for the front chins.

#212  

@Normad 6R  is your desk top level?

PRO
Belgium
#213  

hi nallycat

yes as you can see in the pic.

User-inserted image

PRO
Belgium
#214  

something is 2% procent off center.thats why you dont see it.i stumble on it just by accident.

PRO
Belgium
#215  

User-inserted image

two knees are reddy.printing the front lower chins.

PRO
Belgium
#216  

doing some test with the front chin.i never don this before so any tips ideas are very welkom. sofar it looks i need to chorten the front chin with 4MM .

PRO
Belgium
#217  

new design front chin.i found the older design little big.

User-inserted image

PRO
Belgium
#218  

here's a little video about the new chin.fourth design is printing now.

PRO
Belgium
#219  

final chin is reddy.3 more to go.

User-inserted image

the one on the left is the correct one.

PRO
Belgium
#220  

little video .the front chin is nice vertikel now.

PRO
Belgium
#221  

a new error with 3d printing.layer chift.anyone knows what to do?

User-inserted image

#222  

@Normad 6R The print head collided with something. Maybe something got in the way of the printer, or maybe plastic has been piling up on part of the print and then the print head hit that spot. Your printer is trying to move too fast and the motors cannot keep up.

PRO
Belgium
#223  

hi nallycat

too fast , i will try slower then. thanks for fast respons.

PRO
Belgium
#224  

okay i tested it.lower speed is inddeed much better.but stil i have layer chift.in the begin and last part of the print.

PRO
Belgium
#225  

here is a pic with error message.

User-inserted image

User-inserted image

seems pic below is not correct.

#226  

try the print without the raft.  there is an error and I am not familiar with your printer screen,  not sure what I am seeing.  reset the Printer to DEFAULT SETTING you may  have entered a setting that is not correct for your printer.  I print from my Computer using a USB cable using a very good Program called Simplify3d.    If the data flow to the printer is interrupted for even a second it can lose  it's  position and start printing in the wrong position.  if you are using a Mem card in the printer to print from   format that card and reinstall the .stl file.  if you are using a usb cable remove from computer and printer  cable and switch the ends.  check to see if you have the cable near a high voltage source like it's power supply and move the cable away from this. even shielded cable can loose the data flow with an  electrical pulse. remove all the stepper motor cables one at a time and reseat on the controller card. check your ground connection.

PRO
Belgium
#227  

hi nallycat

i found this video with all settings for ender-3 and with your tip off setting speed lower.it works. i cant paste video's here? but as seen in pic above ,the numbers 500 chould be 2500x2500x100x25. now the robot is assembled and now comes the flaws in the design.lol:( few things to adjust.

User-inserted image

PRO
Belgium
#228  

hello nallycat:D

question ,how can i reduce some support on my 3d prints? if thats a good idea ? i al using cura 4.5.0

#229  

@Nomad 6R   I do not use cura with the program simplify3d I can put the supports where I want, or reduce the amount  of support material I don't know if  cura has this capability. but usually I just reposition the part on the build plate, as long as the object does not have an overhang of more then 45 degree it can be printed without support, the change I made to your part that I checked for you. I sent it back to you on it's short side. there was an angle to the rest  of the part but it was under 45 degree.  and could have been printed without support  one overhang at the top may have been rough at the bottom.  another way of saying you don't have to print flat.  sometimes printing from a corner for example only puts support to hold the part in that position. that may reduce the support material.

PRO
Belgium
#230  

new actuader,is that a servo

PRO
USA
#231  

did you print this? EzAng

PRO
Belgium
#232  

no no i think they are newest servo's.

PRO
USA
#233  

great stuff, where do you get these servos?

PRO
Belgium
#234  

i dont have these servo's.they are not yet for sale i gess.

PRO
USA
#235   — Edited

That is a great moving robot

EzAng

#236  

XR-1 is really cool...but also I like this one, it is Open Source. So maybe we can build our own remix?:)

PRO
Belgium
#237  

hey mickey

thats a nice one too and printable.

here's zoe blue head

User-inserted image

PRO
USA
#238   — Edited

Great going Nomad - looks good

did you use Pla or abs?

I just purchased my 3d printer, it will arrive soon. yeah!

EzAng

PRO
Belgium
#239  

hi EzAng

this is pla dark blue .abs will be for much later.

witch printer did you ordered? and glas bed?

PRO
USA
#240   — Edited

I only going to buy one, I believe, so I bought the:

Creality CR-10S Pro FDM 3D Printer Creative, Auto Leveling Capricorn PTFE Dual Extruder Gears, 300x300x400mm, PLA ABS, for Hobbyists, Designers and Home Users

I got dizzy watching so many videos - pros and cons on every 3d printer

I will try my best! EzAng

PRO
Belgium
#241  

you will soon be building an inmoove then.lol. you will like it.

PRO
USA
#242   — Edited

Yeah!  this is exciting

inmoves have been done, I want something better lol

I also purchased a glass bed

EzAng

PRO
Belgium
#243  

oh what are you going to build then? are you familiar with tinkercad?

PRO
USA
#244   — Edited

Yes I am aware of tinkercad

One thing at a time is my seed, lol

I am an old Linux, Debian guy, so I am also re-doing my Linux with , ROS (Robot Operating System) programs, python learning

For today, leaving my home going to our farm, country land to do some physical work :-(  but it has to be done. bush hogging  and all the rest etc...

At our farm, country land - no internet, to far out, only a hot spot on my phone, talk later my friend.

be well

EzAng

#246  

Heeeeey!!!! You did it!!! You are amazing @Nomad6R, the print came out great!! Zoe is happy to meet you!!!:D

User-inserted image

PRO
Belgium
#247  

hi mickey

great picture off zoe.question.how does the head frame fits in the head? i dont see it.

thanks

#249  

Oh sorry, you wanted to know how the frame is fitting into the head...wait one second!!:)

PRO
Canada
#250  

@Mickey666Maus

I'm very curious to how you made that diagram, it looks awesome!

PRO
USA
#251  

Nomad, Now that I purchased a 3d printer, I want to build a robot with one of the robot talking heads I made, seems like fun.

We'll see,

EzAng

PRO
Belgium
#252  

ezang

designing heads is not easy.and you need to learn your printer. do it slow and practise with small things first. howmany heads do you have?

PRO
USA
#253   — Edited

Right I will take it very slow, lol

I have the Roman head to start I put on yesterday  the Richard head, did you see it?

EzAng

PRO
Belgium
#254  

yes i saw it on youtube.love the mouchstache&beard.lol you can use the body from jd and modified that in TC for excample

#255   — Edited

User-inserted image

Last Image was too big!!:)

PRO
USA
#256  

lol, it is a regular size head, JD would look like an alien lol

EzAng

PRO
USA
#257  

I can't wait to see your robot you are printing

Ezang

PRO
Belgium
#258  

mickey

thank you for the picture.very helpfull.

Ezang

you mean the yellow robot?if yes all parts are reddy. soon i start testing walk gait.

PRO
USA
#259   — Edited

Nomad, nallycat  does not like PLA?  Why?

Is ABS better?  What mm?

EzAng

PRO
Belgium
#260  

abs is much stronger but you need some experiants . also your printer need to be in a sorta case . thats why start with pla .you also need isopropyl to clean the bed.also UHU sticks, there a lot off stuff to learn,one of the most is bed leveling.aldo yours is automatic,stil needs to check by hand. on a roll filament you can read the temperature use the highest reading.each color is diff. i use esun cause there rolls are transparent.so you can see howmuch filament you have left.

User-inserted image

ask alot off questions.

PRO
USA
#261  

is the PETG  1.75mm?

EzAng

PRO
Belgium
#262  

i forgot.see the instruction off your printer.i gess the nozzle is 0.4 mm and filament 1.75 mm   printer c10

PRO
USA
#263  

ok I will check when it gets here, thanks

PRO
USA
#265  

great news, thanks again

PRO
Belgium
#266  

petg is kinda rubber.here a pic see label temp,nozzle,bed,color and size. this sticker is also on the roll.

User-inserted image

PRO
USA
#267  

Thanks Nomad,

I ordered all 3 to see how they print for myself: PLA, ABS and PET G

Just got cleaned up from bush hogging some of my property

Did I miss anything?  lol

EzAng

#268  

@Normad 6R   PETG is the same plastic they use to make soft drink bottles out of,   it is not rubber but printed thin it has some flexibility.  use the highest temp list on the box for extruder the bed temp use 65 deg and make sure you use retraction if you don't you will have lots of strings.  to join 2 pieces together use Weldon 3 it is a solvent bond.  use acetone to bond ABS.  I do not use PLA as it deforms at 75 deg no good for robots.   PETG is very resistant to damage.  if you think differently try to rip a coke bottle good luck with that.

PRO
Belgium
#269  

hi nallycat

oh is flex then maybe the rubber one?thanks  for correcting me.

PRO
USA
#270  

nallycat, you seem to know a lot about 3d printers, the dos and don'ts.

Can you make a list or your findings? I know it will help me and others.

Also let's see some of your prints,

thanks,

EzAng

PRO
Belgium
#271  

hi EzAng

1 first see that you have all item's,filament,UHU sticks,isopropyl 90% 2learn your printer ,buttons how to use it. 3learn your slicer and tinkercad 4learn leveling off the bed very important to even get a print done. 5 test print learn how to get a print to stick on the bed,and how to clean your bed after. you can make a testprint with raft .that gifs you time to see if your bed is level.

uhu sticks

#272  

@EzAng  I am just finishing the head od ZOE that Mickey was so nice to give us.  it will be just a little longer, you can see one of my two Inmoov robots and they were printed on my flsun large delta printer.  I always use a glass bed with hairspray "AUSSIE" and never have parts warping and coming off the build table.  as you know I don't put much of my work on this site as I am sure you know the reason.  Here is Brucee a few years ago when I made his new elbows. have a look.  https://www.youtube.com/watch?v=AfD0saECb0A  I will make a  list for printing when I find the time for you.  all my prints are in PETG with some nylon carbon fiber infused filament  for gears. Thanks for your comment.    glad you will be joining the 3D printing group.

PRO
USA
#273   — Edited

thanks for the response

I am not sure about what you mean, " as you know I don't put much of my work on this site as I am sure you know the reason. Not here long enough, Not sure what reason, can you explain?

I will watch the video when I get out of the farm , country land I have, I am on a phone hot stop, no internet out here :-)

Anyway I will wait for the 3d printer tutorial list, thanks

EzAng

#274  

@nallycat Super stoked that you printed the head already!! Let me know once you have hooked him up to some servos for testing!!:) Where can we find more of your work, do you have a website?

#275  

@Mickey666Maus    I have added a mouth to ZOE and I am still working on the mechanism to make it work.  Mickey when you make 2 large inmoov robots you become very good at 3d printing and you get fast at printing.  I am not at my best when designing parts but I am getting better.   I don't have a website, I always had the desire to have one but never got around to it.  I should say I admire your presentations of ZOE on synthiam, they are very professional.  Thanks again for the .stl files for ZOE.

#276  

Guys, I am really happy you are having fun...its cool to see that things are picking up some pace!! Isn't it the best thing when robot fever hits you hard!!

That's what I love most about our little DIY Family here!!:)

PRO
USA
#277  

Hi Nomad, how is the printing going?

I am back at my house with internet, yeah!

EzAng

PRO
Belgium
#278  

tomorrow is printing timexD.head assembly and body.

PRO
USA
#279  

Hi nomad, can.t wait for my 3d printer to appear, what are you into now?

EzAng

PRO
Belgium
#280  

waiting for parts like a batterie.:( is your printer a building kit?

PRO
USA
#281  

4 or 5 screws and it is together, I believe

EzAng

PRO
USA
#282  

Want me to test your robot, I am back home from our farm, country land?

EzAng

PRO
Belgium
#283  

not at the moment.i am on tinkercad designing a backpack for the yellow robot.

PRO
USA
#284  

Nomad, how is your printing going?

EzAng

PRO
Belgium
#285  

hi EzAng

almost done.need to level my mini printer first and new nozel.

PRO
Belgium
#286  

sure i put my helmet on,lol

PRO
Belgium
#287  

i made a chort video how to clean the glas of a 3d printer. whatever you use to stick the print on the bed. some ordenary soap from the diches will do.

PRO
Belgium
#288   — Edited

hi all

question,i bouth a batterie from 2200 MaH 35 C 7.4 volts. can i use the charger from ez robot for this batt? i forgot the link off the batt. batt 2200 mah 7.4 volts

PRO
Belgium
#289  

i made a lid to cover up your ezbv4  or to protect against dust or any.

User-inserted image

post #288 you can use the ez robot charger to charge the big batterie.

PRO
Belgium
#290  

what do you do when your brakets are too long? you can make a block cover.

User-inserted image

and slide that over the bracket.

User-inserted image

and hold it in place with a screw.

User-inserted image

waiting for parts ,duh. i will call him lewanbot

#291  

Aaaaaawwwww ZOE has another brother!! The family keeps growing!! I really like the thought, that ZOE is no longer alone...:)

PRO
Belgium
#292  

hey mickey

its good to have a big famely.xD says lewan .

PRO
Belgium
#293  

i started printing the inmoove head.and have a few questions.

what kind off servo's are used in the picture ? and second ,how is the horn calibrated ? calibrated when horn is up or down?. i modified the gear so you can screw a horn on it.

User-inserted image

anyone thank you

PRO
Belgium
#295  

hi cem

ok i have it.thanks

#296  

Nomad   You might want to have a look at the inmoov quiet Jaw,  I changed my inmoov to this as it makes less noise it is easier to setup and the big advantage is the mouth closes fully when inmoov quits talking.  the old jaw design made the mouth difficult to shut the mouth fully and I did not like the look.  the quiet jaw is on thingiverse      https://www.thingiverse.com/thing:2787185

PRO
Belgium
#297  

hi nallycat

i just use thisone for a test.to get into the inmoov. there's alot changed .i put it in my FAV.thanks. i want to make the head and neck movements.

inmoov head stand

PRO
Belgium
#298  

i modified the wormgear for using a horn.the servo screw is allreddy in place. just a hole 3 mm in center wormgear.

User-inserted image

User-inserted image

#299  

@Nomad, your really quite good at this stuff! Nicey done.

PRO
Belgium
#300  

hi dave

its actully easy to do.just practise allot with small parts.

User-inserted image

wormgear assembled .inmoov jaw.

PRO
USA
#301  

Thanks guys for all the links to start 3d printing above, your conversation with each other help me.

this week I will begin, I purchases a 3d printer, Ion Amazon the Creality 3D Printer CR-10S Pro V2 with BL Touch Auto-Level, Touch Screen, Large Build Volume 3D Printer 300mmx300mmx400mm with Capricorn PTFE 2019 Newest 95% Pre-Assembled Printer

Be well

EzAng

PRO
Belgium
#302  

hey nallycat

indeed the jaw was not perfect.i modified it.there was too little room for movement. so i put it in the back off the head.also left some space for the gear to pass. in 2 hours i make a video.thanks for the tip.

User-inserted image

PRO
Belgium
#304  

oops inmoov has a identity crysis .xD

PRO
USA
#305  

mouth looks a little crooked, is it or just the video?

EzAng

PRO
Belgium
#306  

ezang

there still need the upper mouth part.

PRO
Belgium
#307  

my first big 3d print .22 cm x 11 cm  it took 2 days and a 1.1/2 nights cool oehoe

User-inserted image

#308  

I missed out that you are printing an Inmoov now Nomad...great challenge!! Good luck...I am looking forward to see your updates on the build!!:D

PRO
Belgium
#309  

hi mickey

lot off work now .lol need to finich 3 robot now .xD just testing some parts from inmoove.

thanks

PRO
Belgium
#310  

added the LED in the fingers.

waiting for parts:(

PRO
Belgium
#311  

auch sometimes learning cost money. i saw a video on youtube from a guy removing the filament, just by pulling it out.i though that is an easy way . i did samething, and i got this:(.

User-inserted image

yep a little filament broke off just above the heatblock. i had to cut the tube to get it out. new boden tube cost 40 euro.  and waiting again. the lesson is ,use the option on your printer, to get the filament out ,not by pulling it out.

some update hand inmoov.

User-inserted image

the horn is on the gear with screws .

User-inserted image

PRO
Belgium
#313  

hey mickey

thanks .havin lots of ffun.xD

PRO
Belgium
#314  

this printing is dangerous addictive:p.

User-inserted image

#315  

@Normad 6R      Told you so, what next the torso or the waist.    LOL    Bruce-e thinks he will have a new friend soon.

PRO
Belgium
#316  

hey nallycat

the torso would be a good start.need to look how all fit together. good thinking off brucexD.

#317  

@Nomad 6R   to fit the torso parts together, and as long as you are using PETG  you boil water in a long enough pan to hold the edge of the torso parts and you hold  the edge with the dove tails  into the water wait about 30 to 40 seconds and remove from the water using a hammer put the dove tails  over the slots and lightly hammer the dove tails down into the slots, you get a perfect fit.   you join the parts together using Weldon 3 by wiping the joint with a brush.  this is a very strong bond.

PRO
Belgium
#318  

nallycat

thanks for the tip.i still use pla for the moment.

test part

User-inserted image

#319  

Normad  PLA is not acrylic  but PETG is and you can glue it with any acrylic glue.  have you watched Will Huff's Droid Bartender build.  it is PETG and you can join parts together using a soldering iron.  you are wasting your time using PLA on a large robot,  get yourself some PETG and start making inmoov parts.  I would not use PLA for anything used in robotics. If you printer can be used with ABS then start using that, save the PLA for owl sculptures.

PRO
Belgium
#320  

okay abs will be .petg is to expencive here . 80 euro's per 1 kilo + chipping almost 100 euro's

United Kingdom
#321  

Nomad, I don’t know why PETG filament would be so expensive in Belgium, here in the UK, it’s not much dearer than ABS or PLA. Usually I find 3D printing parts cheaper in Belgium and Holland than in the UK. Have you looked on Amazon?

PRO
Belgium
#322  

hi cem

and goodmorning here. one roll cost 30 euro's pteg or abs .i order always two rolls. chipping cost 27 euro's . thats some 87 euro for two rolls . there is only white/black or red to get here. i love grey . i cant by amazon .they dont have paypal . qustion how many roll did you need to build your inmoov?

thanks for the tip

PRO
Belgium
#323  

cem

when i set my printer for abs .can i  print pla too .or are the settings only for abs then.

#324  

Now your are hooked on building an InMoov!!:D

Looks like a lot of fun!!!

PRO
Belgium
#325  

hi mickey

goodmorning too .xD am just calculating the cost . printing is fun and rewarding ,do a complete inmoov is a huge cost.

United Kingdom
#326  

Nomad, it’s a shame you don’t use Amazon, I have Amazon Prime and get free shipping on Filament. Obviously you have to be careful on who you get it from, but I haven’t had any bad filament yet!

Regarding how many rolls of filament I used on my InMoov I don’t know as I built it over a long period of time, and still keep adding to it. I think the main costs are the Servos and electronics. It is a huge cost and a lot of time in building a InMoov. But great fun!!

If you go into the InMoov website I’m sure people have asked about how much filaments is needed to build a InMoov before and have been asked many times in the forum, you can do a search.

PRO
Belgium
#327  

cem

i send a mail to amazon with the question how i can by . they said they will look into it. sofar nothing.i do like amazon cause they have alot . i am redesigning the part where the eyes go in.i wanna use ez robot micro servo's .

PRO
Belgium
#328  

here a new design ,its called the eye offset. i modified it .now you can use ez robot micro servo's tomorow some more test .here's how it looks.

User-inserted image

here a test for the dove tail .fits like a glove.

User-inserted image

PRO
USA
#329  

What kind of string do you use for the fingers?

#330  

The string used for the finger is fishing line not string  1000 test the reason is not just strength but because the larger diameter causes less wear on the joints.  if you use PETG you can use much lighter fishing line as PETG is very resistant to abasing .

PRO
USA
#331   — Edited

thanks again nallycat

So what do you use with PETG?

PRO
Belgium
#332  

nallycat

another great tip.i used katoen string for now .

PRO
Belgium
#333  

waiting for parts for the inmoov . funny thing happened . i adjusted the servo holster for using the HDD ez robot servo's. all went well untill i saw the head only moves about 2 cm up or downxD . thats when it hit me why the robot builders use the potentio meter .lesson learned .

start doing some test printing . djeez these robot cost alot off money on ebay.

here's the head . the one dj has cost some 300 dollars:( bummer .

User-inserted image

PRO
Belgium
#334  

some more pics .

User-inserted image

User-inserted image

i notest that my apps are stated private .is that normal proscedure ?

PRO
Belgium
#335  

print last two days ,two nights .xD head is turnable .

User-inserted image

#336  

You're getting pretty good at this Nomad, nice job.

PRO
Belgium
#337  

hi perry S

testing lesser support . 15% infill . there is room for iotiny and a batt.

thank you

PRO
Belgium
#338  

the body is reddy .its 13 cm high .

User-inserted image

lots off space for iotiny and batt .

User-inserted image

printing a new head .

PRO
Synthiam
#339  

That’s coming along really great. When I bought mine on eBay, it was only $40 or so. Back then before these old retro toys weren’t worth as much. Now I’m surprised how expensive it’s all become

PRO
Belgium
#340  

hi dj

indeed and it cells too . i saw a NAO figure on ebay cost normal 39 dollar .they ask 300 dollar now . its crazy .

PRO
Belgium
#341  

sofar so good .the dalek is 23 cm tall .

User-inserted image

PRO
Belgium
#343  

hey mickey

yeeeesss lookin good.

thanks

PRO
Belgium
#344  

finichedxD learn alot .

roborad he's yours if you want .

User-inserted image

PRO
Belgium
#345  

a mini dalek . turneble head . 13Hx14W

User-inserted image

PRO
Synthiam
#346  

Wow that looks real sharp

PRO
Belgium
#347  

dj

thank you . what i learned is this.when you scale up parts ,that doesn mean it still fit together .

PRO
Belgium
#348  

another piece off the puzzle .

User-inserted image

PRO
Belgium
#350  

i made from an 180 HDD servo a continious servo . took the pin out the main chaft and cut out the arret out the pot . one problem .its turns only one way . what do i missed?

PRO
Canada
#351  

You’ll need the potentiometer still (glued in the center position) or solder 2 identical resistors in its place. 2.2k or 2.49kohms are good values to use.

PRO
Belgium
#352  

hi jeremie

is there a video from it ?

PRO
Canada
#353  

This video does a decent job of explaining it:D

PRO
Belgium
#354  

ah thanks for the video.

PRO
Belgium
#357  

got me the ears and lower back head .

User-inserted image

PRO
USA
#358  

great head Nomad - eyes, talking (with my lines, lol)

Did you print the eye parts?  where are they online?

EzAng

PRO
USA
#362  

Nomad your InMoov is coming along fine

thanks for the parts

EzAng

PRO
Belgium
#363  

hi ezang

what do you think, what servo to use for the head .continious rotation ? thats the one with the red horn.

PRO
Belgium
#366  

hi ezang

indeed that woulld not work .

PRO
Belgium
#367  

worm gears in place .

User-inserted image

jeremie

the soldering of the resistors for the continious rotation worked great.

thanks

PRO
USA
#368  

Nomad, do you use actuators for the neck / head movements?

PRO
Belgium
#369  

ezang

to oblique the head i use normal HDD 180 servo for now . i dont have a clue what to do for the front servo . i dont get  no notification on this topic.

PRO
USA
#370  

You know, maybe his mouth can open a little more , if you can when he speaks

just a thought

EzAng

PRO
Belgium
#371  

ezang

yes he can . ithink the mouth doesn open much when there is to much distortion the mp3 file . when he speaks it great .

United Kingdom
#372  

Nomad, have you played around with the delay settings under the Talk Servo, to get Inmoov’s mouth more in sync with the words. Also adjust the max and min to get his mouth opening more?

PRO
Belgium
#373  

hi cem

yes i did . it just happened when there is much distortion in the mp3 file .

admin

i dont get notification when someone replay to my topic.

PRO
Belgium
#374  

i found a way to control a continious rotation from start to finich. 1 make in the Movement Panel a motion stop and ad a port and set to 90 degrees. 2 make a script write  stop() 3 second script write move(d12,"forward") ( you can use any port ) sleep(100) controlCommand("Auto Position", "AutoPositionFrameJump", "Stop")

the lower the sleep the chorter the servo will move . sleep(10) is about 1 MM the higher the sleep the longer the servo will turn. the servo stops auto when reached the sleep.

here a little video

#375  

Hey right on Nomad  glad you got it going!:D

PRO
Belgium
#376  

hi roborad

thanks for the link . tomorow i give  my inmoov a yes motion.

#377  

Ya Synthiam ARC has so many great servo movement panels,I spent a whole month 2 years ago getting complex movements on my out door Terminator arms and BB gun HDD servos. Follow scripts to shoot at targets "search and destroy" look for red target (Need to Hide if I was wearing a red shirt) then terminator would pause,say something and shoot the gun at target red, all full intelligence no remote control, very fun,was cool.

PRO
USA
#379  

Are those simple LEDs?

How did you code for it?

EzAng

PRO
Belgium
#380  

bright leds .transparent .the disc is translucent blue.

:loop sleep(50) pwmRandom(d0,0,100) sleep(45) pwmRandom(d1,0,100) sleep(45) pwmRandom(d2,0,100) sleep(45) pwmRandom(d3,0,100) sleep(50) goto(loop)

PRO
USA
#384  

Great stuff Nomad - keep it going!

EzAng

PRO
Belgium
#385  

does anyone know if there's a button in TC to place your design in center of the work space?

oops almost over the edge .

User-inserted image

PRO
USA
#386  

what is that Nomad?

PRO
Belgium
#387  

hi ezang

thats a raft sitting very close to the edge of the bed .

PRO
USA
#389  

very nice Nomad

when will you put it all together?

PRO
Belgium
#390  

hi ezang

alot of parts needs to be printed . tomorow i print the backside of of this . am thinking to put all in that .batt en iotiny . i think some 3 days , then i can put this together to test .

PRO
Belgium
#391   — Edited

waist part a little closer to the finich . and a little video . this video is for turning waist left&right using the splitter.

User-inserted image

PRO
USA
#392  

Looking good Nomad :-)

PRO
Belgium
#393  

hi ezang

this is the setting and parts for the inmoov movement left&right.

#394  

Hi Nomad. Nice idea on using atto position for a CR servo. However what if the servo moves somehow after power down? How do you really know where your position moves will end up next time you power up?

#395  

Hi Nomad, nice to see the progress. I have a few questions/suggestions as I have built an inmoov before.  -The joint you are working on and showing in your pic is to tilt the inmoov chest, not rotate it, correct? -That is one of the higher stress positions in an inmoov. I am not sure that standard size servos will cut it. I guess you will find out and be able to tell us! -The servos need to be electrically connected such that they only receive one input signal. The reason Gael set it up that way is because you will never be able to sync them correctly after power down and during power up.

Great progress so far and thanks for sharing. It is an adventure to build an inmoov.

PRO
Belgium
#396  

hi perry

that is correct .movement chest left&right . i used a splitter HDD contineus rotation from ez robot . am thinking they have metal gears .i will sure post a video when reddy . they do work perfect at same time .

User-inserted image

thank you for the tip .

PRO
Belgium
#397  

hey perry S

question for you .witsh side is left or rigth ?

User-inserted image

PRO
Belgium
#398   — Edited

nice work done today .one step closer . the waist are lots of small parts .

User-inserted image

PRO
Belgium
#399  

hey dave

sorry i didn catsh your comment .i use the HDD they dont move when powering on or off .

thank you

#401  

Oh man those 'advanced Chinese robots' are just an insult to people that create.

PRO
Belgium
#402  

hi perry S

idd , i was actully lookin for this guy remote . he has an antenna .

User-inserted image

PRO
Belgium
#403   — Edited

video's are back on yotube.

PRO
Belgium
#404  

finally with the help from synthiam i can control the contineus rotation perfect . i made a bridge that stands for the inmoov body .just to see what it does . more printing .

PRO
Belgium
#405  

hi perry S

what is the purpose of these 4 bolts ?

User-inserted image

#406   — Edited

The purpose for those bolts is to hold the collar to the waist plate. You will notice the collar holds a set screw that engages the waste rotation gear as well. This is how he will rotate at the waste.

Also about the demo video you posted. If you put a pivot point in that cross bar like the inmoov is set up I fear you will start to have problems.

PRO
Belgium
#407  

hi perry S

the cross bar is just for testing . i was thinking the 4 bolts are to keep tention between the , top plate and lower plate so the ball bearings wil not fall out .

thanks for your time .

PRO
Belgium
#408  

secret hiding for the iotiny .xD also the batt fit in there. turn waist &tilt sides goes on the iotiny.

User-inserted image

#409  

I think that red part is on backwards

User-inserted image

PRO
Belgium
#410  

perry S

oh i missed that one . you are correct .but now i have space for the iotiny . maybe i need to double it .

PRO
Belgium
#411  

hi perry S

i have a question . i have posted it on inmoov site but get always an error message ( you use an inapropiate word )?

am lookin for a foto's ,video how the stand is mounted on the waist . and what is this slot for in the picture ?

User-inserted image

#412  

I'm not sure what that slot is for and I can't remember from assembling my first inmoov.

PRO
Belgium
#413  

perry S

ah ok . i will look further then .

thanks

PRO
Belgium
#414  

little update

i modified the  low waist stand .you can use now a bolt and nut . nut is with locker 4 mm ,the bolt is 4.27 long 4 mm. and pre hole for attach on the pole . also extra support for extra screw or bolt&nut 4 mm .

User-inserted image

#415  

Those are good mods Nomad.

PRO
Belgium
#416  

hi perry S

thanks .there some parts that can be a little better . the above part .one screw hole is to close to the side . thats why i connected the two rails .now you can ad a screw more to support that hole.

User-inserted image

PRO
Belgium
#417  

another new idea .the front body waist covers but apart . they break off very easly .so i made them separt .to mount with one screw .

User-inserted image

PRO
Belgium
#418  

hi perry S

do you have the correct size off this gear ? i have two diff size when upload this part .

User-inserted image

PRO
Belgium
#419  

who remeber this robot named archie robot off steel . this was my first fav robot .

User-inserted image

so am testing a archie head .

i separated the original jd rgb housing from his head . and put that in the head .tomorow testing how it looks and if it works . i also made an inner plate to store eye LED and mouth LED.

#420  

Nomad 6R, Your Archie head really has the retro look, very nice. Looking forward to seeing more about Archie. Steve S

PRO
Belgium
#421  

hi steve S

for now i have only te head .

thanks

PRO
Belgium
#422   — Edited

lsome huge progress. completed the waist .and a new brace for the servo . this job was for a hole day working .

User-inserted image

here's how it looks .

User-inserted image

only one servo for turning the waist .

for those who going to start building an inmoov .the ring ( 4 bolts ) inside the waist main gear. must be put in first before put averything together . i forgot the stl from the brace. beugel.stl

PRO
USA
#423  

Hi Nomad, how is is going?

How is your Inmoov coming?

PRO
Belgium
#424  

hi ezang

got waist reddy.next thing to do is put the body on the waist.

PRO
Belgium
#427  

hi perry S

thanks .reddy to get body on .

PRO
Belgium
#428  

first chest part reddy .

PRO
Belgium
#430  

hi dave

thanks .i sure will .xD

PRO
Belgium
#431  

sofar the chest . tomorow the top chest parts .

User-inserted image

PRO
Belgium
#433  

hey roborad

thanks .its amazing howmany parts there are .

PRO
Belgium
#435   — Edited

i mod the stl from the pre last chest part so you can ad a screw in . i just need to know the correct size .i get all kinds off diff sizes . print these standing upright.

User-inserted image

plate bolt.stl

PRO
Belgium
#436  

ok next ting to do .if you going to use this lower cover ,you need some support , to get a screw in on the side. simpel solution .two blocks . and weldon3 .

User-inserted image

two support.stl

PRO
Belgium
#437  

shoulder covers reddy . tomorrow finich the eye cam .

User-inserted image

PRO
USA
#438  

Looks great Nomad, waiting to see it move

PRO
Belgium
#439  

hi ezang

thanks .not much movement yet.

#440  

Nomad 6R, Nice work, the color combination looks good and is something different. Thanks for sharing. Steve S

PRO
Belgium
#441  

hey s steve S

thanks . hoping to make a video tomorow about the cam.

#442  

@Nomad 6R,

Your inmoov is looking great, I like the colors you're using.

PRO
Belgium
#443  

hi Merne

thanks .glad you like it .

PRO
Belgium
#444  

the eye for the cam is reddy.tomorow it goes in his head . its the original cam from ez robot .

User-inserted image

User-inserted image

User-inserted image

PRO
USA
#445  

Nice looking eye, camera

#446  

Nice job. I made those same mods. You are getting to be a master!

PRO
Belgium
#447  

hi perry/ezang

thanks for the kind words .

PRO
Belgium
#448   — Edited

its in the head the cam and works . i notest when using 3d print colors , the cam works very good with 3d colors.

PRO
Belgium
#449  

question.what do you do with left over filament? i got this idea. make some color palets .you can use these to adjust your camera . i use some 25 infil . you can make diff colors . it takes about 4.5 hour to print.

User-inserted image

color palet.stl

PRO
Belgium
#450   — Edited

wel i thougt give the inmoov some more LED light . this looks similar like the pir sensor .only it has an LED . for filament i use transparent blue .

User-inserted image

pir glas.stl

pir sensor case.stl

PRO
Belgium
#451  

here a little video how it looks.

PRO
USA
#452  

Very nice, is that an eye ball?

#453  

Nomad 6R, Looks great, it will make your build more custom. Thanks for sharing. Steve S

PRO
Belgium
#454   — Edited

hey steve S/ezang

thanks . steve would be a good name for the inmoov.

ezang

no two 3d prints and LED inside .

PRO
Canada
#456  

Quote:

This auction is only for OEM Custom made Intelligent Robot Humanoid Waiter Restaurant Food Delivery , You can select language,color and some other details function,please ask me by message. The final robot price is depending on your selection,it is usually between $15000--$20000.

This auction's $300 is only for the remote install software instruction fees for the robot. So please don't bid it if you don't want to Custom made this robot.

Looks like the Robot is not as cheap as you might think, the description is tricky.

The $300 fee is for a custom software install service and not for the robot itself, which is still $15k-$20k.

#457  

Yes, that seller is sketchy as heck. I have seen those robots before and they are made by a Chinese company that steals designs. They also sell a preprinted robot that is directly off the inmoov STL files. Gael can't stop them.

Also, I looked at that sellers store and they only had a few items for sale. The other item does not give me a lot of confidence in their operations.

User-inserted image

PRO
Belgium
#458  

hi jeremie/perry

oh some tricky stuff then . its amazing howmuch chinese copie stuff.

PRO
Belgium
#459  

color box is reddy .tomorow a few more palets to print.

User-inserted image

User-inserted image

PRO
Belgium
#460  

wel inmoov is on vacation . so i need some els to print . and i got the idea of making, a binocular from a door spy and put it on a M4A1 .here's how it looks . the riffle takes 102 files for printing and some 20 files needs to be modified.

User-inserted image

the riffle sofar .

User-inserted image

#461  

You should put a IoTiny in there and make it a talking riffle.:D

PRO
Belgium
#462  

hi dave

"stop or i will shoot you myself" haha sounds good .

#463  

Nomad 6R, You are always coming up with new things,  Looking forward to any updates. Steve S

PRO
Belgium
#464  

hey steve S

the ideas comes along with the modifying off parts . this is a great test for your mind. you need patients,presistents and focus , inventing stuff  .things where i have problems with . its amazing 102 files . that big .   for excample the designer made this part with the option of put in a nut .

User-inserted image

on the other hand he uses plastik bolt , that easly break and hard to print . so i made from his part a bolt holder .

User-inserted image

bolt in on one side and a nut the other .perfect for bolt 3d parts together . 3MM bolt&nut .

BTW the riffle actully works .except no bullets flying out . but you  can smile the riffle and click . eject bullets . load magazine.

thanks

PRO
Belgium
#465   — Edited

deleted post . unsolved .

PRO
Belgium
#466   — Edited

post compleet deleted

PRO
USA
#467  

Hi Nomad, how are you?

Hope all is well.

sorry about the problems you were having above..

What is the latest on your on your project?

EzAng

PRO
Belgium
#468  

hi ezang

for now am printing riffles . dont have a clue why .  they are working props .xD here's a second one a colt 45 .

User-inserted image

sombody called me even '( that one ) haha    also the moving is torture me . you have to know about me. i moved 17 times now and i am tired of moving. my GF father died of the second vaccin for covid . from the moment he got , the vaccin a few houres he was death . so i let time go by for now ,take some rest .

thanks ezang

#469  

Patrick, I am very sorry for your loss. Hope you get settled in from the move. Steve S

PRO
Belgium
#470  

hey steve S

we are waiting uppon notest to move out . am hoping to find a space with  no stairs .xD

thanks

PRO
Belgium
#471   — Edited

hi dave

excample is the M1 GERAND .:p

your idea to make the riffle talk is donexD . i also made it mobile . needs to do stil . is make room for speaker and iotiny ,batt in the choulder part .

PRO
Belgium
#472  

hi all

just wanna say hi to all .i have some new print idea. one off my fav book is this one  johan the red knight .

User-inserted image

i love the sword .so i started to make one.life size sword .

User-inserted image

you have the handle .the top piece , middle piece and point . the little block is for assemble all parts together. the middle part you have to print as much the lengt you want the sword to be .each piece is 15 cm long . here's the handle reddy .

User-inserted image

User-inserted image

#473  

Patrick, That is a very creative idea.  It is looking great. Steve S

PRO
Belgium
#474  

hi steve S

its fun to do . thanks for the comment.

PRO
Belgium
#475  

second part is reddy .

User-inserted image

PRO
Belgium
#476  

printing is done .now painting and sanding .

User-inserted image

PRO
Belgium
#477  

howdy all

i saw this cute little fellow and i thought .hmm ARC can this to .not so thechnicall but still lots off fun . little fellow 

User-inserted image

sofar i have the head .robot is bigger do .

User-inserted image

i use the front off the rgb case .hold it inplace with hot glue .

PRO
USA
#478  

Hi Nomad,

Here is one from me.

I still want to learn how to have the camera follow it, with audio, mouth moves, speech

EzAng

PRO
Belgium
#479  

hey ezang

thats an awesome face .looking forwart to see more .

PRO
USA
#480  

I still want to learn how to have the camera follow it, with audio, mouth moves, speech

PRO
Belgium
#481  

hi ezang

thats alot to learn . any idea how you going to start?

PRO
USA
#482   — Edited

I see a few guys on here that have accomplished that but they are gone at this time.

Let me know if you have accomplished this, thanks

PRO
Belgium
#483  

here how they make the eyes. but i dont have the skills for it .

PRO
Belgium
#484  

hi avery one

just say merry christmas soon and happy new year also soon .

#485  

Marry Christmas and Happy New year to you too, Nomad!

PRO
Synthiam
#486  

Thanks Nomad - that's really nice of you! Happy holidays to you and your family! I hope it's a safe and pleasant holiday!

PRO
Belgium
#487   — Edited

dj

thats nice a christmas hat on ower iconpic .

thank you

PRO
Belgium
#488  

back to basics programming can be fun too .xD

PRO
USA
#489  

Nice Nomad, follows the hand moves

PRO
Belgium
#490  

hi ezang

the IR sensors on the choulders do .xD

thanks

PRO
Belgium
#491  

dj&team

great idea the swag store . like it .

User-inserted image

PRO
Belgium
#492  

playing a little with the meccanoid robot .

PRO
USA
#493   — Edited

look good, what is that green light? an LED?

PRO
Belgium
#494  

hi ezang

yes a flat LED . connected on the signal .black/white on ezbv4 . whit the talk servo .

PRO
Belgium
#495   — Edited

hi

i made a servo block that fits in the arm of a meccanoid robot . now you can turn your hand or gripper .

User-inserted image

the little plate in front is to line up the block with the arm . above you can ad some little screws in from original HDD servo's  screws in bolt side .

you can ad real hands also . you can order them now assembled and with the wire and end bracket included .

robot hands .

User-inserted image

PRO
Belgium
#496  

hi

in the above video i used a MG995 servo witsh has a range from 7 to 173 degree . the HDD from ez robot has 1 to 180 full range . huge diff .

new finiched servo block for meccanoid wrist .

User-inserted image

PRO
USA
#497  

Like the hand movements, your robot is coming along

PRO
Belgium
#498  

hi ezang

making funnels for the eyes . using 3 color LED . these comes behind the eyes .

User-inserted image

thanks

PRO
Belgium
#499  

new block is in the arm wrist .

User-inserted image

PRO
Belgium
#502  

ezang

you have a meccanoid ?

PRO
Belgium
#503   — Edited

hey ezang

you can now order from ez robot.com the connection parts for servo 's . also the back&brakets for HDD page nr 2. connectors servo's

PRO
USA
#506  

I don't have a meccanoid

PRO
Belgium
#508  

hi ezang

just got lucky today . found tree robots in good working condition for low prize . one meccanoid for free just 6.60 euro shipping . the other a rs media complete and working 120 euro. a joebot&femiesapien for 50 euro . diliver to my place . thanks for the link .

User-inserted image

PRO
USA
#509  

Congratulations!

PRO
Belgium
#510   — Edited

here's a video how to get yellowed parts back to normal color . you need UV licht .

UV light

product

PRO
Belgium
#511   — Edited

i made a speaker housing for the meccanoid robot . here's how it looks . for in the chest . i have also alot of mp3 files from cylon and evil female bot . if anyone is interested i send a copie .these are original from wowwee rs media robot . they sound real great .test in video .

User-inserted image

and here's is it in the chest meccanoid robot .

User-inserted image

the stl for printing .

ring.stl

meccanoid mouth LED .

mecca mouth led.stl

PRO
Belgium
#512  

here some more pictures of the speaker in meccanoid chest . also some cool sounds . if you put some cotton in the speakerbox, you wil have more sound effect ,more lower sound . the voices are cylon,female EvilBot and female

User-inserted image

User-inserted image

User-inserted image

PRO
USA
#513   — Edited

Speaker in chest - works well,

If you want a robot voice - audacity is what I used, it's free

Highlight the whole audio, then apply form effects, Vocoder at the very bottom of the effects, here are te settings:

User-inserted image

export as a mp3

PRO
Belgium
#514  

hi ezang

i have some similar called swiftalker .you can make al kinds of voices  and centens . also download as mp3 files .

thanks

PRO
Belgium
#515  

meccanoid gets a new logo in chest .

PRO
Belgium
#519  

hi ezang

thanks for the compliment .

PRO
Belgium
#522   — Edited

hey ezang

did you had a problem ? i have the files on my pc if you want .

this is a robot that can walk and moveble arms +LED ontop his head .

this guy has some 40.000 robots .he makes them too .

PRO
Belgium
#523  

i changes the arms and feet a little . solid feets and gripper on the arms .

User-inserted image

PRO
USA
#524  

sure - send the stls

#526  

I love that little guy. I really want to get into 3D printing. You guys make it look so easy.

PRO
USA
#527  

It worked, the zip fife

PRO
Belgium
#528   — Edited

hey ezand/dave

dave there are tons off allreddy downloads for free . and you can modified them . its practise . tinkercad you learn in one houre .

ezang

this guy has thousands of robots .

https://www.youtube.com/user/Robothut/videos

PRO
Canada
#530  

Pretty awesome channel, thanks Nomad! I subscribed. I had a good laugh watching the God Jesus Robot videoxD

PRO
Belgium
#531  

het jeremie/dave

yeach that guy is awesome . am allreddy think his robot .iotiny and some micro servo . speaker .what alot of fun to do .

PRO
Belgium
#533  

hi ezang

here the file for the back slide plate . you can glue or screw a batterie case on with on/off switchs .

plate body.stl

PRO
Belgium
#534   — Edited

some improvement made . an LED as one eye . hatch in head to pull the wires from in the body , into the head . little more space between the arms and body . in the body are turning gears ,so best to pul the wires into the head .

User-inserted image

new folder with parts . send files.zip

left over filament robot .

PRO
USA
#535  

smart, using the leftover filament

PRO
Belgium
#536  

hi ezang

you can use up all filament and make it colorfull . the new folder has new mods .

PRO
USA
#538  

Great you got them, great grippers

PRO
Belgium
#539  

hey ezang

yeach i ordered them with the servo but they didn include them . so i had to mod the gripper whit HDD servo's .

thanks for the link .

PRO
Belgium
#540   — Edited

bad news on the horizon:(

am not feeling wel lately so i called the doctor and have some blood drawn . i have got hodgekin cancer and was cured from that . now it seems back , and there's a chance its all over my body .they also found tumor cells:(. its going to be a nasty ride or maybe worse . friday comes the dockter again. to see what needs to be done now or in the future . so if you dont hear , from me after friday i problebly in hospital . seeya .

PRO
Belgium
#541   — Edited

the problem is soved .

thank you whoever fixed .

PRO
Belgium
#542   — Edited

website issue,website issue

PRO
Belgium
#543   — Edited

reminder for all who uses 3d printers . i notes for some time am short of breath some headtaches . running nose . this morning i stood up and had no breakfast or took any medication and my nose start running . little headaches . i had started only my 3d printer . alot of chemicals come free when printing . use printers in a good ventilated area . ABS is the most danger one .

astma from printing .

PRO
Belgium
#544  

here's a video how to make a ventilation .

#545   — Edited

Brother, vent, vent, vent. I truly hope you and everyone living with you will be ok and have not been permanently hurt by this.

Are you going to build and enclosure like in the video you attached? Seems like the thing to do. You've said before that you live in a apartment building? Hopefully you have a way to vent the fumes outside. Maybe through the bathroom exhaust vent?

PRO
Belgium
#546  

hi dave

yes i need to build something if wanna print more . i had no idea i was sick from printing . and i had two printers going . there chould be a warning when bying these printers . i put it up here for people who prints all night for days . be carefull guy's youre in the danger zone before you notest its the printer .

PRO
Belgium
#547   — Edited

howdy folks

first thing. i had some problem with my extruder . filament didn go thru . as i learned to check the copper gear and it was worn out . you can if you dont have a spare lift the gear up or down to find a good spot .

here a picture worned gear . the middle of the gear is almost gone .

User-inserted image

and so i placed a new one . and had some 70% improvement so not fully fixed. i was practise with some flex filament . and it was diff . but then i notest something els .

i learned when one thing is worned out replace the complete set . as seen picture below .amazing . the filament went thru the metal hole .

User-inserted image

and now some good news . the test hand is almost done .

TADA

User-inserted image

my first flex knokkels . temp 239 nozzle and bed 60 temp. standard speed ender3 pro . medium flex is skin color . the most importent i notest is , you have to adjust the spring from the , extruder very accurate . you have to do that with a raft . that gifs you plenty of time to adjust . flex is strecheble and , bent before its thru the extruder . its really adjusting by  a 1/4 of a turn , and keep your eyes on the raft and the gear very carefull . when it start to , go wrong pinch the spring together and pull back the flex until the knob is out and adjust 1/4 . of a circle. you have to keep this doing aslong the flex goes constant , smooth thru the extruder . i had to try about 5  times .

flex filament 

now have some rest and making bagage am going on holiday tomorow . DUH.

#549  

Wow, you must really run that printer of yours to wear it out like that. LOL.

That Flex seems to work amazing for that hand. I wonder how it will stand up to ware as the joint gets bend back and forth over time.

Have fun! Don't forget to vent that printer.

PRO
Belgium
#550  

hey dave

well we will know howlong the knokkels last . i was surprized that the ender3 pro , could print flex . normal is only for . PLA?ABS? and PTEG . another problem is will the fingers go back in srand position .

thanks

PRO
Belgium
#551  

solved the finger back to position .it needs a little spring . yellow arrows is a tiny space for the spring to sit .

User-inserted image

and a short video how the finger retracts . i tested a random spring .

https://www.youtube.com/shorts/j6ZxX9W9WOY

PRO
Belgium
#552  

goodmorning all

i woke up and instant i wanted to print . haha problem nm 1 filament got stuck in the nozzle . okay set nozzle temp 255 and you can pull out the filament . then came THE axcully problem that cause all other problems .and that is the complete , block were the nozzle sits was loose ,thinking how i gonna solved that ? after some time , i saw the light .see picture . the below roller has an axel thats out of center . when you use L-wrench and turn to left or right you put back good tention on the top 2 roller . and that was the main problem of bad always diff prints . level the bed after that .

User-inserted image

PRO
Belgium
#558  

i notest something od in the speech recognition window. the check box doesn stay off when command is given . even when in the script the pausseoFF is written .

PRO
USA
#560  

Have the stls ?

PRO
Belgium
#561  

hi ezang

you have to ad the male or female end part .

send.zip

PRO
USA
#562  

Thanks Nomad,

I will try them out

PRO
Belgium
#563  

the micro servo goes in the cover complete . dont take the back cover from the micro servo off .

PRO
Belgium
#564  

how to get very strong 3d parts .wel this guy in the video knows it . i tested the settings and my parts looking very nice and are alot more stronger .

#565  

Thanks Nomad. That was really interesting. I don't 3D print but I enjoyed that and learned something.

I really want to get into 3D printing someday soon. I can see how it could help me build better stuff. However, I'm having a hard time moving away from old ways. I'm kinda old school when it comes to building something. I'll grab some aluminum or polycarbonate, a bandsaw and drill press and start measuring, cutting and shaping.

I have a hard time sitting down and taking the time to put a design into a CAD program or onto paper to plan it first. I should try to move away from this a little and get the process out of my head. That may keep me from having to rebuild things two or three times to get them to work. LOL! I make so many brackets by hand to mount components. I've always thought that if I could do the process in software first and then 3D print them, This would be so much better. However till recently I felt that 3D printing was still not to the point that it was easy to understand, implement with good results.

Then there is the final print on areas that need to look smooth. Resolution is very important to me and I hate the finishing process that would need to be done to make a 3D printed surface look smooth. I understand there are methods to make this process easier and the printers are coming now that print in higher resolutions. I think these printers and software are just about ready for someone like me to make the jump into this world.

I really think it's the way of the future for building things. I saw a movie recently where there was a spaceship that crashed on Mars. They needed to get to the base that was set up for them before they got there. The needed to 3D print the parts they needed for the damaged equipment so they could survive. This makes so much more sense then trying to carry parts you think you may need into places you have no way to get them.

The big thing I dream of doing with a 3D printer (other then make small parts and brackets) is to start printing a full sized Robby the Robot from Forbidden Planet. I've found that there are high quality STL's of this life sized robot. I couldn't imagen how long it would take to print the pieces for something like this. I can seeing me having to buy 2 or three printers!   LOL

PRO
Belgium
#566  

hi dave

i like to modified parts and make them stronger . her's an excample . fragiel trigger from a AR15 . i made it thicker in TC and see the result .  you will have some errors and forget some things withs is very annoing. but doing is again makes you mentally stronger . the feeling when , your print is sucsesfull is awesome . but you have to learn bit by bit . the creality ender3 pro is the best for beginners . and use glas bed . also remember when you mod a part most likly you have to adjust more .

reinforced trigger . top has 1 mm spring in it .

User-inserted image

if you have stl's from robbie . i have time enought to have a look at it .

PRO
Belgium
#567  

hi

printing a riffle is  not so very robotic . but its a great way to understand 3d printing. all the stuff that can go wrong , what you forgot to ad . it similar like what iphone did . you take designs from others  and modified them . ask the designers or mention his/her name , in your design . so they get the credit . here sofar my design AR-15 . with scope and org viser . i used a door spy  funny . now soon there will be no door spy availble in storesxD just kidding i hope .

User-inserted image

you can still use the org viser and its adjustble in hight .  you can see thru , underneed the top rail and use it .

User-inserted image

is someone wants to try this .i send you a folder for free . also other type's are availeble for free . if you can let it work , you can 3d print . also needed are springs , bolts and nut .  i dont want to place the folder here cause its a robotic forum .

PRO
Belgium
#568  

here some more pictures .

you can take off the scopen and top rail . its changeble .

User-inserted image

User-inserted image

PRO
Belgium
#569  

hi

does anyone know how to design springs ? am having trouble with this one . cant get it to print . its not my design .it to thin 0.4 mm .

User-inserted image

file torque_spring.stl

PRO
Belgium
#570  

hi all

printing with turbo speed  .

#571  

Now that's what I'm talking about! Now we're getting there.

PRO
Belgium
#572  

hi dave

that is super sonic speed printing .

PRO
USA
#573  

Very cool printing, now mine seem so slooooow   lol

EzAng

PRO
Belgium
#574  

hey ezang

keep printing slow . this super sonic printing is for the ones who understand avery setting in there slicer .

#576   — Edited

That was a fun video to watch. Thanks for posting.  That HUM SUV sounds like a really bad idea. I foresee lots of road rage happening when some jurk starts driving over cars in front of them.:(

PRO
Belgium
#577  

yeach i can't imagine that a jeep drives over your new car .:(

PRO
Belgium
#578  

amazing cool robot .

#579  

Nice designs incorporated into that little guy. I love the clutched joints. I'd like to know how they work and are installed.

A lot of young people these days wouldn't know that was a phone. Nor would they know how to use it if it was functional.xD Time marches on.

PRO
USA
#580  

lol right Dave, a rotary phone is long gone...

Nomad, cool robot video

PRO
Belgium
#581  

hi dave

you can find the video's on his channel how they work .

hi ezang

dj made some similar phone .

PRO
USA
#582  

what year was that?

PRO
Belgium
#583  

i cant remember the year but dj sure can .

PRO
Canada
#584  

Looks like it was 2017 going by the date on the video:D

PRO
Belgium
#585  

hi jeremie

i still find that a cool hack , the phone .

PRO
Belgium
#586  

hi all

bad news . belgium is drowning . we are not able to pay the bill for gas .  from 1600 euro per year to 7022 euro per year . with in a few months am , not able to wach myself anymore . ordering parts is double the amount , thats why i bin quit so lately .

#587  

I feel for you, your loved ones, friends and country my friend. I hope you and yours find a way though all this. Life changing problems for sure. We all need to pray that things level off and start to get better soon. For Belgium and the rest of the world. Seems it's getting hard all over. I hope our leaders wake up soon and find a way to ease the suffering.

Until then, I hope you find a way to enjoy yourself somehow for a while now and then and withdraw from the stress.

PRO
Belgium
#588  

hi dave

yeach the world has gone crazy . leaders are looking only for themselfs . ppff

thanks

PRO
USA
#589  

Sorry to hear this, Nomad, yes prices are going up

green energy is not working so well

PRO
Belgium
#590  

hey ezang

this is terrible . i hate gouverment and ministers . sitting behind there desk and go home , with thousands off euro's while people suffer .

thanks

PRO
Belgium
#591  

hi all

did anyone found a gear like this one but with 50 teeth and 60 teeth ?

gear

PRO
Belgium
#592  

hi all

a little video about what am trying to do . cause bying servo's chipping,customs, and send to my house , turns out the cost is high at the moment . so i wanna try to , avoid warrenty by not opening the servo's . lot off testing . i found a seller who is looking for the metal gears for me .  the ones i have are 40 teeth .25 spline . the mistake i made earlier , was i thought bolt wormgear turns eather left or right but thats , not the case . bolt has to turn inwarts or outwarts to turn the big gear .

#593  

Thanks for showing us. I'm glad you're staying busy and enjoying yourself.

I'm not sure how your design is set up but can you reprint the servo mounting bracket to move the servo gear closer to the drive gear? You probably know this but if you increase the size of the servo gear you will drastically change the speed of the final gear or wheel. In your case it will move slower but have more torque.

PRO
Belgium
#594  

hey dave

actully i didn know that . good you mention that . i cant get the plate closer cause then i have no room for , the screws to go in . its about 2 mm .so am gessing the , speed will not change so much .

thanks

PRO
Belgium
#595  

hi all

does anyone know how to get these files back to normal ? i changed one files and all files changes .

User-inserted image

PRO
USA
#596  

wow, never seen that

Maybe change the "view"

PRO
Belgium
#597  

hey ezang

i try them all whats in the drop down list . but no luck there .

PRO
USA
#598  

Which windows are you using 7, 10, 11

PRO
Belgium
#599  

hi ezang

i have a windows 10 .

PRO
USA
#600  

I have windows 11 so a little different

try

  1. Open File Explorer.
  2. Click on the View tab.
  3. Click on the Options button.
  4. Click on the View tab.
  5. Click the Reset Folders button.
PRO
Belgium
#601  

nope that is for folder options . but i learn something new thanks .

#602  

Try this: *Open your folder you want to change in File Explorer. *Once your folder is open click on the View tab like EZ Ang mentioned.  *Once this tab opens look to the left and you should see different view options like "Extra Large Icons, Small Icons, List, Detail and more.  *Click on each one till you get the view you want. I don't know what you consider "normal" but I like the "Details" view.  *I'm a little sketchy on how to get it to stick. Maybe you don't have to do anything and it will save this view. However you may now need to follow EzAng's steps but when you get to the options/view tab click on "Apply to Folders". That should make all your folders look like the options you just set. In addition there is a "Restore Defaults" button on the bottom of that tab you can use and the windows default view setting will take place.

Follow my advice at your own risk. LOL. Good luck.;)

PRO
Belgium
#603  

hi dave

i figured the folder option .but am lookin for the file options . i know i have to click on file , choose properties . the one original is not in the choose options .  this foto is what i mean with normal .

User-inserted image

thanks

#604   — Edited

Other then the suggestion I offered I can't really help anymore. Sorry. I've always struggled with this setting also.

In the past I've done a google search to find out how to make changes to the setting and views I need in Windows. However it seems that the guides and suggestions I get always seem outdated and the steps incorrect to make the change. Windows seems to always change the way you work with it. Ugh.

Good luck. I know it's frustrating.

PRO
Belgium
#605  

hi dave

all advice are welcome .

thanks

PRO
Belgium
#606   — Edited

problem solved .

#608  

Nice job Nomad, I like the video.

PRO
Canada
#609  

Happy New Year Nomad and everyone else here in the community!

PRO
USA
#610  

Happy New Year to everyone in the community

#611  

And a happy new year to you:) and every one in this great community !

PRO
Belgium
#612  

howdy all.

having some fun with printing .my longest print sofar . the torso alone 84 houres . JFK . i found another robot . the good old bioloid comp complete never used .

User-inserted image

PRO
USA
#613  

Looks good, did you color him?

PRO
Belgium
#614  

hi ezang

yes i painted him with paint for kidsxD .  just the stand is pure gold PLA .

PRO
Belgium
#615  

hi averyone.

a few words i wanna share . i just met the CEO from ez robot.com in a chatroom . we had a talk about robotic and about life how it changed my life . it was my first chat with a real person online . it was stunning . life is full of surprizes .

PRO
Belgium
#616  

hi anyone

question . is a chromebook or notebook suitble for using ARC ?

thank you

PRO
Canada
#618  

ARC is not compatible with Chromebooks as it requires a Windows or Mac operating system. However, you can use a notebook with Windows or Mac operating system to run ARC.


I am a customer support GPT-powered AI and still learning. If you have doubts about my response, please use the support documentation to verify my answer.
PRO
Belgium
#619  

athena works great and fast .

PRO
Belgium
#620  

hi averyone

is there a way to know if there are new members on board here ?

PRO
Belgium
#622  

hi all

i made some double female clips to connect two male brackets . to make very strong parts with pla , you can use the gyroid in your slicer .30%infill. am also making a mini servo box for the camera ,pics later .

User-inserted image

User-inserted image

double-femaleClip.stl

PRO
Belgium
#623  

hi

here's an excample off the mini servo box for the head . am finiching the box now .it will be a little lower so you, cant see the mini servo itself .

User-inserted image

User-inserted image

PRO
USA
#625  

Looking good,

by the way, what happened to the Inmoov head you made?

PRO
Belgium
#626  

hi

the head is stil on the shelf .

PRO
Canada
#627  

Hello @Nomad,

I was planning on uploading some more clips and adapters to Thingiverse. One of them was going to be a female-to-female EZ clip but I see you have already made one! I'm going to test it out tomorrow, if it works well would you be open to having me host on the EZ-Robot Thingiverse account? I will credit you of course:)

PRO
Canada
#629  

Thank you @Nomad, I appreciate it!

PRO
Belgium
#630  

hi averyone

i notest for some time now , my extruder gets very hot .so i replaced with a new one . and still have desame problem . today i figured it out . at one time i replaced the nozzle . same dia and 0.04 . thats when the problem started . there are two things that can go , wrong and heat up the extruder. first one using a nozzle with longer treath , that will , cause the bottem off the ptfe tube to crush so the filament can not go thru easy . second is the replace the nozzle with a shorter treath withs causes the filament , to leak in the heatblock and cause a blokkage . here's a picture ,see the yellow line , for cause number 2 the gap . the heat of the extruder should be some hand warm . if its hot you have a problem . to solve the problem . take off the nozzle and push , the ptfe tube all the way thru , then take out the ptfe tube all the way after cleaning. put the nozzle back in , and then the tube all the way untill it touches the nozzle . you can do this cold . use desame nozzles always . even if you print several days , the extruder should still be hand warm .

User-inserted image

#632  

Hehe ! that is awesome. I love it ! JD looks so classy

PRO
Belgium
#633  

hi robohappy

thanks for the kinds words .

PRO
USA
#634  

Nice bow tie Nomad,

I like the green also.

PRO
Belgium
#635  

hey ezang

the green was one of my first jd robot .

thanks

PRO
Belgium
#638  

hey dave

these are great for left over filament and learning .

PRO
USA
#640  

Hey Nomad your Tin Man is on the march. Looks gooooooooooood

PRO
Belgium
#641   — Edited

hey ezang

thanks for the kind words .

PRO
USA
#643  

Hey Nomad,

looks like your robots can dance, lol

PRO
Belgium
#644  

hey ezang

hehe . skeletons . they lay flat on the printbed . it comes off like that . even the green little one ( 60% ) INFILL is moveble .lol

PRO
Belgium
#645  

hi averyone

today first steps of starting back the inmoove robot . i choosed this color .copper .

User-inserted image

PRO
Belgium
#648  

hey dave

yeach this color is awesome . it has the reactor like iron man too .

PRO
USA
#651   — Edited

I see the blue, red and green colors cool

PRO
Belgium
#652  

hey ezang

you can make also yellow,pink,white with a tree color led. could you read the tex behind it ?it says ARC.

PRO
USA
#656  

You are printing copper parts?  wow looks great

PRO
Belgium
#657  

hey ezang

yeach they looking nice and chinning . more pictures to come .

sorry for late respons .

thanks

PRO
Belgium
#658  

hi averyone

has anyone have the 2 files from the inmoove kinnect covers ? any chance i can get a copie ?

thank you

PRO
USA
#659  

Nomad what 3d printer do you use for printing copper?

PRO
Belgium
#660   — Edited

hey ezang

ender 3 pro . 220 nozzle heat and 50 heat for the bed . i'm doing the top covers . when reddy i will post them here .

User-inserted image

PRO
Belgium
#662  

hi averyone

the inmoove face mask in copper color .

User-inserted image

PRO
Belgium
#664  

hi averyone

i made a new base for the inmoove . some things i didn like was the hole to short to the edge. a part of the carrier was in the hole .so i placed more up warts . that make the bolts also more upwarts and the groeve for ball bearing is free now . i use a locknut and bolt M4 . the hole for the bolt is all the way thru the part , so any lengt can be used . here a short video and the new files . https://www.youtube.com/watch?v=-WpuN_K3KsU&ab_channel=EDP

base.stlbase-L.stlbase-R.stl

PRO
Belgium
#666  

hi all

does anyone have the lengt of the inmoove tube that used for the legs to the ground ?

User-inserted image

thanks

PRO
Belgium
#667  

hi all roboteers

first part of the pole reddy .

User-inserted image

User-inserted image

PRO
Belgium
#668   — Edited

hi averyone

i have a problem i cant solved with my printer . i put a new nozzle in , level the bed . after some 30 minutes i hear the famous tock sound from the extruder . its a new one few months old . i see this ,see picture . any idea what cause this ? i also regulate the rollement of the heatblock .

User-inserted image

thanks

problem solved . it was the heatblock was loose on one side .

PRO
Belgium
#669  

hi

some new pictures . of the inmoove legs .

User-inserted image

the upper pole will be extended and a metal bar comes inside . i'm thinking to put the inmoove on a bar ( pub , cafe ) seat .  also i changed the base bolt with flat headed ones .

User-inserted image

PRO
Belgium
#670  

hi all

i finally found the M8 tube nut for the schoulder . the back bolt is same head . the tube nut is 60 MM long , the back bolt is 20 mm long M8 .

User-inserted image

PRO
Belgium
#671  

hi averyone

upperlegs are reddy to mount on the hips .  waiting on parts:(. printing the inside of the knees now .:D

User-inserted image

PRO
Belgium
#672  

HI all

why printing a 2 part file when you can print it in 1 file ? way stronger and more straight .

User-inserted image

rightclamp.stlleftclamp.stl

User-inserted image

waiting for filament to arrive:(

PRO
Belgium
#675  

hi averyone

i have a problem with my printer . i get een error and sound heat runaway . i have change the complete heatblock and bolt fans . also a new circuitboard al original . also a new termistor . stil have the error sound and message . what can this be ? any ideas please .

thank you

#676   — Edited

@Nomad, have you contacted the manufacturer? They may have an idea.

I did a quick Google and found this. Maybe???:

The thermal runaway error occurs when the hotend is unable to reach its target temperature within a certain amount of time while printing. This tends to happen when the fans are set relatively high (80-100%) during the first few layers of printing.
PRO
Belgium
#677  

hi dave

i found tree problems . the power supply gives  only half power 11.94 volt insteadt of 24 volts . and the motherboard is killed . i orderd new parts cause they are cheap .60 euro for complete power supply, and 34 euro complete heatblock include all fans . i saw the video about thermal runaway . the thermistor was complete gone . what i also notes wat the speed from the fans went up&down.

User-inserted image

thanks for the tip .

PRO
Belgium
#678  

hi all

printer is after 4.5 months back to be used . it was a very anoing 4.5 months .  so what was the main problem , firts the power supply was bad . the main board was bad , also the new board was bad , also the new heatblock whit the fan's was not ok . the termister wires were exposed that gives a beep sound when power the printer . the first powersupply was damage on arival in the shop , another 3 weeks later, they send another one . so what caused all these errors ? my opinion is this . when starting printing , the fan of the board doesn start running . also the side fan , heatblock doesn start running . only the fan's of the powersupply and front heatblock, are running .  i see no setting in cura to for starting all fan's when printing starts . you can start all fans in the tune setting after the printing has allreddy started . i'm printing with the old board and have a regular check untill the new board arrives .

first print

User-inserted image

finiching the legs now . just the ankle and feets left to do .