


Hi Guys,
I still have my Omnibot project just sitting for the moment, I really wanted to buy the EZB to have in an Omnibot 2000. Well today I went ahead and picked up this guy and brought him home.
Will do a work in progress post with this one and hopefully try and up date it as the project takes shape. First steps will be cleaning.
Enjoying the ride in the Jeep:


Thanks Wayne
By Nonsonic
— Last update
Other robots from Synthiam community
Jer361's Romni The Omnibot/Roomba Hack
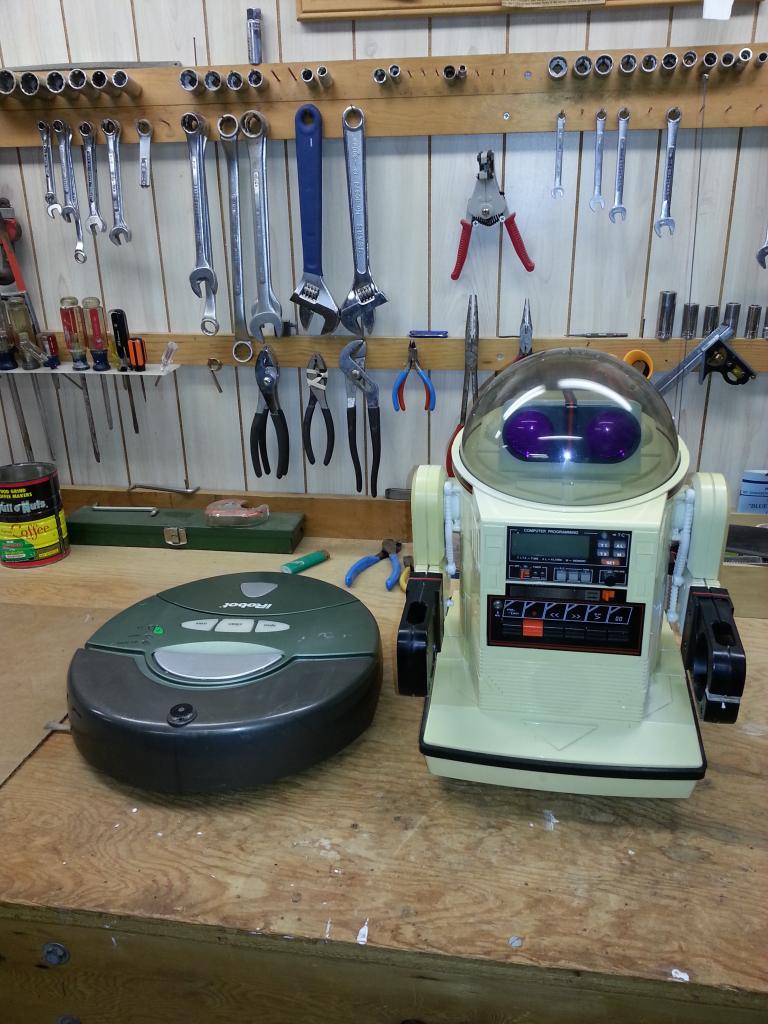
This is my first build so it might take a while. Here is an overview of the project an Omnibot will be mated to a Roomba...
Billderwent's Boris!
So, my first EzB project - a Frankensteinian (I think I made that word up!) mating of EzB, Meccano, Cable ties and.. A...
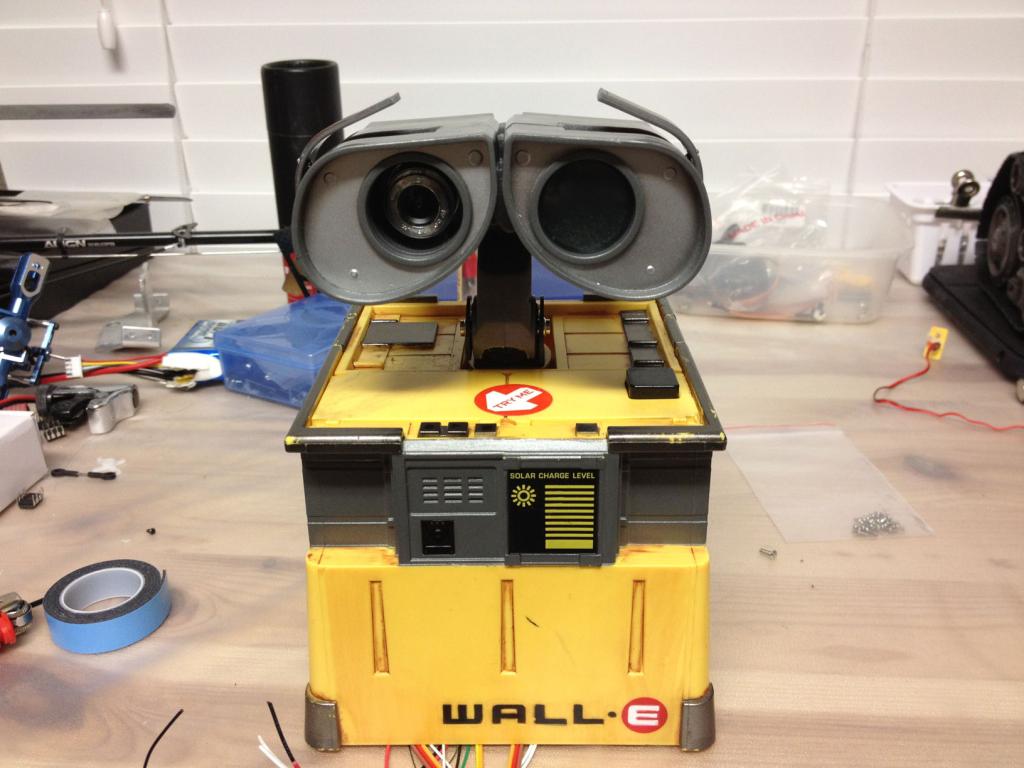
Louis's The Real Wall-E By Louis T
Inspired by DJ Sures and many other Wall-E projects on here, i decided its time to make my own Wall-E and he will be my...

Hi Wayne, congratulations on that robot! Looks pretty cool in that car! Seems to be in very nice shape - no yellowing from what I can tell. Good thing the robot was kept in that box for so long to prevent it from getting a sun tan. Anyway, could you send me another set of photos of the box? [email protected] Regards, Mike P.S. Are you planning on getting rid of any internal parts? Cause I always need spares for my Omnibots - pls let me know if you happen to sell anything.
Hi wayne. Im josh. Im super excited to see you picked up a omnibot 2000. There are so many mods you can do. any goals for him yet? it has been a going trend to give our omnibot 2000 projects a name to make it stand out from the others. the 2000 is large enough to have both a mini itx and two 12v 9ah sealed lead acid batteries in them
Hi Guys,
Had fun picking it up today and driving it home, I took the box to my old house to save some space and will probably take some more shots later in the week, this site below has great pics also :
Old Robots Webpage
I should be taking some more photos prior to taking it apart once I get the key components such as the EZB. I didn't want to get it all in the same week but this Omnibot was in get shape and looked like a great base to start with. Not sure on the name idea, I suppose since I used to be fairly known Star Wars collector in that community with a great IG-88 collection ( The type your wife wouldn't want to know how much it costs ) I would name him something like a predecessor to him maybe will have to think about it:). Probably will be Old BOB or something
Mike, I did think about parting out some things and the box perhaps but it's brutal looking, the seller says it adds to the price but it's not in great shape and I'm hacking it:). I thought it was a Canadian box, therefore more rare usually but it is not at least from what I can see.
More pics soon...
Wayne
Just wanted to see if there is anything special to that box that makes it Canadian - but looks just like the box on the website.
The box is too large to send to Germany anyway.
Anyway, drop me a message, I might need something once you are parting out.
Mike
My other omnibot that I posted here on the forum last year is a Canadian box with English and French on it. I thought this was one as well but quite sure it is not. I dropped it off somewhere for storage so will have to take a look again.
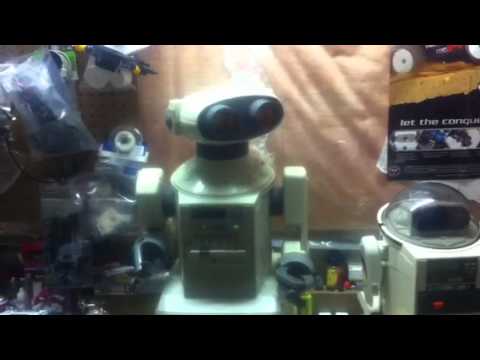
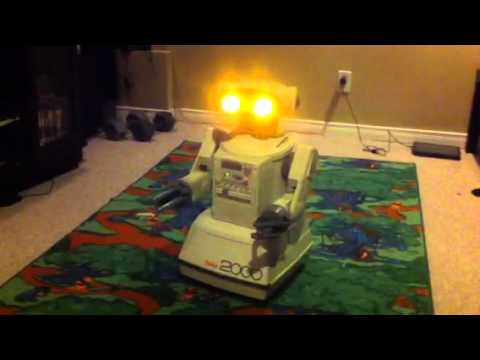
Shot a quick video of the new robot added to the collection and posted it on YouTube.
Good to see everything on your omni 2000 is working. You will have it easy putting a ezb in. you will need 4 l298n h bridge motor controllers. dj sells them at a great price so be sure to pick those up when you get your ezb and camera This is because every movement is actuated by a 3 to 6 volt dc motor. Each hbridge gives you two channels of control both clockwise and counter clockwise which can be directly plugged into ezb servo ext cables.
I should be ordering the EZB this week I believe, I was going to ask DJ about a cost to replace the basic servos for the Heavy Duty ones he used in his project Omnibot 2000. Definitely a novice with this project so i'm sure any help with it will be greatly appreciated
The cost to use servos in the joints using djs 10kg cm servos (thats 140 oz in) is 12.99 per servo. You need three for each arm 2 for the neck and 1 for radar. Thats 116.91 plus shipping ect. if you want more power i found pololu.com has 1501mg 240 oz in servo at 19.99 each thats 179.91 plus shipping but nearly twice the torque
http://www.pololu.com/catalog/product/1057
If your looking for his arms to move for entertainment but not enough power to pick up anything get djs servos they are an excellent price. If you want a quick response and enough power to grab light objects like a can of cola then get the stronger servos
Fyi i bought 8 1501mg servos. good torque for being so cheap. Removing all the complicated gears and little motors frees up alot of weight. Plus servos are a contained unit and plug up to ezb. They are easier for sure. Using the stock motors and gears you need a hbridge for each one and still run the risk of original gears breaking. servos is for sure the way to go especially since they give feedback on position.
Great help on the servo's I have some R/C ones I know have high Torque so I may use some of those but we'll see. I worked on cleaning up my work area to begin working on the project and hopefully will have some updates later.
Oh, I took some pics of the box today. Not sure if there could be some variants out there but I did notice my Omnibot has TTC in the front and not Tomy. The TTC logo is on the front of the box but he does say Tomy on the bottom. I think Tandy distributed this one originally? Anyway, that is the collector talking and not the Robot hacker.
Hi there! Could you send me a message to my email or send me your email so I can message you? Mike
When are you going to post some hacks mike?
Haha - good question, right now I am just trying to get some spares together for my robots to fix them up. I am studying for my final exam - to make the last six years of college worth it. Once I got it over with that, I will think about my own hacked robot, but first I will have to get the spares for the robots in my collection.
Wayne, Mike, Josh,
That model is one of my Favorite robots. I will be watching closely. Happy Modding!
Ya-vole! (If my German is correct.)
:D
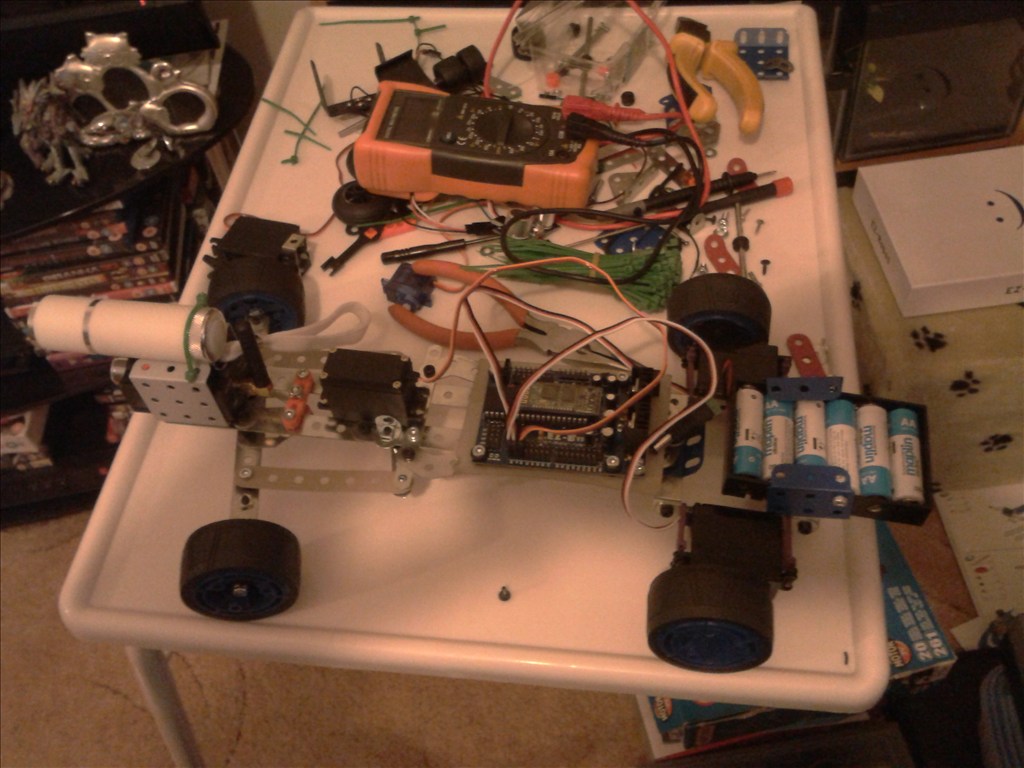
Ordered my basic kit late last week ! Will update when it arrives and what happens next
Nice. The co-driver must speak too much.
What's funny is while driving I had several people looking at him wondering what the heck it is : )
Added a new short running video of the stock Omnibot 2000
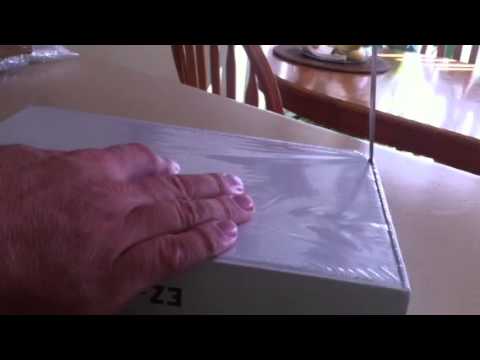
Hi Guys,
Received my kit from Hong Kong which for some reason I didn't know it was coming from and had to pay extra for the delivery. Will be mindful when ordering but I did think it was coming from out west for some reason.
I uploaded a couple of related Unboxing video's and thought I would add them to the thread.
EZ-Robot Complete Kit Unboxing Video Part 1
EZ-Robot Complete Kit Unboxing Video Part 2
Will update on what happens next
Great! I am curious to see where you are going with this!
I'm surprised the back of the camera came out so easy. Very cool packaging.
Hi Guys
Not much progress in the couple of weeks, had some problems with the kit and not sure what to do. Even though I know about RC servos and have some experience with building computers and other projects for some reason I've had some bad luck.
At first I had 2 servos that weren't working but the others were ok, I emailed about the 2 servo's and the suggestion was to send them back for testing which was good. I thought it best to just re-check everything but now none of the servo's work and for a time the blue light was not turning on. The board or first heat sink seems to get quite hot but the fuse is fine.
Not sure how to fix this as I am not an electronics expert in terms of soldering or messing around with circuits which is one of the reasons I'm looking into Robotics in the first place as I want to learn !
Anyway, right now my project is on hold as I have a bunch of servo's and a board that is not working at all and don't know what to do as in between the moments I get to do anything hobby wise I'm trying to get help.
The heatsinks do get warm quickly. Its a great idea to ziptie a good 40mm fan to it. I have not played with ezb yet.
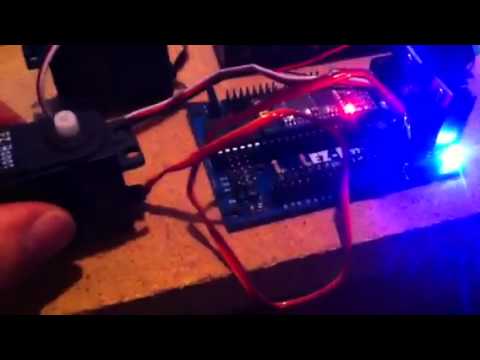
Shot another video, my servo's don't work for me. I have been trying to just connect one at a time and they aren't working.
https://synthiam.com/Community/Videos/Default.aspx?id=FtPVhoY0HiA Modified servo panel https://synthiam.com/Community/Videos/Default.aspx?id=epya0kY0RlI Robot servo control https://synthiam.com/Community/Videos/Default.aspx?id=JeqzGDOfOZo
These should help you out with getting a servo moving. Obviously the servos in the kit you pointed out have you tried any other RC servos?
Yep, I have tried another servo outside of the kit. At first it worked fine and now it doesn't work either. I can try others tonight.
I watched all of the video's even as I started, with one step at a time and they just aren't getting power. I think there is something wrong with the EZB.
Hello Nonsonic, I have been following your posts and grieve with you It is sometimes hard to troubleshoot over the internet, but a few suggestions...
Pick up a multimeter ASAP and confirm that there is voltage and how much on each power pin (the center pins on all ports). It should be 5v. Between the fact that your regulator is heating up so much with no load and the fact that servos started working (albeit with loose motors) then stopped makes me think of possible over voltage (faulty regulator or short) and burnout. But you need to confirm with a meter to be sure.
I have also noted that the blue light sometimes does not come on, or is very dim, when first powering up my EZ-B. I have found just quickly un-plugging and re-plugging in power does the trick. According to DJ, the dim or dark blue LED indicates incomplete firmware boot... possibly power related? as I notice mine happens more often when running a 12v source as opposed to the stock battery pack (7.5v)
Also, try to put your EZ-B on non-metallic standoffs or otherwise cover the underside... it is an open circuit board and susceptible to unintentional shorts when sitting on potentially conductive surfaces (like the battery box )
)
And final idea... test each servo, one at a time on each port from D0-D19 documenting any irregularity's per port. You should be able to set up a test that will cause constant activity on all ports so that you can focus on the physical port hopping. I am at work right now so can't easily determine what control would do such, but I think I remember seeing something that might do the trick?
EDIT - Ah yes, the Multiple Servos control... config and click on Add All
Yes,
That might have been it regarding the servo's just spinning but hard to say, this was all on the first time out really. Had been careful with it, I have built computers myself so have tried to take extra care but power and voltage is not my thing I can say that. I have to learn circuits essentially
With that, I've got some pics for some ideas. I have been taking apart printers for an eventual build of some sort. I wanted to build a battle bot or I like those 3D printers. One of the printers I took apart was an older HP Laserjet and got some neat gears and motors but also this face place in case I need it for something.
I planned to get a screen and do a similar build to DJ's Omnibot for just starting out. I thought the LED panel might come in handy for the upper area that a display may not fit in and or use it for some sort of second display area.
I think i'm going to get help with the board, I am not an electronics guy for soldering etc, I hope to try with some arduino but i'm not ready to start soldering yet. If things go good, I would like to some how do something with this Roboraptor I picked up for $10.00. I got this one and the Robosapien both with remotes for $20.00
Below is my computer set up is separate from my " Bat" cave where my robot projects are, this is part of my computer set-up. I7 gaming computer, a Mac mini and below is an older PC running Ubuntu 12.04. Above my PC i have a Kinect that I am messing around with trying to learn and maybe integrate into the Omnibot 2000 : )
Thanks!
I will make a how ton solder video just for you nonsonic
I forgot where i saw it, but D.J. has a trouble shooting video just for the EZB. Go through the steps and see if it is at least working. after that, you can tackle the servos.
hope that this helped,
MovieMaker
Seems to connect just fine still, just not working with the servo's.
I'm good Josh on the soldering thanks!
I'm sure it's easy to do it as I've done it in the past and done repair to some copper pipes in the house. Just not about to solder circuits just yet until I need to.
Yea its harder than copper pipes. To do it correctly at least lol. So how are you going to hack this robot without cutting wires and soldering?
@Nonsonic You can also test the digital ports with LEDs Turning them on and off and using PWM to dim them.
Finally getting back on this project, had some time to work with the EZ-B to hp check out the Camera from the kit, hooked up a servo and controlled it with a WIi controller. Going to start taking him appart and planning the build.
That's great! I wondered where you went
POST some photos of your build on for ideas check my omnibot 2000 project
my omnibot 2000 project He is more of a super omnibot design nickname 6 MILLION DOLLAR OMNIBOT
Also my buddy JSTARNE1 he made some good changes in his too
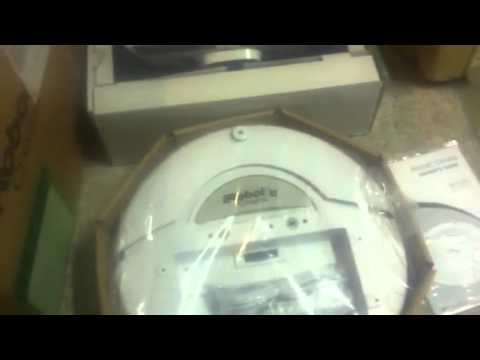
Some robot project updates, may try build this IRobot create into its base.
Hey Non sonic , I borrowed some pics from Bret. The square base doesn't fit well on the roomba. He trimmed off the square part and it makes it much easier to make a custom mount. Plus you can have a turning waist. Because the roomba is round its easy to use a round steel trash can for a base that fits well
So how did you guys get rid of the yellowing look on the aged plastic?
Mine must have lived in the sun for a bit...
Most of us just paint the robots. Its really the easy way out. You can whiten them to the point the parts look like new but it takes a week in the sun ( uv accelerates whitening) and you will go through several bottles of 40 volume developer. Its messy. I recomend wet sanding with 600 grit and then paint.
Hi Wayne! Any news on your robot? mike