martin.ryschka
Germany
Asked
Faulty Head Servos Behaviour
After successful assembly, installation and some testing of JD, the vertical head servo doesn't respond anymore and the horizontal one moves after powerup to the utmost position and stays there. What procedure do you suggest to correct the servo responses?
Related Hardware (view all EZB hardware)
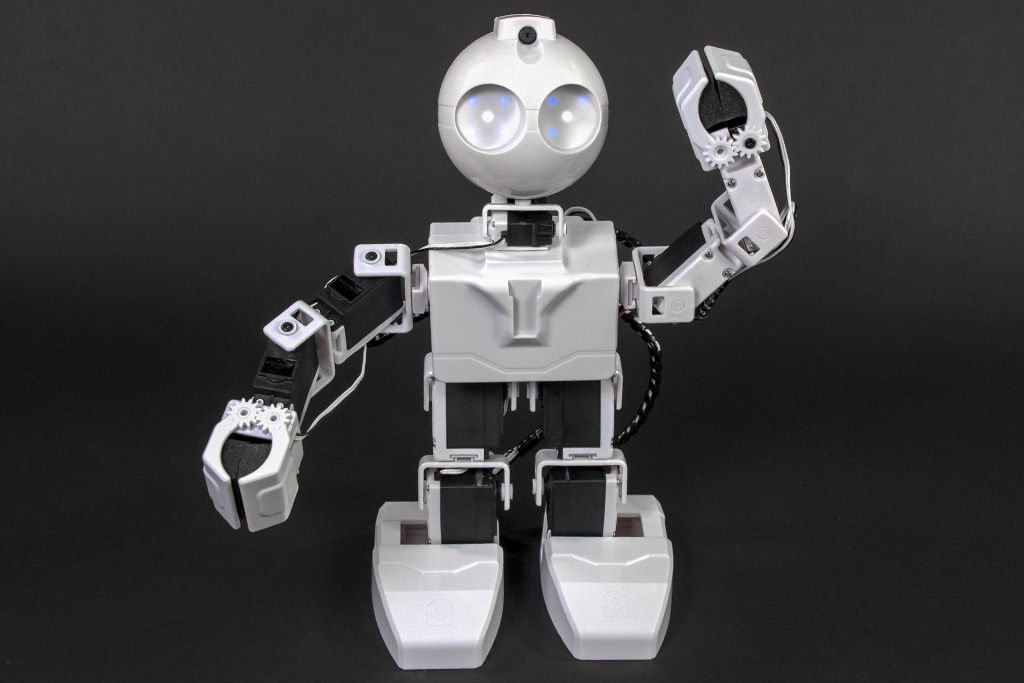
JD Humanoid
by EZ-Robot
JD humanoid robot kit - WiFi-enabled, 16 DOF with metal-gear servos; easy, fun, educational, available from the EZ-Robot online store.
Wi-Fi / USB
Servos
24
Camera
Audio
UART
3
I2C
ADC
8
Digital
24

I'm sorry to hear that you're having trouble with your JD Humanoid's servos. Here are a few steps you can take to troubleshoot the issue:
Check the servo Connections: Make sure the servo wires are properly connected to the EZ-B v4 controller. The black wire should be on the outside, the red wire in the middle, and the white wire on the inside.
Test the Servos: You can use the servo Pad in ARC to test the servos. This will help you determine if the issue is with the servo itself or the connection to the controller.
Reset the servo Positions: If the servos are moving to the wrong positions, you can use the Auto Position robot skill in ARC to reset them. This skill allows you to define and edit positions for your robot.
Check for Physical Obstructions: Make sure there's nothing physically blocking the servos from moving. If there is, carefully remove it.
Update the Firmware: Make sure your EZ-B v4 controller is running the latest firmware. You can update the firmware using ARC.
If you're still having trouble after trying these steps, you may need to replace the servos. You can find replacement parts in the ezrobot store.
For more detailed instructions on how to troubleshoot and fix servo issues, you can refer to the support section on the ezrobot website.
When ever I install servos into anything I always power them up first to see if they are working. This may also move them automatically to their natural center position. Servos should always be in the center position before you install them. If they don't move there on their own to center when power is first applied when outside the robot then center it as close as possible manually with the power off.
Before you insert the servo into it's application this may be a good time to attach it to an EZB, install it in ARC and test to see how it moves.
Once centered and installed into the application you can safely use the servo control's set up page in ARC to find and set the actual limits of the servo in the application. In other words, how far the servo will move in your robot before it hits some physical obstruction.
As far as your servo that that doesn't "respond anymore"; it sounds like it did at one time? If so an it doesn't now, you may have burned it out by having it try to move past it's physical limits as I described above. It happens, even to the awesome EZ Robot HDD servos. I just burned one out last week I had in a robot by not following my usual set procedure.
One way to always insure that a installed servo wont move past it's applied limits is it set each servo's min/max positions in a INT script that runs at ARC start up. Here's an EZ Script example that I've used in my INT script:
I had that problem with my head up down servo causing the head to violently smack against the wall behind it! So quick fix was to disable that servo and only use left to right head tracking movements with camera. much less scared of cracking robot's head now LoL!
@martin.ryschka Please contact EZ-Robot support, they will help you with your issue.
Many thanks to all for your fast response. Though I have a technical background I'm totally new with servos. I didn't expect them to be so selfdestructive. Thought that there would be some means to prevent them from overloading. So I will try to apply the suggested INIT script. But I'm not quite sure how find and place that INIT script.
There isn't a script ready to install into ARC called INT that will run automatically when ARC starts.
You need to install a script control onto ARC's workspace. You'll find this under the top menu "Project" tab and then click the "+" to find all the controls you can install. Once you install the EZ Script control you go into it's setup page by clicking the three "..." at the top. Once there you can name it (it can be whatever name you want that tells you it's the set up script), write the script in this control (it can contain commands to set up everything in your robot and ARC the way they need be set at start up. Things like automatically connecting to the EZB(s), servo positions, servo min/max positions, servo speeds, needed variables for other scripts to run, run other scripts you have in this project, commands to set up connected devices like motor controller start up and homing commands, animation commands to servos, motors or to play voice clips while the robot is starting up).
Once you have your script named and written you need to make a shortcut for your Windows desktop. You can find ARC's Shortcut Creator under the Options tab on the top menu bar. This Windows shortcut when placed on the Windows desktop and clicked from there will start up ARC and run any script in ARC at Arc's start that up you want. In your case it will be your Int script. Here's the tutorial in the Support section of this forum to make a shortcut: Shortcut Creator
If you start up ARC just by clicking on it's exe file or it's icon on your win desktop the Int script will not run. Only by clicking on the shortcut you created will the Int script run.
You can also setup a command within Windows it's self that can start this shortcut when you power on your computer and Windows boots up. That way your robot will be active within a minute or so after you push the computer's power on button. I hope this helps.