Asked
— Edited
Hi Everyone,
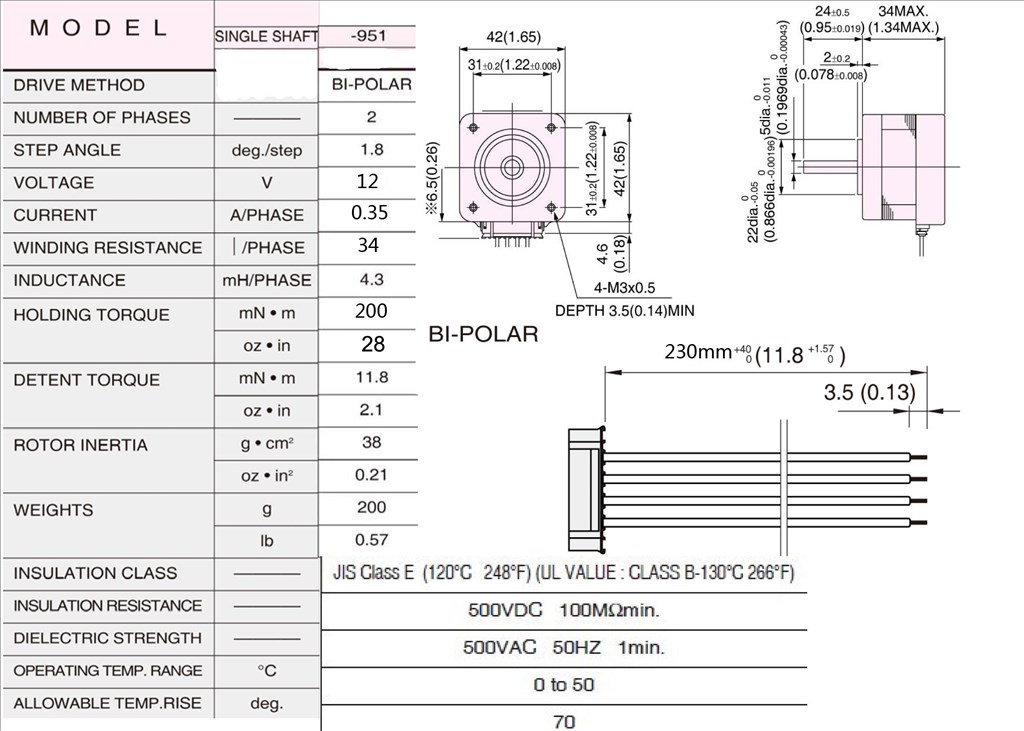
I was wondering your thoughts on using an EZB-V4 to drive a stepper motor such as the one attached.
Stepper Motor link https://www.adafruit.com/datasheets/12vstepper.jpg
Uploaded data for driver.....
Using 24V battery with a 12V regulator.
Dave

Link is bad (it may only work when navigated from the product page at Adafruit, getting a "forbidden" error when linking directly).
Anyway, if you search the forum for Stepper Motor, you will find that most have found it not to be worth the effort. Apparently, there are no driver boards that are as simple to interface with as H-bridges. Several have tried, and I don't think anyone has had enough success to make it worth it, particularly when there are plenty of good DC motors and h-bridges, including ones that can read position encoders (Sabertooth with kangaroo or Roboclaw are two examples).
Alan
Try these....

A4988StepperMotorDriver.pdfAre you telling me that the EZB would have a difficult time driving this stepper motor driver board?
Dave
Dave... you need to find a stepper motor controller board that will work with the ezb... To my knowledge no one has had much luck finding such a motor controller...
If you find one that is compatible, please let us know...
My last post has a link to a stepper motor controller board. Please review that and tell me if it would work with the EZB.
Dave
I don't mean to step on your toes @Alan but it isn't that difficult to drive a stepper motor. They can be driven simply with 4 digital ports connected to a Dual H-bridge such as a L298. You just have to generate the sequence in which the stepper coils are activated with the ez-b.
I believe a driver such as the A4988 delivers that sequence automatically. In an age of a million 3D printers, stepper motor control has been dialed in quite nicely, and all the driving information has been open sourced since the RepRap if I'm not mistaken.
@Jeremie... Thanks for that.... I will retract what I said earlier.... It may be easy or easier to do this now, but to my knowledge no one on the forum with maybe the exception of Jeremie and DJ has a clue on how to work with a stepper... Maybe there is possibly others lurking out there that also can help you David, I am not sure....
I was looking at the A4988 and it seems pretty straight forward. It's a very popular driver in the 3D printing community.
Here's the signals you would need to send to the driver from the ez-b:
STEP: This needs to be a 0V to 3.3V signal. Each rising edge of this signal will cause one step (or microstep) to be taken.
DIR (Direction): This needs to be a 0V to 3.3V signal. The level of this signal (high/low) is sampled on each rising edge of STEP to determine which direction to take the step (or microstep).
Most of the other pins, such as reset, enable, MS1, etc need to be pulled high or low accordingly, but don't require a signal from the ez-b, only the two are needed.
Hello everyone , late to the game to chime in. The latest Texas instruments drv8825 is excellent at driving stepper motors. If you use an actual stepper controller vs a h bridge then the board just counts the pulses , verify what mode it is in and does the work. This board for example has multipliers so that the motor can make several steps for one pulse. That is good for when you need a quick yet precise movement. I have several of these and look forward to making a ezb v4 , "shield" that just plugs into the top of the board and the rest of the pins just pass through. Make it easy peasy!