Asked — Edited

Custom Charging Application Issue

Hello all,

May i introduce myself, i am Garrett and am constructing a robot for a class project. I have run into an issue in charging my robot and have not yet been able to locate an answer in this forum and online.

My issue is:

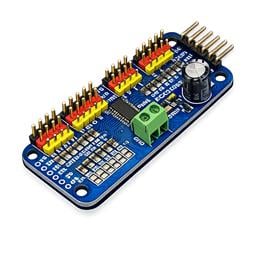
I am going to run two motors with TB6612FNG dual motor controller. To my understanding, i cannot run the power source for these two motors directly off of the EZ-Board... I must supply a seperate power source to the motor connecting it directly to the HBridge and a seperate power source connected to the EZ-Board.

I want to create a docking station that the robot can connect to and charge both the battery for the motors and the EZ-Board without turning the robot off. I cannot seem to find a splitter or the right information to complete this task.

Any ideas?

Thanks,

-Garrett


ARC Pro

Upgrade to ARC Pro

Experience the transformation – subscribe to Synthiam ARC Pro and watch your robot evolve into a marvel of innovation and intelligence.

#1  

check out the OAP project for a idea,using something like that for my larger robot design using gell cell charger 2 charge 2 different batteries

OAP ROBOT PROJECT

ALSO HAS OTHER CIRCUITS THAT ARE USEFULL

#2  

Gel cell or lead acid battery chargers are cheap. Im.using a 1.5 amp smart charger from walmart for 20 bucks. Charges till its full or if it shorts it cuts charge or if battery won't take a charge the unit stops trying for.safety.

#3  

i mostly like building mine from scratch on docking station it charges 2 different batteries with different charges,now to keep your EZ ROBOT board you need a backup battery,dont need much current output ,just to keep it on while battery is charged drive batteries dont need it,another idea ,let say you need 4 amp battery charged,so use 2 2 amp batteries one stays connected while other gets charged,then have it charged second battery will need a small delay timer for a few second while switching batteries

#4  

@Nighthawk355,

I will come clean here. Many folks are saying you need separate power sources for motors and electronics. While that is probably true for industrial and heavy duty bots, I don't think it is a mandate, especially for hobby robots. I use a single RC car battery for my bot. I connect the EZ B to the battery directly with 7.5 volts. I run several motors using the EZB to provide logic control from the EZ-B and power for the motors comes direct from the RC battery. Common Ground. Everything works fine. You will hear that folks say brown outs will be an issue. If your battery is low or you have too much amperage draw, it is going to happen, but not as often as folks say if you pick the right battery and charge it before it gets too low. I would say that if you were making a 'remote control airplane' robot that must never ever loose control.... then go with separate power sources for your control electronics. If this is a simple bot project, I say go with a single power source.

v/r

Kevin

#5  

on small robot is better to use one battery,i think @nighthalk355, might be making a larger robot where you do do sometimes 2 batteries,like my avatar photo i have up,it has 2 batteries,special microcontroller board and itx board in photo it taken out for changes,sometimes motors need a seperate source for noises small robots dont use up alot of current,another very good reason to use to batteries is longer last time motors and servo's use of the most current,and other stuff and board use up some current ,so it is good to have 2 different power sources,another is motors sometimes takes higher voltage then lower current stuff

there is also simple divider circuit using one of the analog ports to detect low battery voltage,do need a zener and about 3 resistors

#6  

i don't know...the TB6612FNG is only a 1 Amp motor driver.

#7  

I HAVE A ROOMBA and it only lasts about 2 hours or less per charge and thats on basic roomba no vacuum parts so i made a special dual battery switching circuit and automatic charging circuit also when you add camera,EZB ,plus servos and other stuff not looking at much run time with a second battery design,one reason i use LDO in all my circuits low current sonars like MAXSONAR ,about 5ma compare to most AT 25 TO 35 MA,it all adds up

#8  

All,

Thanks for all of your input for the charging station. I do believe that i only need one 7.2V or like kkeast said 7.5V battery to run my entire robot. My robot is small and will only weigh around 6 lbs total and only need to be ran for 15 minutes at a time. So a single power source i think is just fine. My concern was more towards how i am going to tap into my battery and charge it while my robot is still connected to the battery... This way once the batter is charged i can just reverse the robot off the charging station. I am thinking i could just tap into the positive and ground of the battery and run those to the EZ-Board as well as my motor control board to run the motors.

-Garrett

#9  

thats fairly easy only need a small backup battery like a computer desktop has maybe 100 ma battery at 7.4 volts with a diode for protection,when charging your battery your EZB stays on kinda hard to charge a battery hook up to a load ,it wont really charge it right ,because it charges by current at contant voltage battery can be smaller or as low as 6 volts,other problem you will need a relay and delay circuit to switch the main battery for charging and backup battery for charging ,delay circuit using 555 timer is for to keep on battery always connect while switch batteries also without timer and relays is use 3 diodes and current set resistor i dont have a drawing software to draw it it easy,can find ond for you and send link fairly simple circuit one diode is connected to input of regulator, cathode to input pin and anode to main battery ,then another diode anode to postive of back up battery and cathode to regulator input pin,3 diode is for keeping the backup battery charged,anode to main battery cathode to current set resistor about 680 ohms then other end goes to backup battery battery that would work is like a telephone battery or cell phone battery,may need two to get 6 volts to 7.4 volts i design and build backup battery circuits and in-house testers for test equipment at a company i work for

#10  

@Robotmaker, Wow! thanks! I actually was speaking with an electrical engineer at the company i work for and he said the same thing... however im mechanical and not electrical and for some reason cannot grasp what he said and what you said above...:( (i need visual aids). A diagram would help significantly. However, one thing i was told was to test the load of the board and motors when the robot is at stand still and see if the load is below or above 70ma. I was told that if the load is below 70ma then i do not need to impliment a switch and relay into the schematic and i can just attach everything together... to my understanding i think the reasoning is my charger will be charging at a rate of 1A+ and 70ma is nothing compared to 1A so therefore my battery will have no issue being charged. What are you thoughts about this?

-Garrett

#11  

i dont know what type of battery you have to be charged

back up circuit you dont need the regulator circuit the link,where is connects to 5 volt regulator that is where your battery connects too and charger connects ,where the switch in the circuit you connect to the power supply of the EZB BOARD it w ill be well be above 70 ma depending on sensors charging the battery will not charge right thats in most light systems burglar alarms and more use this type of circuit will need a few sensors on to tell when battery is charged,plus need a disconnect relay to remove charger from charger and connect,and you using charging plates like used on the roomba

#12  

@robotmaker the battery i was thinking of using is this one at Fry's Electronics: http://www.frys.com/product/6468002?site=sr:SEARCH:MAIN_RSLT_PG

It comes with a charger too which is definately a plus since the circuitry is inside that already.

The circuit that you provided looks really complicated to me and hard for me to grasp, tomorrow i will have a circuit i can post that i had some help with from the engineer at my work. It most likely is going to be similar to the circuit you posted.

-Garrett

#13  

dont forget you only need the diode circuit only and where the regulator is you connect the battery and charger where switch is goes to input of the EZB

battery from tenergy look good ,but doesnt say the size so found at battery site ,where sometimes i get batteries it is 5.39 inches long,with that fit inside your robot tenergy 7.2 volt battery

#14  

@robotmaker

The battery size is not an issue. However, is there a more simpler circuit for my application? I look at the circuit you provided and i have not a clue to what components i need to purchase, what will be included in my actual charger and how to connect these components. I mean, do i need to have a PCB made for this application? To me it looks like i do...

-Garrett

#15  

only need the 3 diodes and one resistor

#16  

Here is a schematic that i put together. My questions are:

  1. Does only positive (+) from the charger and battery connect together at C ?

  2. Does only positive (+) go from B to A (+) ?

  3. Does ground (-) at A tie into the battery ground?

  4. What happens at D?

Attached below is the image:

User-inserted image

Thanks,

Garrett

#17  

battery and charger goes to point C and point B be goes to point A for point D you need a small back battery like from a cell phone or wireless telephone battery about 6 volts to 7.4 volts ,current of battery can be very small current like 100 ma so the EZB board will also be on,when you charge main 7.4 volt 3000ma main battery ,also should have a switch to turn it off ,so dont drains both batteries also i see you have power going straight to motor controller witch is ok,but should have a fuse for rating of the board

#18  

@ ROBOTMAKER Okay, sweet thanks for the input. I updated the diagram.

Question(s)

  1. location of the switch... should it be located where the switch is current? or at either point A or B?

  2. How does the common ground wiring look from the battery/charger to the EZ-Board?

-Garrett

User-inserted image

#19  

everything look good,what program did you use to make the drawing also also you may need a second switch at point B if not using it for a while or dpdt switch with get 10 ma drain with only switch for EZB and maybe small drain on motor controller and still need switch going to EZB because of both batteries will drain too

also on instructables website so a very cool wireless battery charger ,what the circuit is using 2 coils one on bottom of robot and one on the floor and a circuit like dc to dc isolation converter ,but instead of using a transformer ,using 2 seperate coils

#20  

@Robotmaker

The program i used was MS Word lol... i just layed down the lines haha... took me like 3 hrs. I agree that point B needs a switch, that way no drawn from the motors can occur. I'll keep the current switch position as well.

Thanks for your help. The next phase is to now buy the components and some how hook everything up. I think i will use a small bread board to make the diod and resistor circuit.

-Garrett

#21  

@robotmaker

The resistor in this circuit... is it a 1/2 W 680 ohm fuse? or 1 W?

-Garrett

#22  

not a fuse 1/2 watt resistor to set the charging current needed for the battery 1/4 watt still ok

#23  

Opps, sorry i mean't 1/2 watt 680 ohm resistor.

So which is better i guess? 1 watt, 1/2 watt or 1/4 watt?

-Garrett

#25  

here is idea for a backup battery ,close to the kind used in laptops two 3 volt coin cell battery in series like CR2302,i am using that for my robot projects

#26  

@robotmaker

The battery backup system is great. However my other challenge is how can i charge my 7.2volt battery and continue to have power to the robot for me to take it off teh charging station once it is finished? Below is a picture of an idea that our group had... it does not utilize the battery backup system.

User-inserted image

#27  

problem with that is, charges work like this they charge your battery by current and if you have another load like EZB board hook up to it wont charge correctly thats why always good to remove or use a disconnect switch or relay to the battery and have a backup battery that keeps the unit on

it may work like that only if EZB and all sensors attached and you measure current to be under 10 ma

wow i just measure the current of EZB without sensors almost 100MA so you really need the backup circuit

#28  

Okay, so i definately need to incorperate the battery back up system below

User-inserted image

However, where in this does the relay come into play? In the drawing i show the connection / disconnection point in which the robot will interface with the charger.

#29  

Oops, i guess some sort of pressure switch at connection point "S2" would work wouldn't it? Something that the robot could drive up onto the station, then compress the switch to then disconnect the main power source from the robot. Once this happens the robot motors won't be active though... which is a problem to get the robot to move backward uncompressing the switch to allow the main battery to be utilized.

any ideas?

-Garrett

#30  

relay instead of switch 2,can use a switch or relay or relay is good becase you can drive it from EZB digital output board ,like a reed relay you do need a transitor to turn on the relay plus added idea is to monitor the battery when battery fully charged the relay disconnects then you have a automatic charging station

#31  

Ok so a relay at switch two would work. However how can power still get to the motors? The relay would be cutting power to VM positive line which I thought powers the motors?

#32  

dont need power at the motors till ready to move after charge,when charge is done battery connects to motors and board

on batteries not all coin cell batteries are rechargeable,found out that cr123 batteries are,and cheap on ebay,need 2 of them,but and small 6 battery will work only need about 300 ma

#33  

Okay, i am confused how this relay is going to allow charging and then once the charging is finished it will then somehow allow the batteries to run the robot... Below is another schematic using a relay, does this make any sense how it is hooked up?

User-inserted image

#34  

need only normal open contact relay charger and battery are hook up together and charge the battery ,then when finished charging the battery battery connect to the circuit you need reed relay rated at 5 volts coil n.o contact and use a npn to turn the relay on from one of the digital outputs on EZB,can do by time or a battery monitor circuit

here is the circuit to drive a relay from digital pin driving a relay from digital output