
Reprap Prusa I3xl Printer Build
I am thinking about building this printer, but replacing the hot end with an E3D v6. I see I can print out the parts to connect the e3d to the extruder. I want to do this because I would love for this to be a project for my high school students next year and want to get some experience with it before throwing it to them to do. I know that there are better printers out there, like the makerbot or its many clones, but I wanted to know if any of you know if this is a decent design for the type of things we do around here. For example, would it be sufficient to print off the parts that would be involved in building an InMoov for example, or maybe the Jimmy type bot from intel. I have no experience with 3D printing and want to truly understand what is going on instead of dropping a box on my desk and saying Print This. Just the way I am I guess.
Is there anyone in this community that has experience with Prusa i3 printers that could tell me if the quality of the prints would be worth this project or not? I know that a lot of this has to do with setup and configuration, but once configured, were you happy with your printer? I don't want to go down a path that I ultimately would be disappointed in. Which opensource software should I be getting familiar with? Any other recommendations?
Thanks in advance. As you can see, I have just started scraping the surface of this and a lot of questions.

Well, after days of researching and thinking, I pulled the trigger today and purchased a MakerFarm I3v kit to build. I completely did a flip-flop after analyzing how much it would cost to add all of the parts that I would be adding to the Astrid unit and remembering something that I always told my employees. When I got into management about 25 years ago, I promised myself that I would never ask an employee to do anything that I wasn't willing to do. I have kept true to that. While the students aren't going to be employees, I still feel the same way about them, so I didn't feel good about having them build a 3d printer if I wasn't willing to do the same.
I researched many kits and found that the people who have built the MakerFarm kit were more happy with the kit and the finished product than pretty much any other kit out there. i had considered sourcing all of the parts myself, but the cost was just about as high with the kit, but with many more trips to the hardware store because of forgotten pieces and such. Also, there are extensive build instructions with the MakerFarm and more choices for hot ends. The kit comes with everything that I was going to do to the Astrid, just in kit form. After watching all of the build tutorials and videos on youtube, I am very confident in how easy this kit will be to put together. In addition, there are some mods to this unit like auto leveling that I will be adding. From what the forums are saying, this is the I3 kit to buy.
I also had a bid going for a duplicator II on ebay. It got up to a higher cost than purchasing from the company so I backed out. 3d printers are almost as wanted as the ez-b 4 by the fine folks on the internet
I will be documenting the build and posting it. Its always nice to have another person in this community with experience on building a reprap or repstrap as it might be. More to come!
Makerfarm i3v kit
Yes indeed. 3d printing is only growing. I'm almost sad I got my printer when I did because it's only been a few months and there are so many more and available, decent, $600ish printers out now. I could have gotten something a little bigger. On the bright side, I have owned a 3d printer for a few months. I look forward to the follow ups.
So I ended up canceling the order with MakerFarm. The reason for this is that I saw a review on youtube where the guy started experiencing some issues with the wood frame expanding and contracting with weather changes. I get that living in an area that can be very arid one week and extremely humid the next. I ended up parting the project myself. I relied on Ebay and MakerFarm for components and ended up building a Prusa i3 Rework which is a single aluminum frame Prusa i3. I got the frame and other hardware and stepper motors over the past week and put it them together last night. Electronics will be ordered after the first of the month.
As far as the build, the only issue that I had was one tap in the plate wasn't completed. It looks like it was started but not completed. This is on one of the 3 holes holding the right Z axis lower bracket. The tap was completed about 80% of the way so I shortened the screw and put it in place. it is still very well mounted. This is nothing compared to the stories that I have read about some of the kits that are out. Also, the 3D printed parts that I got were perfect. I didn't have to do any cleanup except for the hobbed extruder bolt hole which is printed closed to prevent any warping from taking place to the material around where the hole would be. It was easy to clean out.
I had concerns about ordering parts off of Ebay for this build but I did a lot of research before I ordered. I may have just gotten very lucky so, here are the items that were purchased from ebay. All of these are in the USA, which for me was a factor in getting them by the weekend.
Prusa I3 Rework frame and hardware
Prusa I3 Rework Printed parts
Belt and pullies
I also purchased my stepper motors from ebay but will wait until I know that they are working before I comment or recommend. I will purchase my electronics from Makerfarm. I spent some time talking to the main guy at MakerFarm and he was very honest and helpful. The other parts that I have ordered from him were shipped out in a matter of hours from the time I placed my order. Very impressed with these fine folks.
Well, now I wait until the first, which could be a problem because the EZ-Robot parts that I have been waiting for should be arriving at about the same time that my electronics for my printer are arriving. I really hope that I have to decide which to unbox first. That would a great start to the hottest time of the year around here. May keep me from getting any sunburns
Climate had a huge impact on my thermistor. I'm in NW Ohio and wanted to set up my printer in the basement. It was still so cold that it wouldn't stay hot long enough to melt the filament. This was right out of the box with no enclosure, just a frame. I went about 2 hours trying to figure out what could be wrong and moved it to my bedroom in an act of desperation and it started working just fine then.
I always thought that wood was an odd choice just because of swelling and shrinking due to temperature changes. It's good to hear some info that confirms my suspicions.
I look forward to see how it goes. Are you going to build it or the students? Or were you going to build one and get a second one for them to build?
I'm sorry your summer is starting out with having to make those tough decisions. I personally have to use SPF 100000000000000000000000000000000 to keep from getting sunburns so unless I'm going to be swimming somewhere, I try not to bask in the glory of the Fat Old Sun.
Keep the update coming. I'm enjoying watching your progress and process.
I am building one for myself. The students will be building one also. Its nice for me to have gone through a build first. I'll have a better idea of issues they run into and can print the parts for theirs.
:) Not a bad plan at all. I was going to suggest printing what you could once you go the first one done.
So, here is the latest update. I got the controller and display and got them setup over the past couple of days.
I went with the Azteeg X3 PRO 3D printer Controller
Azteeg X3 Pro
And the ViKi LCD - Control Panel Interface
ViKi Control panel
along with the Helios 200 Heat Bed kit 200 x 200 mm
Helios 200 Heat Bed
I love the Azteeg X3 Pro for a couple of reasons. The first is that it is extremely expandable. I could add 4 more extruders to this guy, making it a 5 head printer. I could add another hot bed giving me 2 of them. I could add 6 more fans, 6 more thermistors and a couple of thermocupliers.
I can build out as much as I want to on this board and not have to replace anything. If something fails on the board, I can just use another location on the board.
The second thing that I liked more is that there are 4 different power points for the board. I am running the hotbed off of its own power supply. I am running the board off of the usb power. I am running all of the stepper motors off of their own power supply and then the hot ends are on their own power supply. That is great for me. I would hate to have the board shutdown when something happens with the hotbed. There are other things about this board that I really liked, but it is worth checking it out if you are looking at doing something like this.
The ViKi controller was bought simply because it looks great and functions great. It is a bit expensive, but I also wanted something that would mate with the Azteeg X3 and it did that well.
The Helios 200 is really cool. It comes with a fiberglass tape for insulation, 2 solder pads on the bottom right by where the thermistor is installed for the thermistor to be mounted to. There are leads in the board that then go to the edge of the board. The board is robust and got to 125 C without any issue. It also mounts flat because of the insulation tape and the thermistor not having to run the length of the board. Check it out. I like it.
I got everything running smooth except for the extruder. I can extrude a short piece of 3 mm fillament to the length that is requested. For example, I can tell it to extrude 100 mm and it does 100 mm. When I tell it to print, nothing comes out yet. I dont know why yet, but I think it has to do with a modification that I made to my extruder. I am printing out a new one as I type this on a different 3D printer..
The stepper motors that I bought were used from ebay. They ended out to work great.
https://www.ebay.com/itm/121349990048?ssPageName=STRK:MEWNX:IT&_trksid=p3984.m1497.l2649
I paid $50 for them. I could have gotten them cheaper and gotten new ones. In the future, I will be buying them from MakerFarm. The only real snag that I have come into so far is that the thermistor didn't come with the Helios. There happens to be a 3D printer company in the city I live in, so I thought I would go over there and pickup a thermistor, which they offered online. They were not used to customers showing up at their door, and wouldn't let me buy it there. I had to buy it online and then pick it up. I broke out my cell phone and bought it, and then they handed it to me. Really strange, but I got it and could complete the build.
So, right now, there is only one issue that I know of that is preventing me from printing and it is being printed right now. I will hopefully be printing by tonight on my own 3D printer. I will update this again after I am printing.
One more thing... I replaced the prusa MKII that I had purchased, with a E3D V5 that I got locally for $50.00. Good price and even better, I could take a 15 minute car ride to get a very popular hot end. The prusa worked for the initial tests but something went wrong with it and I got sick of messing with it.
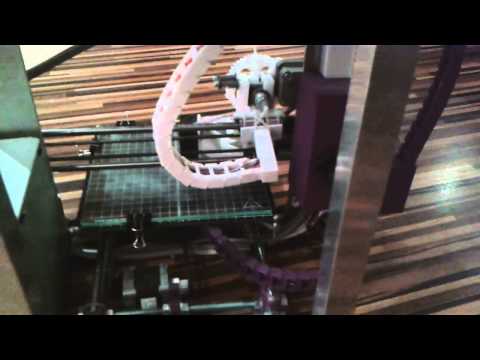
The issue with this is that the extruder that comes with the Prusa i3 Rework, doesn't work well with the E3D. I am now at the makerspace that I am a member of, printing the exact same part that I printed yesterday, but for the E3D. The good thing is that this auto bed leveling piece that I printed yesterday will work better with the new setup than it did with the really short Prusa MKII. Also, my current fan can be used for cooling the newly laid material instead of cooling the hotend. the E3D comes with a fan that is mounted directly to the heatsync.
Anyway, maybe today I will be printing something