Step 2. Creating a Pandorabot.
To get started, you will need to create your very own Pandorabot using their website. You can choose one which already has content so you can start a conversation straight away, or you can choose one with no content so you can build your bot from the ground up. Setting up your own Pandorabot is free to do (at the time this tutorial was written), and this step will explain how to do just that.
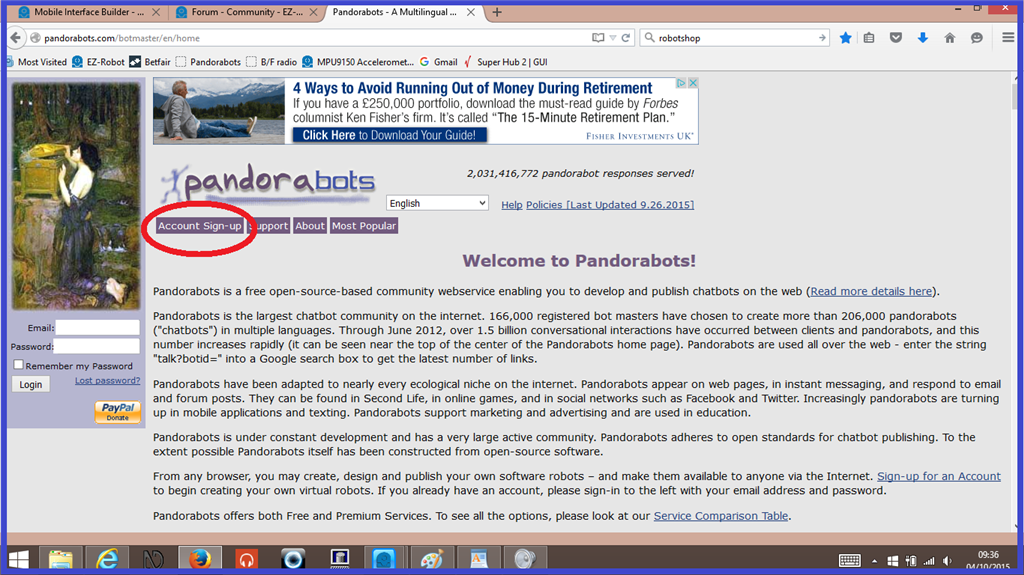
If you use the link below, you can sign up to a Pandorabot account and start creating a new bot.
1.) After clicking on the link above, on the sign up home page, click on "Account Sign Up".
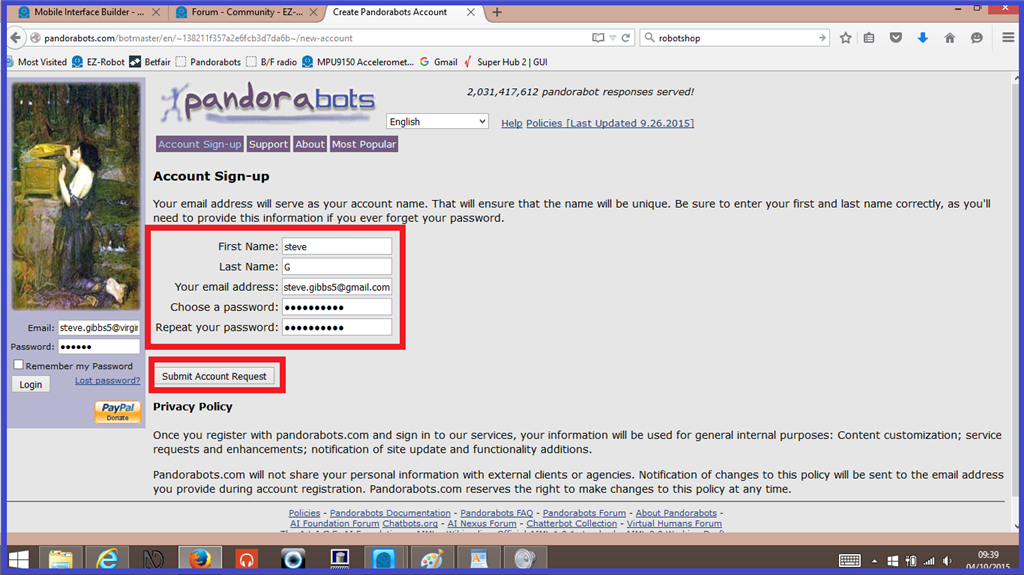
2.) Enter the relevant information in to the text input fields, then Click on "Submit Account Request".
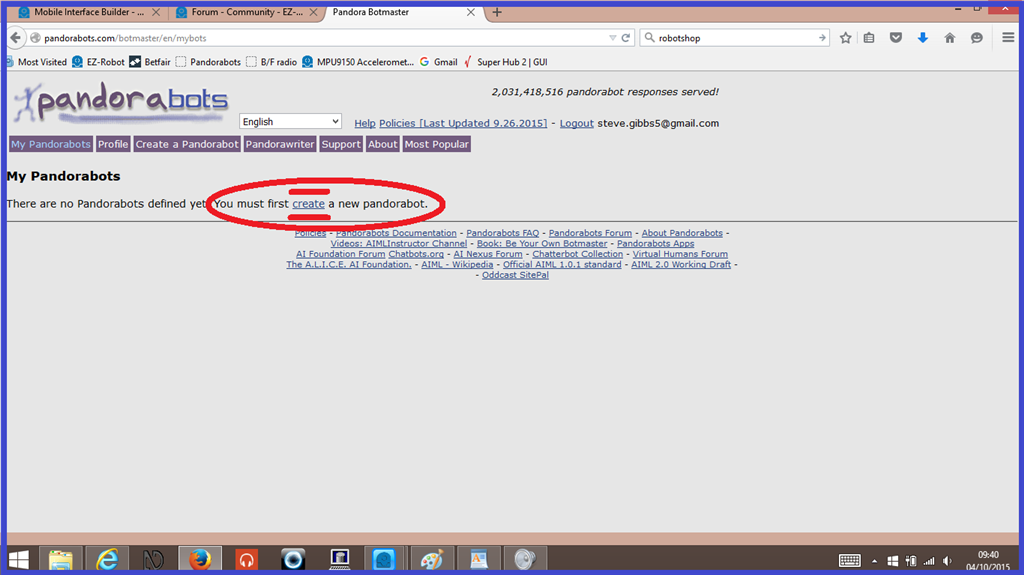
3.) You will now see a message saying that no Pandorabots have been defined yet. Click on the "Create" link in this message to create your new bot.
4.) Choose what content you want your new bot to start off with the categories are...
Standard AIML - Sept 2001 Dr Wallace's A.L.I.C.E - March 2002 Annotated A.L.I.C.E. AIML - September 2003 Christian Drossmann's standalone German AIML - January 2002 Sandro Pons' Italian AIML set - April 2001
and No initial content, the Pandorabot starts with no knowledge.
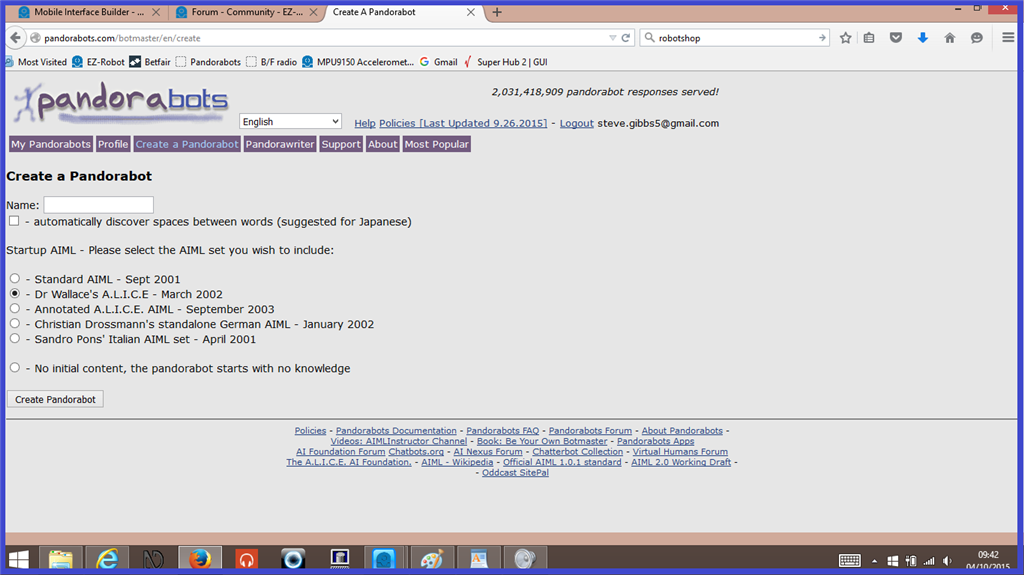
In this tutorial, we will use a bot with "No Initial Content".
Easy way to train your bot.
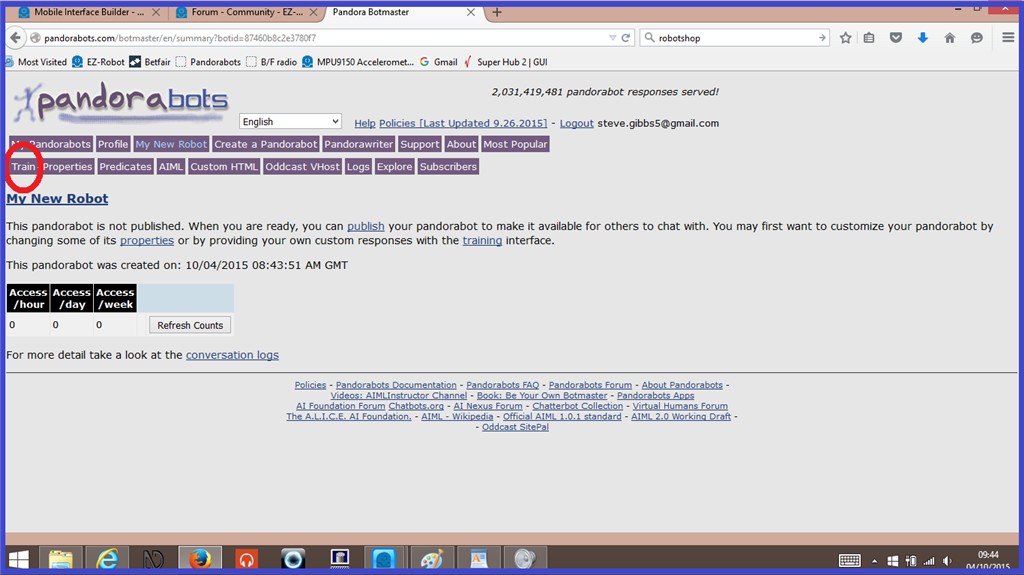
1.) To give your new bot the ability to hold a conversation, the more are a couple of options you can use. One of the ways is to use the "Train" interface. This is the easiest way to add or edit knowledge to your bot. To start, click on the "Train" tab.
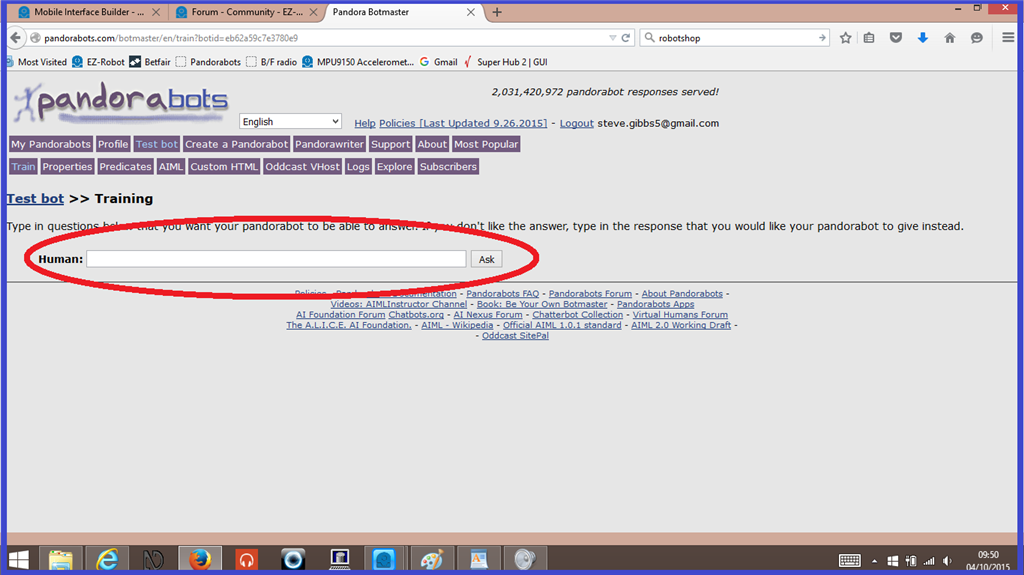
2.) The text input field where it says "Human" is where you write what you want to say to the bot. Click on the field and write Hello", then press "Enter on your keyboard, or click on "Ask".
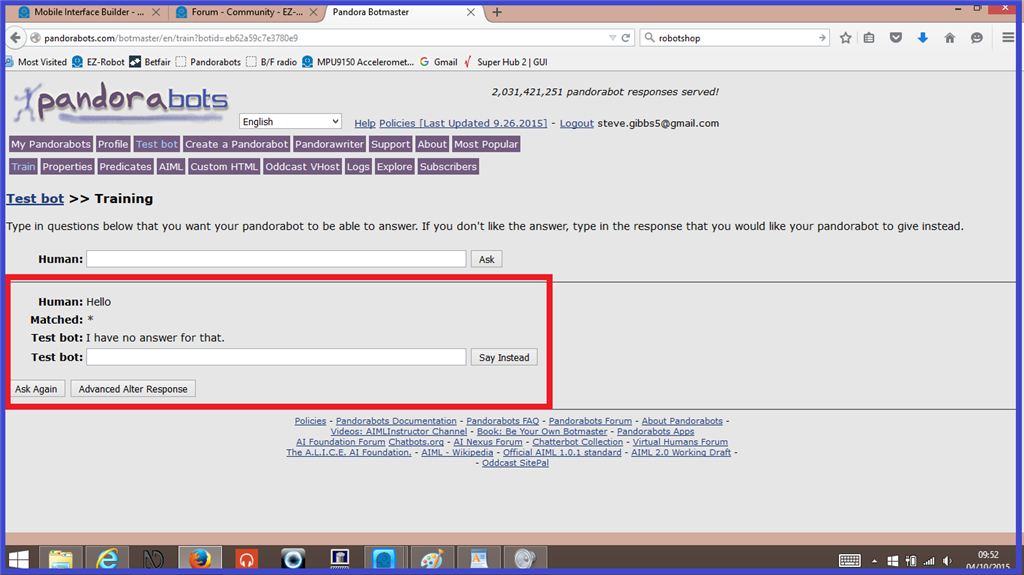
3.) When training a bot with no initial content, you will get the bots response "I have no answer for that" which is a default response. In the bots text input field, write "Hello. Nice to meet you.", then click "Say instead".
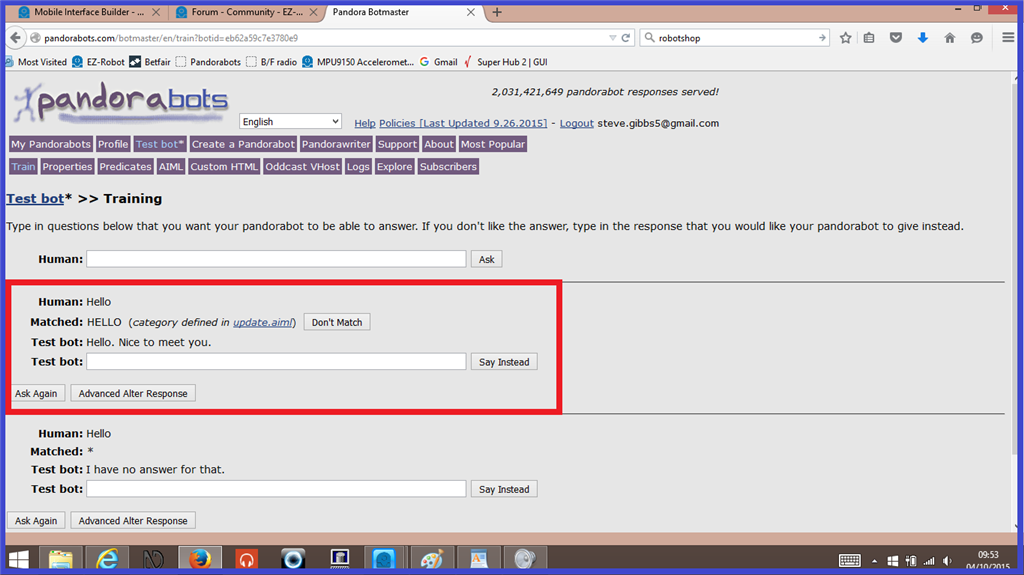
4.) Click on the "Ask Again" (which says your "Hello" response again) and the bot will now respond with it's new "Hello. Nice to meet you" response. As mentioned, this is the easiest way to train your bot, but more time consuming.
Advanced way to train your bot.
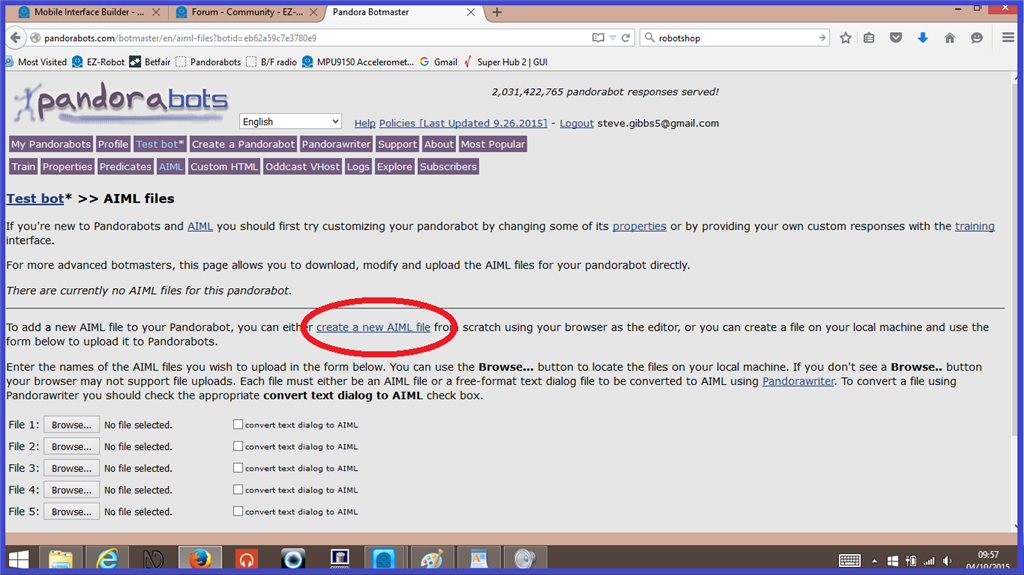
1.) Another way to train your bot, is by adding or editing it's AIML files directly. This is a more advanced option, but once you get the hang of it, it is much quicker to train you bot. To start with a simple example with the bot with no initial content, click on the "AIML" tab.

2.) Now click on the link that says "Create a new AIML file".
3.) You will be presented with an AIML script editor. In this editor the will already be a body of code that will run your AIML categories. The AIML categories you wish to add (it could be one, or a hundred) need to go where it says [/b] (this message can be written over or deleted).
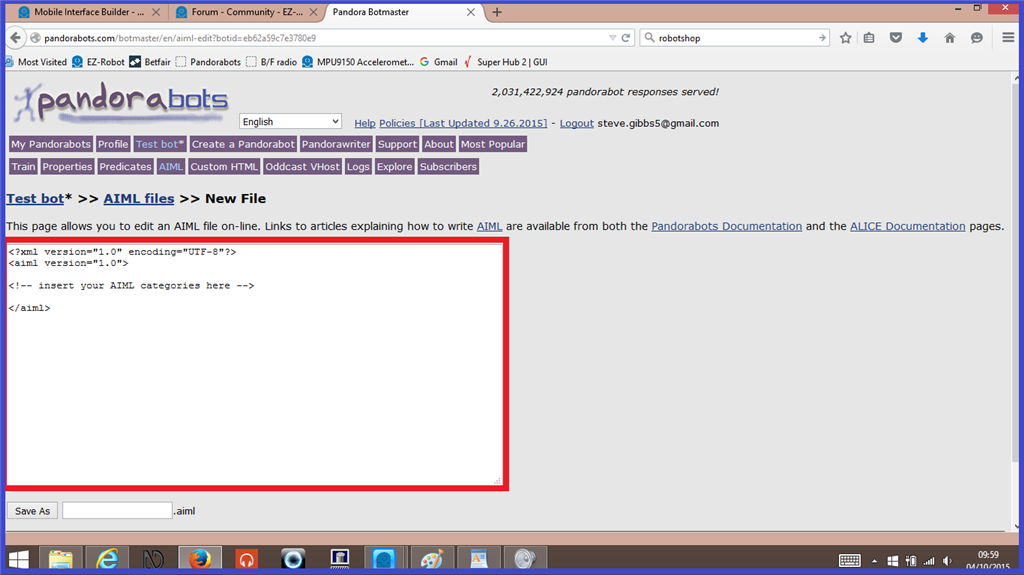
[b]4.) An AIML category is made up of the following...
Cetegory: separates the category from others in your bots AIML files. Pattern: is what you say. Template: is the robots response.
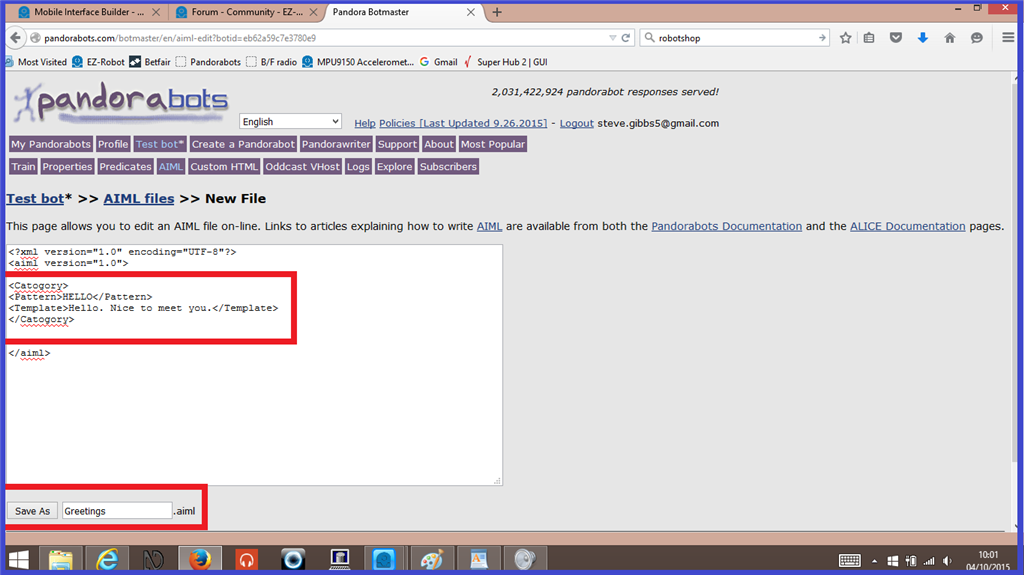
Once you have added your new category, it should look like the screen shot below. When your category is finished, give your new AIML file a name and click "Save As". (NOTE: If you Aiml category contains any errors, you will receive a red error message. Carefully check over your code again and correct any errors).
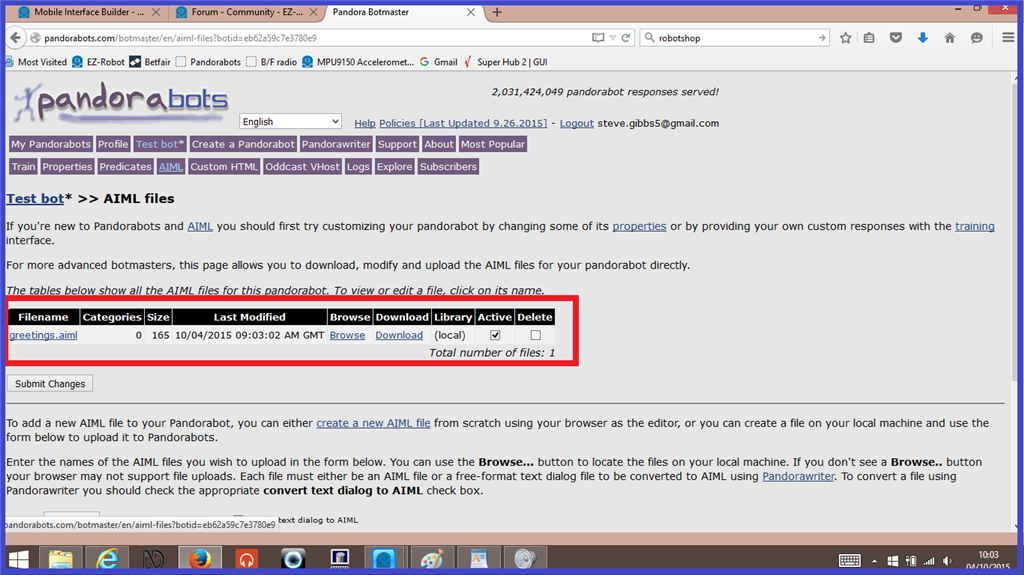
5.) When the file is successfully saved, you will now see it listed in an AIML file list, like below...
6.) To talk to your new Pandorabot with EZ Builder, you first need to publish your bot. Click on your bots name tab, then click on the "Publish" link highlighted below...
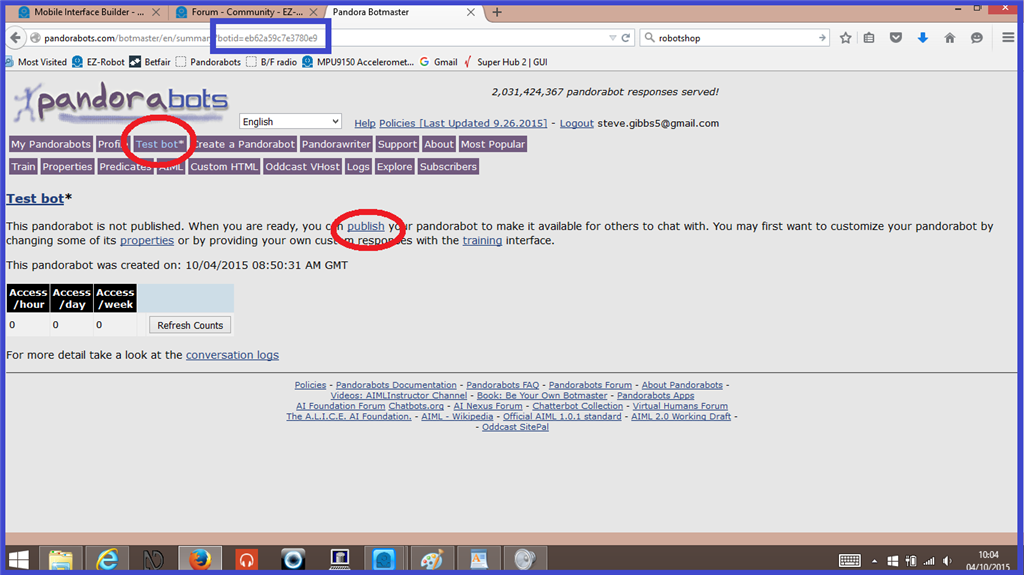
7.) One final thing you need to do, is make a note of your new Pandorabots Bot ID. This will be needed to set up your bot in EZ Builder, which will be explained in step 4. The bot ID can be found in the URL on the publish screen which can be seen highlighted in "blue" in the screen shot, above.
That covers the basics of setting up a new Pandorabot and giving your new bot knowledge. There is a lot more extensive information that covers how to train your bot in the following links which will help.
