Overview
In this post I present a project that I set up to link a Microsoft Kinect Xbox 360 sensor with ARC A background program (in a language called processing) runs behind the scenes. This program analyses the skeletal orientation of the user from the Kinect Camera. It then passes this information to the ARC A script can be written in ARC to respond to this information. Detailed set up instructions are given An ARC Example Project is presented An ARC Example Project for the Revolution JD is presented this is a copycat game which moves its servos in accordance with the user position
Introduction
I am a gaming enthusiast particularly when this comes to Kinect Xbox games. What amazes me so much is how these Xbox games can almost see, and then respond to how our human skeleton move. I also enjoy learning about microcontrollers and electronics. I became hooked on Arduino microcontrollers a few years ago I am an amateur robotics hobbyist as well and was delighted a while back to get my hands on a EZ-Robot Revolution JD Robot. Recently, the idea came to my mind on how to link all these interests. I wondered what it would like to interact with my humanoid robot using body gestures like in the Xbox Kinect games. So what follows in this post is how I got my Xbox Kinect 360 Sensor to interact with my EZ-Robot Revolution JD Robot. I used a language called Processing which I became familiar with from my Arduino experiences. Processing can be downloaded for free at https://processing.org. Furthermore there is an amazing Kinect processing library , also for free , called simple-openni. The website for this library is at : http://code.google.com/p/simple-openni. Included in the library is a magical skeleton tracking algorithm which enables the software to see the angles of our different joints as we move around in different positions In this post I attempt to describe a way of how to integrate the ARC with the Kinect Xbox 360 Sensor. No knowledge of processing language is required. A processing program is run in the background linking ARC with the Kinect. But all coding is done in the ARC software.
Discussion
A Processing program runs in the background continually monitoring the user’s position through the Kinect camera. It continuously sends this data via WIFI to the ez-bv4 Wi-Fi Robot Controller And while this is happening a script in ARC continuously polls the data (from processing) which contain the angle of the body’s joints. This is done inside a GOTO loop inside ARC Script. I will illustrate this by way of an example. Let say you are standing in a room facing your Kinect sensor. You continuously move your right arm from the floor to the ceiling. Then the angle between your arm and your spine will continuously change from 0 degrees to 180 degrees and back to 0 degrees.
Fig 1 Right arm pointing to floor
   O
/   | \
/ | \
/
/ \
Fig 2 Right Arm point to Wall
   O_ _ _ __
/   |
/ |
/
/ \
Fig 3 Right Arm pointing to Ceiling
          /
   O/
/   |
/ |
/
/ \
So in the above figures the angles between your Right arm and spine would be approximately as follows Fig 1 10 Degrees Fig 2 90 Degrees Fig 3 180 degrees
So for example you want to move a servo, connected to pin D1, that mirrors the angle between your right upper arm and your spine, then you can code as follows Servo(D1, $rightShoulder)
All this is illustrated in the Kinect Demo EZ script which is attached to the post.
I have mapped out 8 joints into 8 variables that can be used in the EZ-Script. See Table 1 below
Table 1
Name of Variable Joint
$leftElbow Left Elbow
$rightElbow Right Elbow
$leftShoulder Left Shoulder
$rightShoulder Right Shoulder
$leftHip Left Hip
$rightHip Right Hip
$leftKnee Left Knee
$rightKnee Right Knee
The range of these Variables are from 0 to 180 degrees.
Equipment required
One ez-bv4 Wi-Fi Robot Controller with charged batteries One servo connected to pin D1 of the ez-bv4 Wi-Fi Robot Controller. Optionally: An Assembled, Calibrated and Connected JD with charged battery One Kinect for Xbox 360 Sensor (See Note below) connected to a USB port of your PC and to your wall socket with the Kinect Power supply Cable. One Windows PC with the latest version of EZ builder installed. (I am using Windows 8)
Note regarding the Kinect Sensor
An Xbox 360 console is not required. Only the Kinect 360 sensor is required. You require the Kinect power supply cable. You can buy the Kinect for Xbox 360 sensor separately without the Xbox console, which in my case came with the power supply cable. If you opt to purchase a Xbox console bundled with the Kinect, you will possibly have to buy the Power supply cable separately. The article for this post was tested on the Kinect Xbox 360 sensor and not the Windows Kinect sensor or the Kinect Xbox One Sensor. The Xbox 360 Sensor is (I think) the cheapest of the three sensors You might get Installation disks and games with your Kinect Sensor but this is not required for this project. Follow the detailed setup instructions on how to use the Kinect.
Downloads required
Microsoft Kinect SDK - http://go.microsoft.com/fwlink/?LinkID=323588 Processing Windows 32-bit - https://www.processing.org/download/ Processing code : http://pastebin.com/KcYfvuX4
Set Up Instructions
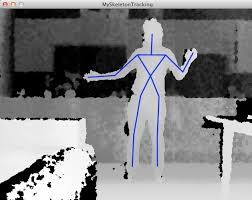
Follow these steps to get the Kinect and Processing going on your Windows system: Install the Microsoft Kinect SDK. If everything worked out, you should see in Device Manager an entry for Kinect for Windows. Extract the processing zip file into your desired location. Run processing.exe within the extracted location. Make sure that the Java environment in Processing is selected in the Combo box on top right hand corner of the screen. If not select Java environment Select : Menu , Sketch , Import Library , Add Library Select and install SimpleOpenNI Open the Processing Code (see Pastebin link above )and copy it into your clipboard Paste this code into Processing. Minimize (but don’t close) Processing Open up ARC At this stage you will have two applications (Processing and ARC) open up at the same time. The rest of these instructions involves switching between these two applications. In ARC : Open the Demo sample application that is attached to the post. In the Connection Window, press the Connect button In the HTTP Server window, you will see a number in blue In my case the number : 192.168.1.2 Make a note of this number In Processing : In the first line , replace the inside of the double quotes with this number. In the second line, the password in my setup is admin , which is the default EZ password. Only change this if you are not using admin as your password. Save the processing sketch with a name of your choice : Select Menu, File , Save In ARC : In the HTTP Server Window , press the Connect button. In the Kinect window, press Start. In Processing : Select Menu, Sketch , Run After a while, a screen will pop up looking similar to Figure 1, attached to this post. face your Kinect sensor Then after a while the screen will change with blue lines indicating your skeleton position. It will look similar to Figure 2 attached to this post. Now move your right arm from the ceiling to the floor and back to the ceiling Your right arm must point to the wall to the right of you and not to the wall in front of you. The servo will move to mirror your right arm . And you will see your skeleton move in the screen Position the windows as per Figure 2 so that your Skeletal Image Window fits nicely inside the EZ builder As a exercise, modify the code so that the servo mirrors your other joints. See the variable names in Table 1
JD Sample application
Open the JD Sample application that is attached to this post. You may have to change lines 1 and 2 of the processing code, as per the set up instructions above. Face the sensor. Move your left and right upper arm, left and right lower arm, Left and right Leg. Move these limbs to walls to the left and right of you and not to the wall in front of you. Revolution JD will follow your actions!
Comment
This post only scratches the surface on what can be done with the Kinect. There is obviously more than can be done. So have a look at the References and websites below and do some Google searches.
References
The processing language website is at https://processing.org The processing library used in this project is called simple-openni. The Website and sample code is at : http://code.google.com/p/simple-openni The Book : Arduino and Kinect Projects: Design, Build, Blow Their Minds (Technology in Action )Paperback April 17, 2012 by Enrique Ramos Melgar and Ciriaco Castro Diez. This books website and accompanying code is at http://www.apress.com/9781430241676 The Book : Making things see, 3D vision with Kinect, Processing, Arduino, and MakerBot by Greg Borenstein. This book website and accompanying code is at http://makingthingssee.com/ Sample code, manuals, tutorials, and videos at the EZ-Robot website : https://www.ez-robot.com/

 JDKinectDemo.EZBKinectDemo.EZB
Other robots from Synthiam community
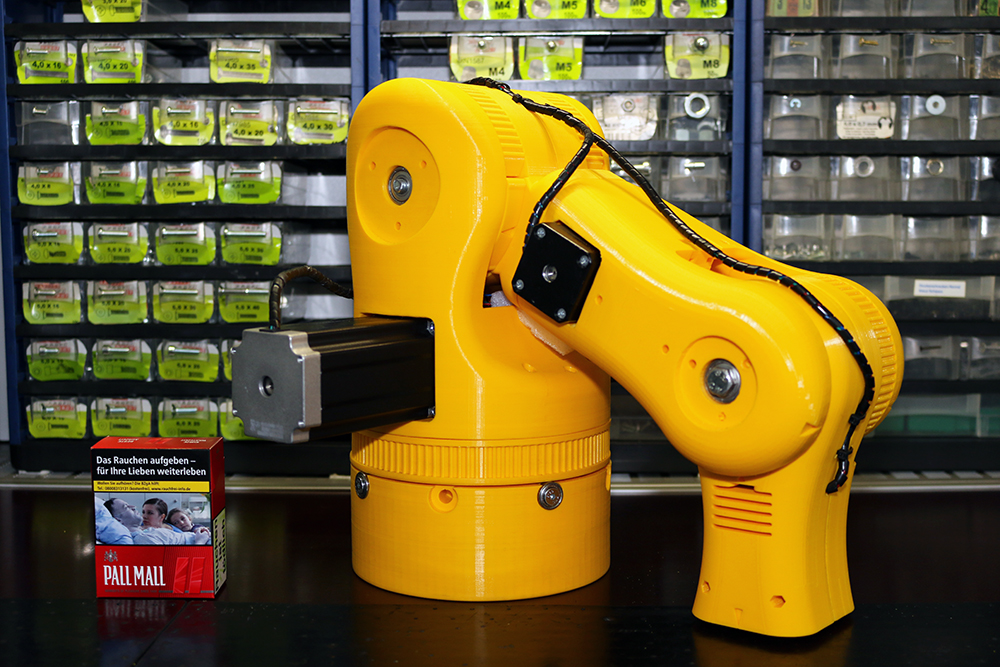
Rentaprinta's Moveo Project
Autiboy's Max The Robot Based Off Of Inmoov

Excellent project. Makes me want to go buy a Kinect.
Thanks for posting.
Alan
Great Project !
I tried last year to connect to the EZB but was unable to get it to recognize. Tell me, what other things do you think, without too much work that this will be able to do?
Thanks for sharing it with us.
Wow. That's one heck of a project.
@ianmbrick, Wow, that's great that you put this all together and posted it. There is a place for the Kinect in my InMoov robot. Until now I didn't know how to get it set up. Thanks for sharing the detailed instructions.
this could be just what we need for better environment mapping as well... interesting and great job!
Love the idea! Tell us more?...
I am very interested in your project for an application with my senior project. I have all of the software and code ready to go but I had some questions for resources on learning processing and interpreting the code you have :)
Can you email me? aclane56@gmail.com
thank you again Aaron
Has anyone. other then @ianmbrick tried this yet? I am going to try it in a couple of weeks after I get my Inmoov back togeter from a fall it took 3 days ago.
Thanks Merne
It has taken me around 40 hrs just to get my PC up and running again, it crashed and not sure way. Anyway it is back up and running windows 10.
Can someone explain what the http://71.210.25.91/ address that show up in the example http server in the ezb project?
Thanks, merne
Your public IP address. It is what you would connect to if you forward the http server port to your internal address (the other one, probably starts with 192.168 or 10.0).
Alan
Thanks Thetechguru, I was just going to post a never mind I figured it out. :)
Thank you for your reply!
Now I am going to play with my Kinect on Inmoov Gideon.
Man this is really cool...I will give it a try! My Kinect was sitting on the shelf for quiet a while now! I do not have any Xbox, so the other setup here on the forum that was started by @ptp recently is not working for me I figured!
But this seems to be worth giving it a shot....sweeet! :)
@mickey, be careful, use a servo not connected to anything. The reason is because when you're running this setup and not in front of the Kinect it will move on its own if the skeleton moves it will move the servo.
Also, you have to change the virtual numbers in the processing and in the ezb project to a digital; port for it to work.
@Anybody, anyone know how to set this up? So if you are not in front of the skeleton/Kinect and someone or something is moving in front of the Kinect it would not move, does it need a variable? Hope this make sense?
Thanks, Merne
Thanks for the warning @merne!
I still did not have the time to check your setup...hopefully I can get it done once I got some days off at work!
But its sooo cool that the Kinect is back in the game! :)