There are a lot of different LCD Displays out there and a lot of them can be tricky to get working. All of them require some sort of backback which converts the serial or I2C commands sent to it in to what is displayed on the screen, but these commands can change between manufacturers and even models.
A while ago @toymaker did a quick tutorial on the Devantech LCD displays which are great to use but I always like a choice.
Digole Digital Solutions provide a huge range of LCD Displays and the great thing about them is they can be used in either Serial or I2C mode selectable by soldering a small jumper in place. The company themselves are still a pretty small, new company so I am told but that doesn't mean the support isn't there either. It is.
The other great thing about them is that they all use the same commands across the whole range, so once you have the datasheet for one, you have it for them all. Once you learn the commands that need to be sent to display text or position text, display an image or clear the screen then you know it for them all.
So, on to the tutorial :)
The Manual First of all, download the manual. It contains wiring instructions, details on how to change from Serial UART to I2C and SPI (we are only concerned with Serial UART and I2C).
The Displays
So far the only displays I have from Digole are;
 The 1.8" DS12864LCD
 The 1602 LCD
They have a whole range of others available in different sizes and colours too though, click here to see and buy the range of displays they make.
I plan to get hold of all Digole displays to ensure they will all work the same way and explain which are able to display graphics, custom fonts etc. and which can't. Bear with me on this, funds are a little tight so they will come in one by one, I am in talks with Digole to see if I can secure some kind of discount which will help make this a more comprehensive tutorial however as they are pretty new and small that may not happen.
The 1602 LCD is probably going to be the more popular one. It's a nice, easy to see, but is limited to text only and is 16 characters long by 2 characters high so space is restricted a little.
Wiring Wiring of the devices is all the same too, you have the choice of Serial or I2C, set by a jumper. For serial, simply connect; Vcc from the EZ-B Digital Port to Vcc (Pin 5) of the Display Ground from the EZ-B Digital Port to Ground (Pin 1) of the Display Signal from the EZ-B Digital Port to RX (Pin 4) of the Display
For I2C, simply connect; Vcc from the EZ-B I2C Port to Vcc (Pin 5) of the Display Ground from the EZ-B I2C Port to Ground (Pin 1) of the Display SCL from the EZ-B I2C Port to SCL (Pin 3) of the Display SDA from the EZ-B I2C Port to SDA (Pin 4) of the Display
No pull up resistors are required for these displays.
Displaying Text All of the Digole units are capable of displaying text and do so in the same way. The following examples assume you have set the module to I2C mode, however if you use serial the command is almost the same, just substitute I2CWrite(0,0x27 for SendSerial(Port,9600
When you first turn the unit on, power it up or whatever you want to call it you will get a welcome screen. By default it will display the baudrate (9600) or I2CAddress (0x27). Before displaying text you will want to clear this.
Clearing the screen CLear screen and set the display position to first column and first row (x=0,y=0), for graphic LCD it also sets the font to default and turns off the cursor.
I2CWrite(0,0x27,"CL")
You may want to turn the cursor on or off (default is off). Turning the Cursor on/off Set the CurSor on/off, 0=off 1=on Turn on
I2CWrite(0,0x27,"CS1")
Turn off
I2CWrite(0,0x27,"CS0")
You may want to turn the backlight on or off, depending on the colour of the display etc.
Set the Back Light on/off, 0=off 1=on. Turn on
I2CWrite(0,0x27,"BL1")
Turn off
I2CWrite(0,0x27,"BL0")
Text Entry Now on to displaying some text. This process is pretty simple, set the cursor position, send the text and escape from the text entering.
First, put the cursor in the position you want it in, x and y values are needed, x is the horizontal position and y the vertical. On a 16x2 display you only have 2 choices for the y value, 0 being the top row and 1 being the bottom. The x value is from left to right, 0 to 15, so 0,0 is top left, 15,1 is bottom right.
In this example we will write "EZ-Builder" in the middle of the top row. So first, we need to see where to start the text. The row is 16 characters long and the text is 10 characters long, 16-10=6, so divide that by 2 to find the point to start at, 6/2= 3 empty characters either side, therefore we need to have the first character on column 4.
So let's set the Text Position in the top row, fourth character across. Bear in mind top right is 0,0 so 4th in would be 3 and top row 0;
I2CWrite(0,0x27,"TP","3","0")
To add text can be a headache if you only read the manual. Once you enter text entry mode you need to leave it, the manual doesn't explain this procedure. So I will...
So first, enter TexT entry mode;
I2CWrite(0,0x27,"TT")
Now send the text we want to display;
I2CWrite(0,0x27,"EZ-Builder")
And now exit from text entry mode
I2CWrite(0,0x27,0)
All of this could be done in one command to make scripting easier, but is not required.
I2CWrite(0,0x27,"TT","EZ-Builder",0)
The display should now display ARC in the middle of the top row.
Another example for displaying the current time, and automatically updating;
# Digole LCD Time Display

# Clear the screen
I2CWrite(0,0x27,"CL")

# Hide the cursor
I2CWrite(0,0x27,"CS0")

# Add the text TIME in the middle of the top row (7,0)
I2CWrite(0,0x27,"TP","7","0")
I2CWrite(0,0x27,"TT","TIME",0)

# Make some code to display, update and over write the time on the display

# Set a label for the loop
:timeloop

# Position the cursor to the bottom line so the time is centred (5,1)
I2CWrite(0,0x27,"TP","5","1")

# And write in the time
I2CWrite(0,0x27,"TT",$time,0)

# Wait until the second changes
WaitForChange($second)

# Loop back up to the label
Goto(timeloop)
Voila, you now have a very expensive digital clock :)
That's pretty much all there is to displaying text. Displaying graphics on the other hand, where the LCD is capable, is a little bit more complex.
Graphics
Graphics are a little trickier to display, especially bitmap images however it is still possible;

Setting the Graphics Position for following draw line command with x and y positions.
I2CWrite(0,0x27,"GP","0","0")
Setting the Display Mode for on coming command, the available values are: "!""~" not, "|"" or, "^" xor, "&" and, this means the next drawing pixel will logic operation with the pixel already on screen.
I2CWrite(0,0x27,"DM","!")
Display Image, 1st is the x position, 2nd is the y position, 3rs is the image width, 4th is the height, then following is data. Each byte present 8 pixels, if the image width is not divided by 8 the last byte of a row will only contain a few pixels, eg for width 9 to 16 you need 2 bytes for a row.
This is trickier as you need to convert your bitmap image to raw code. Luckily Digole have a converter tool. Head over to that page with your bitmap image ready, upload it to the site, set the settings as you want it and click submit.
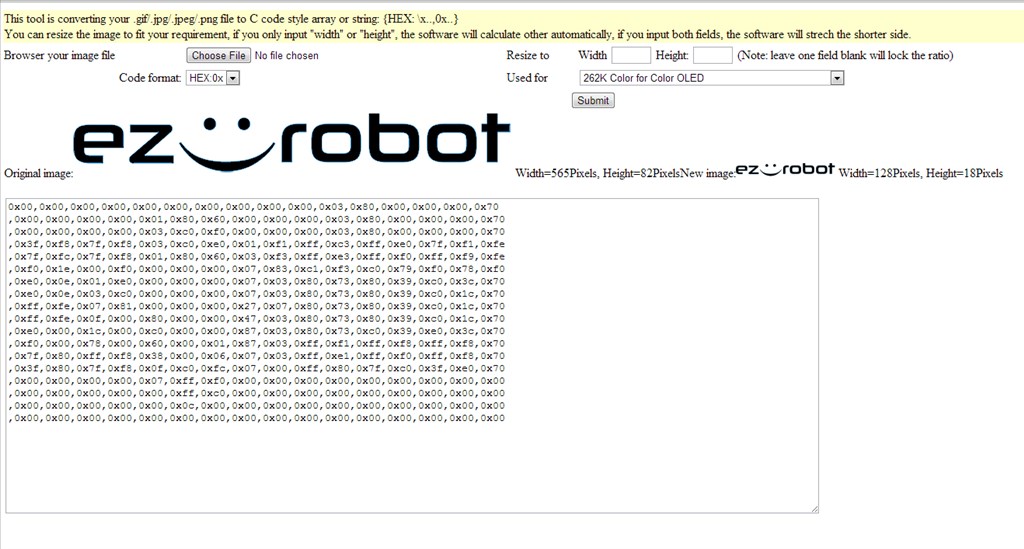
You end up with a bunch of code like this;
0x00,0x00,0x00,0x00,0x00,0x00,0x00,0x00,0x00,0x00,0x03,0x80,0x00,0x00,0x00,0x70
,0x00,0x00,0x00,0x00,0x01,0x80,0x60,0x00,0x00,0x00,0x03,0x80,0x00,0x00,0x00,0x70
,0x00,0x00,0x00,0x00,0x03,0xc0,0xf0,0x00,0x00,0x00,0x03,0x80,0x00,0x00,0x00,0x70
,0x3f,0xf8,0x7f,0xf8,0x03,0xc0,0xe0,0x01,0xf1,0xff,0xc3,0xff,0xe0,0x7f,0xf1,0xfe
,0x7f,0xfc,0x7f,0xf8,0x01,0x80,0x60,0x03,0xf3,0xff,0xe3,0xff,0xf0,0xff,0xf9,0xfe
,0xf0,0x1e,0x00,0xf0,0x00,0x00,0x00,0x07,0x83,0xc1,0xf3,0xc0,0x79,0xf0,0x78,0xf0
,0xe0,0x0e,0x01,0xe0,0x00,0x00,0x00,0x07,0x03,0x80,0x73,0x80,0x39,0xc0,0x3c,0x70
,0xe0,0x0e,0x03,0xc0,0x00,0x00,0x00,0x07,0x03,0x80,0x73,0x80,0x39,0xc0,0x1c,0x70
,0xff,0xfe,0x07,0x81,0x00,0x00,0x00,0x27,0x07,0x80,0x73,0x80,0x39,0xc0,0x1c,0x70
,0xff,0xfe,0x0f,0x00,0x80,0x00,0x00,0x47,0x03,0x80,0x73,0x80,0x39,0xc0,0x1c,0x70
,0xe0,0x00,0x1c,0x00,0xc0,0x00,0x00,0x87,0x03,0x80,0x73,0xc0,0x39,0xe0,0x3c,0x70
,0xf0,0x00,0x78,0x00,0x60,0x00,0x01,0x87,0x03,0xff,0xf1,0xff,0xf8,0xff,0xf8,0x70
,0x7f,0x80,0xff,0xf8,0x38,0x00,0x06,0x07,0x03,0xff,0xe1,0xff,0xf0,0xff,0xf8,0x70
,0x3f,0x80,0x7f,0xf8,0x0f,0xc0,0xfc,0x07,0x00,0xff,0x80,0x7f,0xc0,0x3f,0xe0,0x70
,0x00,0x00,0x00,0x00,0x07,0xff,0xf0,0x00,0x00,0x00,0x00,0x00,0x00,0x00,0x00,0x00
,0x00,0x00,0x00,0x00,0x00,0xff,0xc0,0x00,0x00,0x00,0x00,0x00,0x00,0x00,0x00,0x00
,0x00,0x00,0x00,0x00,0x00,0x0c,0x00,0x00,0x00,0x00,0x00,0x00,0x00,0x00,0x00,0x00
,0x00,0x00,0x00,0x00,0x00,0x00,0x00,0x00,0x00,0x00,0x00,0x00,0x00,0x00,0x00,0x00
That is the EZ-Robot logo in data form at 128 pixels wide. So this is what needs to be entered in the command. However, I2C has a limit of 256 bytes per transmission, the above code is bigger and therefore needs splitting in half (or more section). The easiest way is to do it line by line, the code is given line by line so it takes any guess work out of it but it does display the image being drawn line by line on the display. Not a deal breaker but some may not like it.
So, to display the EZ-Robot logo across the top of the display the EZ-Script would be like this (note, I split the logo in half vertically before passing it through the converter rather than line by line);
#EZ-Robot Logo
I2CWrite(0,0x27,"DIM",0,30,64,18,0x00,0x00,0x00,0x00,0x00,0x00,0x00,0x00,0x00,0x00,0x00,0x00,0x01,0x00,0xc0,0x00,0x00,0x00,0x00,0x00,0x03,0x80,0xe0,0x00,0x3f,0xf8,0x7f,0xf0,0x03,0x80,0xe0,0x03,0x7f,0xfc,0xff,0xf8,0x01,0x00,0x40,0x07,0xf0,0x1e,0x00,0xf0,0x00,0x00,0x00,0x07,0xe0,0x0e,0x01,0xe0,0x00,0x00,0x00,0x0e,0xe0,0x1e,0x03,0xc0,0x00,0x00,0x00,0x0e,0xff,0xfe,0x07,0x00,0x00,0x00,0x00,0x0e,0xff,0xfc,0x0e,0x01,0x00,0x00,0x00,0x4e,0xe0,0x00,0x3c,0x00,0x80,0x00,0x00,0x8e,0xf0,0x00,0x78,0x00,0x60,0x00,0x03,0x0e,0x7f,0x80,0xff,0xf8,0x38,0x00,0x0e,0x0e,0x3f,0x80,0xff,0xf8,0x1f,0x81,0xfc,0x0e,0x00,0x00,0x00,0x00,0x07,0xff,0xf0,0x00,0x00,0x00,0x00,0x00,0x01,0xff,0xc0,0x00,0x00,0x00,0x00,0x00,0x00,0x08,0x00,0x00,0x00,0x00,0x00,0x00,0x00,0x00,0x00,0x00)
I2CWrite(0,0x27,"DIM",64,30,64,18,0x00,0x00,0x03,0x80,0x00,0x00,0x00,0xe0,0x00,0x00,0x03,0x80,0x00,0x00,0x00,0xe0,0x00,0x00,0x03,0x80,0x00,0x00,0x00,0xe0,0xf1,0xff,0xc3,0xff,0xe0,0x7f,0xe1,0xfe,0xf3,0xff,0xe3,0xff,0xf1,0xff,0xf9,0xfe,0x07,0xc1,0xe3,0x80,0xf1,0xe0,0x78,0xf0,0x07,0x00,0xf3,0x80,0x71,0xc0,0x38,0xe0,0x07,0x00,0x73,0x80,0x71,0xc0,0x38,0xe0,0x07,0x00,0x73,0x80,0x71,0xc0,0x38,0xe0,0x07,0x00,0x73,0x80,0x71,0xc0,0x38,0xe0,0x07,0x00,0xe3,0x80,0x71,0xc0,0x38,0xe0,0x07,0xff,0xe3,0xff,0xf1,0xff,0xf8,0xe0,0x03,0xff,0xe1,0xff,0xf0,0xff,0xf0,0xe0,0x00,0xff,0x80,0x7f,0xc0,0x7f,0xe0,0xe0,0x00,0x00,0x00,0x00,0x00,0x00,0x00,0x00,0x00,0x00,0x00,0x00,0x00,0x00,0x00,0x00,0x00,0x00,0x00,0x00,0x00,0x00,0x00,0x00,0x00,0x00,0x00,0x00,0x00,0x00,0x00,0x00)

As you can see, it's a lot of work for little pay off. You may be better off looking at other alternatives but I will leave that choice down to you.
I will update this with more graphics commands at a later time, complete with examples and video.

Thanks Rich for creating this tutorial. I will be adding a display to my new project so this is exactly what I needed.
I'll be updating it over time. When I get home I will sort out the graphics commands then when I figure them out I'll cover the fonts, custom fonts, custom start screens and any other displays I can get my hands on from Digole.
I have some examples already done for the 16x2 display I got a while ago too which I'll be adding in.
Well done as usual. :)
@Rex, what do you plan on doing with your display? I'm looking for examples so if there's something specific you plan to do then I could always tie it in to the example and kill two birds with one stone.
@Rich -- Battery voltage would be a good example if nothing else comes up. Simple to implement as a resistor divider to an analog port. That is one of the things I have done. You can display data as text or as a graphical gauge to get fancy.
Useful to as a indication of how much run time is left on the robot.
You mean like this...
(Although not using the Digole LCD but it is easy enough to change the code - the custom characters may not be possible on some Digole models though)
Solid tutorial Rich! thanks so much! My plan is to use it as a "teleprompter" to remind me of commands and " chat threads". It will be viewable only at a certain angle so that I am the only one who can see it...hopefully :)
Cheers Rich, I may get one now...:) Glad I held back, I just hope it will still fit into the chest of my robot as I've got somebody making me a flux capacitor (thought it would look pretty nifty) now which will take up alot of the room lol...
Battery voltage was the main reason for me adding a LCD. Otherwise I am hoping to get more ideas as I go along. What else would be available from the EZ-B that I could display as status info?
Just added some graphics control info, still more to come but it's all I have the time to do right now.
@Rex, it depends what sensors you have. Battery level is the main function of Melvin's LCD however it can show; Ping Distance IR Distances Time Date Time running Current Draw
You could add in some fault/error circuits for other circuits too and have a systems check (kind of like in cars when they tell you oil is low, lamps are out, tyre pressure is low etc.)
Pointless but fun info too like movement direction could be displayed (although you should know this just by looking at the robot).
I'm sure there are more too.
I'll knock up a post covering the battery monitor at some point. I want to figure out if custom characters are available in the 1602 LCD, if they are then the battery monitor can look cool, otherwise it'll just be something like "Battery 1: 80%"
You have given me some great ideas on how to utilize this. Thanks. Looking forward to this topic as it progresses.
A quick example...