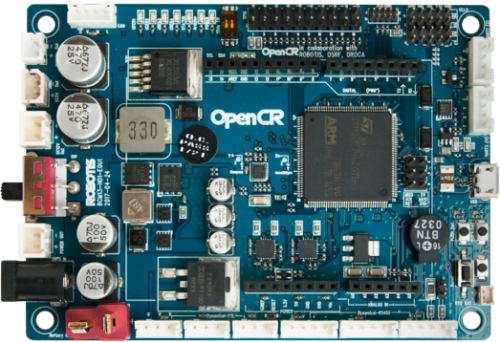
OpenCR by Robotis
OpenCR 1.0 is an open-source robot controller embedded with a powerful ARM MCU compatible with ARC.
Install Firmware Source Code
- Download and install the Arduino IDE.
-
After Arduino IDE is run, click File → Preferences in the top menu of the IDE. When the Preferences window appears, copy and paste the following link to the Additional Boards Manager URLs textbox.
https://raw.githubusercontent.com/ROBOTIS-GIT/OpenCR/master/arduino/opencr_release/package_opencr_index.json
- Install the OpenCR package via Boards Manager by clicking Tools → Board → Boards Manager. Type OpenCR into the textbox to find the OpenCR by ROBOTIS package. After it finds out, click Install. After the installation, “INSTALLED” will be appeared.
- See if OpenCR Board is now on the list of Tools → Board. Click this to import the OpenCR Board source.
- Download DJ's OpenCR v1 Firmware Sourcecode (Jan 9 ,2021)
- Tutorial to compile and upload the firmware
Connectivity
Most Arduino's connect to ARC via 9600 baud. This OpenCR controller can connect at a much higher rate. The firmware is set for 921,600 BAUD, which is very quick! When following the ARC connection tutorial, ensure you specify the correct baud rate for this firmware in the connection control config menu.
Ports
Get technical details of the Arduino pinouts with the OpenCR to understand how ARC maps to the output pins HERE.
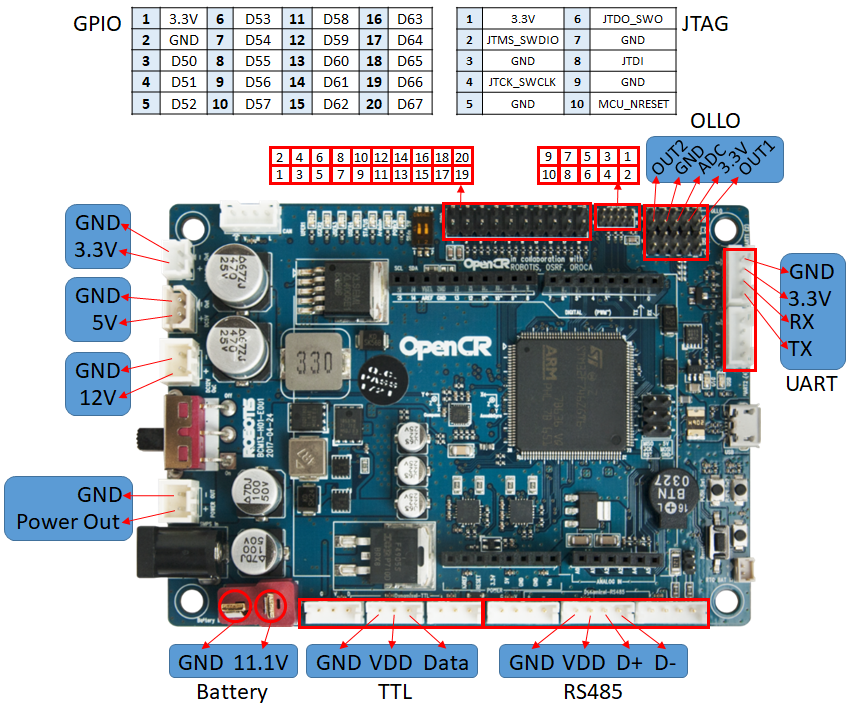
The ports on the OpenCR perform different features based on their usage. The diagram above demonstrates how the ports are connected to ARC. The Ax ports can be either Analog Input or Digital I/O. The Ax also functions as a Dx port. The UART 0, 1, & 2 are connected to UART 1, 2 & 3, respectively. Check the link above for information about how OpenCR maps I/O pins.
PWM Pins
This device is limited to using PWM on the following pins: 3, 5, 6, 9, 10, 11. Check this page to read more from Robotis.
ARC EZ-Script Example
For example, you can flash the LED because it is on port D13 in ARC with this example EZ-Script code. Try it and have fun :)
:loop

Set(d13, true)

sleep(500)

Set(d13, false)

sleep(500)

goto(loop)