EZ-B IoTiny by EZ-Robot

Connect Something!
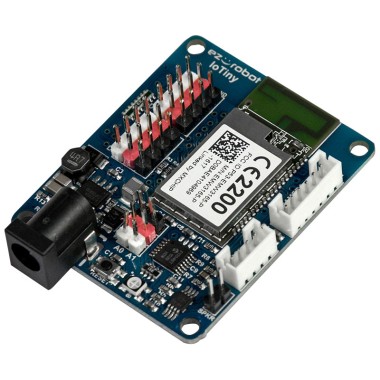
Introducing IoTiny, the smallest tiniest Robot/IoT controller of the EZ-B family. Powered by a 100mhz Cortex M4 ARM processor, the form factor allows you to use custom enclosures or fit in the tiniest places. Invent new IoT projects by easily controlling and automating nearly anything over the internet.
Datasheet
The datasheet is a document published by the manufacturer explaining the specific characteristics. The data sheet will provide information about operating temperature limitations, power consumption, and much more. Always check the datasheet for information about the IoTiny hardware and troubleshooting.
View DatasheetFeatures
- Controlled by ARC PC and ARC Mobile
- Wi-Fi (Skill, Telnet, HTTP, Discovery)
- Supports ARC's skills, such as Speech & Visual recognition
- SDK, Mobile & Microsoft Windows Software
- Verbal Setup Prompts
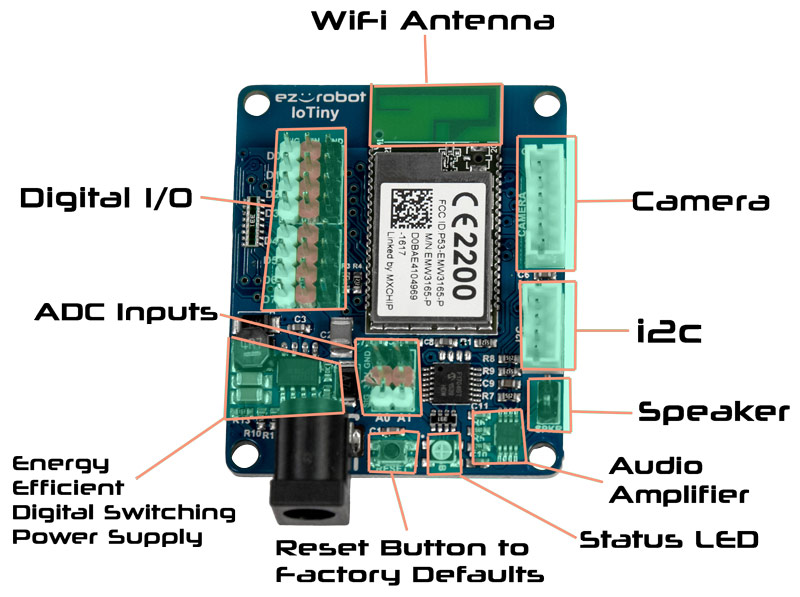
- 8 x Digital I/O, Servo, UART (tx only)
- 2 x ADC
- 1 x i2c
- 1 x Camera Video
- 1 x Speaker Output
- Hundreds of skills & 3rd Party Plugins
Simplicity and power.
The EZ-B IoTiny can be controlled over Wi-Fi using the graphical ARC software without programming on your PC or mobile device. The less time you spend with compilers, hardware programmers, and debuggers, the more time you can spend building and designing robotic projects!
The v4/2 is the next-generation brain of your robot or IoT device, powering over 20,000 robots worldwide! Give your custom robot or IoT project features inspired by science fiction! With the electronics protected by a stylish plastic shell, the ezbv4 clips into your ezrobot Revolution chassis or custom robot. It is easily controlled over Wi-Fi using ARC software.
The ezbv4/2 boasts two Cortex ARM processors running at 220MHz to provide servo, digital i/o, real-time audio/video streaming, and more! 5-volt tolerant I/O, energy-efficient digital switching power supply, Wi-Fi connectivity with security, embedded web server, telnet server, amplified digital audio with the speaker, 3 I² C ports, 3 x UARTs, 24 multi-use servo/digital/serial ports, 73 servos (Dynamixel & PWM), eight analog ports, and integrated video, all in a tiny 2.1" x 2.2" size!
3 PIN (GVS) Connectors
Each port has three pins: GND (Ground), VCC, and Signal. The GND and VCC are for powering the device connected to the port. The Signal pin is connected to the EZ-B Microchip for reading or writing data from Digital or ADC. The GND and VCC pins are not connected to the Microchip; they are used only for powering the peripheral connected to the tiny.
For example, a servo has a three-wire plug that connects to one of the EZ-B Digital Ports. The wires of a servo connector are GND, VCC, and Signal. The GND and VCC provide power to the servo's motor and circuit. The Signal wire carries the information to tell the servo what position to move.
Connecting Camera
The EZ-Robot Camera connects to the EZ-B IoTiny the same way as an EZ-B v4 with a six-pin cable. Notches on the male connector match the EZ-B's female connector. This prevents the plug from connecting incorrectly. The camera connection is unique, making it easy to identify where to click. It is impossible to connect the camera cable to the wrong connector, as it only fits in the matching plug.
If the camera disconnects from your IoTiny, consider checking the cable. A loose connection cable is the leading cause of camera issues with the IoTiny. This happens when the camera or iotiny is moved around and the cable connection loosens. In a worst-case scenario, a wire may break if the cable is bent at the connection. However, this is uncommon, and it’s suggested to disconnect and reconnect both sides of the cable connections simply.
Connecting Servos & I/O
The servos connect similarly to the IoTiny as the EZ-B v4, shown in the video. Much like your home theater speakers, the cables of the EZ-B and peripherals are color-coded. The BLACK cable on the peripheral (i.e., servo) will connect to match the BLACK side of the EZ-B connector.
Connecting Over WiFi
The iotiny allows connection via Wi-Fi in either AP mode (direct from PC to iotiny) or client mode (iotiny connects to an existing Wi-Fi network). The default mode when purchased or when reset to defaults is AP mode. To reset the iotiny to factory defaults, press the reset button when the iotiny is powered. Configuring between the two Wi-Fi modes is done in the web server configuration of the iotiny.
Making an IoT Product
Learn how to create an Internet of Things (IoT) product using IoTiny.
Unregulated Power I/O
As an IoTiny, you must know how the power pins work. This is because you will build a custom robot with custom power requirements.
The IoTiny does not regulate the power on the I/O pins. If you provide 12v to the IoTiny, the I/O pins will output 12v. Of course, this will damage any +5v peripherals connected to the IoTiny when using 12v. You must know how much power is being provided to the IoTiny and what you connect to the I/O pins. For example, the EZ-Robot Servos do not like power above 7.4 volts, so we recommend using Rechargeable AA batteries in the provided holder. If you wish to use an alternate power source, please be aware of this message and select a voltage rating that works with your application.
*Note: The only ports with regulated power are for the camera & i2c.
Learn Your Port Types

Digital
Working with digital means True (On) or False (Off). True means any voltage above 1 volt, and False means GND. There are eight digital ports on the IoTiny (D0 to D7)
Output is writing to a port: When a port's digital value is set to True, a +3.3 voltage will be outputted on that port. If the port has its digital value set to False, then the port will be GND.
Input is reading from a port: You can read the value of a specific port. This is how you can check for voltage, On or Off. Any voltage above GND (and below +5 volts) will be returned as True, and a short to GND will be returned as False.
Example peripherals for digital ports are Switches, Servos, Ultrasonic Distant Sensors, and Buttons.

ADC
ADC is short for Analog Digital Converter and is read-only (input only). This method reads voltages into the EZ-B Robot Controller. There are two analog input ports on the IoTiny (A0 to A1).
Reading Relative Voltage: The returned value will be between 0-255 in 8-bit mode and 0-4095 in 12-bit mode. These values represent the input voltage on the specified port. The value will be relative to the input voltage, between 0 and 5 volts. Example in 8-bit mode: Value 0 = 0 Volts, Value 127 = 2.5 Volts, Value 255 = 5 Volts.
Reading Absolute Voltage: Returns the value in actual volts on the specified port.
Examples of peripherals for analog input are Sharp GP2 Analog Distance Sensors, Pressure Sensors, Light Sensors, Sound Sensors, Color Sensors, and Reading Voltages.

Serial (tx only)
Every digital port of the IoTiny can transmit serial data. Serial Communication is the process of sending data one bit at a time in a sequence. Serial communication is common with many peripherals because it allows the transmission of commands over one wire. The transmission works similarly to Morse code.
The Sender and Receiver must be configured for the baud rate (speed) in which the data will be transmitted. Common baud rate speeds are 300bps, 4800bps, 9600bps, 19200bps, 38400bps, 57600bps and 115200.
Serial communication peripherals include LCD Screens, Motor Controllers, Servo Controllers, Computer Communication, Arduino Communication, iRobot Roomba, and more.

I2C
The I2C is also referred to as the "Two Wire Interface." There is an I2C connector on the IoTiny. I2C is a communication method invented by Philips to communicate with peripherals. The I2C uses two wires for communication: Serial Data Line (SDL) and a Serial Clock Line (SCL).
I2C devices can be chained together in a network formation. Each device is given a unique address. The IoTiny has one I2C header, which provides signal wires and +3.3v power.
Examples of peripherals for I2C communication are LCD Screens, I2C enabled Servos, BlinkM Multicolor LEDs, and more.
Click here for more information on understanding i2c addressing.
Related Tutorials

Control Robot With Virtual Reality Headset
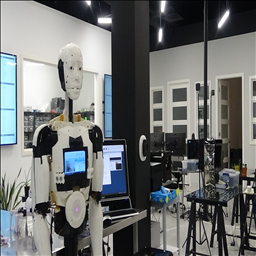
Exosphere Telepresence
Create Auto Position Actions From EZ-Script
Related Hack Events

Thomas The Train Live Hack....The Better Version Of His...

Rock Em' Sock Em' Robots Live Hack...Back Once Again With...

Rock Em' Sock Em' Robots Live Hack....The Heat Is On!

Rock 'Em Sock 'Em Robots Live Hack....A Million Punches!

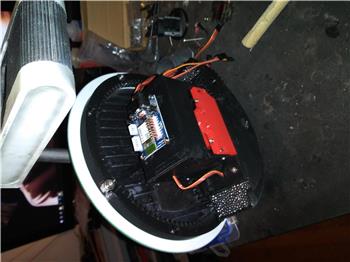
Getting My EZ-Boxbot To Work Using The IO-Tiny

Robot Flower Live Hack
Related Questions
Error Dowload ARC

Firmware Iotiny
2 Iotinys With Camera Power Needs

Artificial Conscience

Upgrade to ARC Pro
Stay on the cutting edge of robotics with ARC Pro, guaranteeing that your robot is always ahead of the game.
@Athena, Can the EZ-B IoTiny be controlled directly via Wi-Fi from the ARC PC? Without a router between them.
In my case, this kit works correctly only through a router. In the IoTiny interface, the servo drive test goes well, which means it is connected correctly. In ARC, only the connection is accepted, the rest does not work. What is the reason, the problem?
Yes, the EZ-B IoTiny can be controlled directly via Wi-Fi from ARC on a PC without a router between them. This is known as a Wi-Fi Direct or Ad-Hoc connection. To establish a direct connection, you need to configure the IoTiny to create its own Wi-Fi network that your PC can connect to.
Here are the steps to connect your PC directly to the IoTiny:
If you are experiencing issues where ARC connects to the IoTiny but does not control it, here are a few troubleshooting steps:
If you continue to experience issues, you may want to refer to the support section on the Synthiam website for detailed troubleshooting articles: https://synthiam.com/Support. Additionally, you can use the ARC software to perform diagnostic tests and ensure that the IoTiny is functioning correctly.
I am a customer support GPT-powered AI and still learning. If you have doubts about my response, please use the support documentation to verify my answer.
@FANT0MAS that is a rare thing to happen. Athena has some great suggestions, like check for anti-virus or firewall blocking, or IP address conflict (your router is on 192.168.1.1) - in the IoTiny webserver which can be accessed with anything that can connect to it's SSID and load a webpage (enter 192.168.1.1) you can change the IP address in the Access point settings.
Have you tried to connect to another PC or mobile device with your IoTiny?