


Other robots from Synthiam community

Steve's Captain Proton Startrekvoyager Tribute Robot.
I have always loved the StarTrekVoyager Holodeck episodes of Captain Proton. So Retro and Cool. Created a tribute...

Steve's Resistance Is Futile 7 Of 9 Borg From Star Trek, My...
Yes, it is another Star Trek character, and she thinks, she is "Irresistible". I started this project last...
Putt's Bigmack
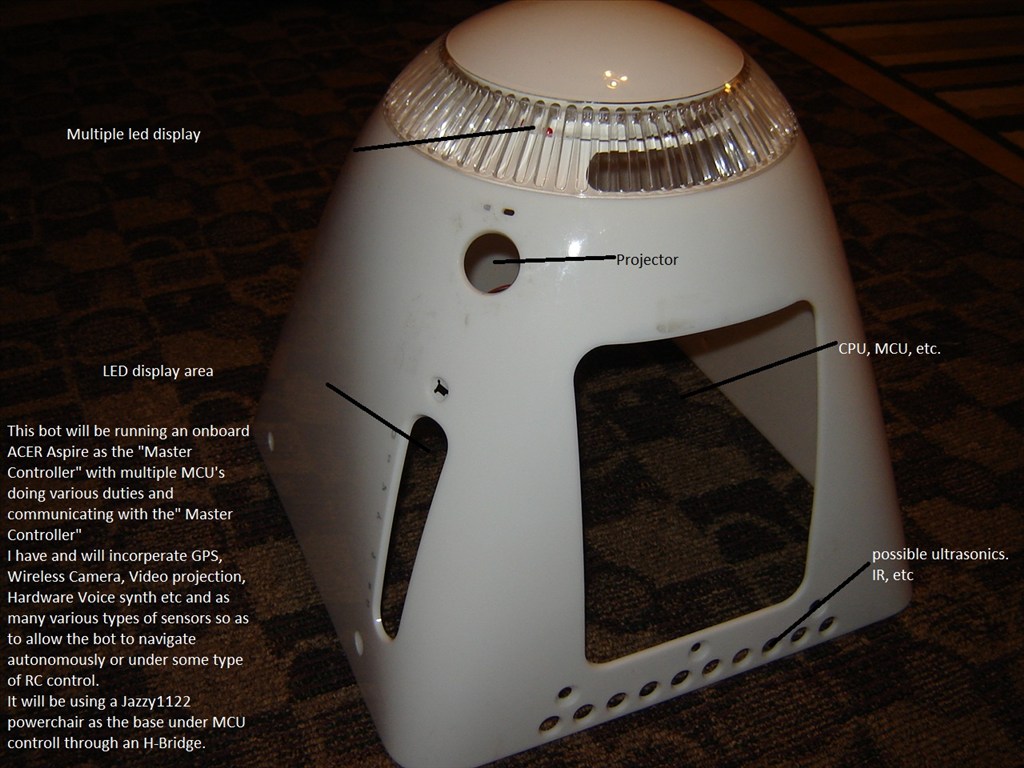
This is the start of my BIG project...the name BIGMACK was used because an E-MAC housing is used for the head , the name...

These are not all the sketches just bits a pieces. I have gone through 3 versions of the concept making it a little better, more practical and functional each time. Of course, anyone is welcome to weigh in with suggestions. The general idea with this concept is to have accessories that can be printed and attached , like for example a weed eating attachment and lawn mower. That is just an initial use , but I would like to come up with even more attachable accessories for this guy. Once I have several accessories available, I will also develop a similar but possibly smaller version dedicated to education. My idea is to put these up for sale and for every full sized kit, giving a special educational package to a local school.
Ideas for play and educational attachments are welcome.
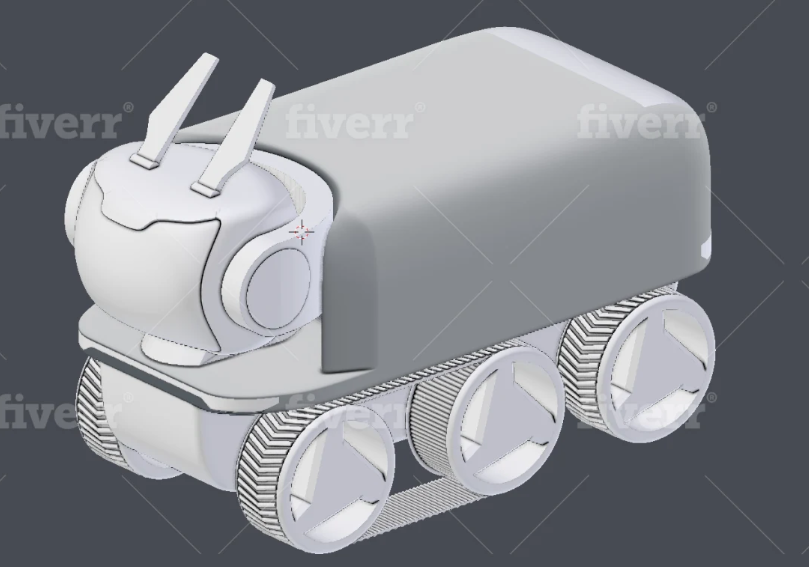
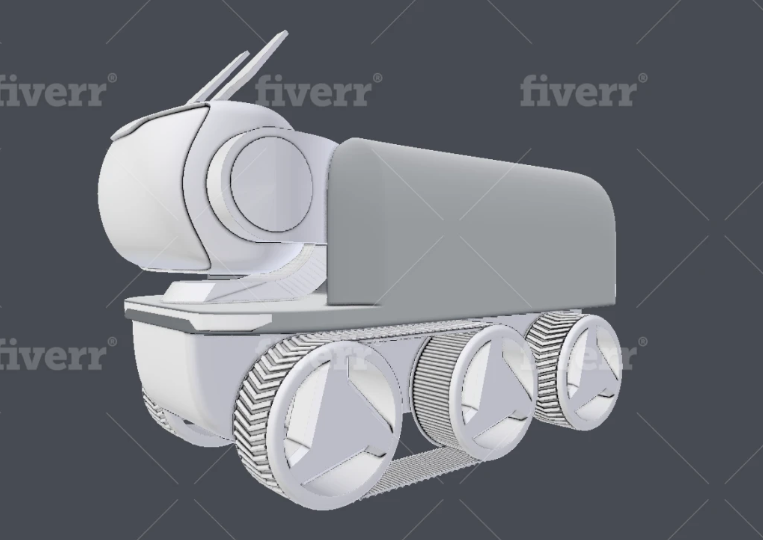
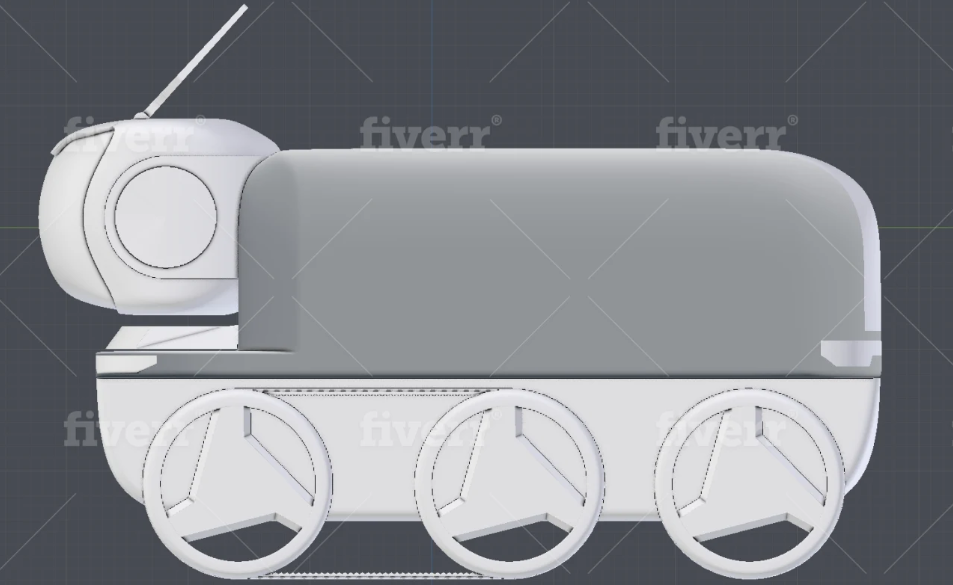
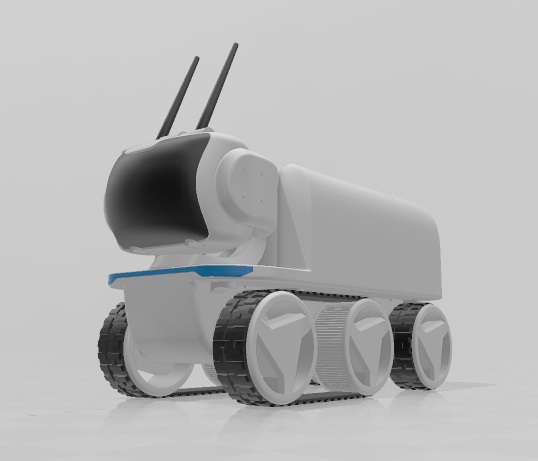
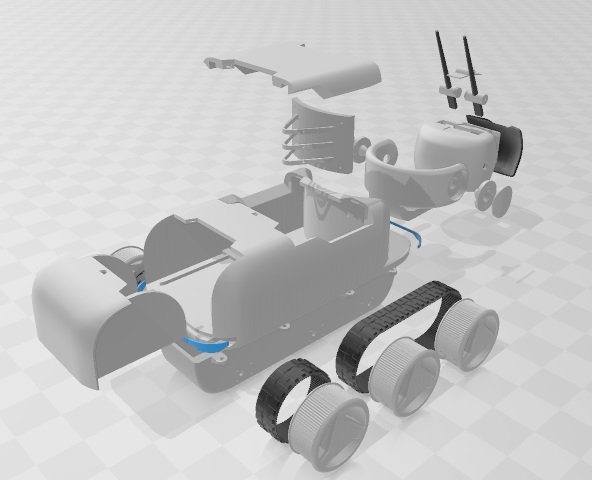
Original POST: Here are some updated renders, I have a talented 3D artist working on options for single piece tracks and tires at this time. I don't like this version of the tracks and tire because it is so thin. I feel it needs to be at least twice as thick so we are back to the drawing board on those. , but I was able to get some different views of the 3d model progress. :)


This is really sweet!! Cannot wait for further updates!!
Will that guy on Fiverr model you the real thing from your sketches? So you can print it and the servos will fit in? Amazing!!! :D
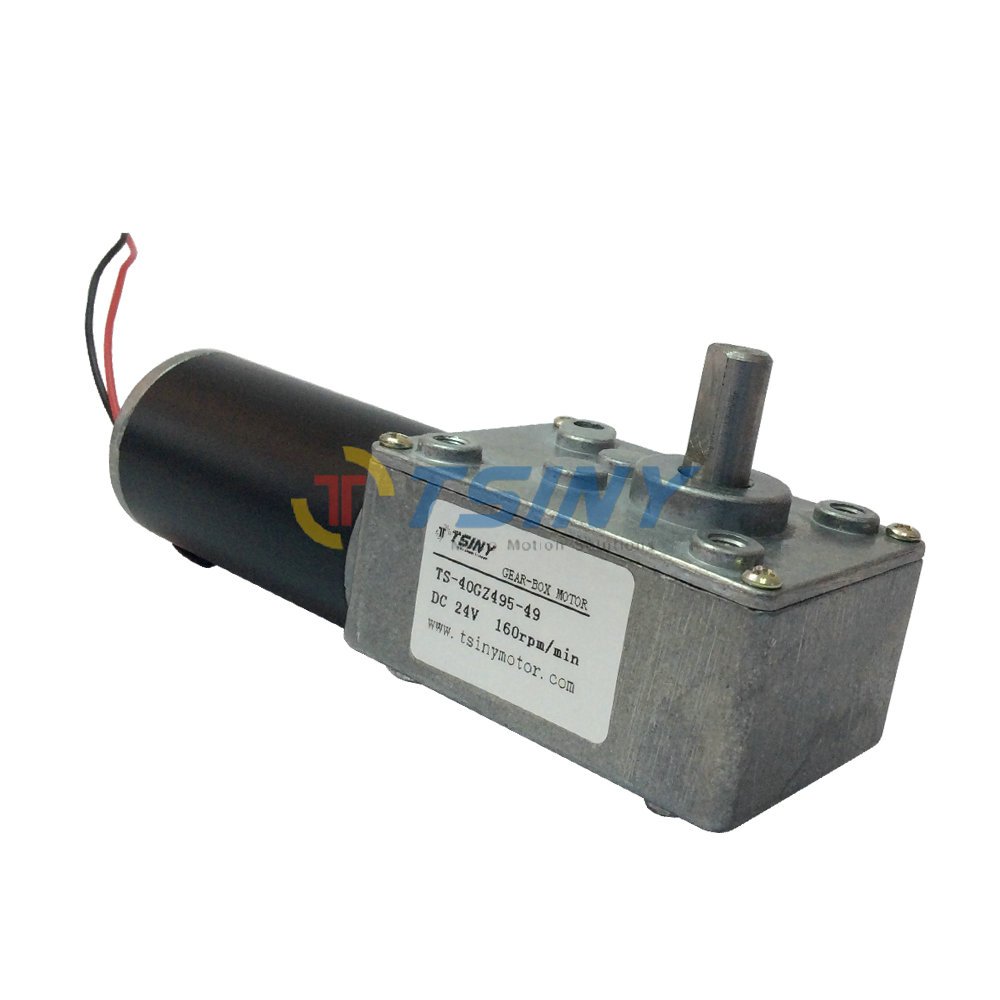
Hi Mickey666Maus, Thank you for your feedback! Yes the Idea is that there will be a "mini" model that uses Continuous RC servos. As it is being developed it is full sized with 6 worm gear drive 160 rpm motors attached to each wheel. The model is much too large to print in one go, so I am getting help from this modeler to break it into manageable pieces with tabs and key marks for alignment as well.
Once I have the three robots I am designing printed and working in the real world I plan to launch a campaign to raise money and build 100 of the models. For every fully built model give a development kit and robot to a local school. There are 79 schools in our county. Hamilton County, Chattanooga TN.
Cool project!! Keep us updated...this looks really awesome!! :D
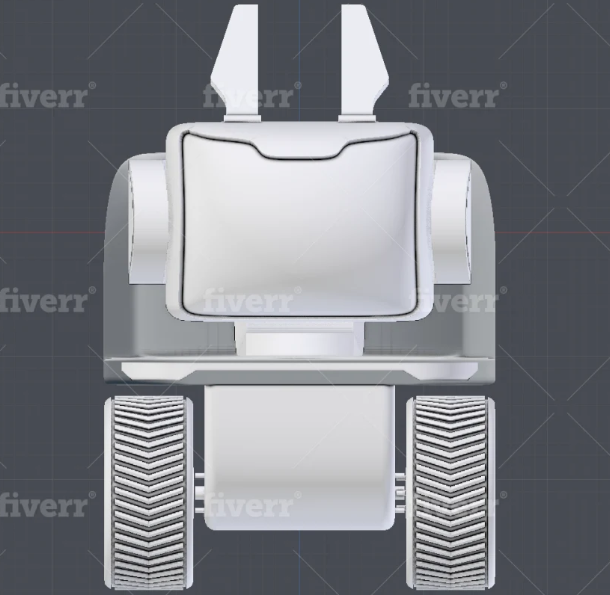
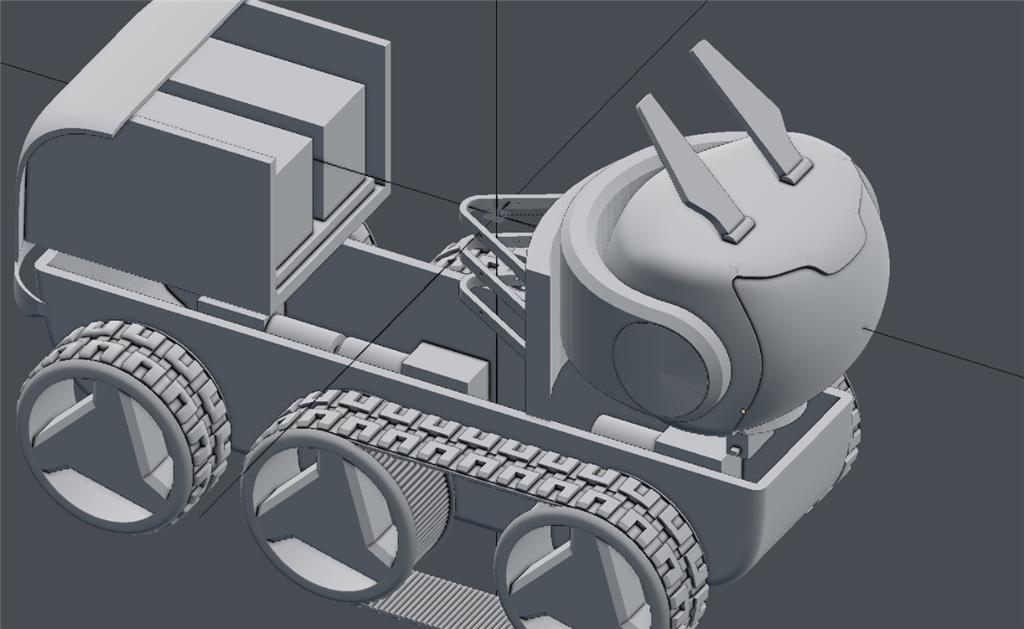
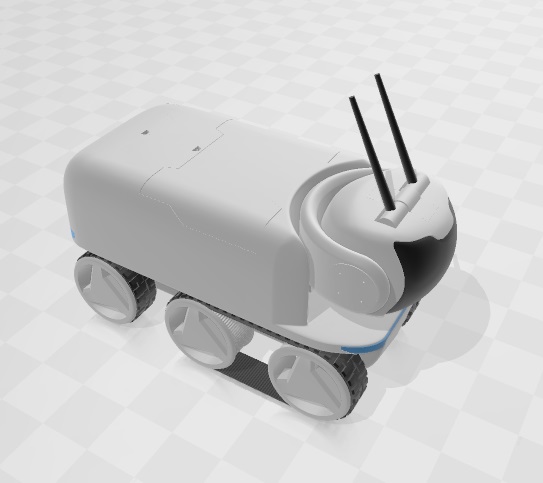
Hello all, this project has made some progress, I will share some images.
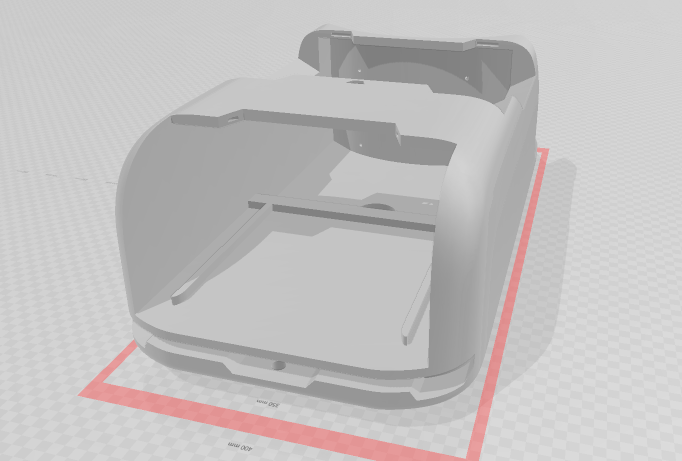
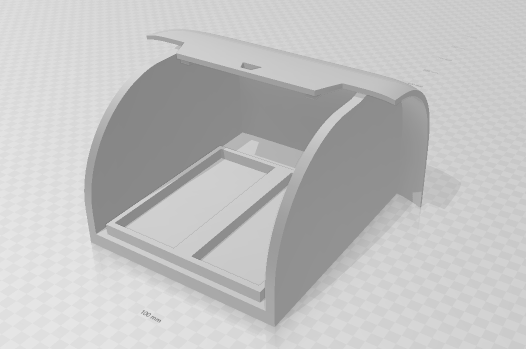
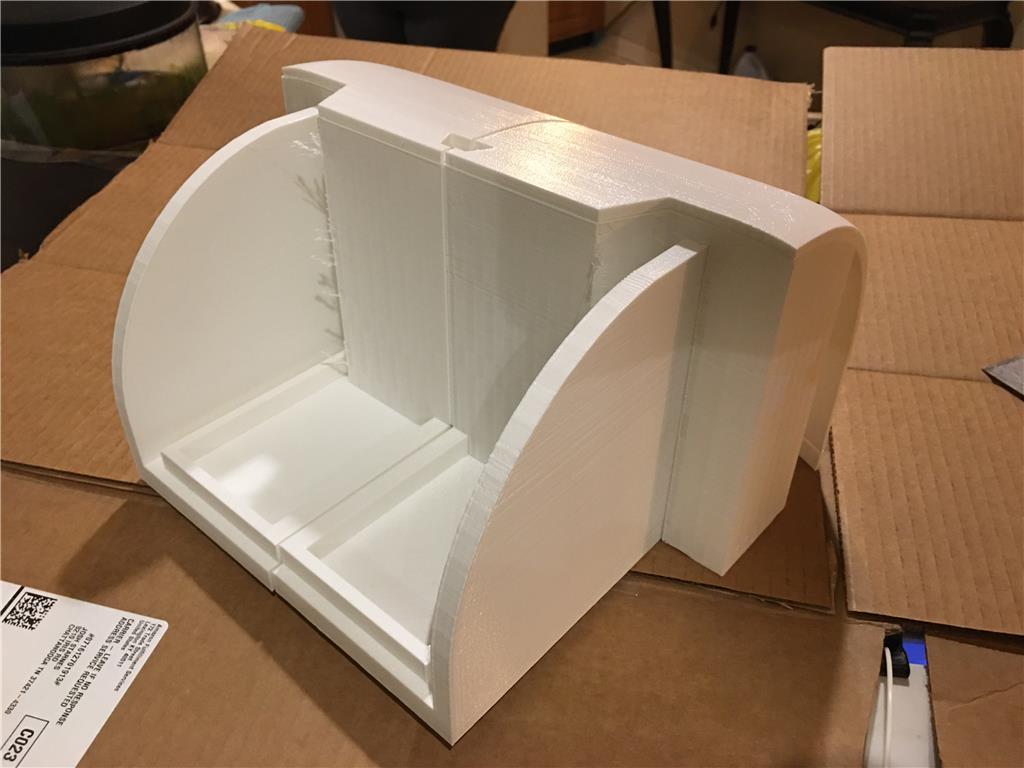
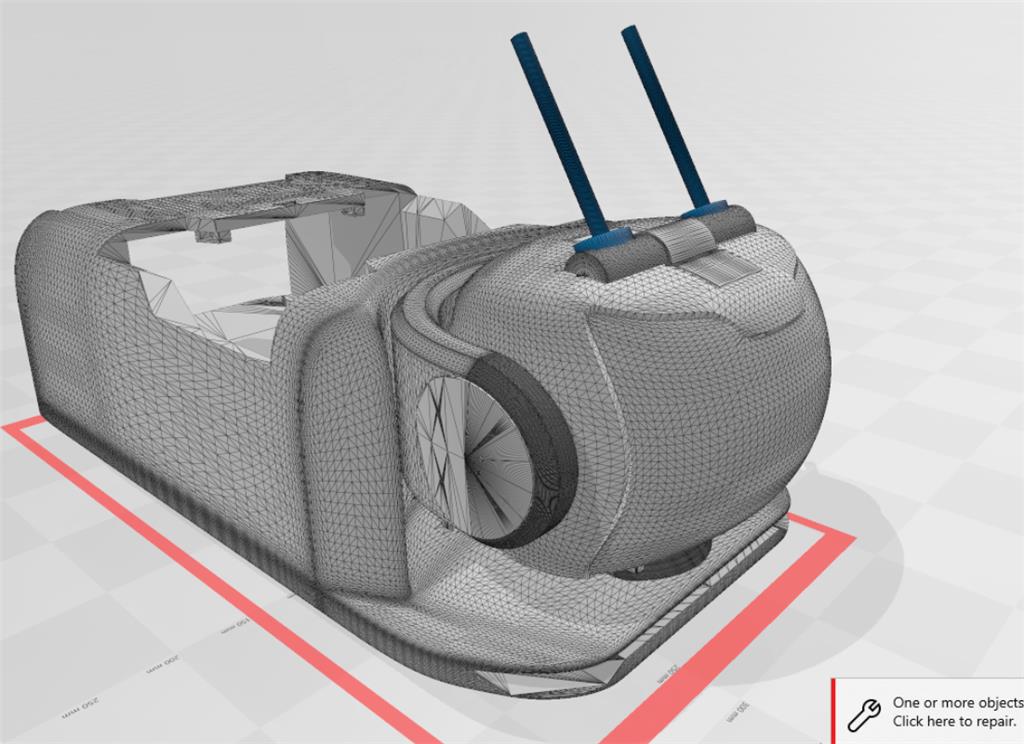
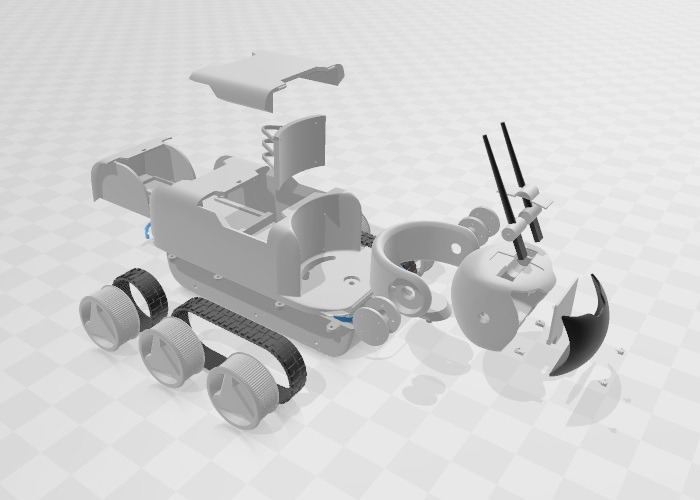
Here is a xray style view. There is a drawer for battery packs in the rear. Center mass is where two din rails are vertically mounted for all the electronics. You can see three of the 6 motors in this view.
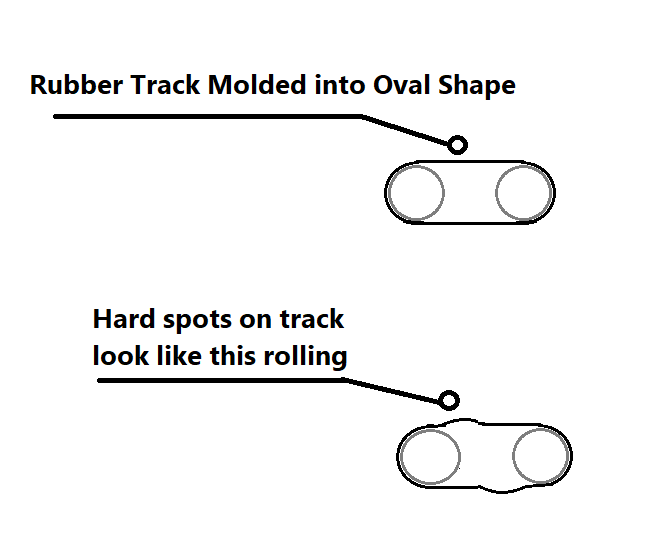
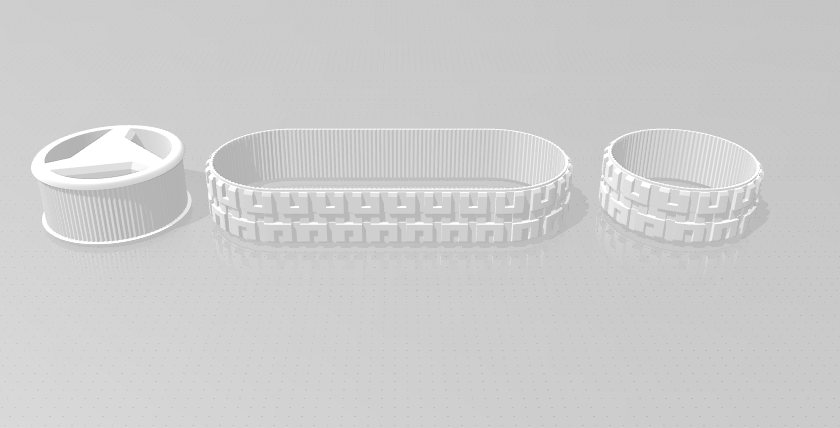
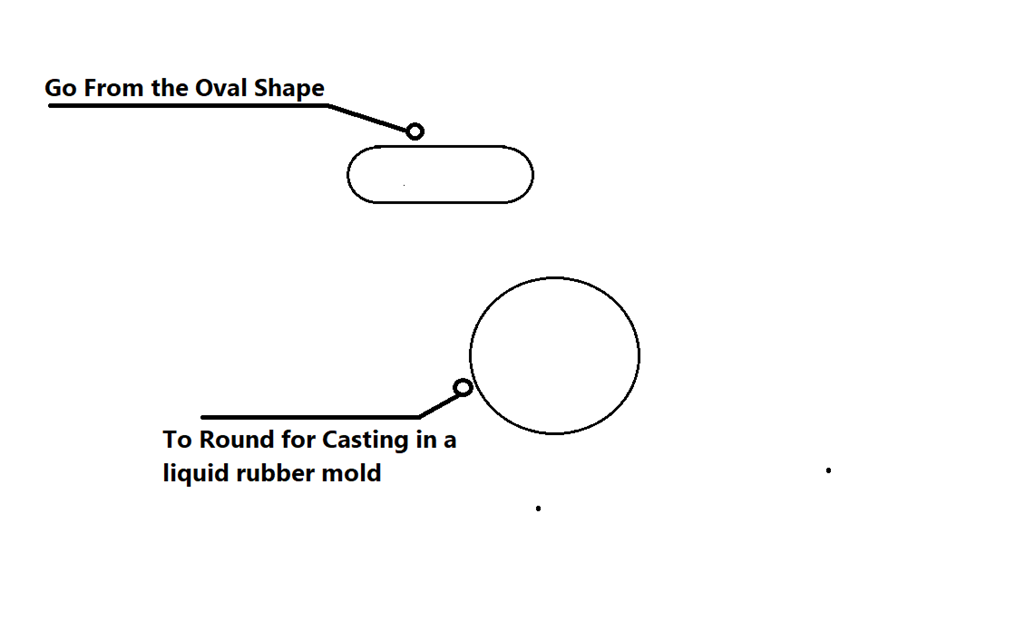
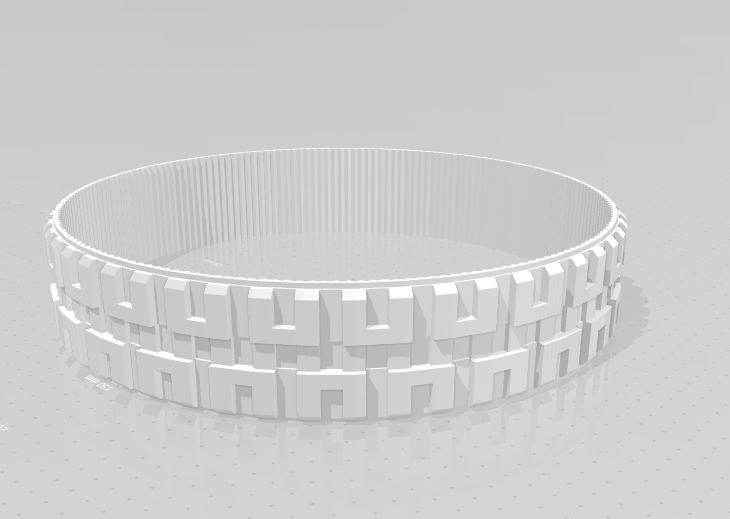
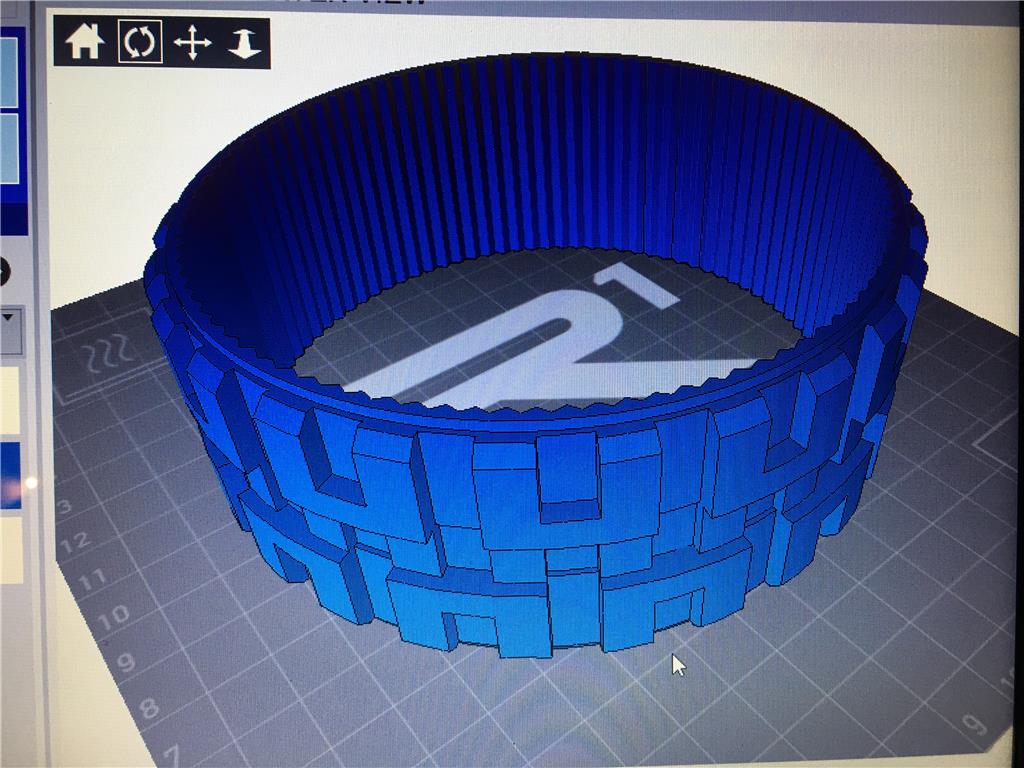
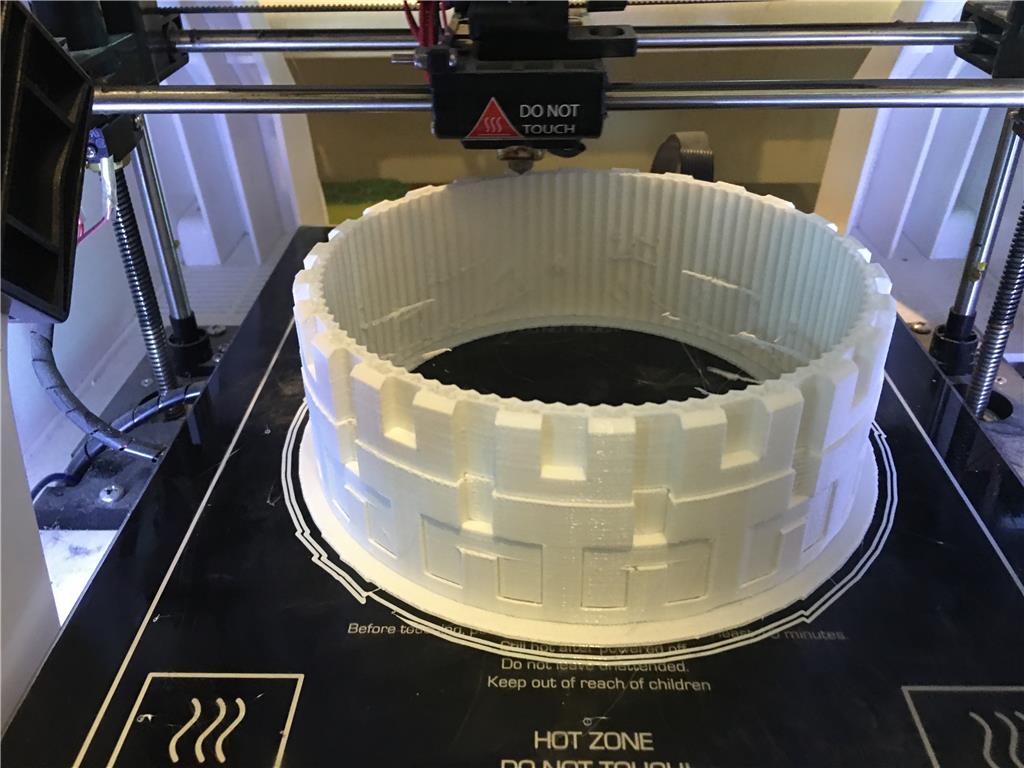
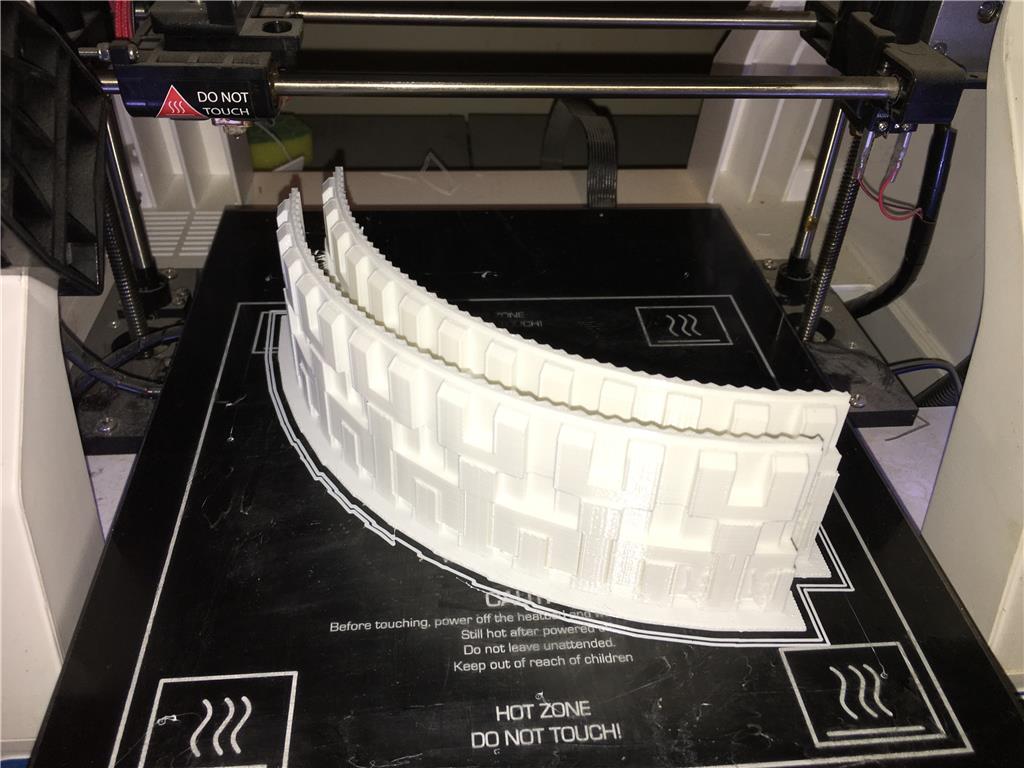
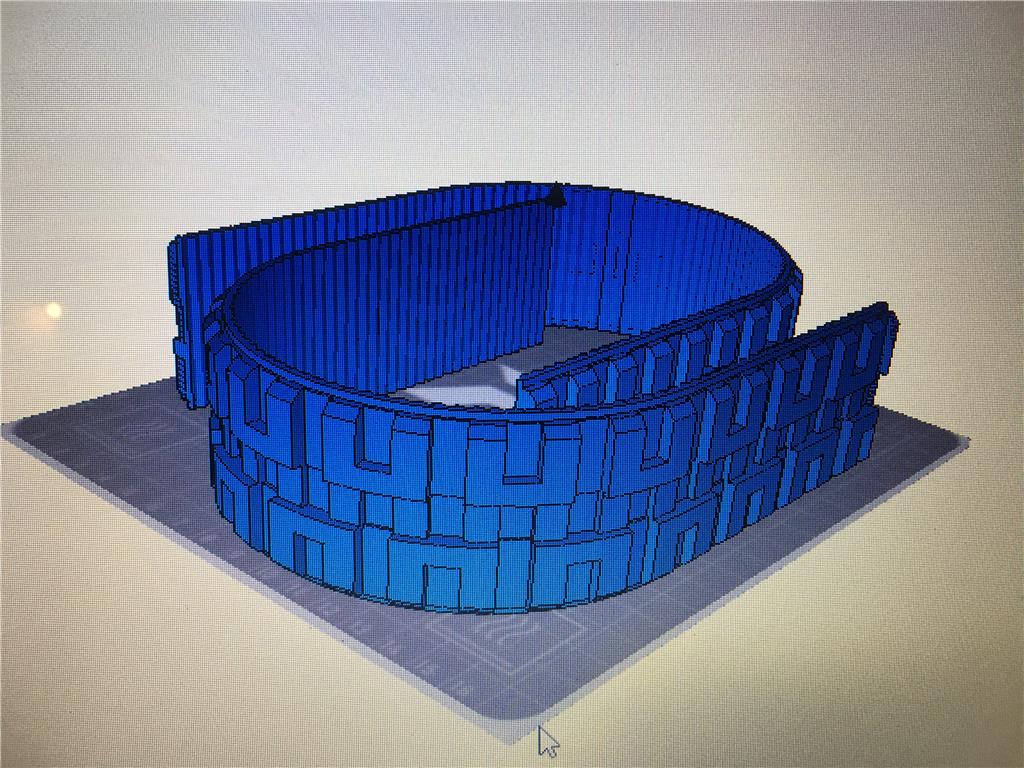
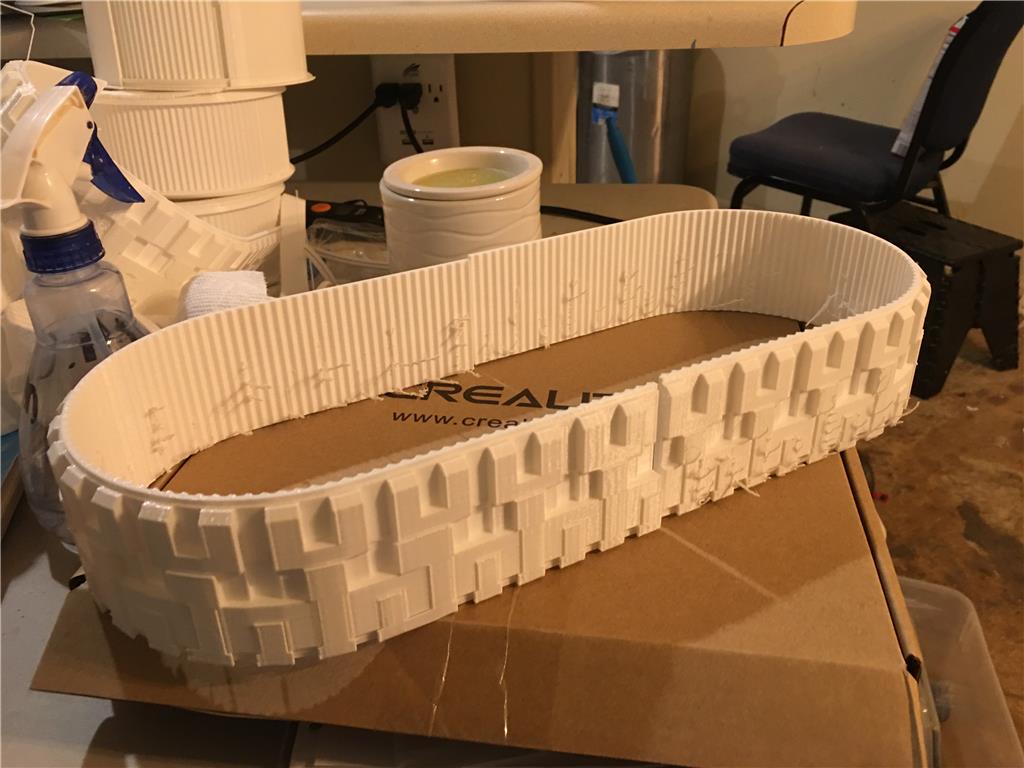
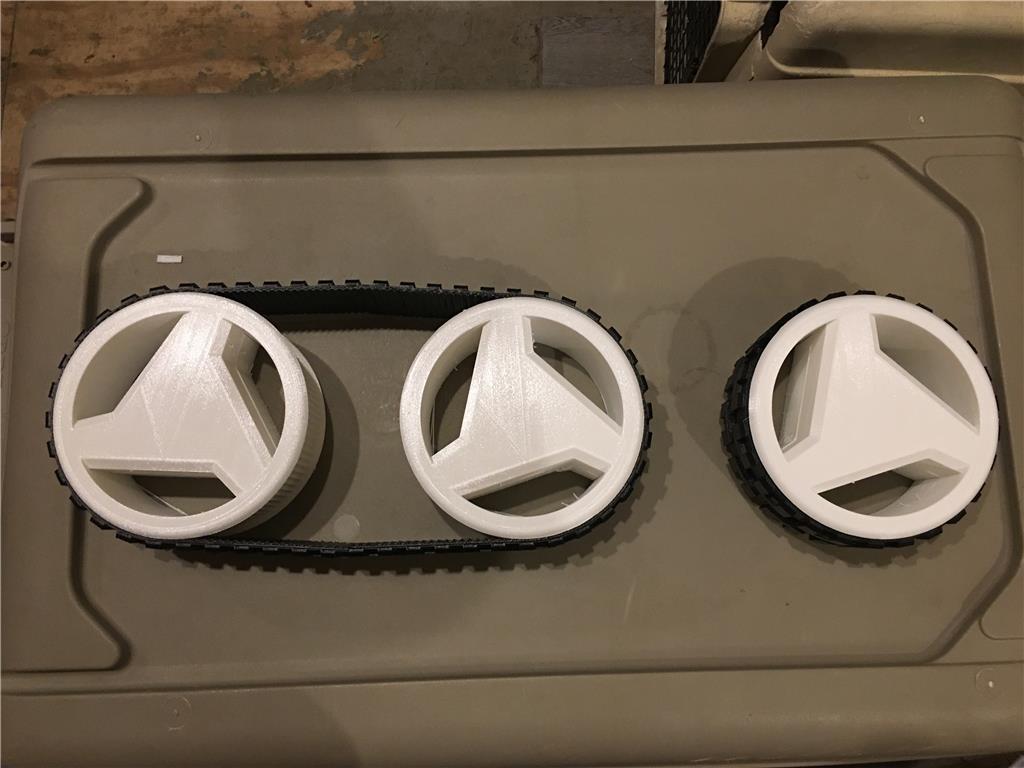
One of the things I am watching out for is hard spots in the track after they are molded into rubber. If they are molded in this shape then I will not have uniformity. So instead the 3d model has to be reoriented into a round shape but the same tread and grooves so that I can get that uniform shape. This is how the parts look off the robot , so lets change them into a mold-able shape.
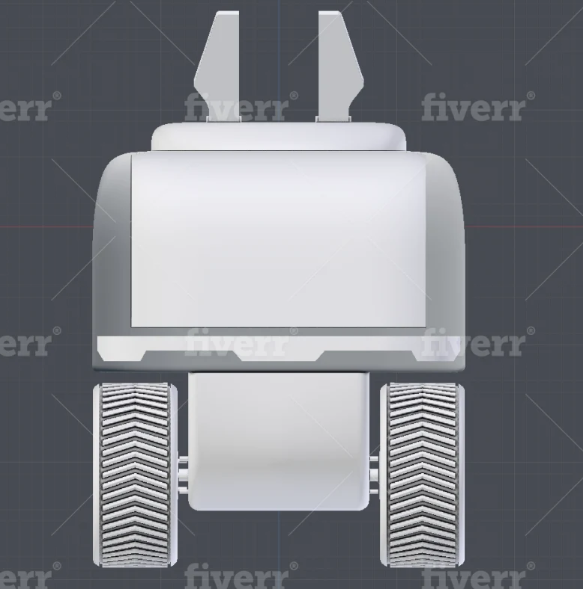
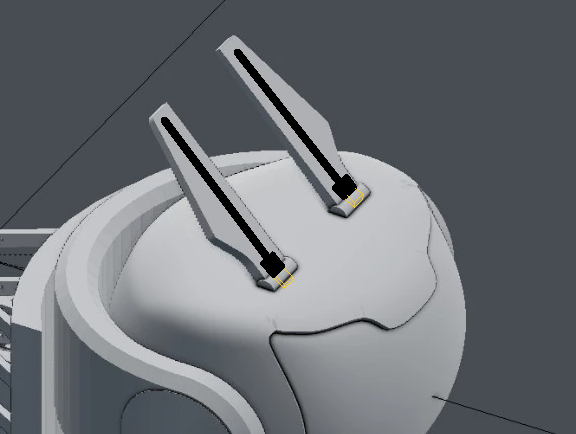
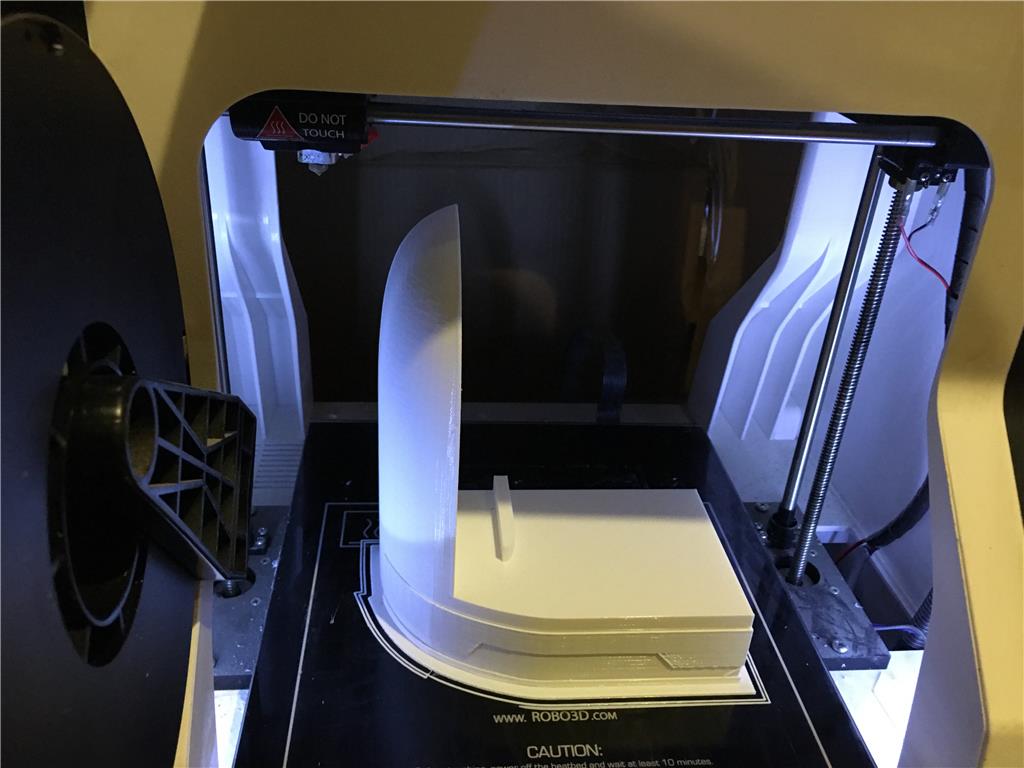
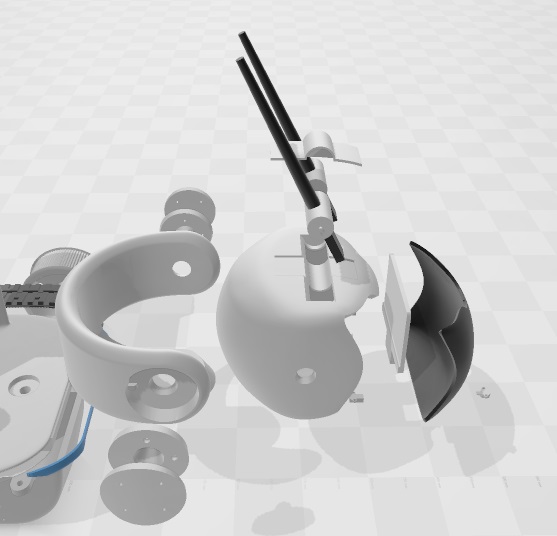
The "ears" on top of the head are antenna holders. They are meant to house two AC1200 MIMO usb3 wifi adapters with -5 db antenna. The antennas would be positioned like this. I do plan to pop off the antenna outer shell to reduce the thickness of the wifi antenna cover for slightly better reception.
Casting parts??? Level Up!!! Awesome!! :D
Yeah only the test models will be 3d printed. Once I have something I like I will cast a few duplicates to give to beta testers to play with. I think I will do 10 beta testers.
Thank You for the Level Up
I have been casting rubber for a while. It is the best way in my opinion to get copies of tires for old robots like the omnibot 2000 for example. :)
If you can spare the time...I guess a tutorial on how to do this would interest a lost of people, including myself!! :)
Yeah Sure, I will take bunches of pictures when I am making the wheels , tires and tracks for this first prototype and use those for a tutorial.
Just realized I hadn't commented on this project. I definitely want to follow it. This is going to be epic!
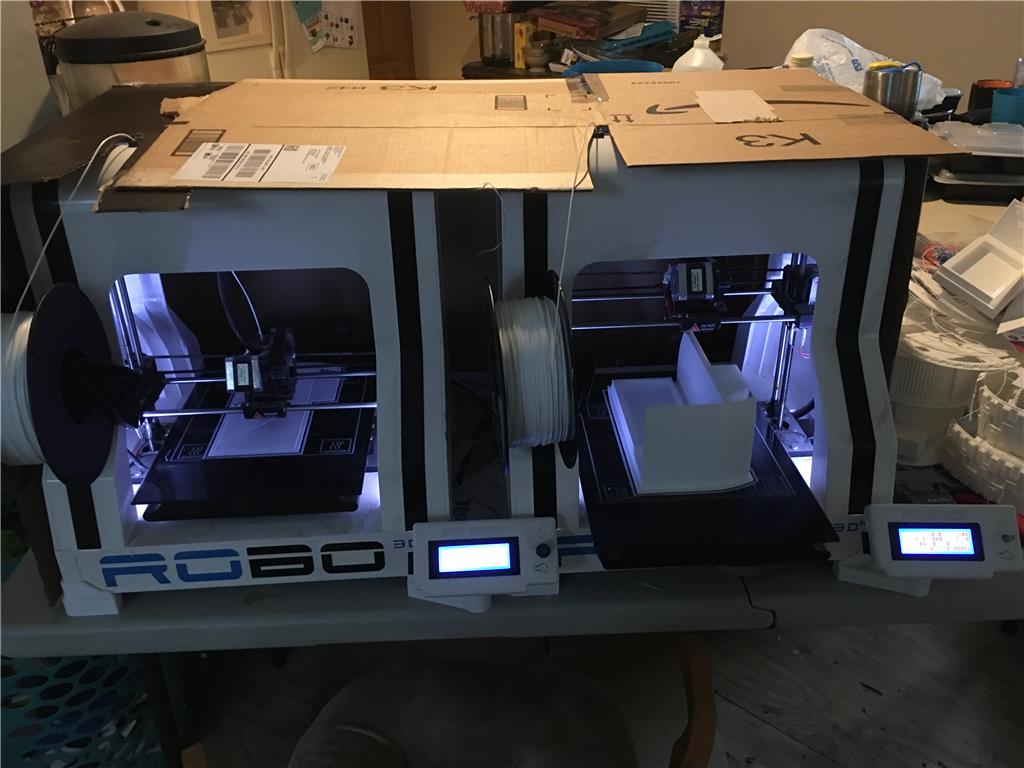
i have both the Robo 3D R1 plas dusted off for this.
i will pick back up soon on the FT6 for printing the larger body pieces as one.
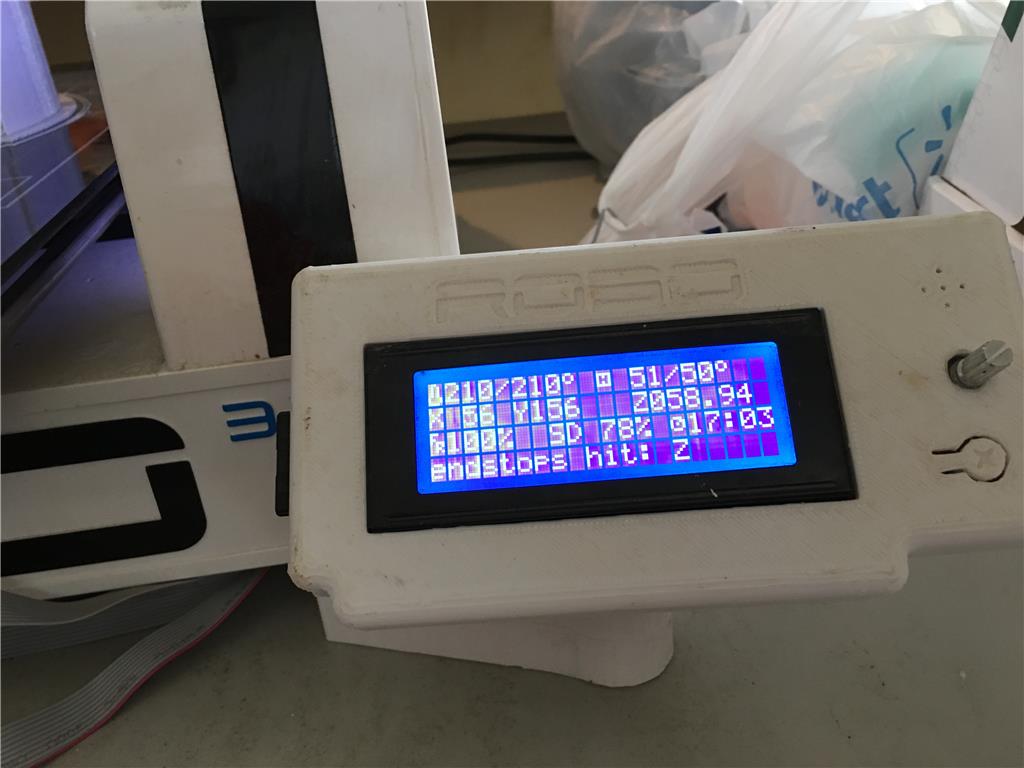
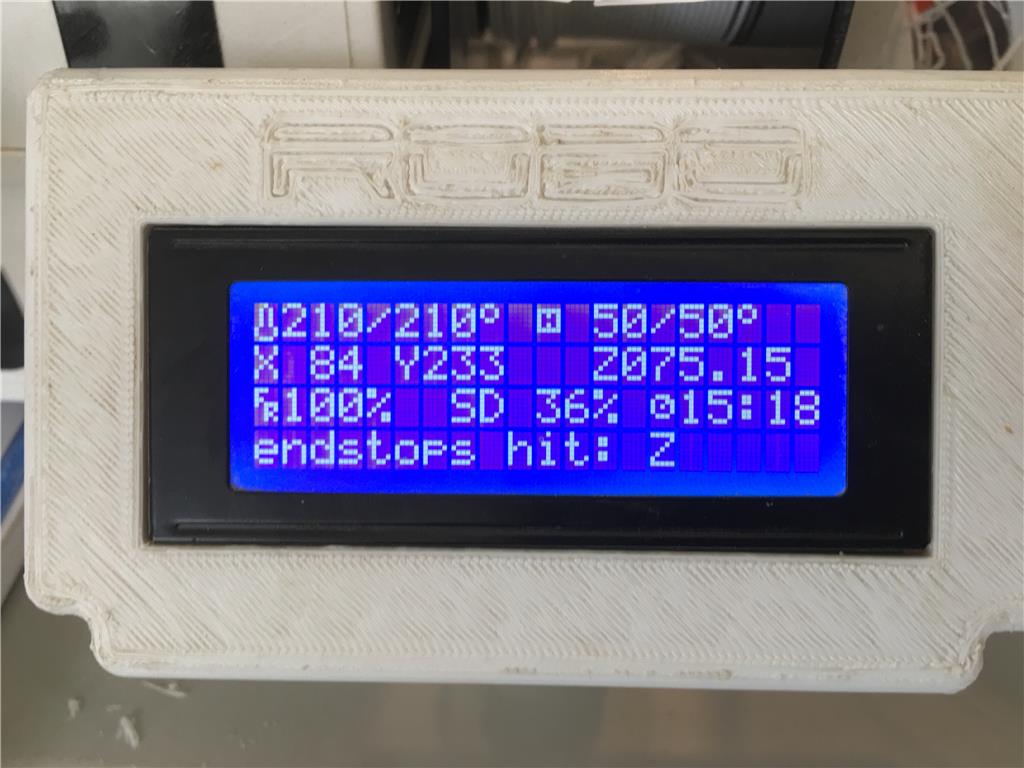
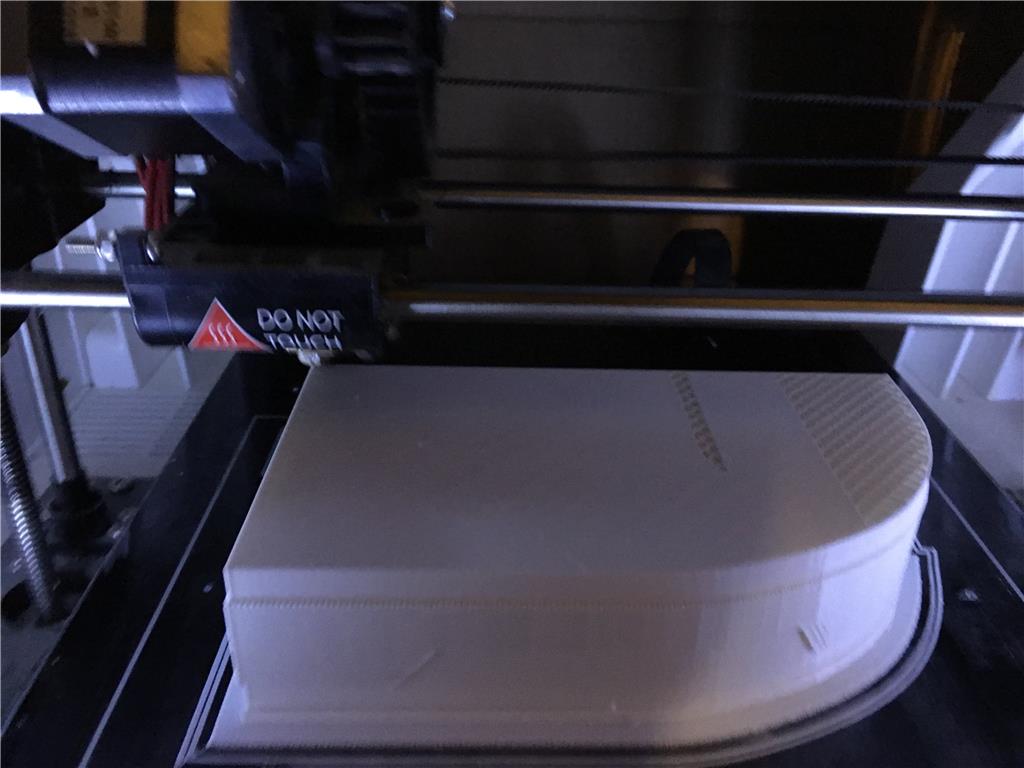
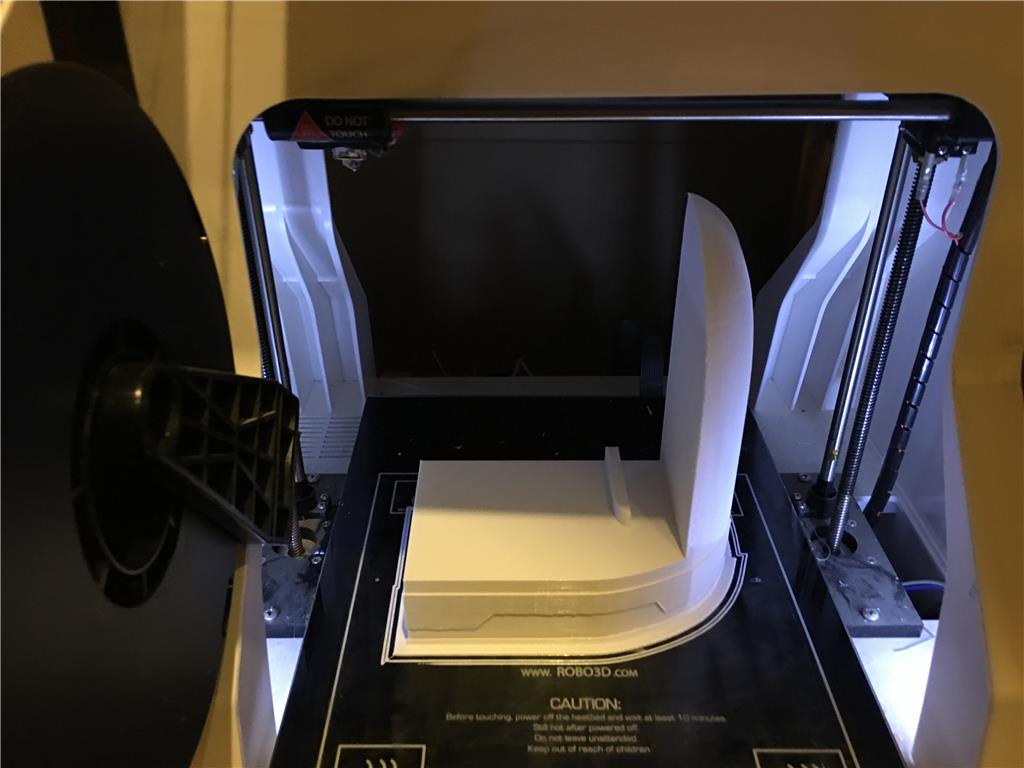
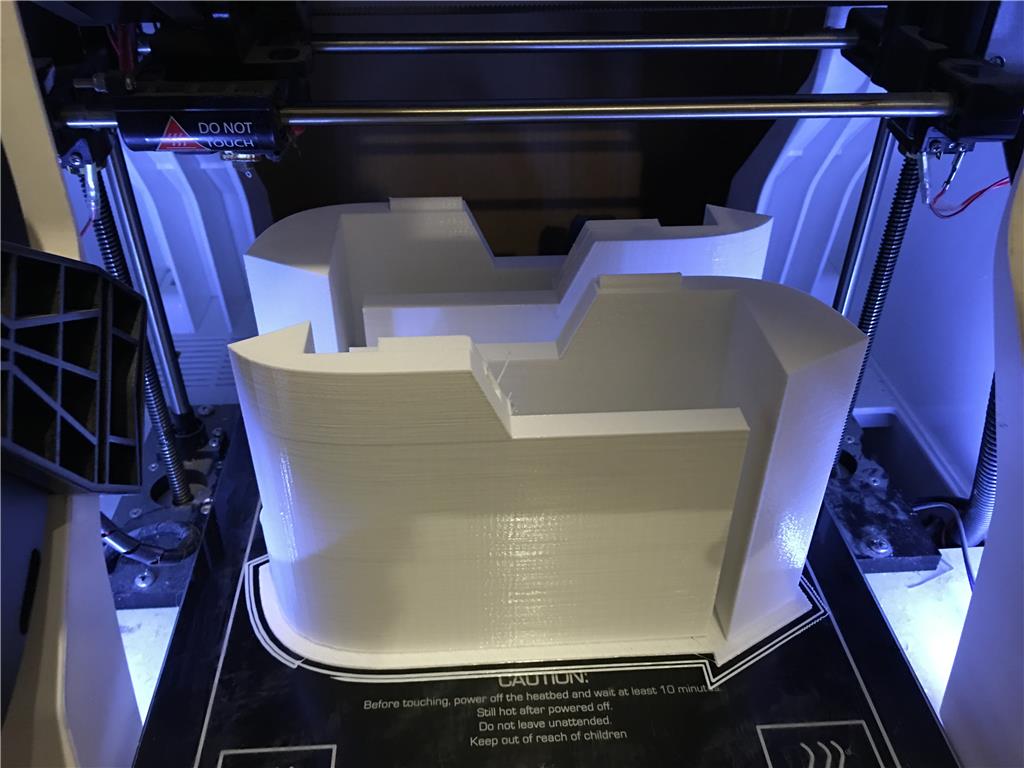
79% printed , it looks like this will be about a 24 hour print at .2mm
At this rate it is a months worth of printing. I think more printers will certainly speed up making these models for testing and such. Especially since I need to print a few for betas. I am thinking I am going to need some more printers of this size. Fortunately the Ender 3 printers start at 170 so maybe I can get some additional ones to make the print time a little more manageable.
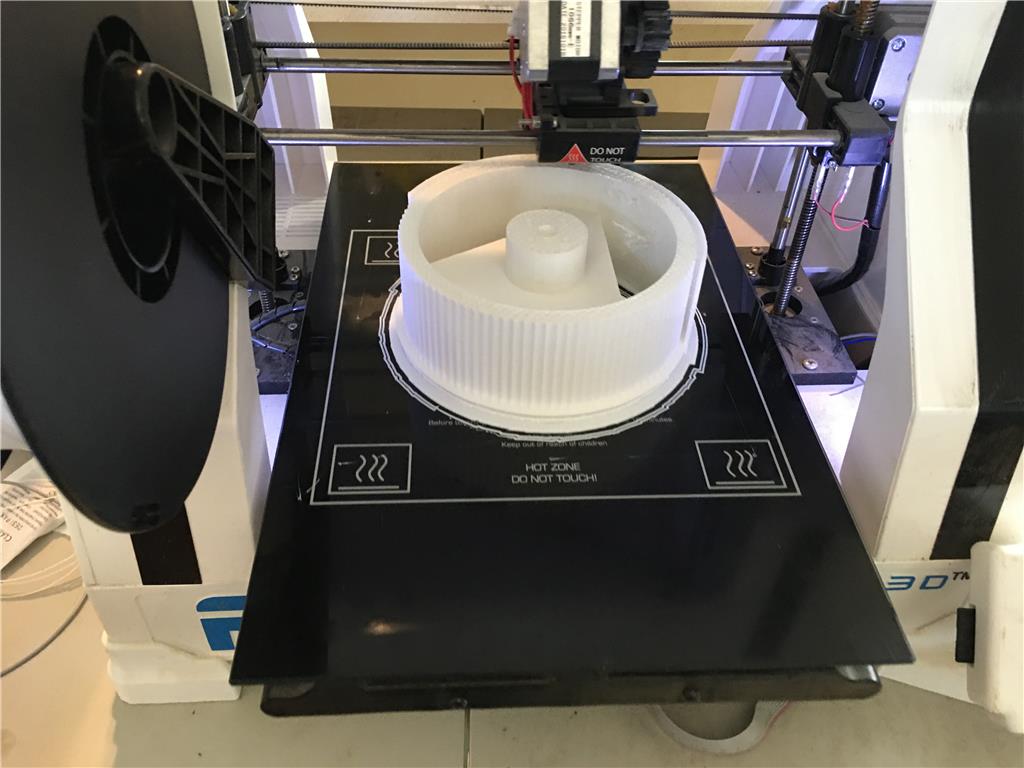
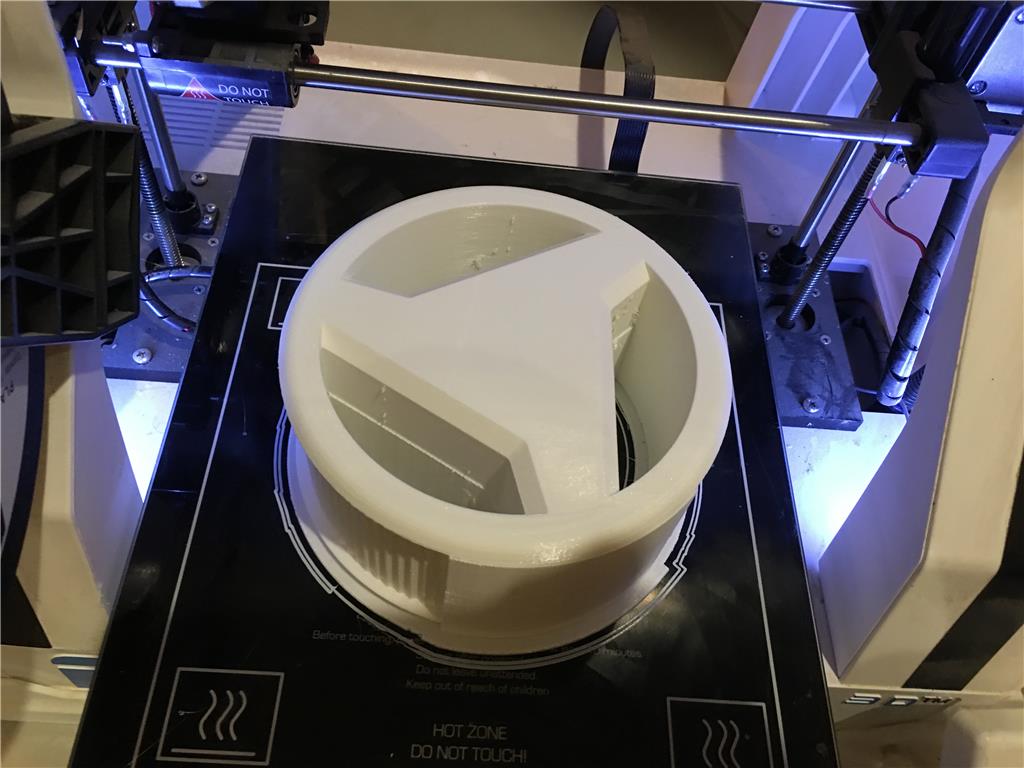
first wheels have finished at 20 hours. The face didn’t turn out as smooth so I flipped and re sliced the next two wheels so the face is cleaner. I will know if the printer is skipping steps if it occurs agian, but I think we are good at the moment.
Man I’m loving that it’s printing now! So looking forward to this build
This is looking cool! Hope you have your lawn rabbit running around soon! :)
I have been timing my prints, I am at work this turkey day, but based on the time the 3rd and 4th wheel should be done printing. Cross my fingers they are perfect and I can start the printers again for the 5th and 6th. I will update pictures either way.
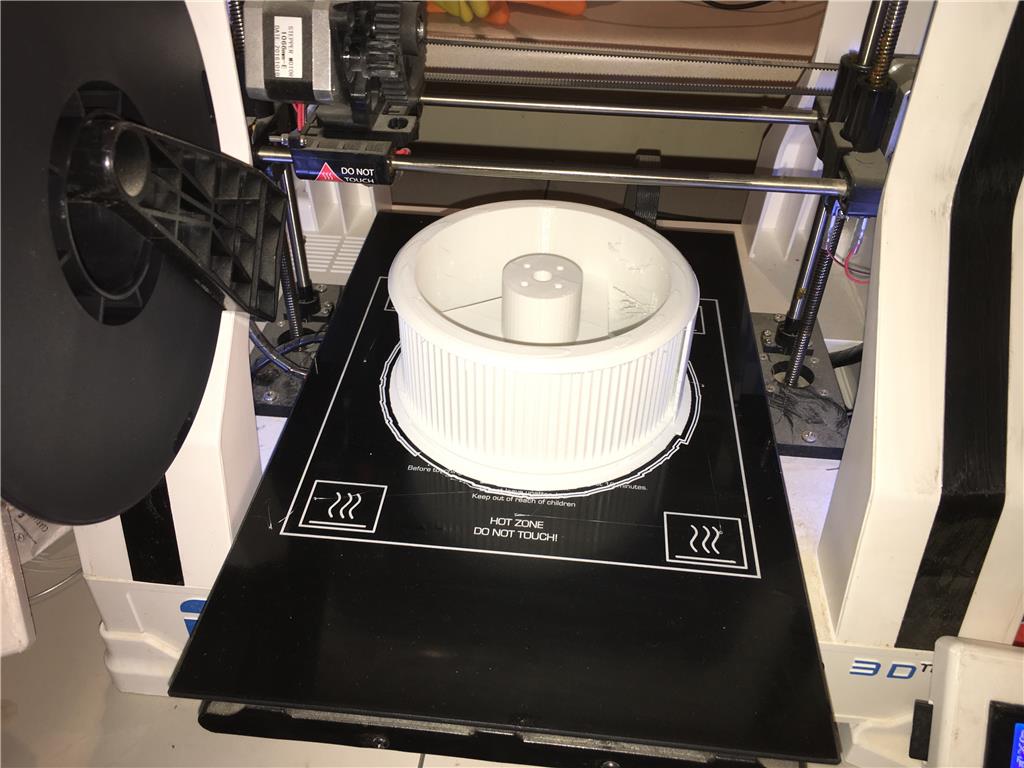
Two wheels right off the printer, they look good. The next set are printing.
Good news, I sold a couple things out of the closet and purchased a couple Ender 3 Pro printers that I get for christmas Yay I will update everyone on the last set of wheels today off the printer and switch to the treads and tracks.
now I just started the rear tread print, we will see if that comes out good or if some changes in orientation need to be done.
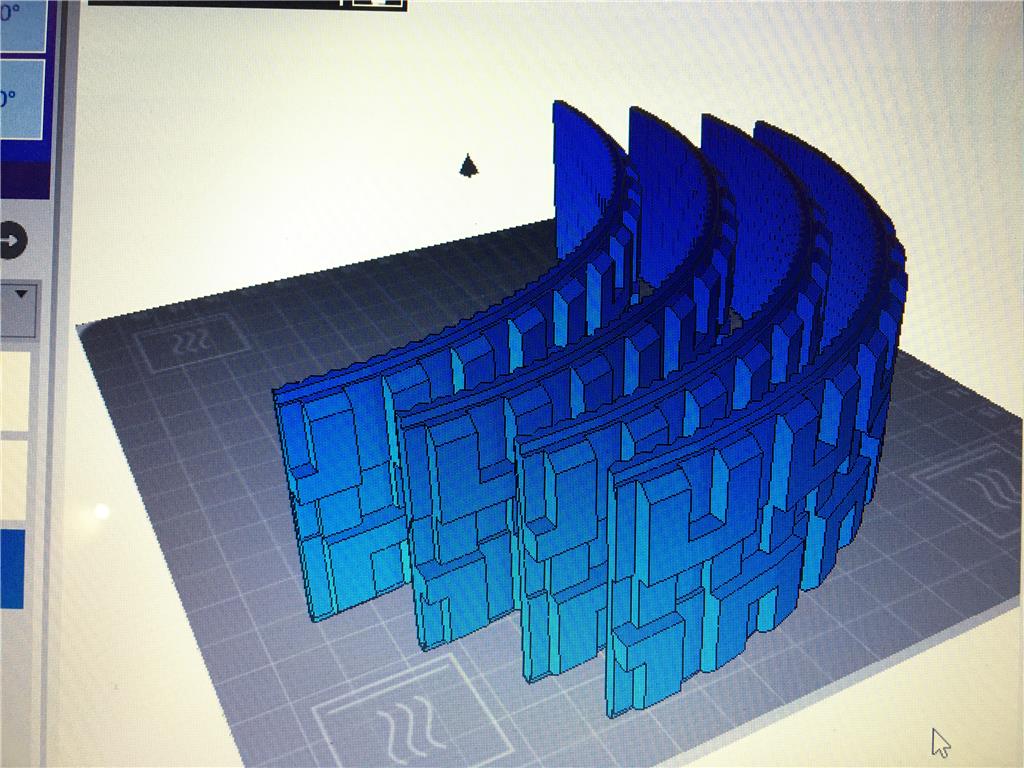
if this rear tread turns out well I will move on to the next prepped print, the large tracks. I sliced them into 4 sections to fit into the print bed.
Got to love the Robo...I've been printing for about two months straight and have 7 printers going. My 3 Robo's are non stop work horses while the creality printers always require tinkering to keep getting reliable...but I got the Crealty MAX for its big bed size.
Looking forward to your progress.
94 percent complete print, they are looking great other than some minor stringing. Next is the big track print.
I would love to buy more robos, but they are either second hand or a couple hundred dollars more than the original price. So I have been watching the creality ender 3 pro for a while until it has really good feedback and I am to the point I really need more printers to get my ideas into physical form in a reasonable time frame.
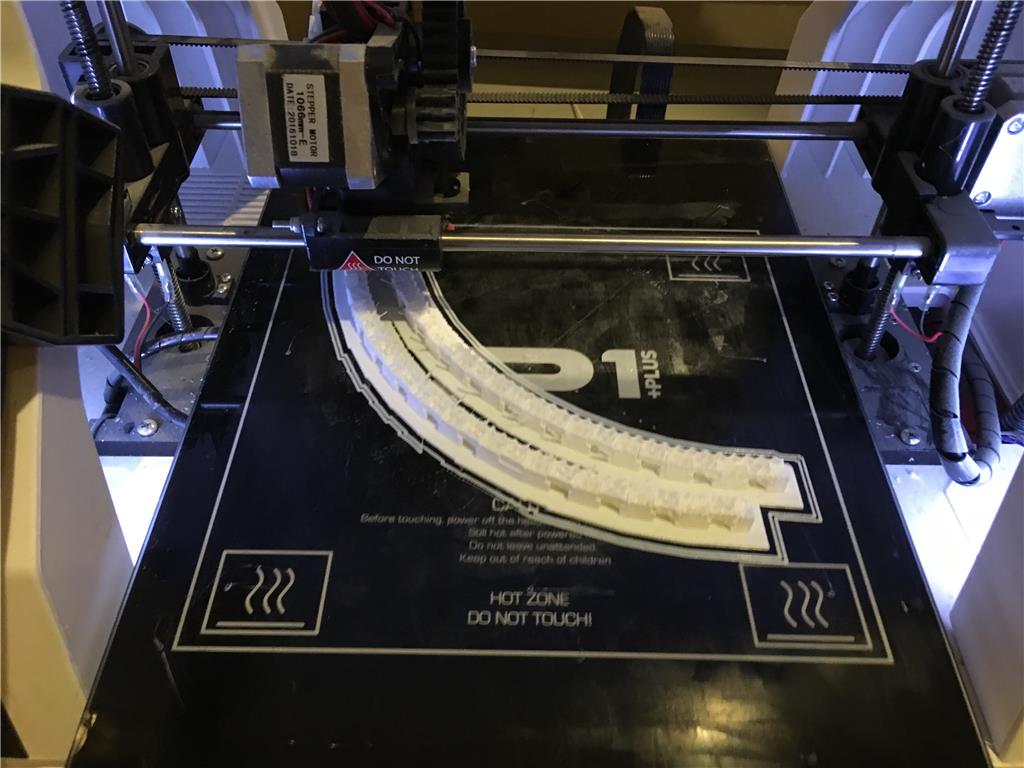
Alright , I moved on to printing the round main track STL into four sections. Two on one printer and two on the other. It should be done mid day tommorow. I did take advantage of a cyber Monday coupon and bought another Ender 3 Pro , so I have three of them on the way now! I’m pretty excited about that part, but one is a Christmas gift I gotta wrap up and stick under the tree for me to later unwrap. ;)
the large circle was broken into four pieces then I put two pieces on each printer so they would finish overnight and I can move on to another print after work today. :)
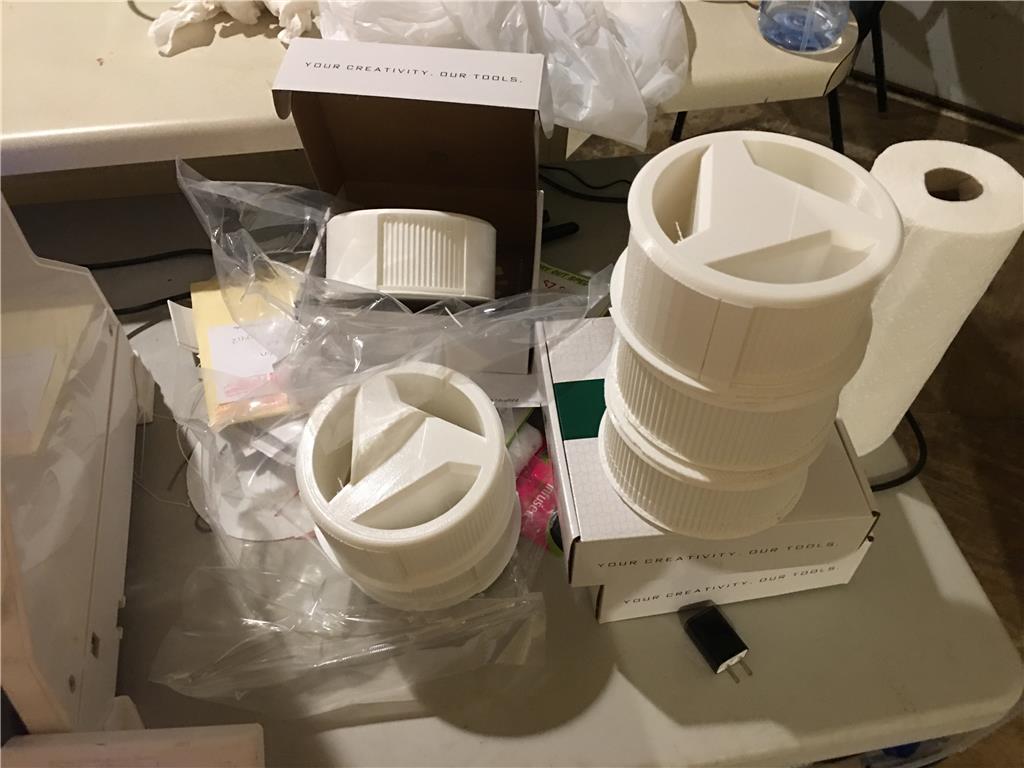
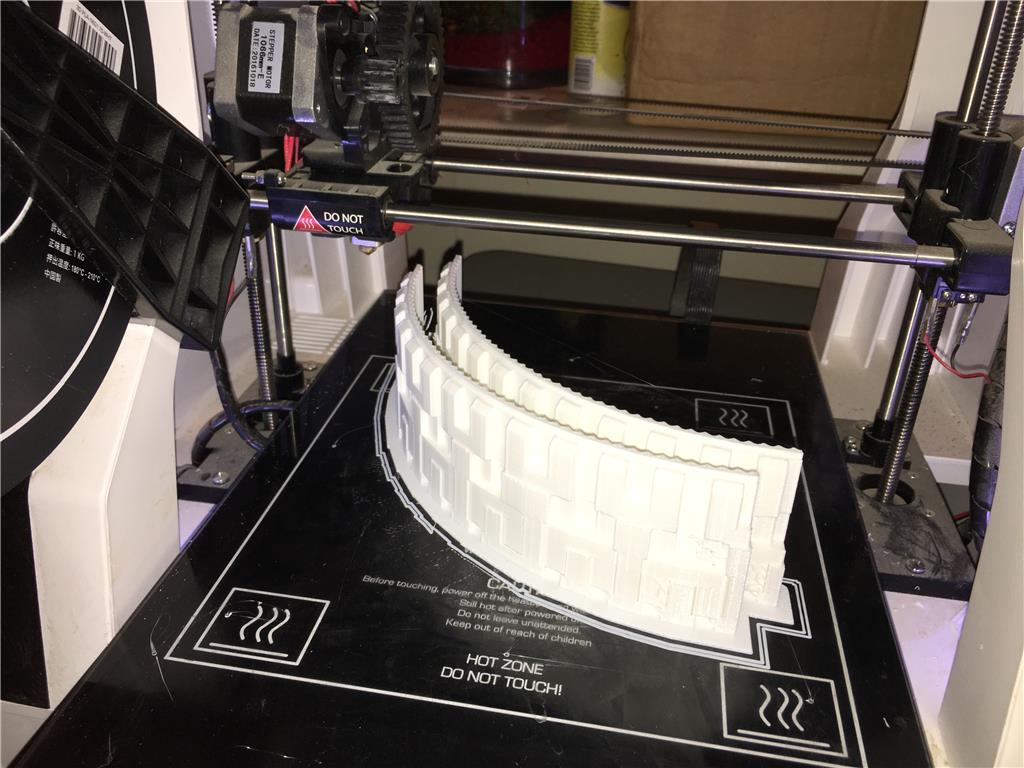
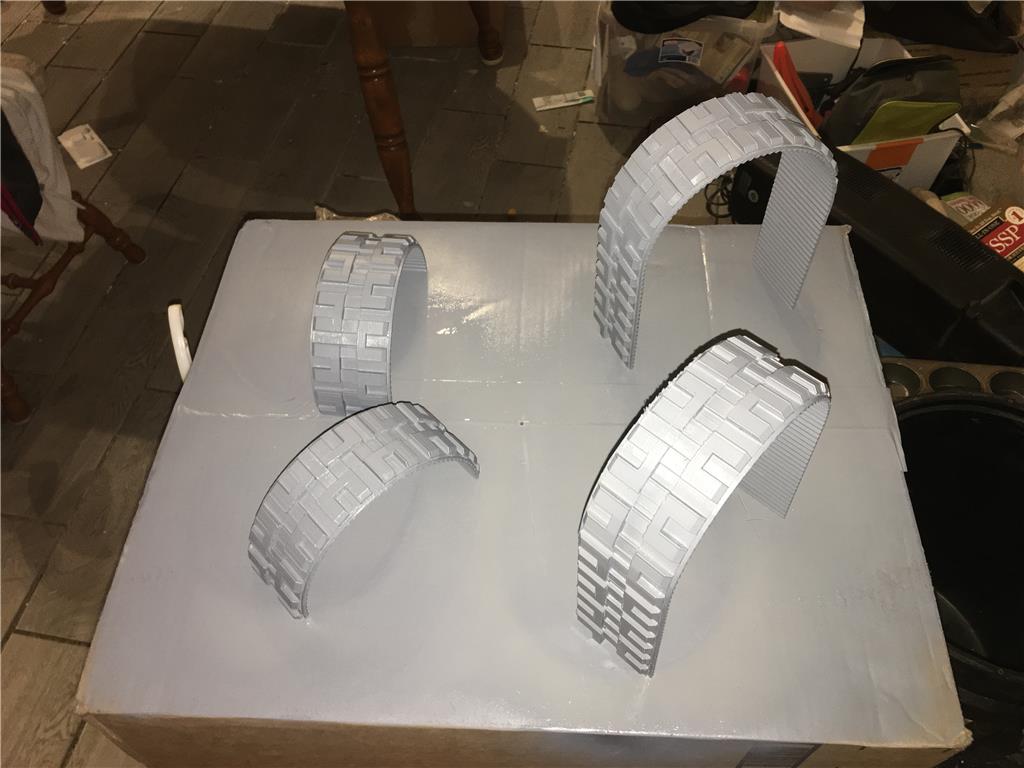
These two halves will be glued together, cleaned up and painted black with rubberized spray. Agian just for a mock-up to decide if I like the form and look.
Hey, I am not sure about shipping and taxes...but while the Anycubic and Crealitys Ender are a very good option, it is also always worth it to check out the new Prusa Mini! Excelent hardware, for affordable pricing!! I never had any issue with my MK2, still a big fan!! :)
I am really loving this design. I like that in the sketches you added arms, because a robot should be able to do things, not just wander around and see things.
One suggestion, even though it will break up the clean lines, is that you add some female EZ-BIT slots around the edges and maybe a couple on top so that it can be expanded easily (or some other kind of standardized mount points - doesn't have to be EZ-Bit).
Alan
Thank you for the comments Alan. I do plan on having accessories that can be mounting by drilling holes through the body. I think I will make some kind of template for each accessory that can be printed and used as a install guide for each add on.
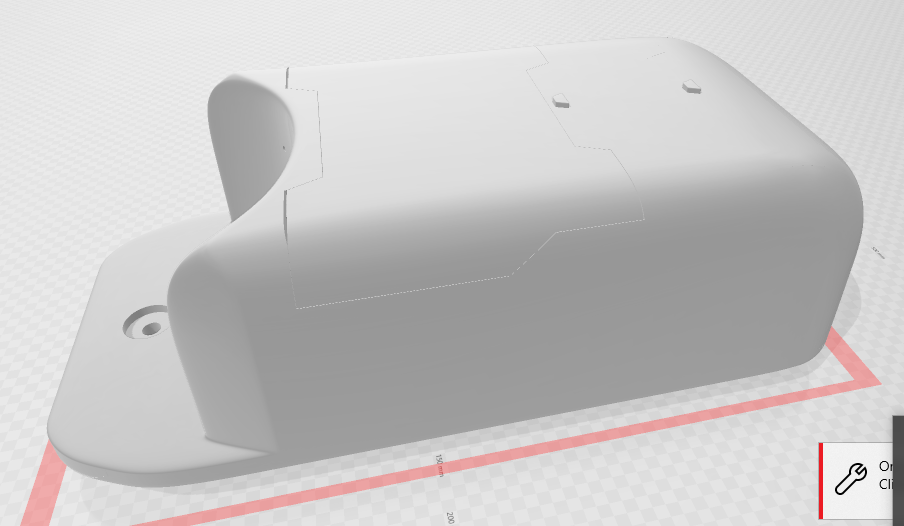
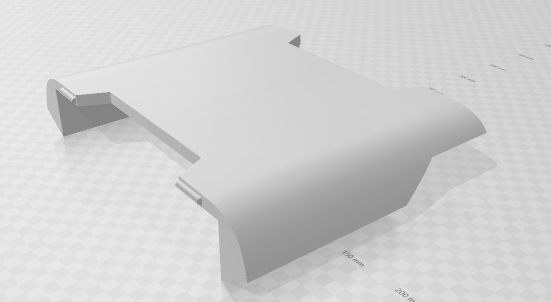
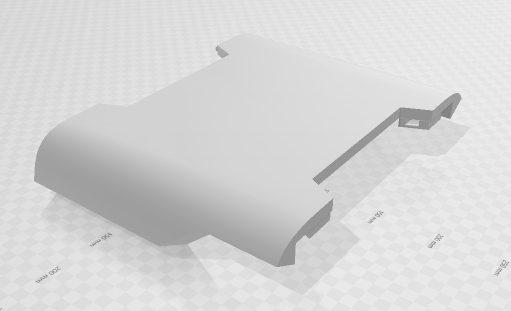
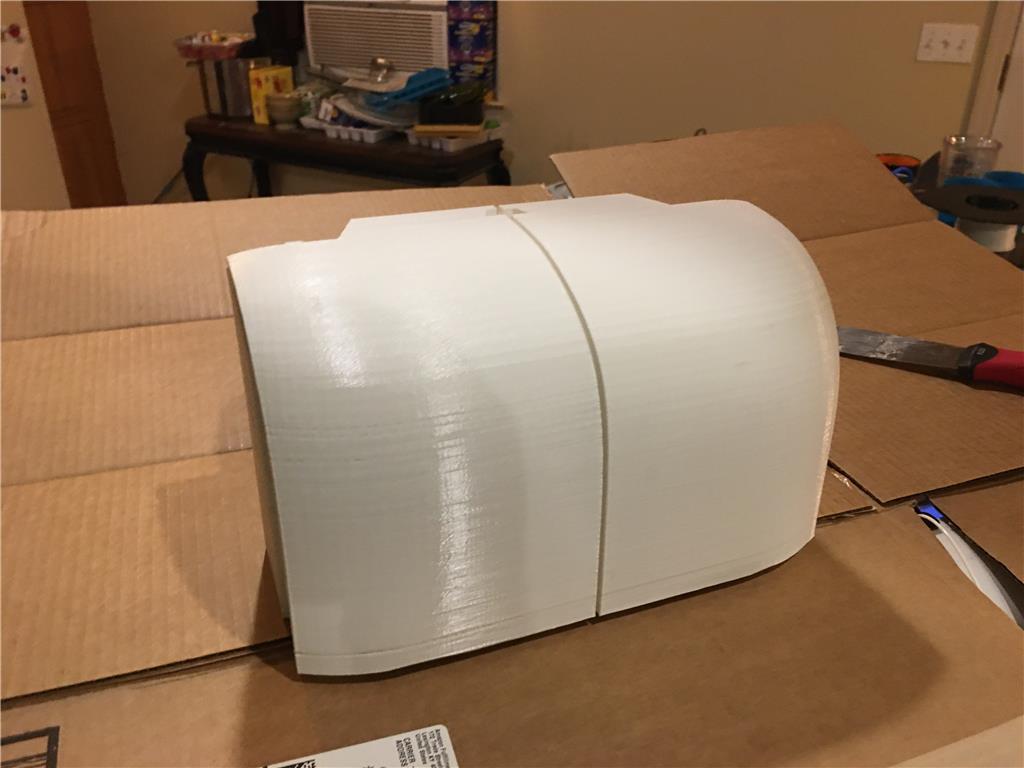
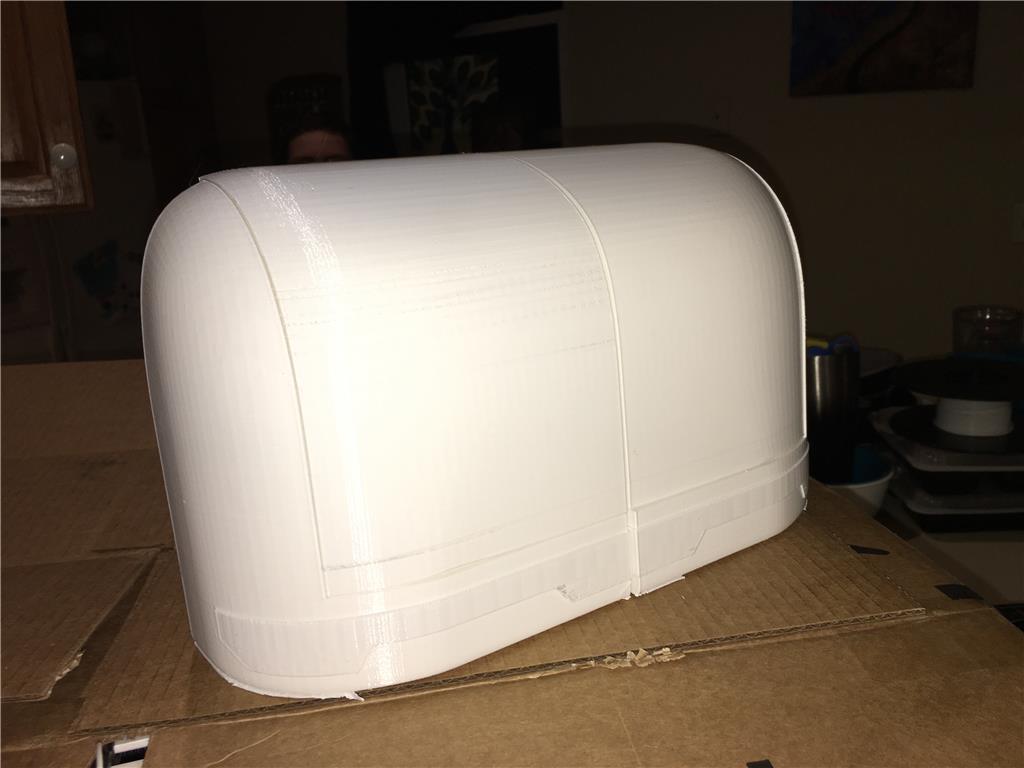
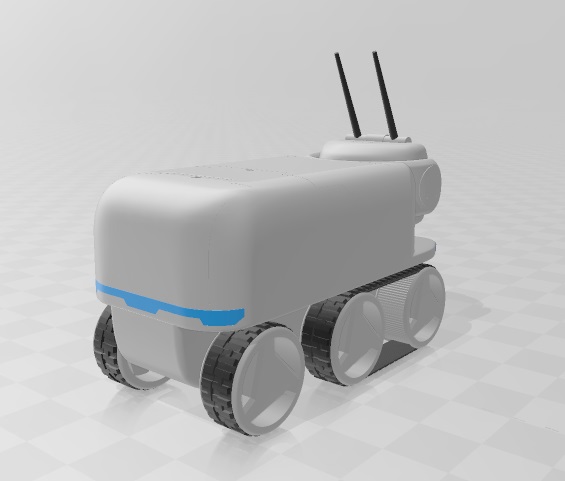
Full body, smoothed edges, doors and drawers in place and buttons for releasing the top door and battery drawer.
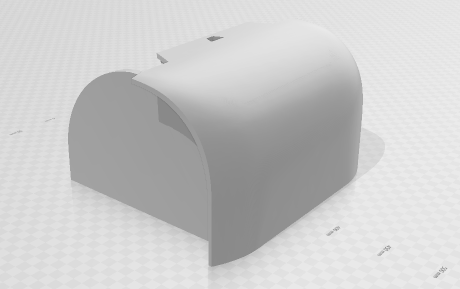
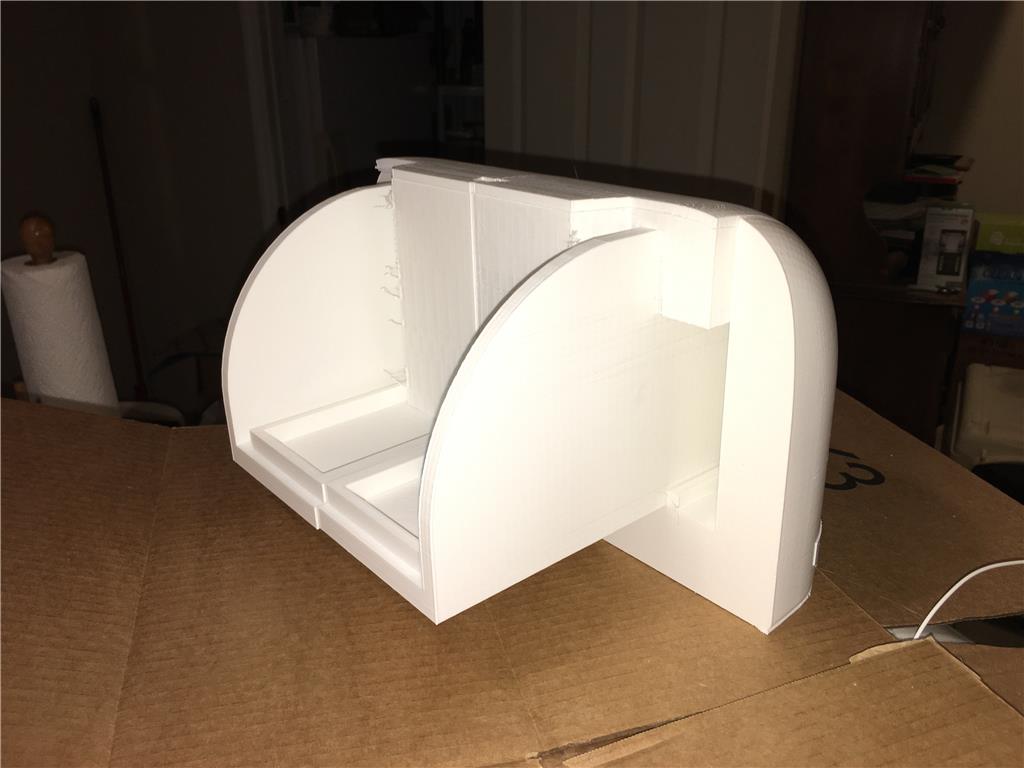
Full Body frame with drawer and top hatch removed, no batteries or electronics rack here.
Top Door to the Body
Rear drawer and battery holder
Din mount for electronics, each board or motor driver will have its own blade mount for the DIN 3d printed.
Cool. You could meet the EZ-Bit need by having a template for the EZ-Bit mounting plate
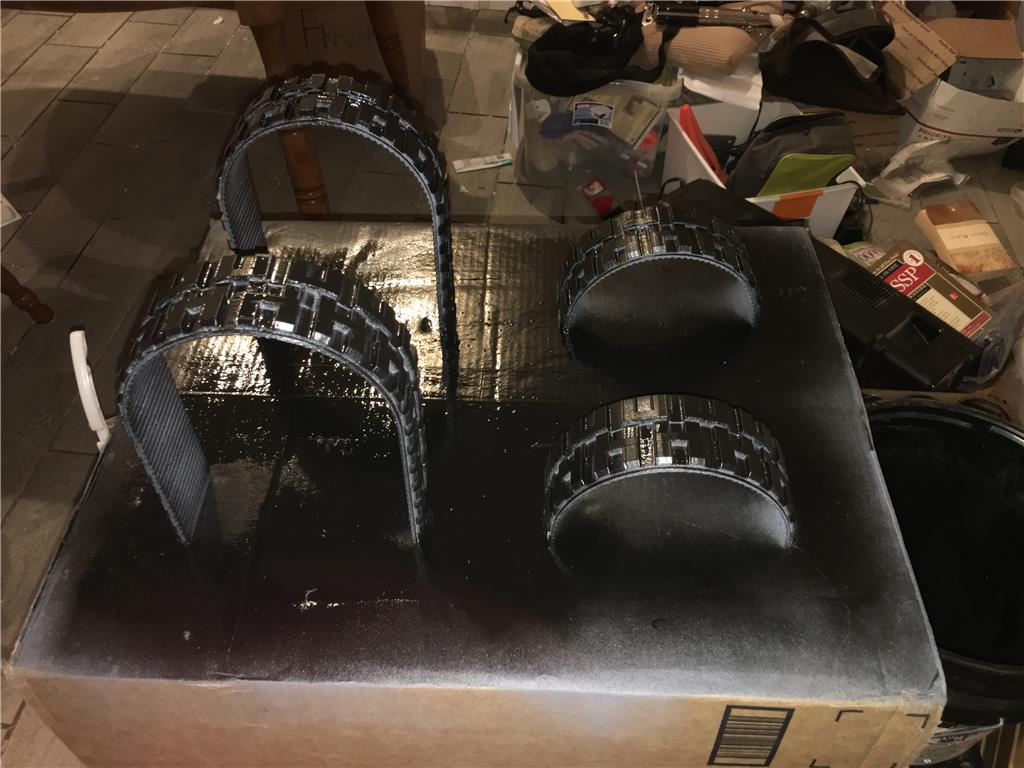
a couple coats of primer and a few coats of rubberizing spray
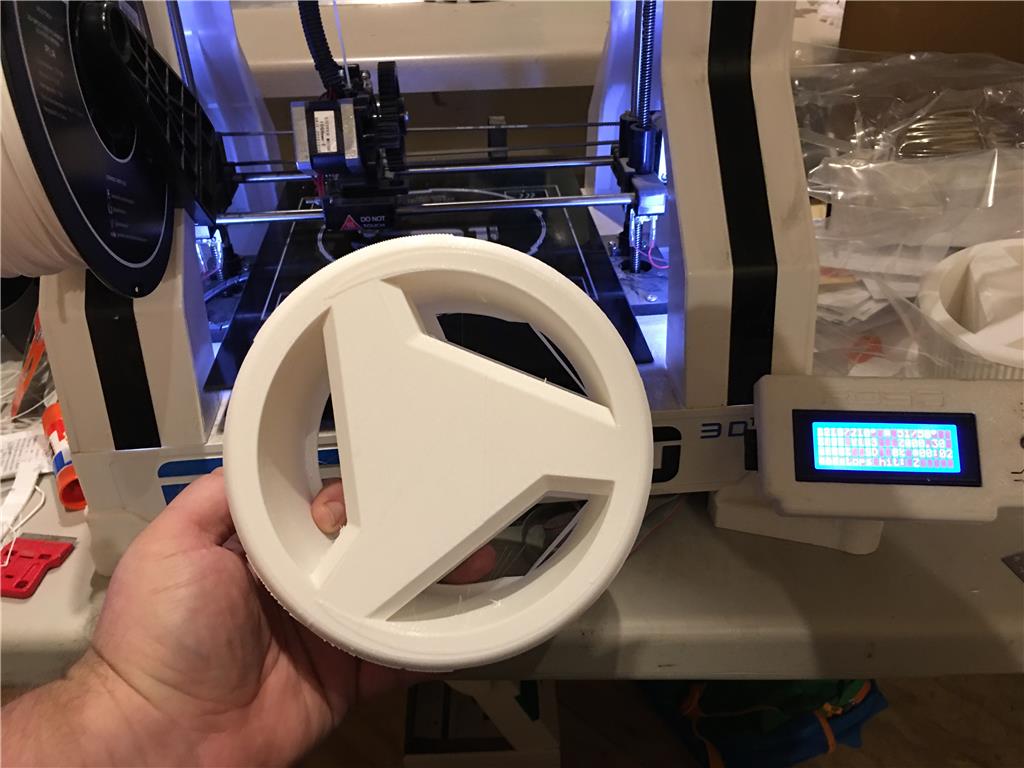
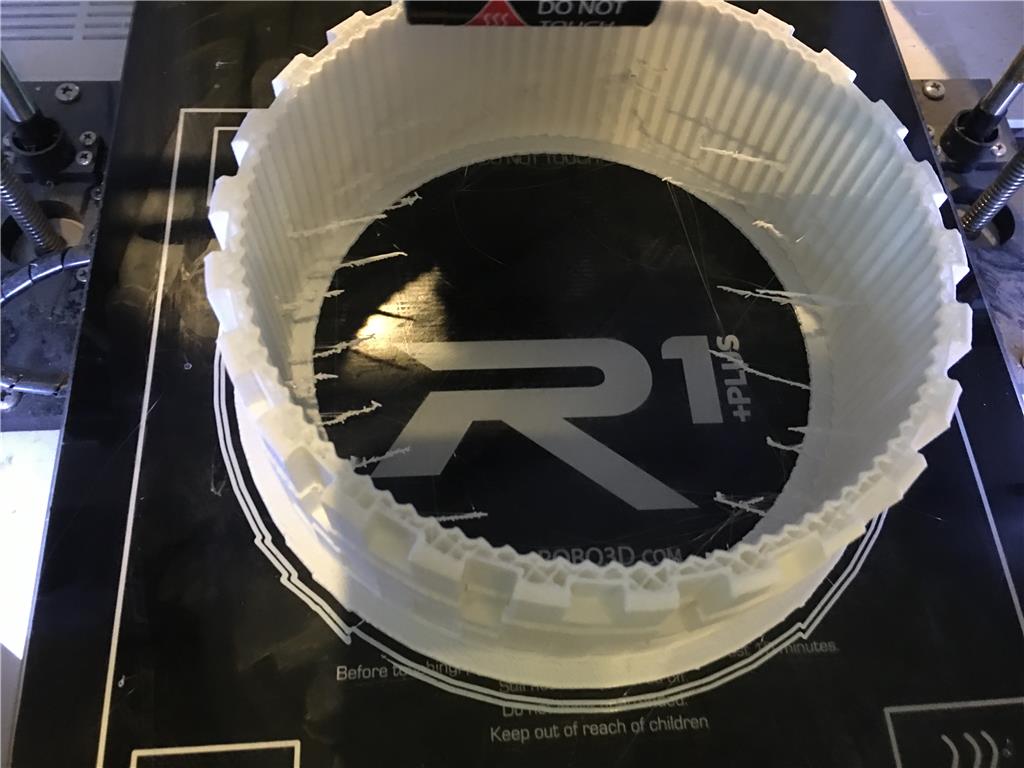
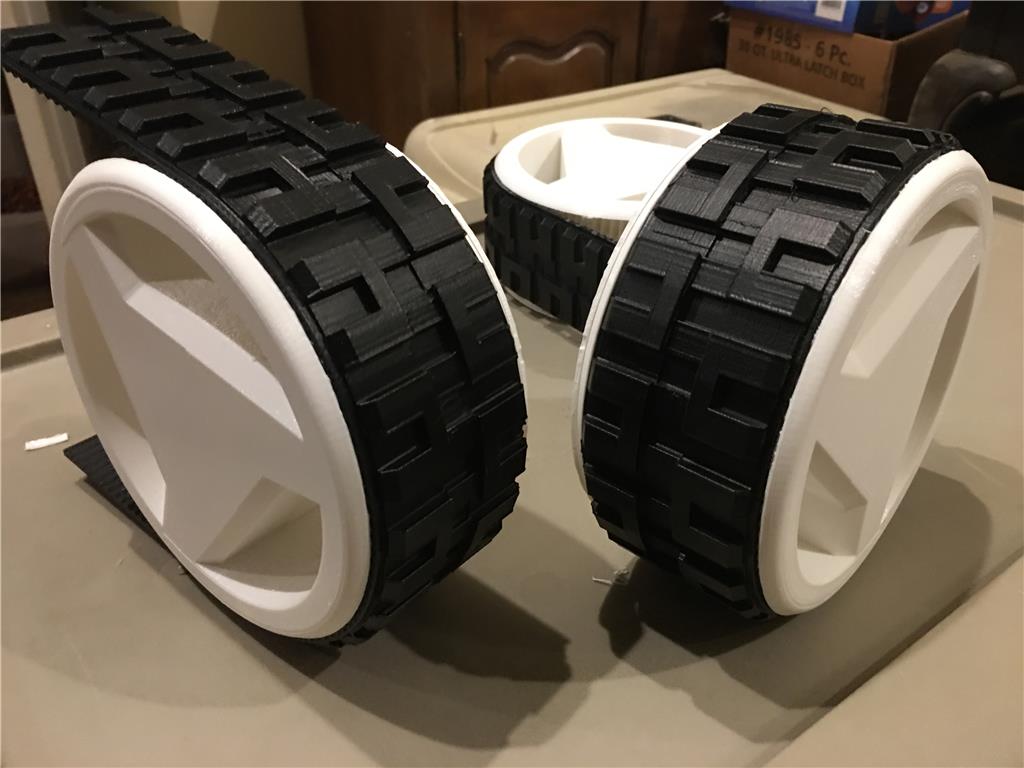
I popped the faux mock up tracks and tire onto some wheels, they are about 5 percent too small, but that should be fine when we are talking about parts that will be rubber and have some level of stretch.
how does it look? Pretty Clean? I like it so far.
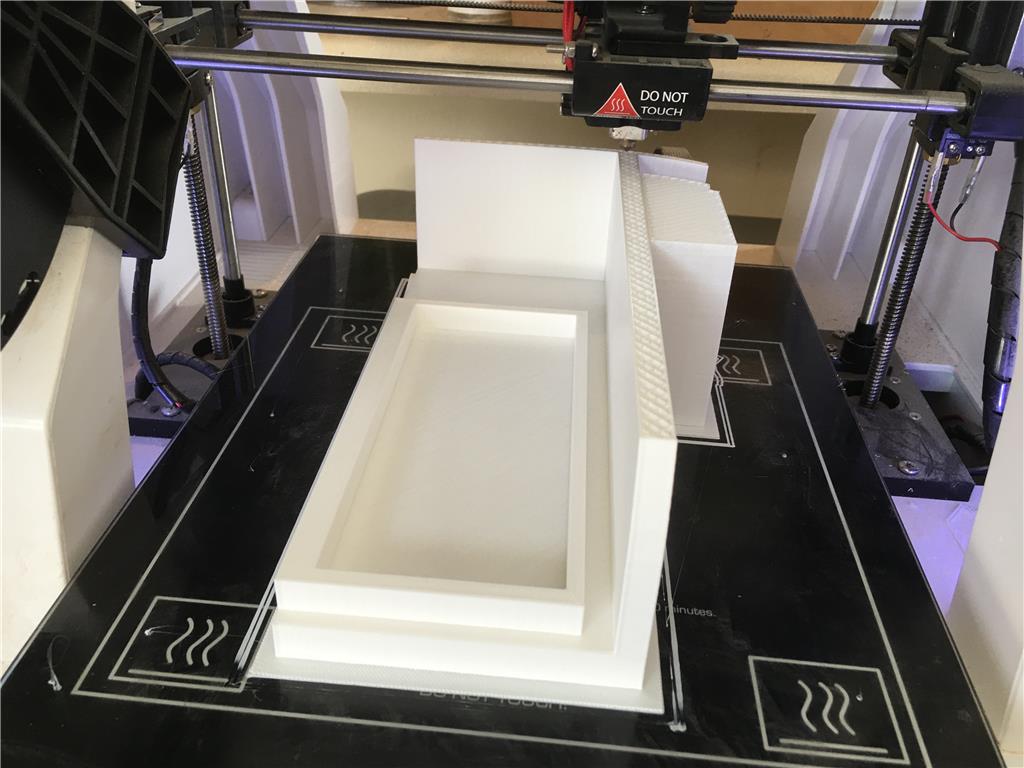
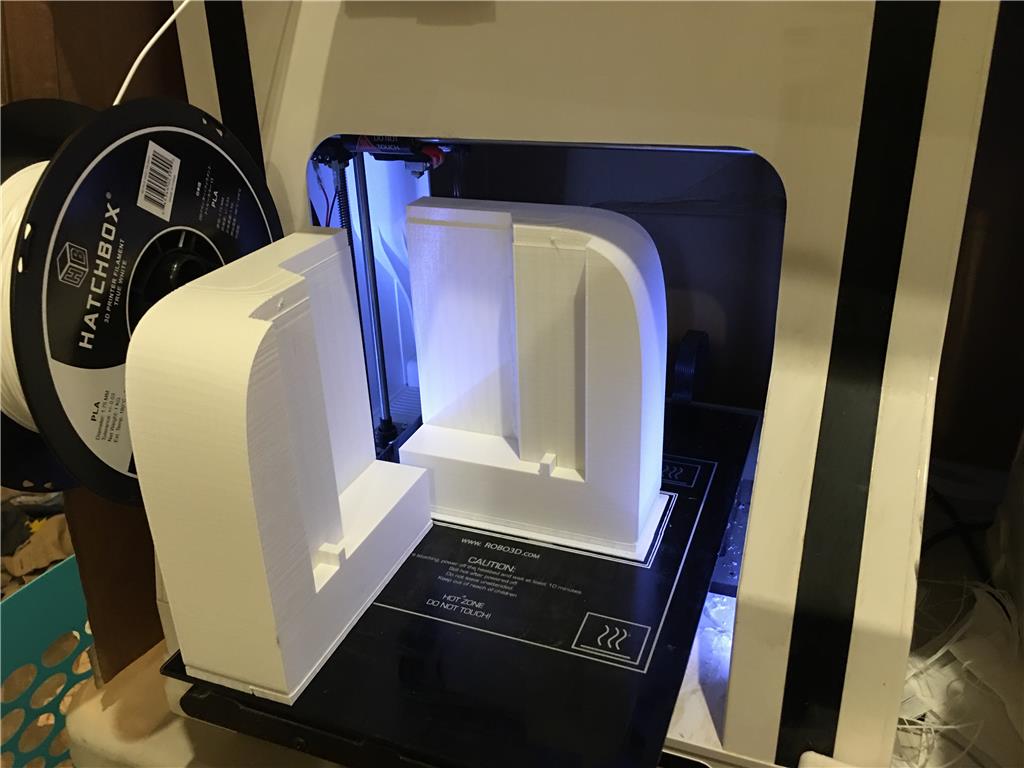
I just started two 30 hour prints. I cut the rear drawer and battery door in half and set the left and right sides to print on the Robo 3D printers. I have three Ender 3 pro printers in boxes that I will need to find time to assemble and setup. I need to take a few days to really buckle down and knock out my Scripting and coding class preferably before Christmas.
the rear drawer and rear body cover are 36 percent printed and they are looking excellent! Based on the time printing so far it will be tommorow sometimes before these two are done.
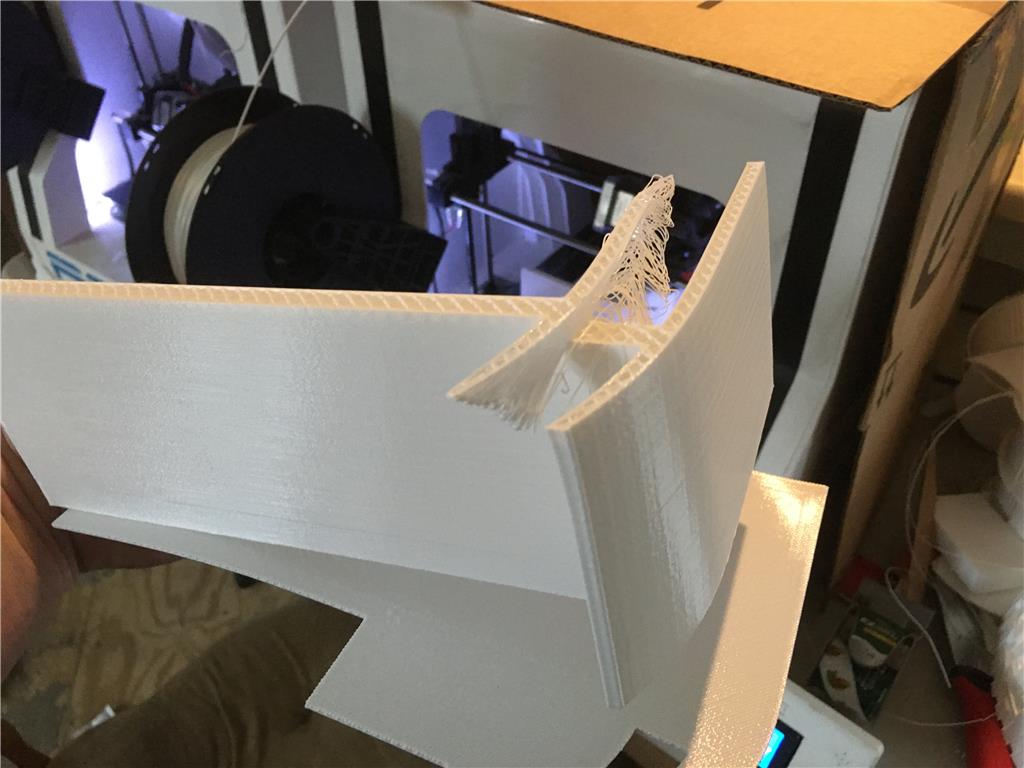
Yuck, my first misprint for the project. All of a sudden the nozzle was caught on a piece of the support that broke away from the bed I think. I put together a Janky card board draft black to wrap around the back, sides and top of the Robo printer and I will try agian.
Are you printing with PLA or PETG? I am printing with PETG and I find its very tar like and sticky compared to pla. It gets on the nozzle and eventually collects and deposits on your model as a blob, which then cools and creates a high spot on the print, which of course the nozzle comes back to hit on its next round about. I got in the habit of taking a straight razor to the balck build up on the nozzle before a print. Seems to help alot.
It is PLA
well the other print failed to and it was my oversight that caused it. I didn’t realize the slicer did not generate adequate support for the top layers overhang. I believe I will switch to using Simplify 3D as I already bought their license a while back but I have not used it recently . I used the oem supplied matter software from Robo 3D for this botched job.

in short I need to take care that proper supports are generated and I don’t thing the stock software is cutting it.
So , moving on and doing what I should have done to begin with.. I installed Simplify3D on my laptop. It immediately sliced with the correct supports in place. I have a license from a few years ago, I wonder if their are any improvements or good reasons to buy a new license? I will start those prints over after I get off work today and we will see if we have some winners.
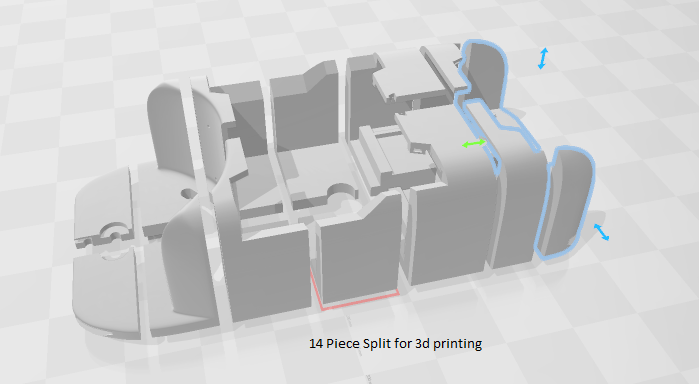
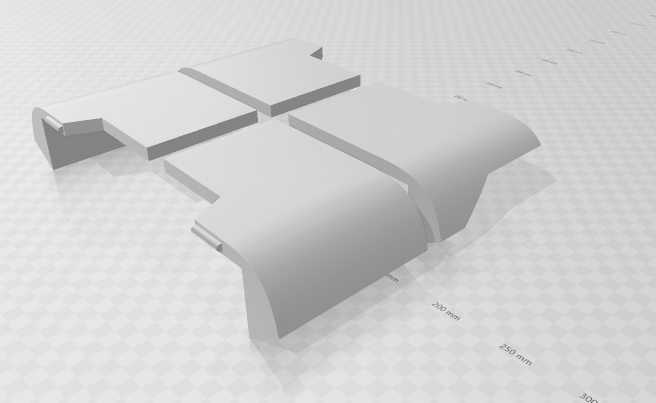
While waiting on the drawer to print, I started slicing up the main body into printable pieces. The main body is 14 pieces and the top cover is 4. The rear drawer was broken into two sides that are printing now.

https://www.thingiverse.com/thing:4031686
For development purposes you are welcome to print along and make your own if you have the patience. non commercial use only, for personal use and you may contribute with modifications for your own use, if they are cool enough we could make them official.
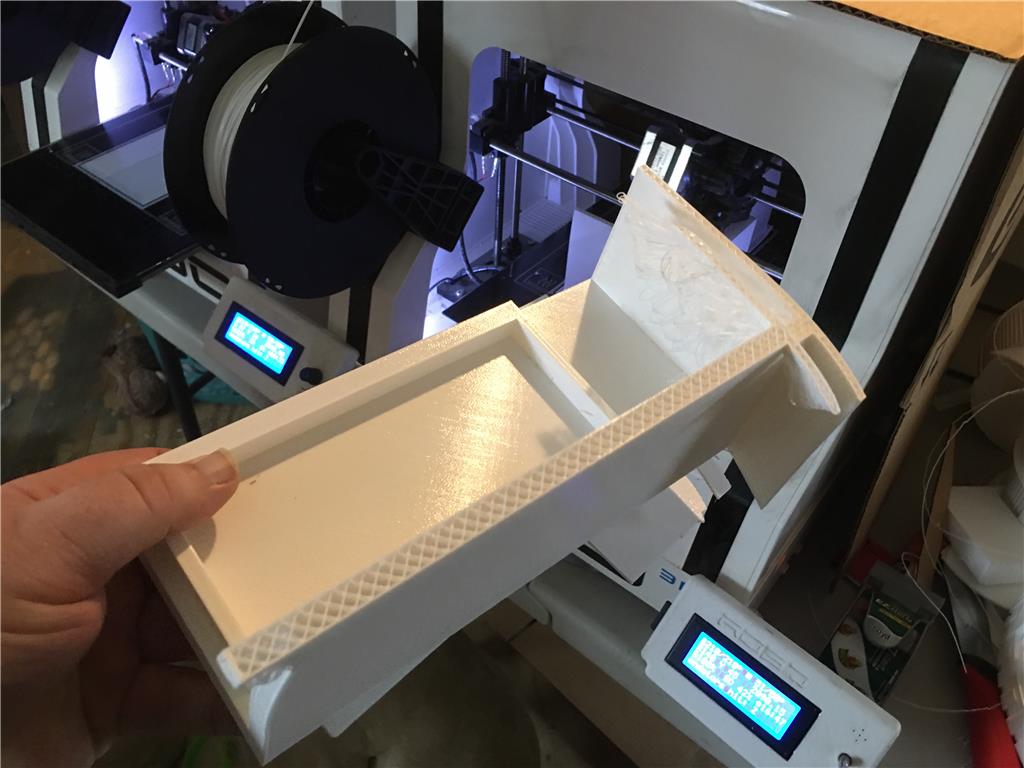
the two drawer halves are printed after 34 hours and a heart attack because I thought I was going to run out of filament. I noticed the rear looks like butt cheeks of the robot.
My bday is Fri the 13th this year!
Just do me a favor Josh and don't go near Elm street :D
But but but, that’s my street:(
also on the agenda is to print a filament splicing jig, I lost two large prints due to running out of filament at the last 5mm of the model. It is highly needed so I can use nearly all of the filament on rolls instead of swapping to a large roll for every big print.
I did not have time to start another print before I left for work today. In hindsight that is probably good because I want to move the printers to a very large closet and put a space heater in there so I will not need a cardboard box over each printer.
This robot is primarily intended for use outdoors so that really is not a problem.
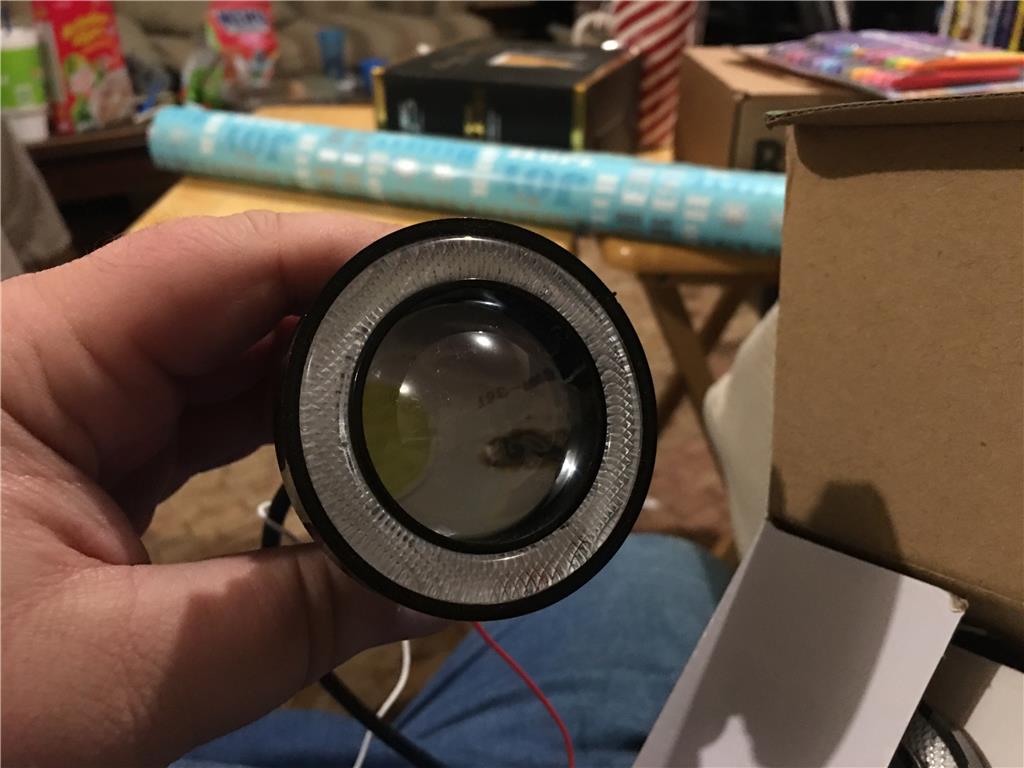
Here are the lighting options I ordered from Amazon. I am leaning towards blue or blue/white mix for the front and rear. I would like to have the option for red or amber to blink when a tool is in operation and for safety lighting as well. So I grabbed a roll of each color.
Yeah I like the antennas, it makes the robot look more bug like!
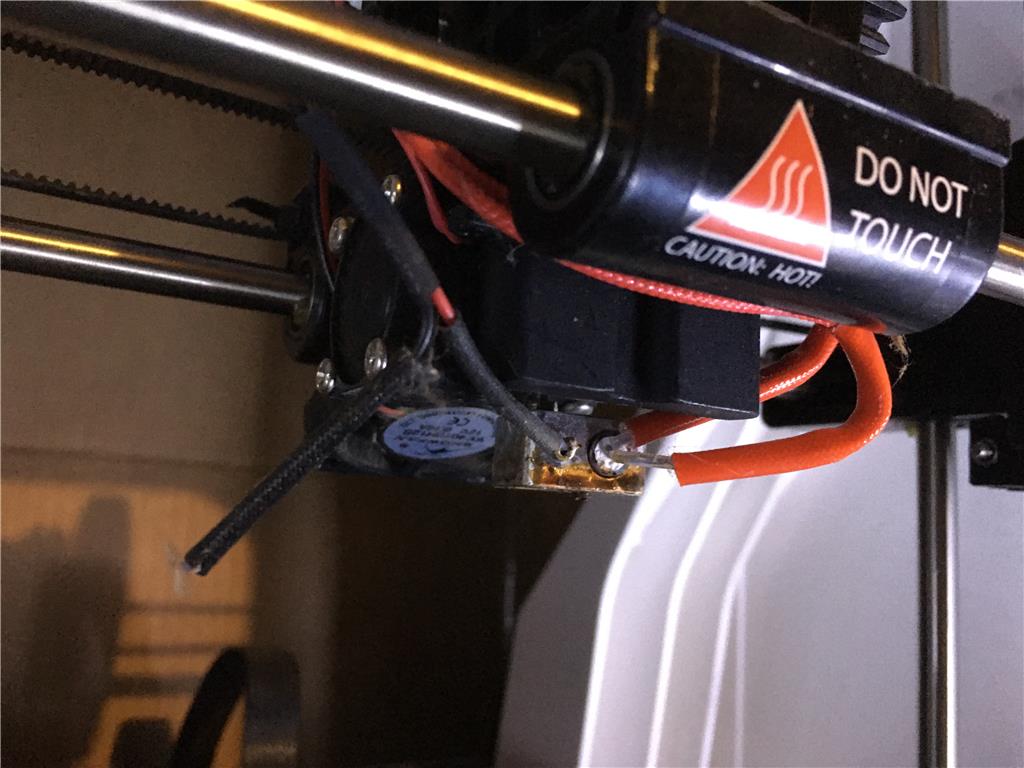
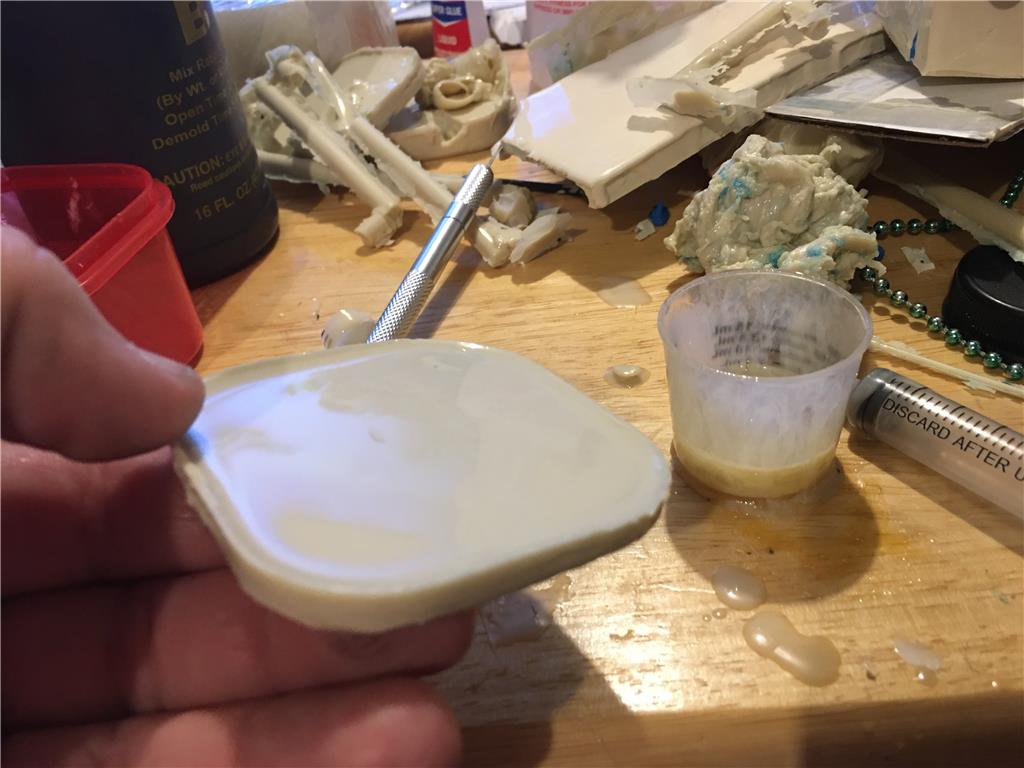
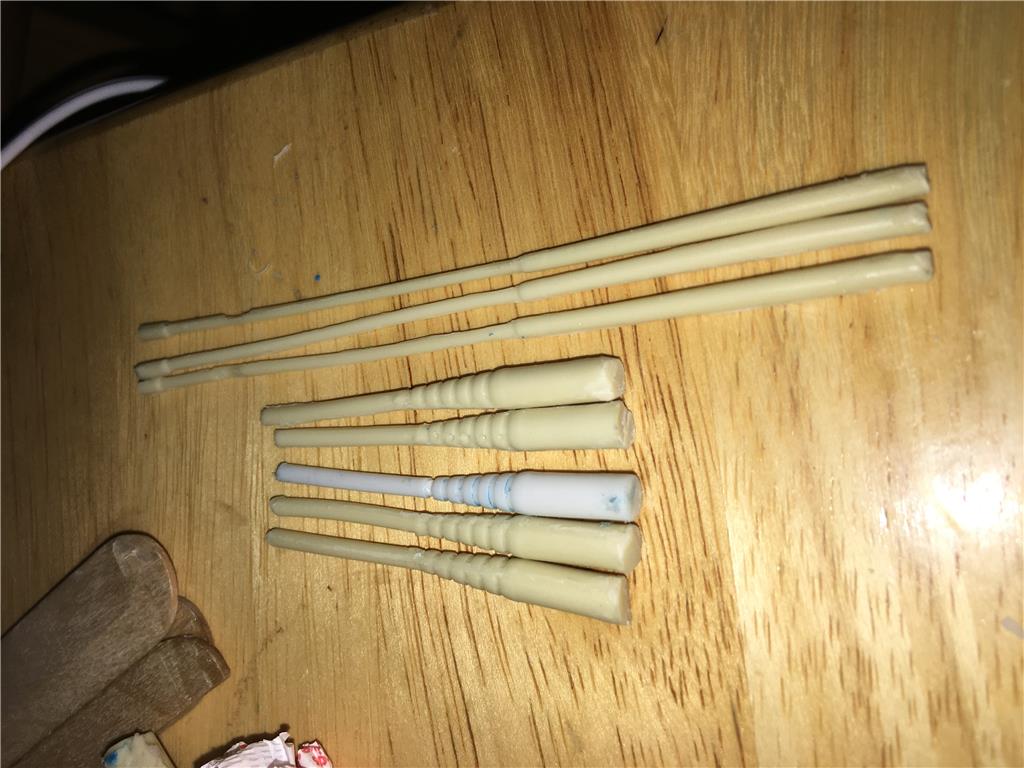
I installed the new extruder but it is not jiving with the controller and still gives a low temp error. I don’t have enough time to mess with it as I am down to two classes and till the end of the month to finish them. Phew! I did get 4 Ender 3 printers and bought 4 400mm x 400mm ext kits from enderextender.com to do larger prints. I. Sold most my BB8 robots to pay for them. And I found some of the BB8s do not have their antennas. So I am using the good antennas, making a two piece silicon mold and casting new ones for the buyers. I have never tried casting parts this thin, so it is new to me, but I will walk through what I have done so far.
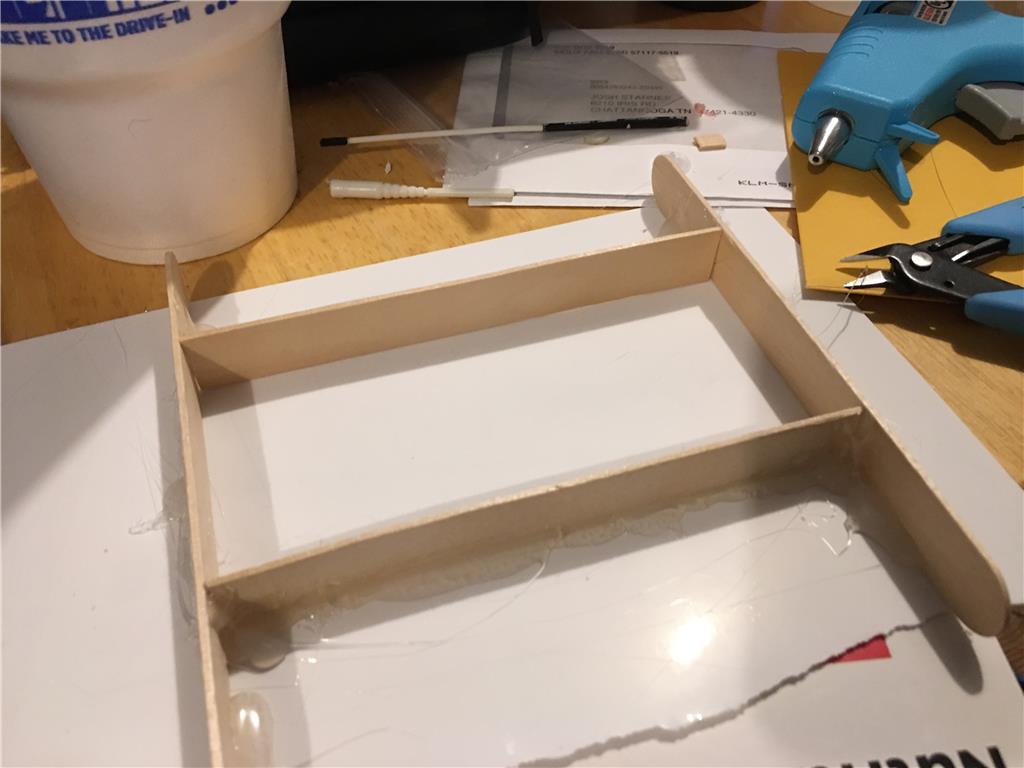
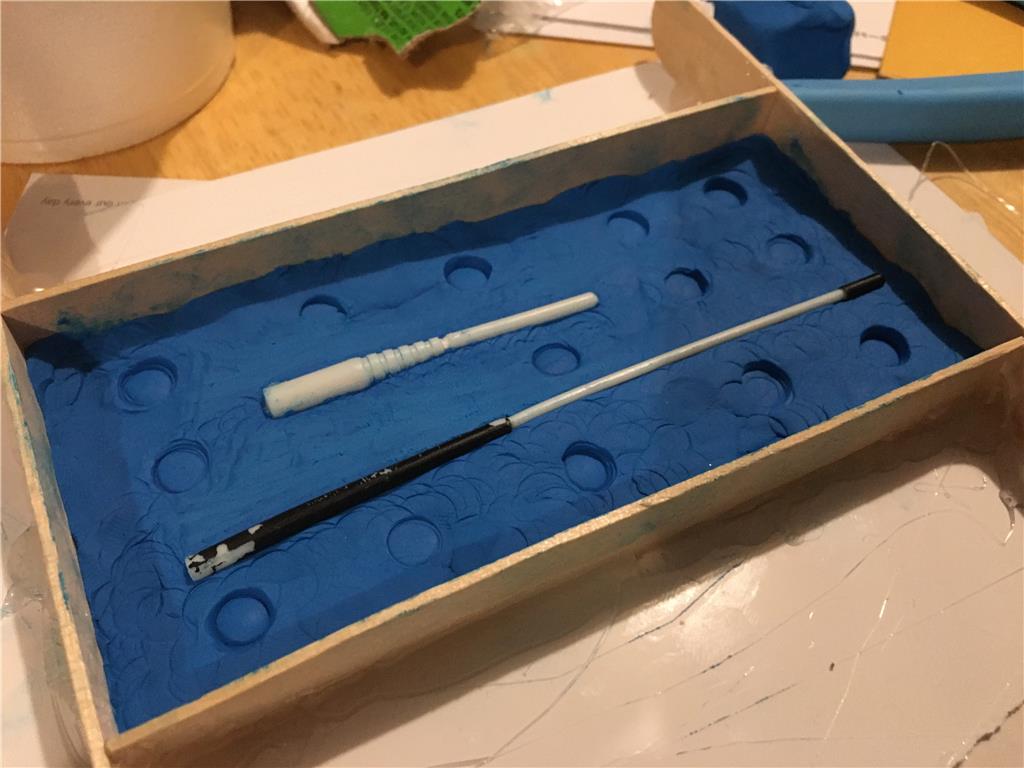
step one, make a box or edge barrier for your box. Use something disposable and easy to remove once the silicon sets.
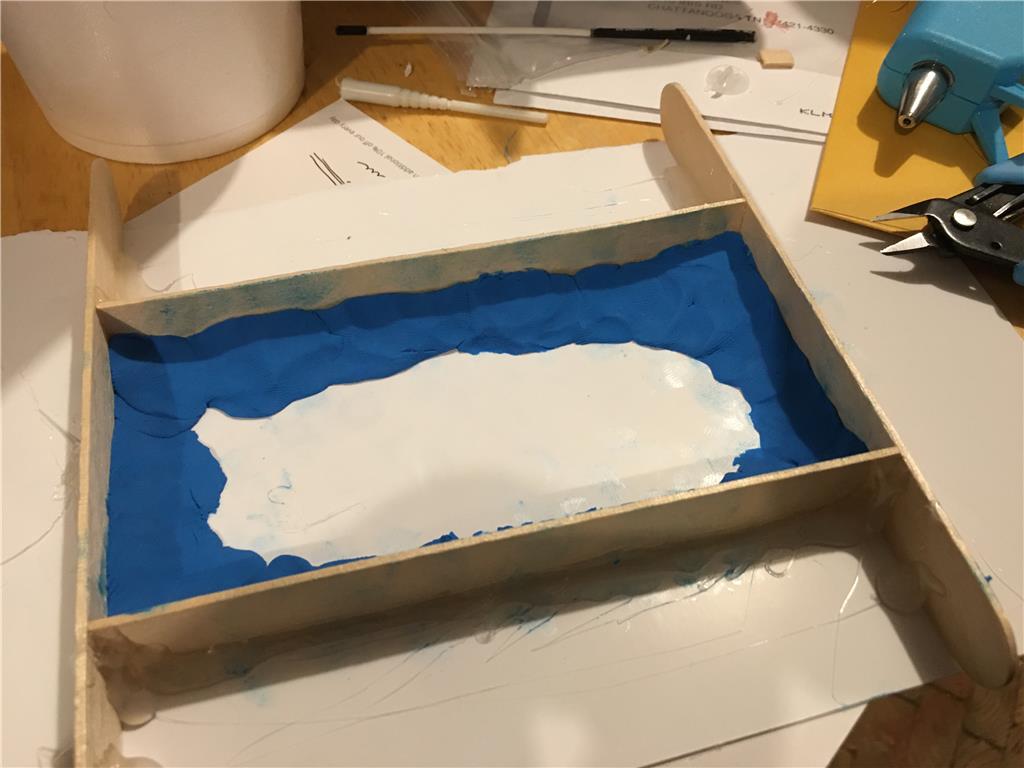
step two, work slowly adding clay around the perimeter pushing it into corners and packing it down.
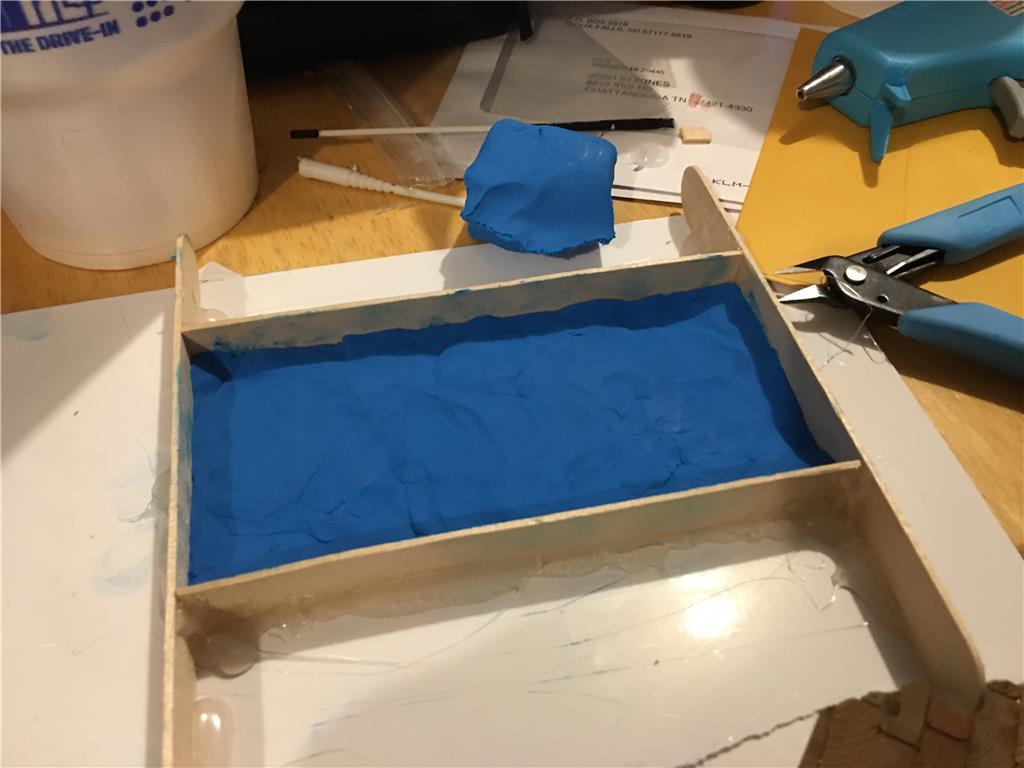
step three, continue adding bits of clay to make a level bed to work with
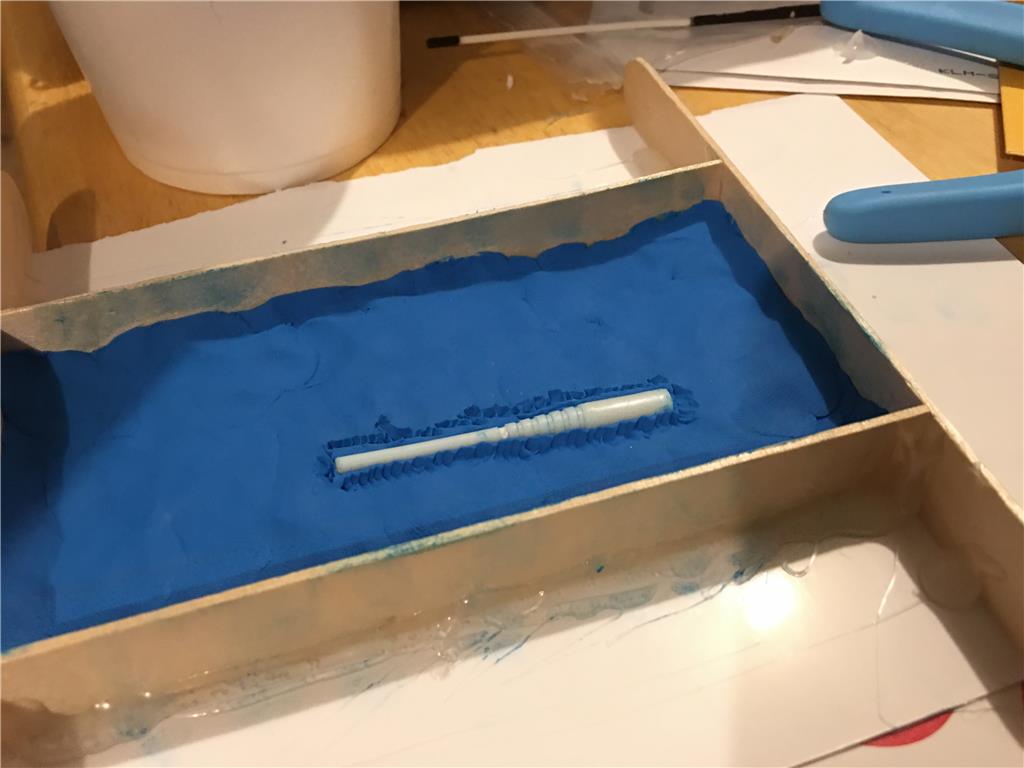
gently press in the first part and push the clay up against the edge of the part
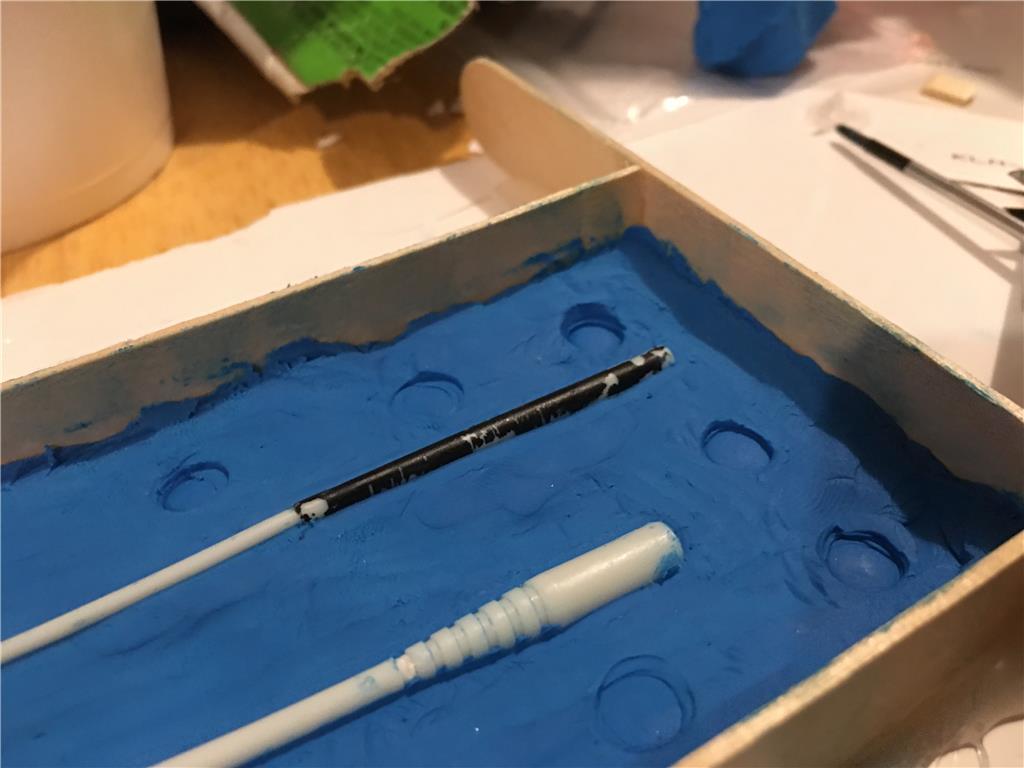
press in the second part and add registry marks for perfect alignment between the two halves of the mold.
gently take a sharp tool and go around the parts edge to make a clean edge.
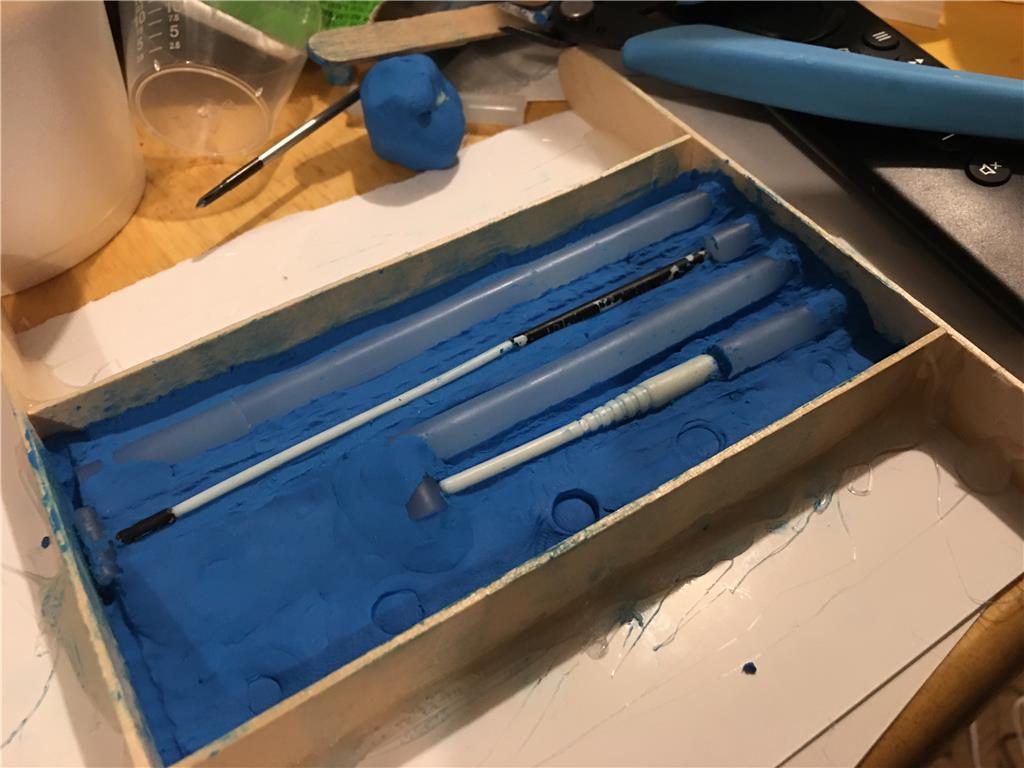
the parts are very thin and bubbles likely cannot rise to the top. I do not have a vacuum chamber on hand so this mold will need a large air vent. In addition I have syringes to gently force the resin down into the mold
I used alumilite silicone rubber that cures in around 12-18 hours fully. This represents a 2 ounce liquid pour. I may make the other half thicker around 3-4 ounces for dimensional stability.
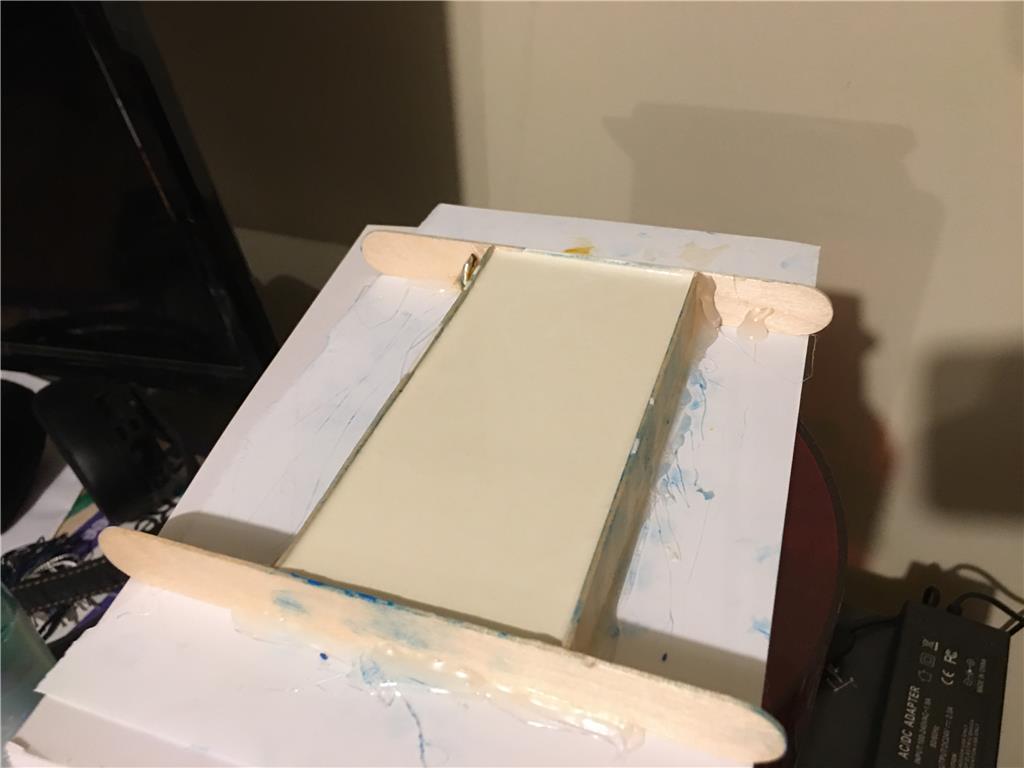
injection molding at home with two part resinoid. Pot life 2 minutes, Demold in 5 -10 minutes
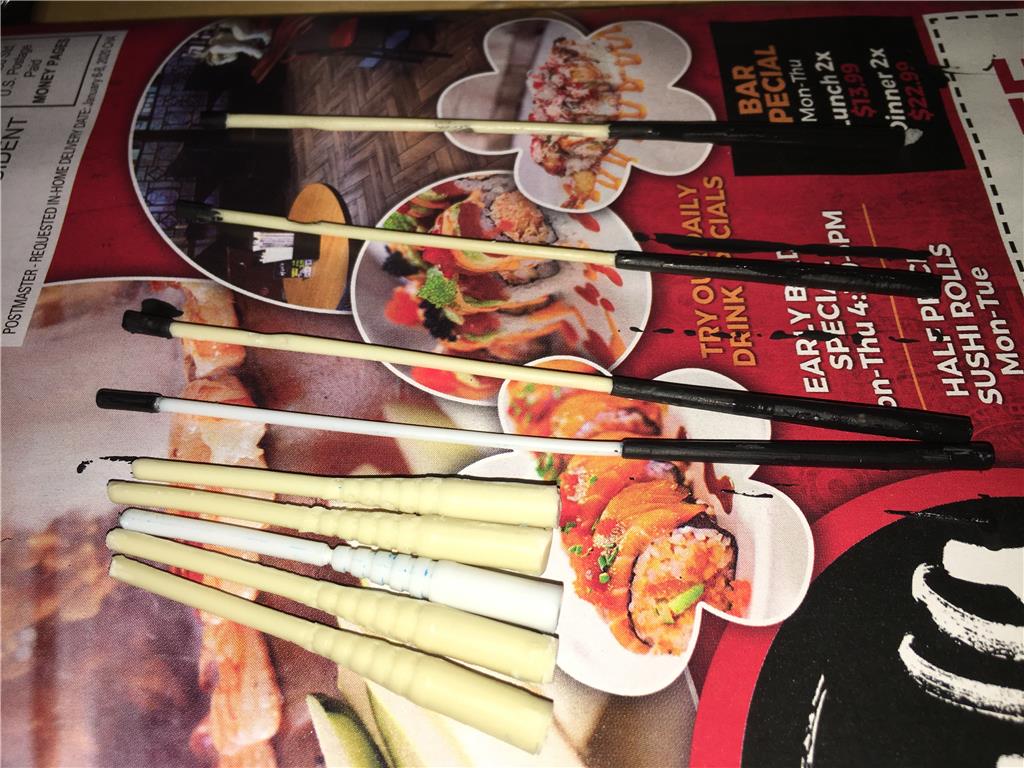
The replacements get a bit of black paint
I used to do a lot of casting for modeling work so I really appreciate your efforts. It can be a science and an art. Maybe subliminal but I really want sushi now.
I seen this one time thought maybe some day I'd give it a try. Looks like a cheap way of doing some small molds. Can you say hijacking a thread ... lol.
https://www.youtube.com/watch?v=7fwytA5r2Mw
Edited: Tried to delete and it will not let me, had to put something here!! Sorry!
Looks great!! :)
Hey thanks Mickey !
Good news by the way, I managed to sell the two Omnibot 2000 toys and 5 of the BB8 Hero toys to raise money for this project. I was able to get 4 Ender 3 printers initially, but I just ordered another 2. Also I got with a guy at enderextender.com and he was kind enough to offer a bit of a discount and some things even at his cost to extend the Ender 3 print volume up to 400 mm x 400mm x 500mm. He is only sending 4 of those kids, so two of the ender 3 printers are going to be normal sized. The Robo 3d printers are both out of commision as they are throwing a thermister cooling error even after swapping the hot end. I dont have time to really figure that one out, so they are on the back burner till this semester is over and finals are taken. I have not given up on the Folgertech 6, but I simply dont have time to get a printer going without help from the manufacturer , so that is on the back burner for the rest of the school semester as well.
https://www.thingiverse.com/thing:4031686
The LEVi Rover 3D print files have been uploaded to the thingiverse repository! I hope a few of you do the honors of downloading and enjoying printing this guy. Come along on the adventure of building, modding and designing accessories for LEVi. What will you do with yours?
All of the pieces for the body thus far have been sliced into sections small enough to print on a makerbot bed ( 6 x 6 inch wide beds) all files were uploaded to both the Facebook Group and the Thingiverse as well!
Edit... Missed that you uploaded tobThingiverse. Will be downloading and trying once I get some experience with the 3D printer I just ordered.
I mean I welcome all donations ;)
I printed about half of it when my printers at the time went belly up, then I spent a lot more time on school. I decided I wanted the design to be wider and have a metal frame to reduce the amount of printing time needed to duplicate them. You can print the whole thing though. All the pieces have been modeled. It’s a complete set of files to print and assemble.
during some spring cleaning wife tossed all the parts made so far figuring I could just print them again if I continued the project.
"during some spring cleaning wife tossed all the parts made so far figuring I could just print them again if I continued the project."
Ouch. I guess she doesn't know how much filament costs.... Of course, I don't really intend on sharing that with my wife unless she asks either :)
Alan
What ever happened to this guy?
Hello! Well this guy was an all 3D print. I got about half way through and both my printers died and I didn’t have a way to get them fixed at the time due to lack of parts and Covid shut down supply of parts. I did decide to make him just a bit larger but instead use an all 2020 aluminum frame with 3D printer parts attached to that core frame.
On a side note I’m been working on another robot I’ll post about :)