


-634710298683623046.jpg)
My plan is to create a platform for experimenting with robotics with parts gathered from garage sales, using EZ-Board and ARC. I love EZ Board and ARC, because it lets me get right to experimenting with the stuff I get from the garage sales. I can test all kinds of electronics right off the bat. Later I may convert some things into code so that the robots can be small and autonomous. Other places I consider within the realm of "garage sale" are Goodwill, thrift stores, and the trusty old Dollar Tree. First I need to build a platform or chassis to "lay out" the parts I plan to experiment with. Of course, everything cannot be found at yard sales. Try as I could, I could find no EZ-Boards at yard sales last week. These are the things I have purchased outside of the garage sales route:
EZ-B v3 You gotta have this!
Solderless breadboard (2.2" x 3.4"0) one so far
A bunch of bread boarding wires
Terminal strip 12-Position European-Style Mini Terminal Strip (RS Model: 274-680 Catalog #: 274-680 $2.99)
Peripheral Cables (you can never have enough of these, I started with 10)
I'll probably need to buy some sensors and servos at a later date.
Other robots from Synthiam community
Cardboardhacker's M2d2-The Diy Miniture R2d2 By...
Klaatu's 1 M Hexapod (Autonomous Insect)

OK, last weekend I started out by picking up a bag of RC cars and a "Brian the Brain". Brian looks like a real keeper - but that's down the road a bit. The RC cars were a good find. There are three, all together (more or less). All had dead batteries, missing parts or broken wheels, but I paid $5 and took the whole lot. (picture) I have been able to salvaged two NiMh batteries, one 6v and one 7.5v, but only one charger. All three are radio controlled 49 mHz. The Hummer- looking vehicle was supposed to climb walls, but I think its days of vacuum sealed wall hugging are over. It looks like a good choice for a chassis though. The one with the cage had a broken wheel that super glue could not fix. The wheels light up when "banged" though (cute little switch with 3 LEDs in each wheel - put that aside for a bit). The hover craft thing worked fine. I am not sure how I will use that baby.
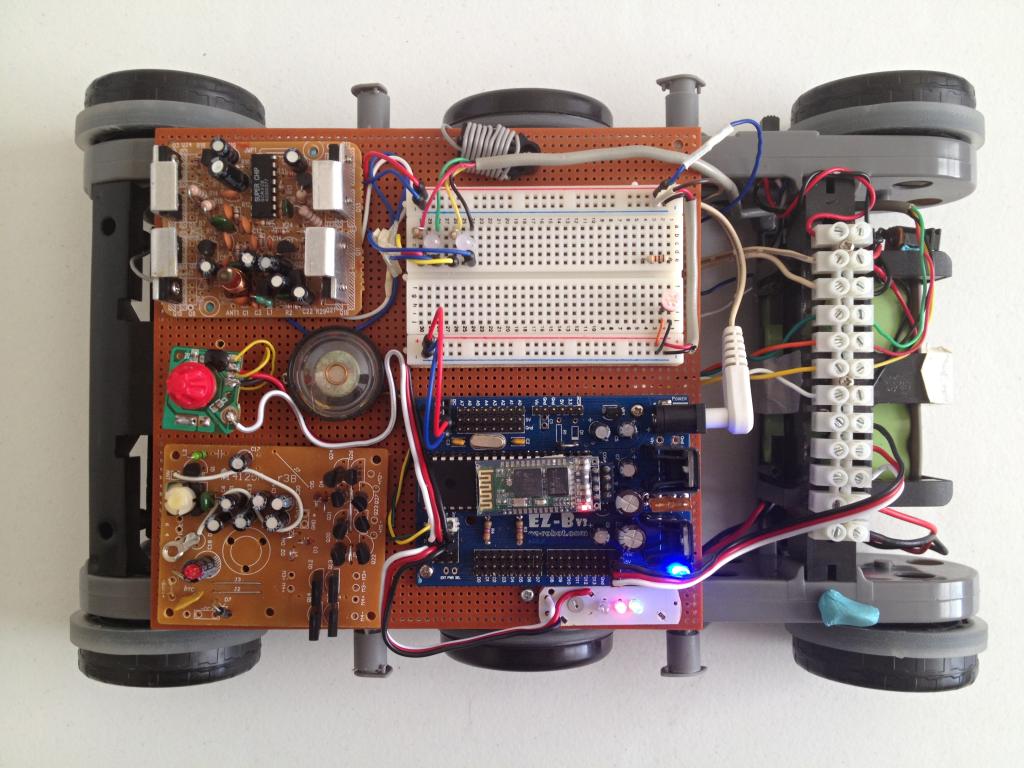
Here we are a week later with all the plastic stripped off. I have added a perf board (Radio Shack), the white breadboard, and of course the EZ-B. The two circuit boards are the 49 mHz transceivers from the cars.
awesome
Wicked Cool!
Looks Great!
I love the concept of recycling items from Garage Sales into Robots. Your effort looks great. Show us a video of what she can do..cheers,,
Here is the latest; a couple of Dollar Tree hacks and some re-arranging:
The little speaker is salvaged from an old telephone answering machine (always a good source of parts, and always cheap. I picked up a free 2 phone set last weekend, nobody wants them any more). That same answering machine supplied a 7.5 v adapter to power the EZ B. Of course the plug was wired backwards, costing me a fuse.
Is there any harm using a 10 amp fuse with EZ-B? I can't seem to find any 7.5 amp.
The breadboard is powered from the EZ-B I2C Header pins. I have the speaker wired to D15 so I can experiment with the Speaker Tone control. There are two bi-color LED on the breadboard next to the 49 mHz module to test the RF motor controllers. I still have not quite figured out how to use ARC with DC motors (non servo).
Currently the terminal strip manages batteries (2 rechargeable, 6v and 7.5v) and the motors built into what used to be the Hummer wheels. I removed the extra motors that allowed the car to climb walls.
The little board with the three LEDs up front is a hacked beacon from the dollar store. It is wired to D17 and (used to flash continuously with an OFF pulse and continued to flash until turned off and on again). This is where I get a chance to explore the scripting control.
Most of the boards and other pieces are attached to the perf board with a blue removable poster putty used to fasten art works to the wall for easy removal. I have used this over the years and find it very satisfactory and immensely easy to remove. I started with screws, but these proved to be a pain since I am constantly redoing things. You can see an always handy glob of the stuff in the lower right.
Notice there are many ports still unused - but then, there are many more garage sales to go to.
Inspiring. I need to get back to working on Boxbot next week. I had been looking for a toy with treads since the modified servo wheels don't do well on carpet or obstacles, but I haven't found anything appropriate yet. Need to start looking at garage sales.
For controlling non-servo motors, you need an H-bridge. DJ sells one that would probably be sufficient for this toy and the price is good.
Alan
The tech guru , there are dewalt (and other small power drills) that you can use the motor and planetary gearbox from , great torque , often several adjustable positions for rpm. They are cheap too. Ideal for a 10-30 pound bot http://www.robotmarketplace.com/products/BP396505-20.html
jstarne1, Thanks for the great tip and URL lead. BTW, although, I have only been aware of EZ-Robots for about a month, I have been following your amazing Omnibot 2000 build with great interest.
Last weekend's garage sale haul. I should be able to use this for something cool.
It is about 8 inches tall and cost $4, but I had to build it (took a whole 15 minutes). Let's get the screw driver.
And, I picked up a free wireless telephone answering system. The circuits are nearly impossible to reuse, but I did manage to salvage these parts:
I have some ideas.
GarBot 1 Welcomes new ARC Release
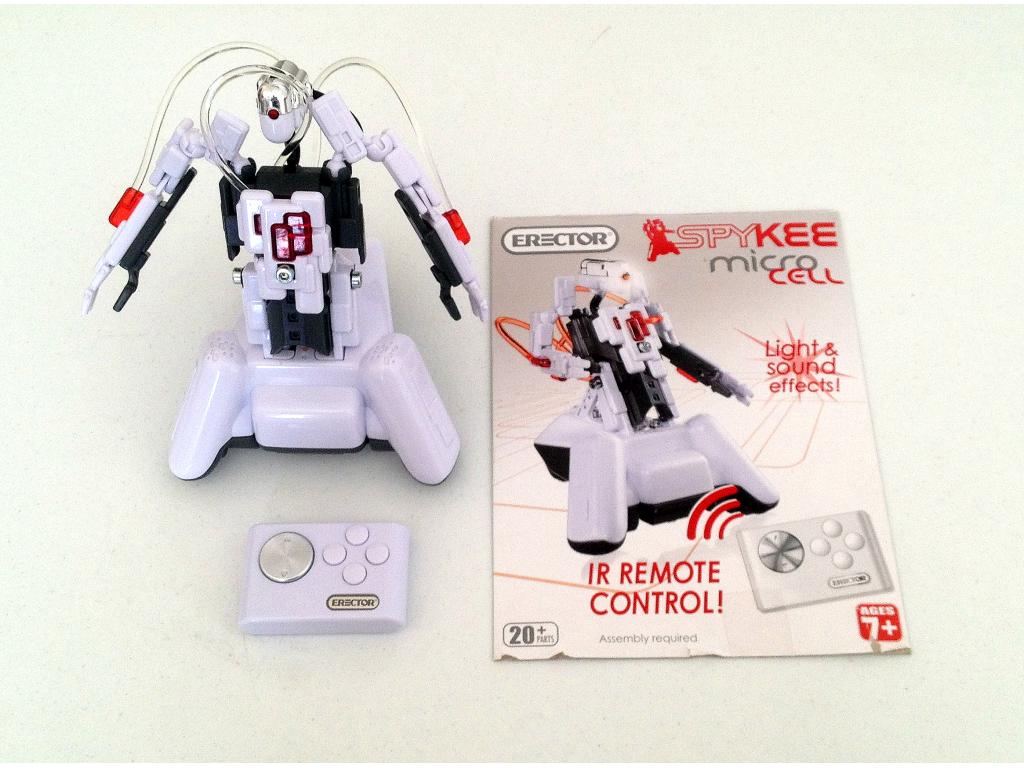
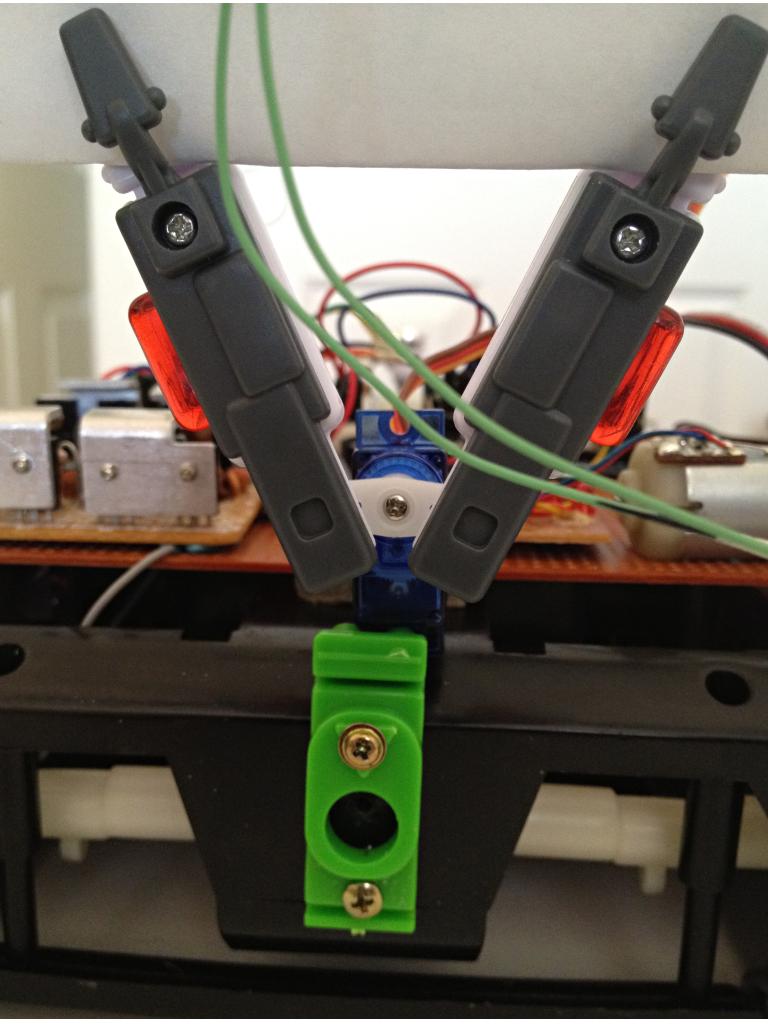
I decided to salvage the IR parts form the Spykee Micro Cell robot, so that I would be able add some IR experimenting circuits to GarBot 1 (GARage Sale RoBOT), as I am now calling this robot. This is what I came up with:
I also decided to use some of the plastic parts to add design elements to this experimental concoction. And lastly, I thought I would try a little servo motor action with that crazy arm thing, all salvaged from the Spykee Micro Cell robot.
The IR sensor is located in that head-like chrome colored piece up front. There is a blinking LED in the EZ-Robot sign, which the arms are waving. And, if you listen carefully (or turn the volume way up), you can hear tones as the arm waves back and forth.
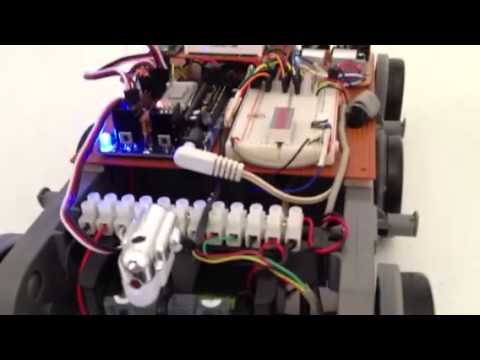
Here is a video:
Click To Watch Video
Brilliant!
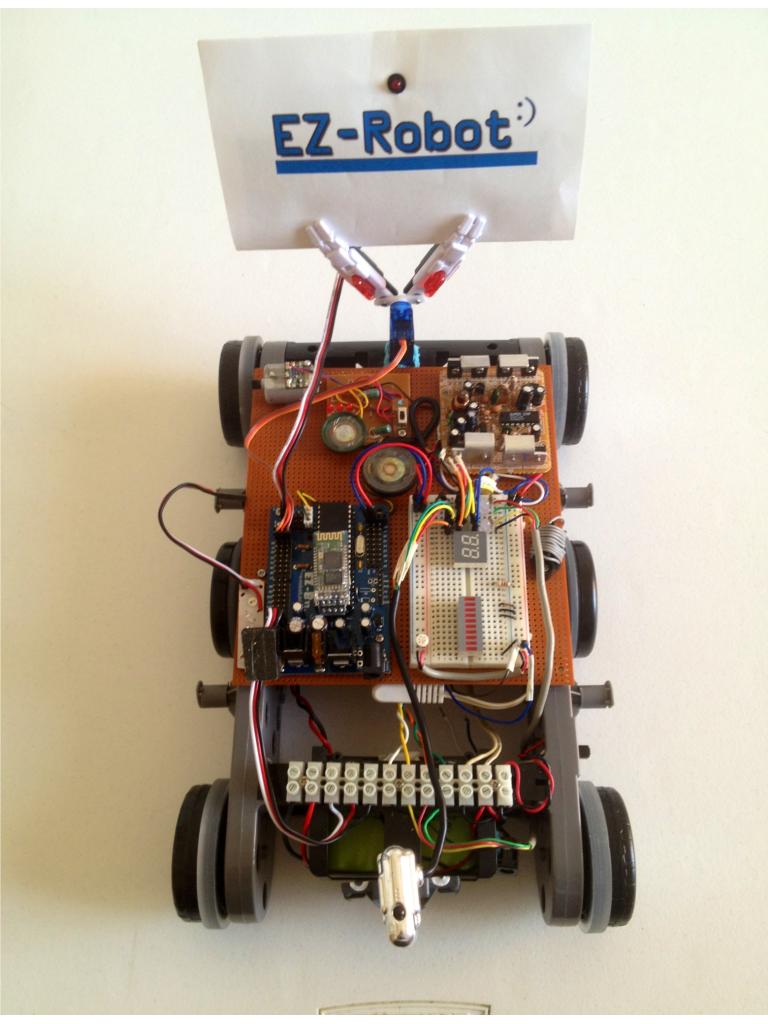
The blue poster putty, used to hang wall art, wasn't quite holding the mini servo with the waving arms. It would give up and everything tended to fall off overnight. Luckily, I try to keep all the plastic pieces whenever I dismantle a garage sale find. That little green piece now holds the servo to the chassis. This picture looks at the back of the waving arms.
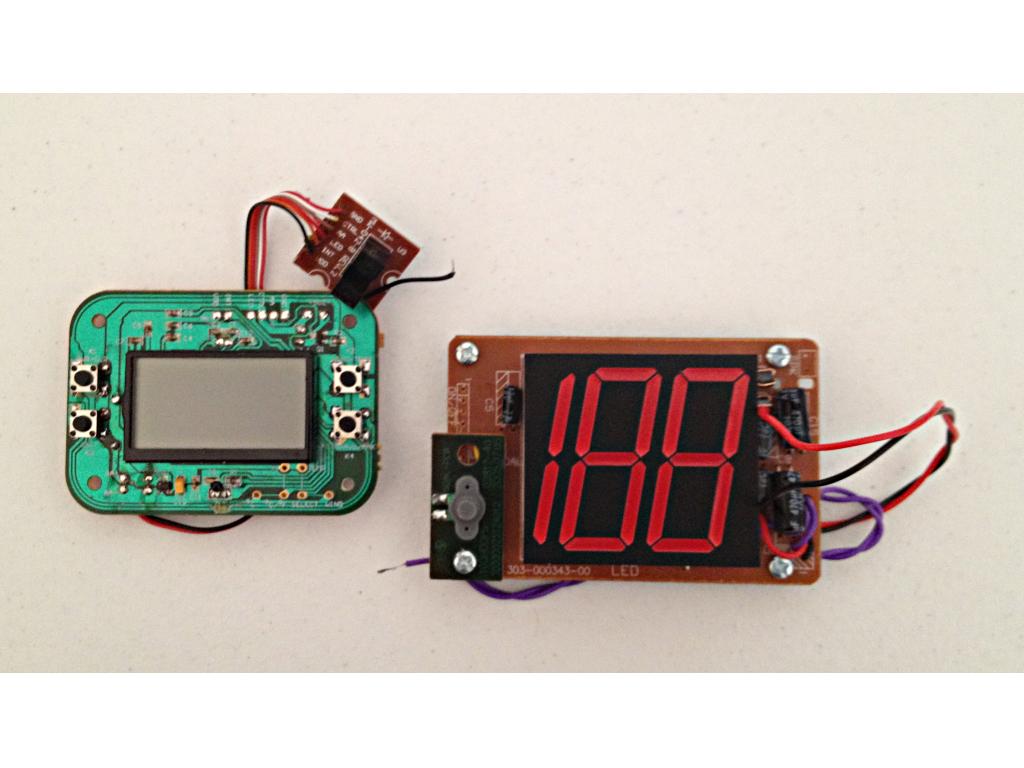
I can now move on to other GarBot 1 add-ons. These two pieces must have a place on any respectable robot:
The one on the left is a digital thermometer with an H92B4 Photoelectric switch, that measured wind speed in its former life. The one on the right came from a kid's game called "100 Hoops". Those giant numbers (2 inches high) are begging to become a counter.
Here is a video of the semi-completed state of ole GarBot 1. Be sure to crank up the volume, this robot does not talk too loudly.
That's a great idea. My next project is a Frankenstein type bot. Mostly stuff I found on ebay or was given to me.
What type of body are you planning on doing? Car style?