


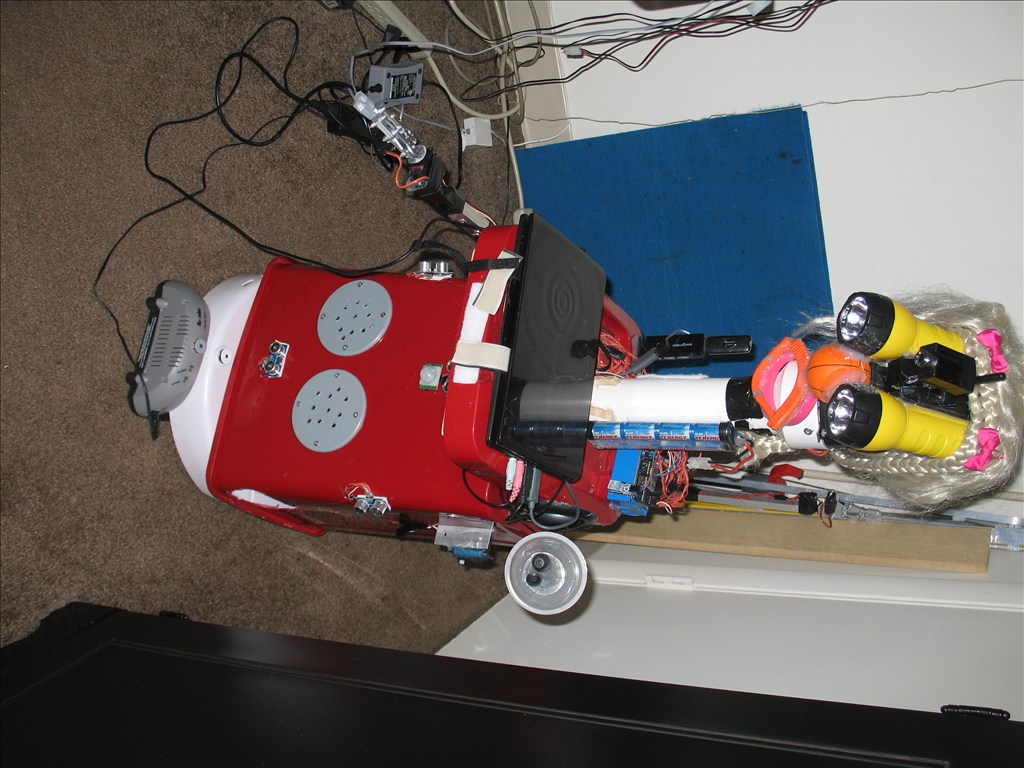
I was working on a generic transforming robot but I used styrofoam and few other design flaws so it got scrapped. Mostly because @Technopro made a cool post about some R2 D2s and it inspired me. I just bought a small garbage can that's pretty much R2 shaped so I'm going to use some of the cool info from those vids and make my own little R2ish bot. The can is about 18 inches high.
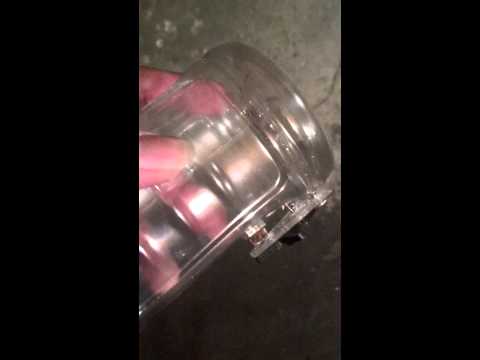
First I'm going to cut a door panel into it. Simple dremel cut and add hinges. I'm going to make 2 cardboard circles to put into 3 sections. I only have 1 US ping sensor so I'm still deciding if I should put it in the head or chest.
I want to make the legs and get it mobile first. I've had a tendency to rush my projects but they were always intended to be temporary. I'll be keeping E2 so I'm going to take the time and do it "right". So expect questions.
I also have an old Droid that I almost disassembled for parts. Super extra special thanks to @Techguru for reminding me that it was still a functional device. I was in this super research and study mode and have been ripping apart all kinds of things and harvesting them for parts to experiment with. So I was going to rip it apart for the sensors and screen. The truth is I probably would have ruined it. He also hooked me up with 2 docks and some mounting goodies.
I'm going to rip off the movies and make it into a forearm control pad type thing. I'm a big believer of a few simple concepts. "Today's science fiction is tomorrows future." "Good artists borrow, great artists steal." "If you can't bedazzle them with brilliance, baffle them with BS." The last one is more for fun ;)
I also want to take a cue from @jstarnes1 and heavily document it. I love how he let's you into his mind and explains what he does like he was teaching a class or something. So, while I'm not as knowledgeable as him, I hope to at least let you into my mind. Maybe you can stop me from some fatal mistakes the way Alan did.
I'll keep you posted. Thanks for being awesome.
Other robots from Synthiam community
Wiinteru's Blue Irobot Roomba Hack
Moviemaker's Here Are Some Rebuild Pix Of Marti


FYI: I have the(or some, give or take) measurements of the actual r2d2. Body: 34" Head/dome: 9" high, 18" diameter Legs: need help on this one Feet: same here
Be sure to post pictures of your bot! I have a little surprise up my sleeve so stay tuned!
@Technopro - Thanks. My little garbage can is 18" to the top of the dome. Head movement is on the list but it's last because for me it seems like its the most complicated. I believe it's @Lumpy who has the life size R2 and has some pretty good pics and info on the head movement so I plan on studying that before I try anything with the head.
I can't wait to see what your hiding up your sleeve.
could you give me a link to lumpys r2 if you have one? im actually really interested in r2's.
Here you go:
Lumpy's - R2-d2 Build "two-two's"
It's so awesome that I'm surprised Lucas hasn't either offered him a job or tried to sue him.
I was feeling a little motivated so I started to do a little work and took some pics.
I picked up a shin guard and mounted the case piece Alan gave me to it with rubber cement and hot glue.
I also got some hinges but I haven't cut the door yet.
I cut out some cardboard circles for the sections of the insides. I also cut some holes in the middle for wires. I'm going to get a cable de-tangler like they use on bikes to keep from twists for when I do get head movement going.
I thought about sealing the lid shut but now I'm thinking I might want to motorize it it so it opens and closes. I took some pics of different possible "modes" the lid could be in.
I still have to make some legs and I still don't know what I'm going to do about head movement yet. Still a lot to ponder. But that's what I've done tonight so far. I may be up for another hour or so. I have a BD party at Chuck-E Chesse to attend morning so if I get anything else done tonight I'll post it sometime tomorrow.
Do you have a drawing on how is it going to look like or will it be an exact replica of the r2?
@bautista116 No I don't have a drawing or anything. I don't really know how it's going to look. I'm looking for some suitable legs. I have a back up plan for them but there is a huge rummage sale this weekend so I'm hoping to find some legs there. If not I'll move onto plan B. I'll get some pics after I do a little more work on it.
Not to hint on what im doing, but have you thought about this?
Yep. I've thought of that. Thanks though, but the junk yard in me has come up with something I rather quite like. If it fails me, I'll probably be doing just that ;)
The plan is to pretty much use servos at the shoulder, or would it be hips? Anyway, servos as shoulders and ankles, modified servos in the feet for motion. I'm starting with 2 legs and adding the third retractable leg later. So I've saved space for it.
I did decide to put the ping sensor in the chest. (I only have one.) I've got a few ideas on the head now so it's a matter of what parts I find first. I haven't decided on a paint scheme or design yet but due to choices I've made I am most likely end up painting it.
I also plan on doing some hardware upgrades as well. I've use nuts and bolts I have just laying around so my selection isn't ideal. So I'll be swapping little things like that out here and there.
I'm going to do some work on it tonight so I'll post my results.
OK. I got a little done yesterday. I'm going to do it in phases. Phase 1 in which Doris get her oats.... No that's not right. Phase 1: Carry That Weight/Drive My Car. Not a lot will be permanent in Phase 1. I want to get the legs mounted. I'll definitely add ankles in the future but I want to test the leg strength and I want something to play with. I have to go get a few things tomorrow to complete Phase 1. Wire or servo cable extensions, nuts and bolts.
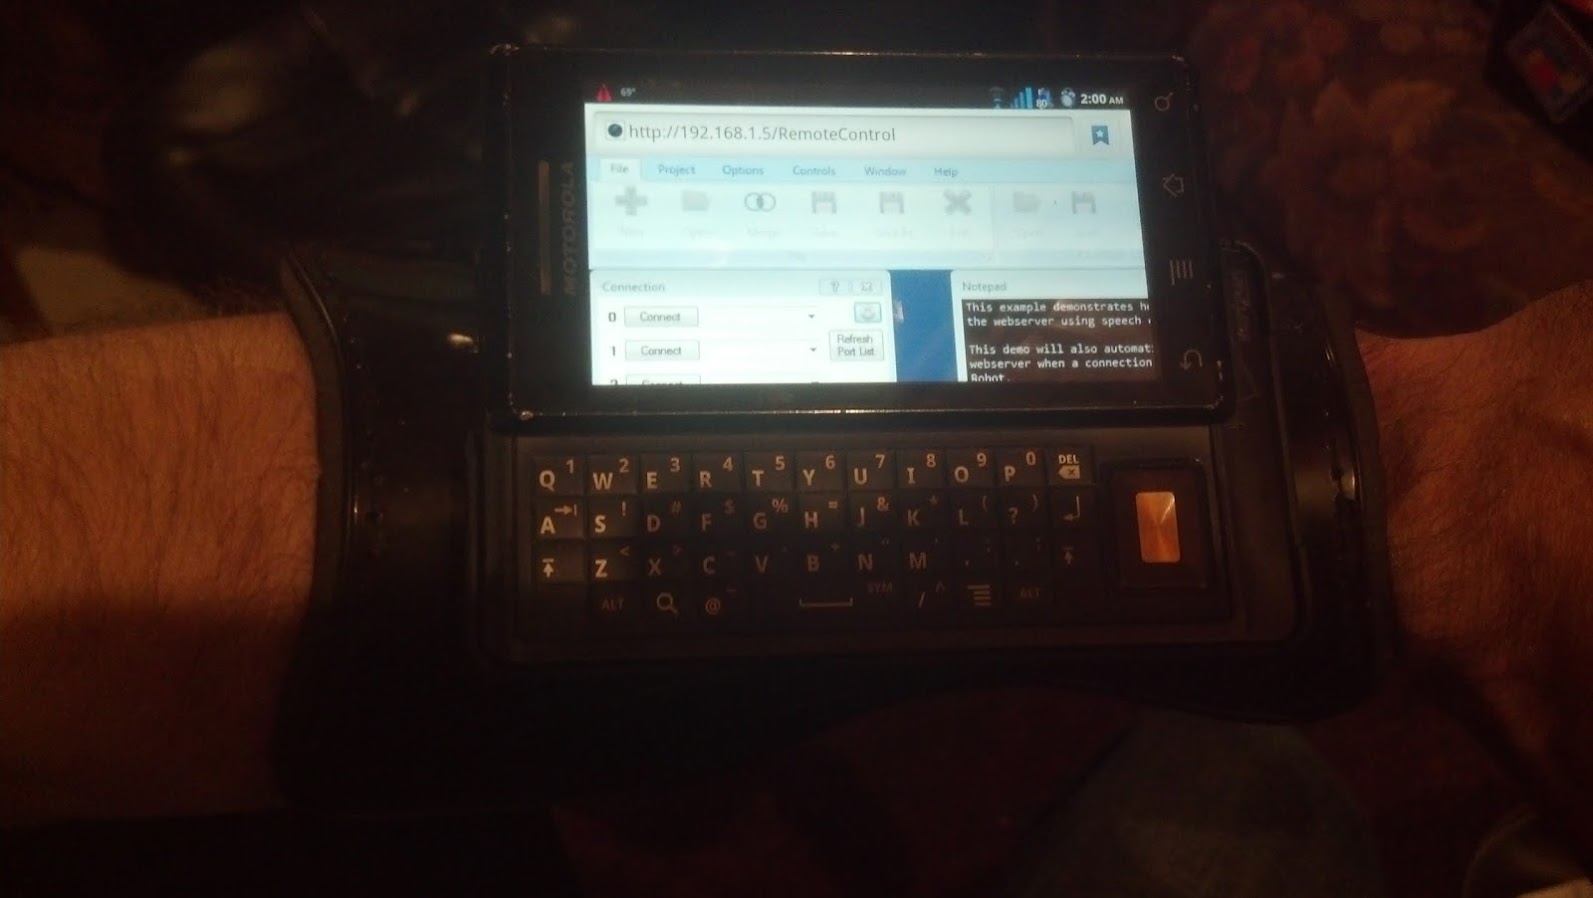
First I'll show off the control pad a little.
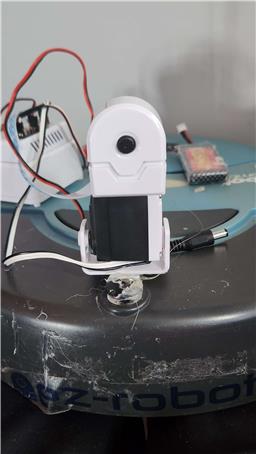
My Old Droid and the cover Alan sent me. I can't thank him enough.
Strapped and mounted. Connected to ARC via the HTTP Server control.
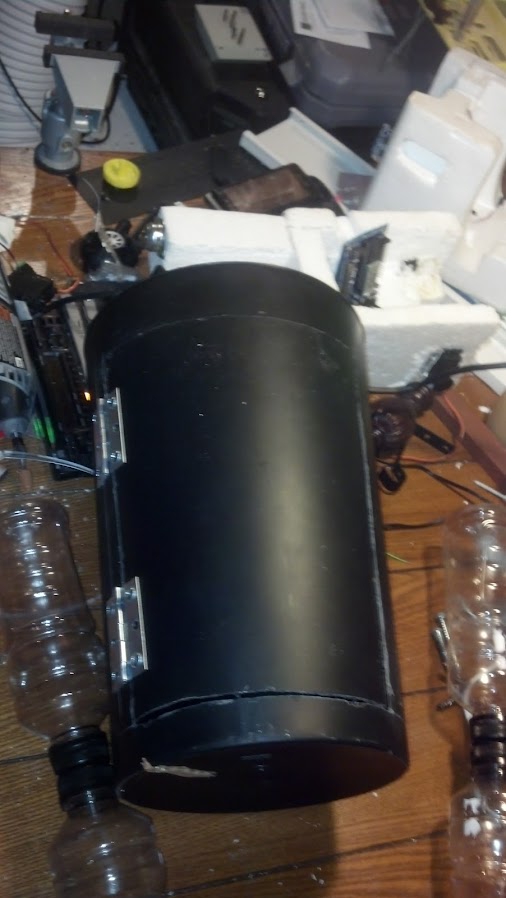
Access panel cut and hinged. Circles partially glued in.
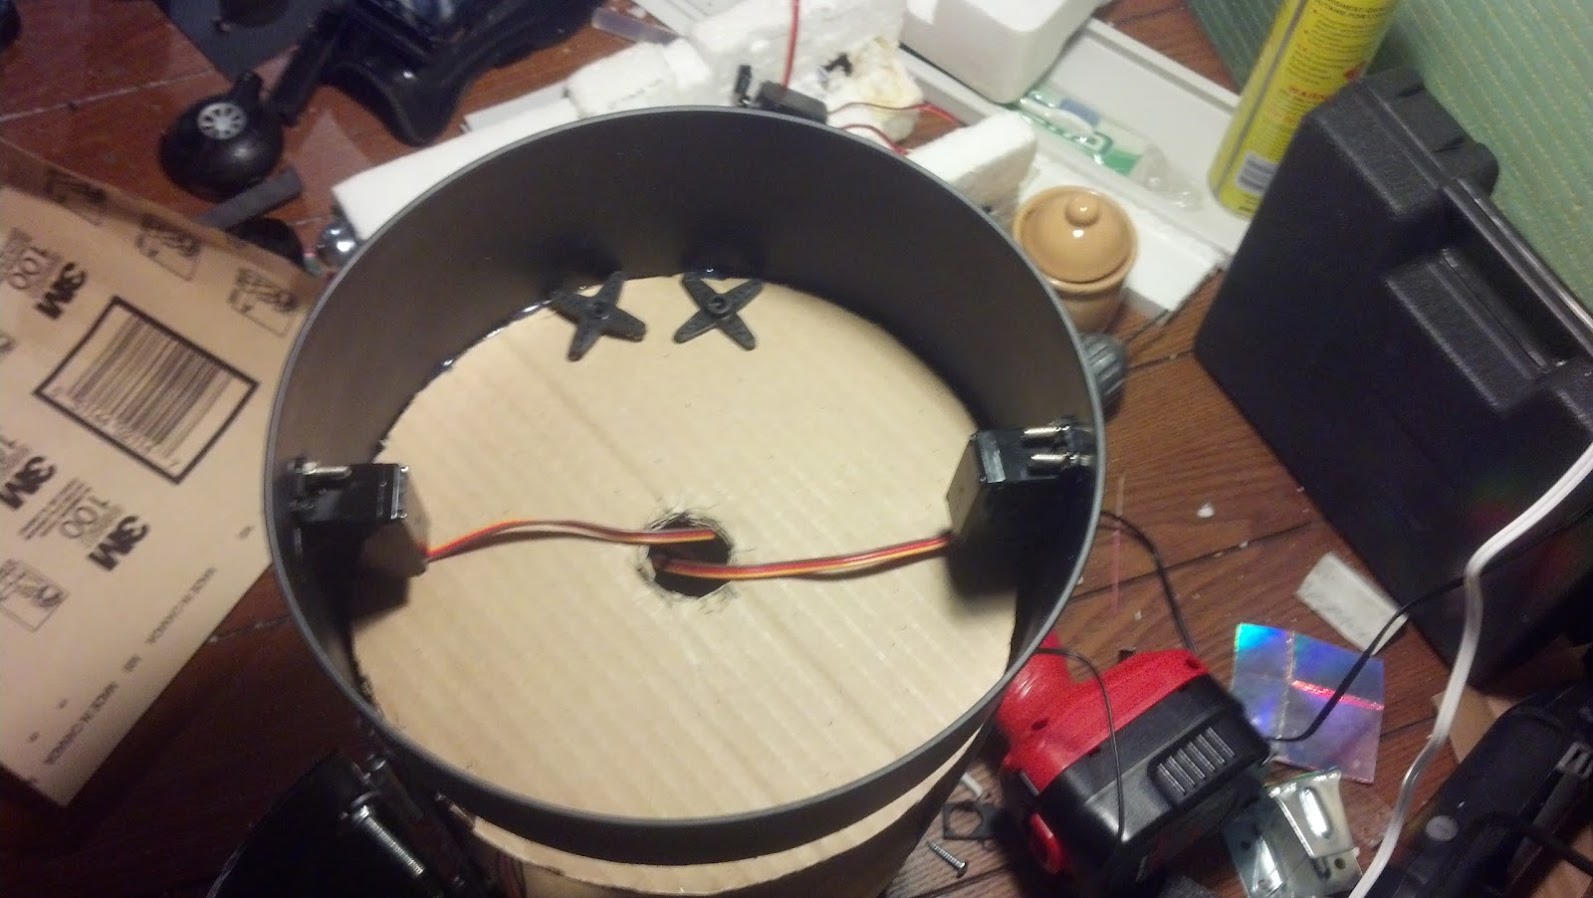
Shoulder servos almost mounted.
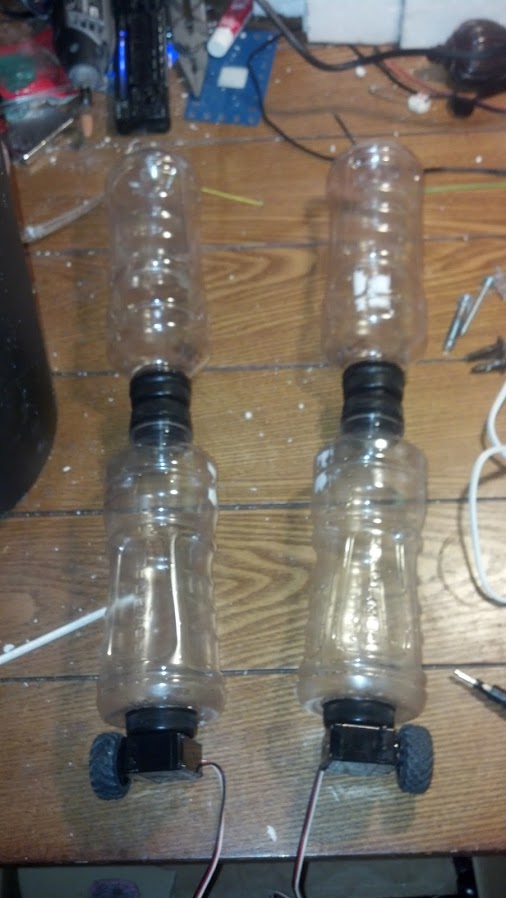
Legs V1.0: Regardless of appearances, E2 is not sponsored by Powerade. I have them joined by bolting the caps together. Advantages and reasons for this? By twisting them where the caps meet I can position them independently for alignment and adjustment purposes. It's been a problem I've had with all of my previous projects so I figured I'd implement a solution. (You see guys, I am learning. )
)
I also have little access panels cut into the upper shoulders so I can mount them. I've found the PA bottles great to work with and the plastic is fairly thick and durable. Being plastic I still don't want to bend them too much. Rough tests suggest they will support the body. If not I have a few ideas (and parts) for fortification. I'm just trying to make it as EZ as possible.
I'll take pics of the caps and panels features for my next post.
As always Input Accepted Thanks for your interest.
More Updates: I made a video this time. While I'm waiting for it to finish uploading, I'll give a short breakdown. I made some shoulder reinforcements/attachments to help with strength and mounting. And a small break down of how I have the upper and lower legs joined.
This next video shows why I need the screws for the servos. It also show a need for ankles, feet and/or that 3rd leg.
I ordered some servo extensions so I can hook the Modified Servos up to the EZB.
Ebay - 10 x Futaba extension cord cable female lead for RC airplane servo
E2 took a couple spills last night. The only damage was, I stripped the inner thread, the one where you would screw an arm or horn into. Gears and everything are fine so it's usable for something else just not a shoulder. I have a new servo coming. Sure I could have probably just got the gear/post but it was a good excuse to increase my inventory.
I also have enough parts to make a couple more sets of legs just like these so I'll be able to make upgrades and swap them out. This is going to be handy when I start developing ankle/feet.
If someone could answer a few questions for me, that would be great. I'm thinking of getting rods to run through the lengths of the legs for support.
Can I just stick them in [----][----]? Will that provide support or just weigh it down?
I can thread them a little on the the ends and I'm sure that will help. -[----][----]- I just want to make as few holes as possible. Of course I could also find "caps" for the tops of the shoulders so the rod won't be exposed/visible.
With all of the weight being on the servo, horn, bracket and inner wall, would running a rod through the center of the leg even matter? Once again just adding unnecessary weight.
Here's a generic diagram of how it's assembled.
An image in regards to my questions.
Thanks in advance for your input.
Small update: One of my leg servos got stripped so I ordered a new one. Good News/Bad News. It didn't work, they gave me a refund and told me to keep it. So I took my first servo apart today. Woo Hoo!. I dis and re assembled it and got it semi functional. It has some sort of alignment error in the gears somewhere. I didn't bother to examine too deeply to see if its the case, pins, or gears. Better news? I only needed the top gear where attachments are placed so I swapped those and now I have a perfect one and a crappy one as opposed to 2 crappy ones.
I'm just a little proud of myself. I fixed my servo and got some spare parts for free. I'm prototyping some wider stronger legs, Juice bottles this time. I have one done and I hope to get it all together by weekends end. I'm going to need bigger wheels. I'm using the one that come with the EZ Complete. (Side Bar: I'm considering ordering a whole new setup with the new EZB. It's a great value considering all that comes with it so, it's hard to pass up on.) I'm also working on swiveling the head left and right.
I'll take some pics and maybe a vid and post at the end of the weekend.
Wow! Your making good progress. I find your legs very interesting. Not sure how sturdy they'll be but in due time we'll see.
@Technopro Yeah, I'm thinking the same thing. I just can't seem to get a good, tight connection with the leg and servo. I think I may need to get metal servo horns.
Anyone care to chime in?
I think it is cool the way you are using the bottles. It seems that they would make good lite arms. If more strength was needed, you could pass a quarter inch rod through there. Also, you could cover them with fiberglass or plastic. But, just like they are,they can be painted to look solid. I like your idea. Bravo!
;)
Thanks MovieMaker. I am considering running rods through them. I hope to get it together for a test run this weekend. I'll post an update. :)
I like your ideas. I think a 3rd leg/wheel would help the balance. I'm not confident the servo pivot point is going to give the legs enough support to stay straight and not want to cave inward or outward depending on weight. Years ago I built an R2 type robot I called J2-R2. I cheated the leg design by going for the effect of legs. I used little boxes attached to the bottom sides of the trash can for feet then used sheets of steel riveted to the feet and body to create the appearance of legs. I then used front and back caster wheels to balance it out. Not an accurate replica, but it was stable and easy to build. Attached is drawing showing how it looked. Just wanted to toss it out as an alternative.
Thanks Justin That's a great idea. I insist on figuring out having the body tilt. I'm in it for the experience and skill acquisition as much as I am for the finished project. I enjoy the learning and improving my engineering prowess just as much as I'll enjoy the robot itself when it's done. :)
I am going to add the 3rd leg. I'm still going to try and make it optional and retractable but until I design some big feet I'm going to have to add it soon and work on retracting it later.
Thanks again for the input guys.
It may not require a servo if you are going on the cheap. You could have the third leg with a castor. Or, just a castor on the bottom of the trashcan to keep the balance.
Oh, BTW, I wanted to ask you, where did you get the little tray that you are using on the shingaurd?
OK, you got it from Alan. But, where can a person get one if they needed one? The case piece, I mean.
:D
@MovieMaker, I imagine you could find one on ebay. If you're looking for one for the OG Droid 1 like I'm using then search for "motorola droid a855 case". That will weed out most of the others like the razr and x and other droid versions.
It's Nothing fancy just the back of the protective case. The Droid slides open to reveal the keypad so it's cases are a little different than other cases. Most cases snap together to hold them together, these clip onto the phone as opposed to the other half of the case so that's why it worked out for me. The top half is just a thin border that clips to the face of the phone. I'm just using the back.
Thanks for the 3rd leg suggestions. I was going to use a caster or something like that I've a few options laying around. I still want to design it to retract. Not sure exactly how yet but, I have a few ideas.
I ended up being busy as well as social this weekend so no work has been done on my project. I forgot I have evening plans tonight as well. I'm hoping to sneak some work in during the week. I'll post when I get more done.
I just wanted to post that I've put this project on pause. It will happen eventually. Maybe this Spring. "Why?", you ask. Well, in short poor design but, I know where my mistakes were made.
My biggest problem is that, the door I cut in the body is too big. When trying to work on the head rotation I found that the body no longer stays round under weight which just throws everything off. So I have a game plan, I've acquired some better materials for the legs I just need to buy a new garbage can body.
I wanted to have panel access to the insides instead of going in through the top so I may go with a couple small panels or just bite the bullet and go in through the top.
This project is one I definitely want to finish but I have a Roli ordered and have plans on using all of my available parts on it so I'll need new servos for E2 which equals needing more money. It's been a rough year for me as far as disposable income goes so E2 is being put into the CR tank until Spring at least.
It just depends on money, how busy Roli makes me, and one other secret (for now) project I'm very close to gaining access too. I basically have the access and permission I plan on using my V3 board to get that project running so I need my Roli first. Then once it's running I'll talk the owner into buying a V4 for it. It's not my robot so I'm not just going to donate my board. I'm sure I'll be asking for some help on this project in a few months. I will definitely be starting a projects thread and posting pics and vids of the secret project as soon as I get closer to making it a reality.
It's only a secret because I want to impress you folks with it. We've got a lot of new members on the forums and they've been posting these amazing projects right out of the gate. And well, I'm inspired. And jealous. I want this to be the "Look at this mostly finished project" thread to go along with all of these new guys amazing projects.
E2 will still be a "Watch me build my robot thread" so, when I get back to it, I'll start an E2D2 v2 thread in the projects forum. So guess we can let this tread die. Thanks for reading, I hope to make 2014 a very robotic year with Roli, E2 and my 3rd project. I'll be seeing all of you great people around the forums ;)
One of the things about building is we don't report all the mistakes we make lol , if you ever cut a hole in a tube or box it looses it's rigidity. The way to fix that is to frame the door. You can use fiberglass or even in stamp plastic. Then you need a round stiff support in the body both above and below the door. Then it will stay rigid. I see you already have cardboard cutouts so you could apply resin to those and epoxy them in place as support rings. Just some suggestions , great job :)
Thanks Josh. Our young friend Tenchnopro mentioned that he was reinforcing his Creeper doors also. I'm no engineer so little tips like that go a long way with me. I so think I'm just gonna spend the few dollars on a new garbage can body, make a smaller door and reinforce it just to be safe. :)
Lol I love garbage cans. Walmart gas a sale in stainless steel ones 14.97. I bought two. They are great for robot bodies.
That's what you used for the Drink Bot/Cooler bot that you recently "finished" isn't it ;)