Ellis
USA
Asked
— Edited
I am going to buy a Seeed ReSpeaker USB Mic Array. I would like to send ReSpeaker sound Direction Of Arrival (DOA) information to Ez-b. If can get it into Ez-b I can write a script that will send instructions to my robot Max and allow Max to point to the person speaking. How would I go about getting this ReSpeaker information into the Ez-B script?
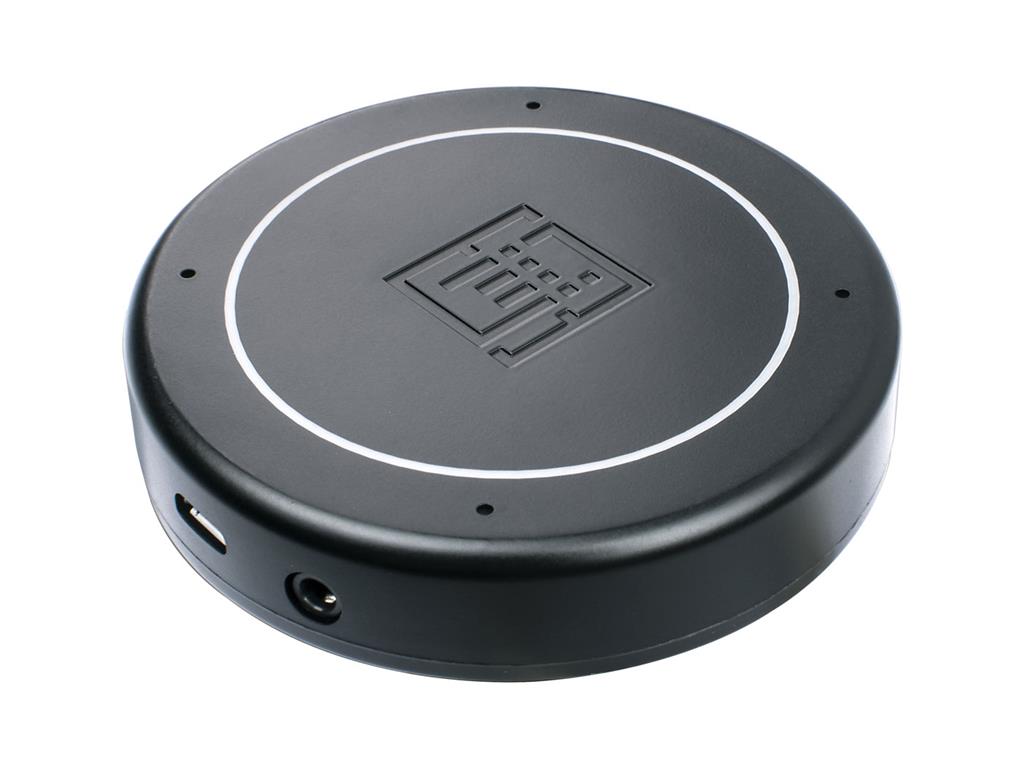
Here is the link to information concerning Seeed ReSpeaker USB Mic Array. I will most likely need direction on how to get it to work with Ez-B.
wiki.seeedstudio.com/ReSpeaker-USB-Mic-Array/
If link does not load. Right click link and select the Go to wiki.seeedstudio.com/ReSpeaker-USB-Mic-Array/. That should let you see the information.
Thanks Ellis
Related Hardware EZ-B v4
Related Controls
Movement Script
Script

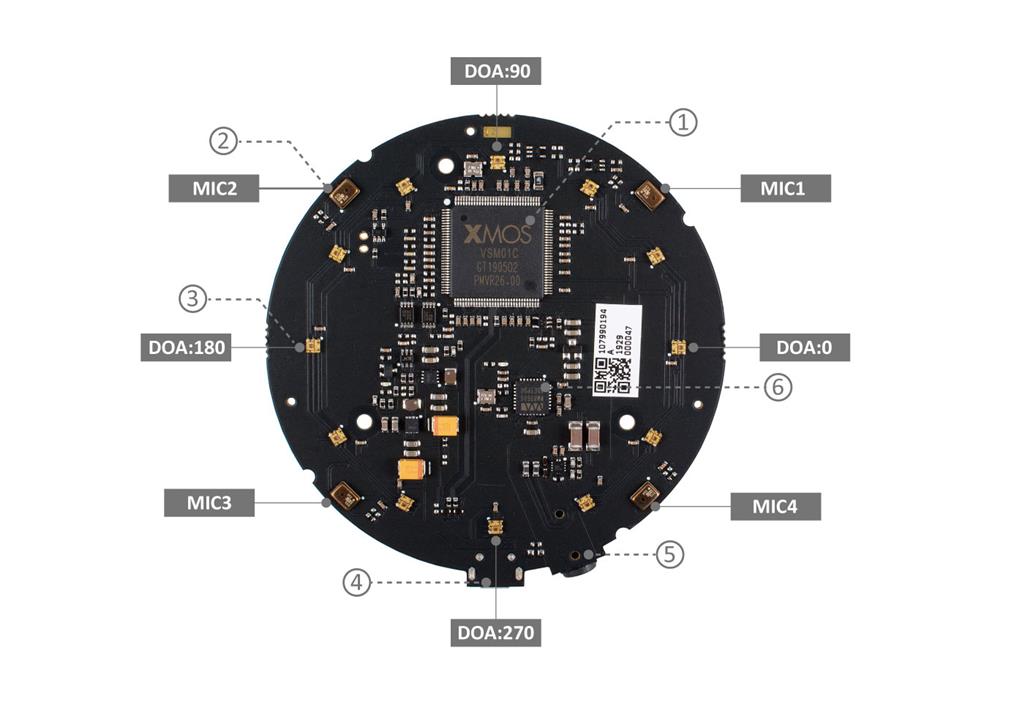
That's a usb speaker. It won't connect to any ezb. It's made to connect to a usb host, which is would be a windows PC. You can use a windows pc running ARC. Because the hardware would need to know where the voice is coming from, you'd have to access their SDK or API. You can wrap the sdk or api in a skill control plugin to work with ARC.
PS, that link won't load because the seed website doesn't have an SSL certificate or HTTPS server. They have no security on their web server. Be very careful when you use that chinese company's website. Do not login or create accounts because it is not a secure website. The way to view that website is to replace HTTPS with HTTP in the url
In addition - if you're looking to have the robot know which direction the voice is coming from, use this control without needing additional hardware. Simply use the left and right mics of your pc: https://synthiam.com/Products/Controls/Scripting/Sound-Movement-16110
I was planning to have information from the ReSpeaker fed into Windows 10 pc. I didn't know how to get that information readable to ARC. I guess this device is not usable.
It would be usable if a little program (skill control) was created for it. If there's a library available, it would be easy to whip something up. I could even do it for you. Just haven't come across anything very trustworthy on their blog. They use a hacked program to force driver installations and fool windows. There's a lot of sketchiness going on with that product.
'd recommend using the solution i provided, which is already in your windows 10 pc... a sound card microphone input: https://synthiam.com/Products/Controls/Scripting/Sound-Movement-16110
I have given up on the Seeed Respeaker after reading your recommendation.
I am going to try the Sound-Movement idea you recommended.
Also, I think there may be problems with my Sound Sensors. They do not seem to be working as they should. In analog I get very little change on the ADC Graph unless I blow hard into the sensors microphone. Then I only get 1 volt variation on the Read ADC intermittently. Are there differences in these sound sensors? Is there a good sound sensor for this application using an Ez-B?
Thank you so much for helping me.
I have a sound sensor - maybe tonight I’ll try it. It might work better with a capacitor to hold the voltage higher for longer. Maybe Jeremie has a good idea
I never thought of that. That is a great idea.
The analog power pin is only 3.3v... If your sound sensor needs 5v that could be the reason it isn't working....
Oh - that could be the case as well. I only have one sensor to test with. It made sense to build a little trigger system between the sensors and the ezb using an arduino uno. You can use a smaller one like a micro or something. They're super cheap and very tiny. All you need are a few ADC's and a Serial UART to write the result to the ezb.
This code i wrote for you on the Arduino will send the microphone index that detected audio past the threshold. It'll only start triggering on that specific port again when the elapsed timeout has passed. I set that timeout to 5 seconds (5000 ms). There's some additional logic that can be added to remove false positives. For example, we can sample all ADC's and compare for the highest one AND check that against the threshold. If you want to go this path, which i think will work, i can make additional changes....
Now that the arduino has sent the triggered index to the ezb via UART, we have to detect it on the ezb. To do this, we first need to initialize the uart that you'll be using. I do this in the connection control using JAVASCRIPT...
Now we need to detect and do something with the data from the hardware uart. A script that runs in the background is a good idea. As you can see in the above script, i called this one [i]Check Audio. This will be started when a connection occurs from the script above.
On the code above - for some reason our website parsed and removed all the array [] references. I’ll have to get Amin to look at that this week. So the code is broke :(
On the above comment about voltage. The sound sensor was powered with 5V. I try to keep those correct.
Thanks DJ for catching the code issue and writing the code for using arduino.
5v with a common ground?
You are right. Common Ground! I always try to do this but sometimes I can forget. Thanks for the advice.
Did anyone fix the array problem?
It's in the website bug report list - hasn't been done yet. Several things in front :D